
How to Build a Personal Job Listings Aggregator (No Code)
Contents
We can all collectively agree that job hunting is an draining experience. Having to update your resume and portfolio, gather references, look for relevant roles, write cover letters, and apply to dozens of listings can be exhausting. And we haven’t even gotten to the process of interviewing, completing test projects, and working out the logistics of a potential match!
One way to make the job search easier is by making the relevant listings come to you. Instead of having to search for roles that meet your requirements, you can store curated options in a database to be viewed at your convenience.
In this article, we’ll be using nocode apps to build a personal job listings aggregator that essentially performs a search on the job board of your choice, applies any relevant filters, then captures the details of relevant roles to be conveniently accessed. Let’s get started!
What You Will Create
Curated job listings can be used to auto-update channels, niche job boards, or email newsletters. But before that can happen, they need to be scraped and compiled into a database. We will be setting up an automation that performs a search on a job site, applies a few relevant filters, scrapes the most recent results, then deposits them into a database where they can be stored.
The tools you will be using are:
- Airtable : To store job listing details
- Browserbear : To create a browser automation that scrapes job details online
- Zapier : To trigger actions in different programs based on pre-specified commands
By the end of the tutorial, you should have a database that auto-updates with current job listings that you can then use for a more comprehensive workflow.

Let’s set up an Airtable base, a few Browserbear tasks, and a series of zaps to make it all come together.
Build Airtable Base to Store Job Listing Details
An Airtable base will store job listing URLs and other details after a scraping run is completed on Browserbear. We will use a single table with two views and a handful of formulas to organize it all.
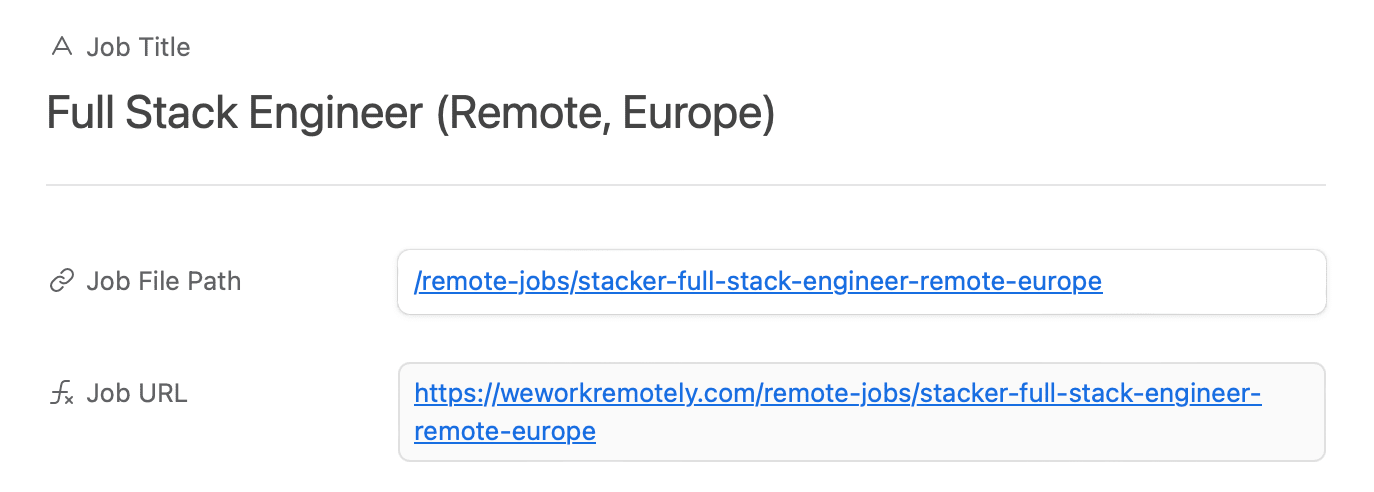
Log into Airtable and create a new base. Add fields for all the job listing details you’ll be scraping. We’ll be using the following:
- Job Title
- Job File Path (as URL)
- Job URL (as Formula:
"https://weworkremotely.com"&{Job File Path}) - Company
- Posted on
- Posted (as Formula:
IF({Posted on},DATETIME_FORMAT(CONCATENATE(SUBSTITUTE(SUBSTITUTE({Posted on}, "Posted", ' ')," on ",""),", 2023"),'M/D/YYYY'),"")) - Job Description
- Days from Posting (as Formula:
IF(Posted,DATETIME_DIFF(TODAY(),Posted,'days'),"")) - Posted This Week (as Formula:
IF({Days from Posting},IF({Days from Posting} < 7,"Yes","No"),""))
All fields with unspecified field types are single-line text types and will be used to receive incoming data from Browserbear.
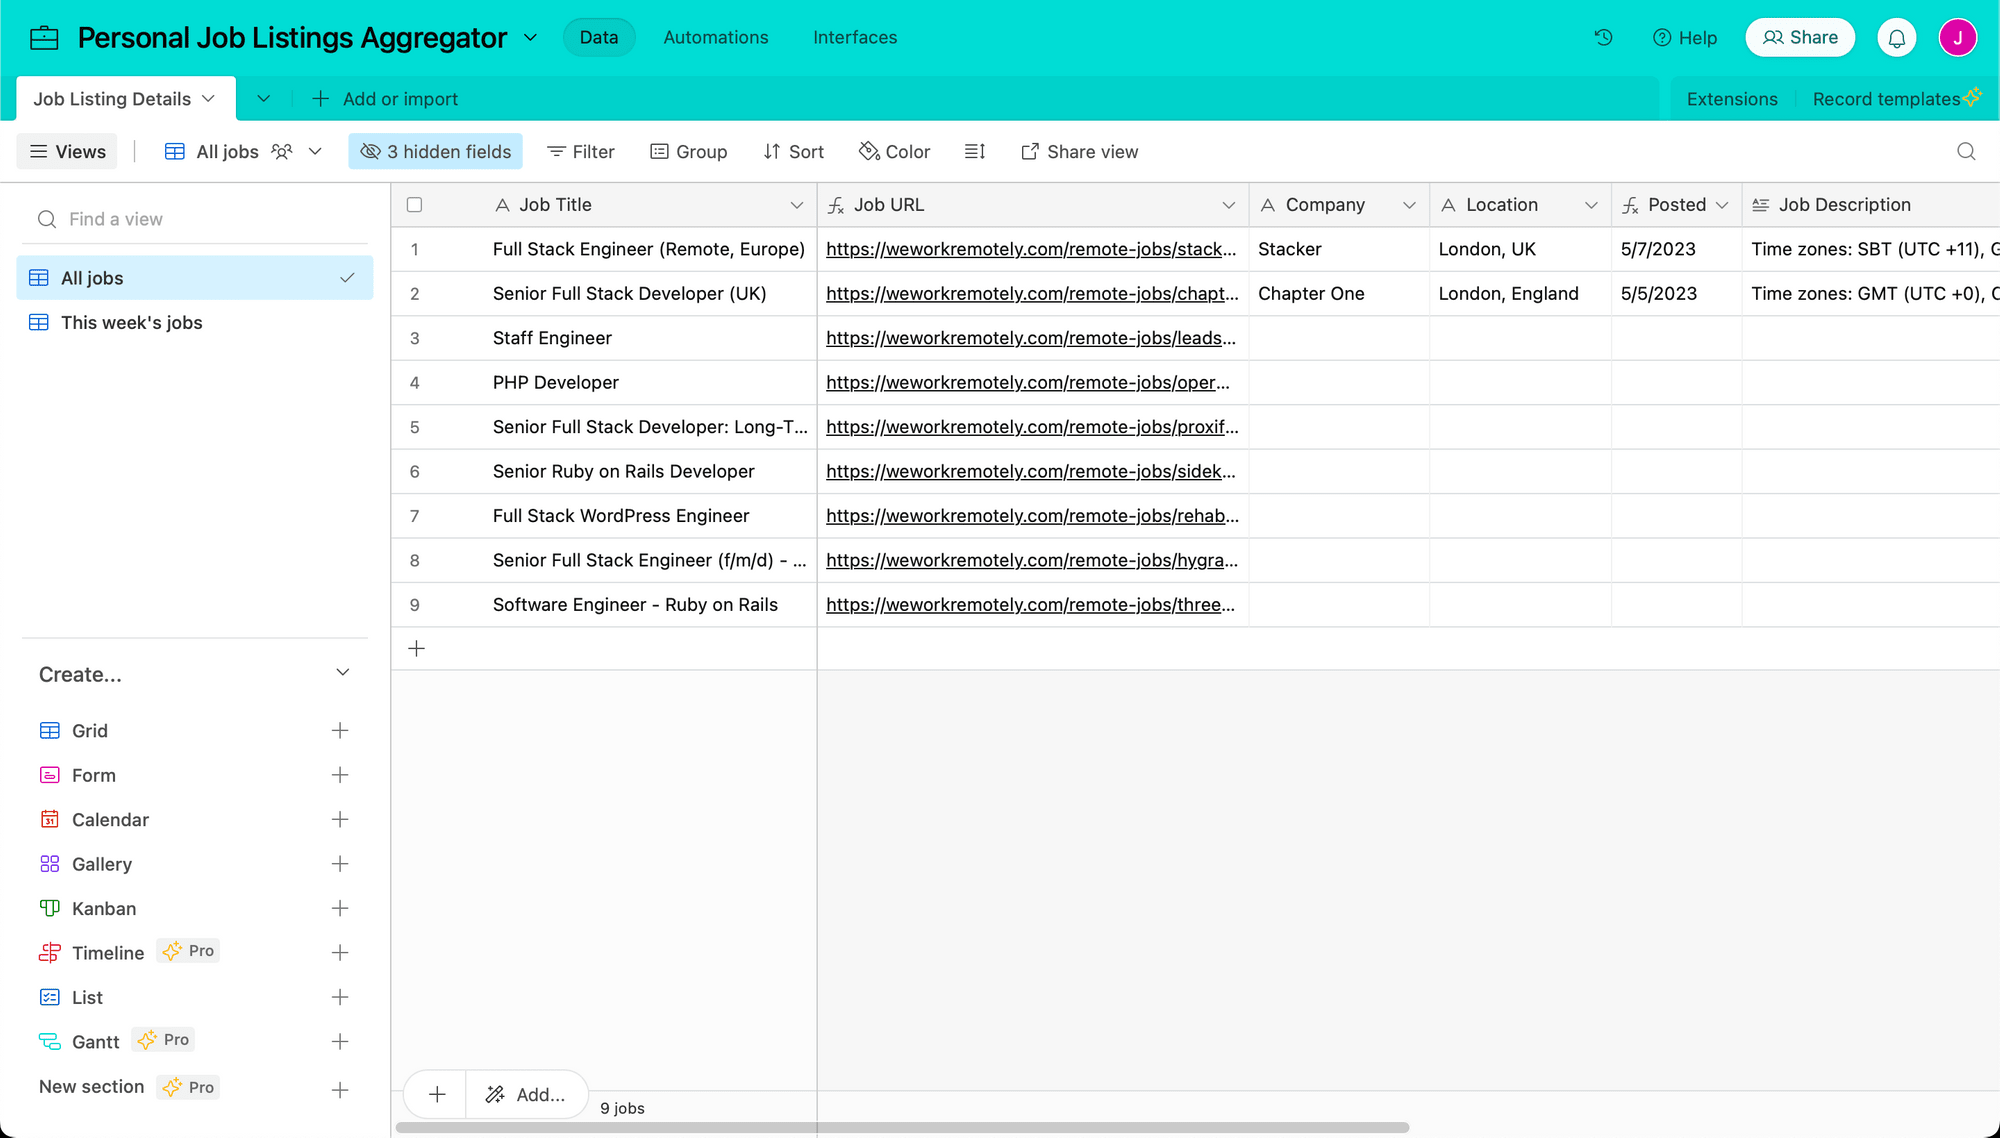
Hide any non-essential fields. Your full table will look something like this when populated with sample data:
Now, let’s set up a way to filter only for job listings posted in the past week. Click the + symbol next to Grid on the left sidebar to create a new view.
Name it, then add a filter: Where Posted This Week is Yes.

This view should now only show recent listings.
❗ Note : These fields and formulas were selected to be used with We Work Remotely and the way the site is set up. Keep in mind that you might need to make adjustments when creating a listing aggregator for other sites.
Create a Browserbear Task to Browse Relevant Jobs and Scrape Links
Log into your Browserbear account (or create a free trial account if you don’t have one—no credit card required! 🎉). Go to the Tasks tab, then click Create a Task.
Name the task, then click Save.
You’ll now be on a task page where you can add steps, run your automation, and view completed runs.
Click Add Step and set up the following actions:
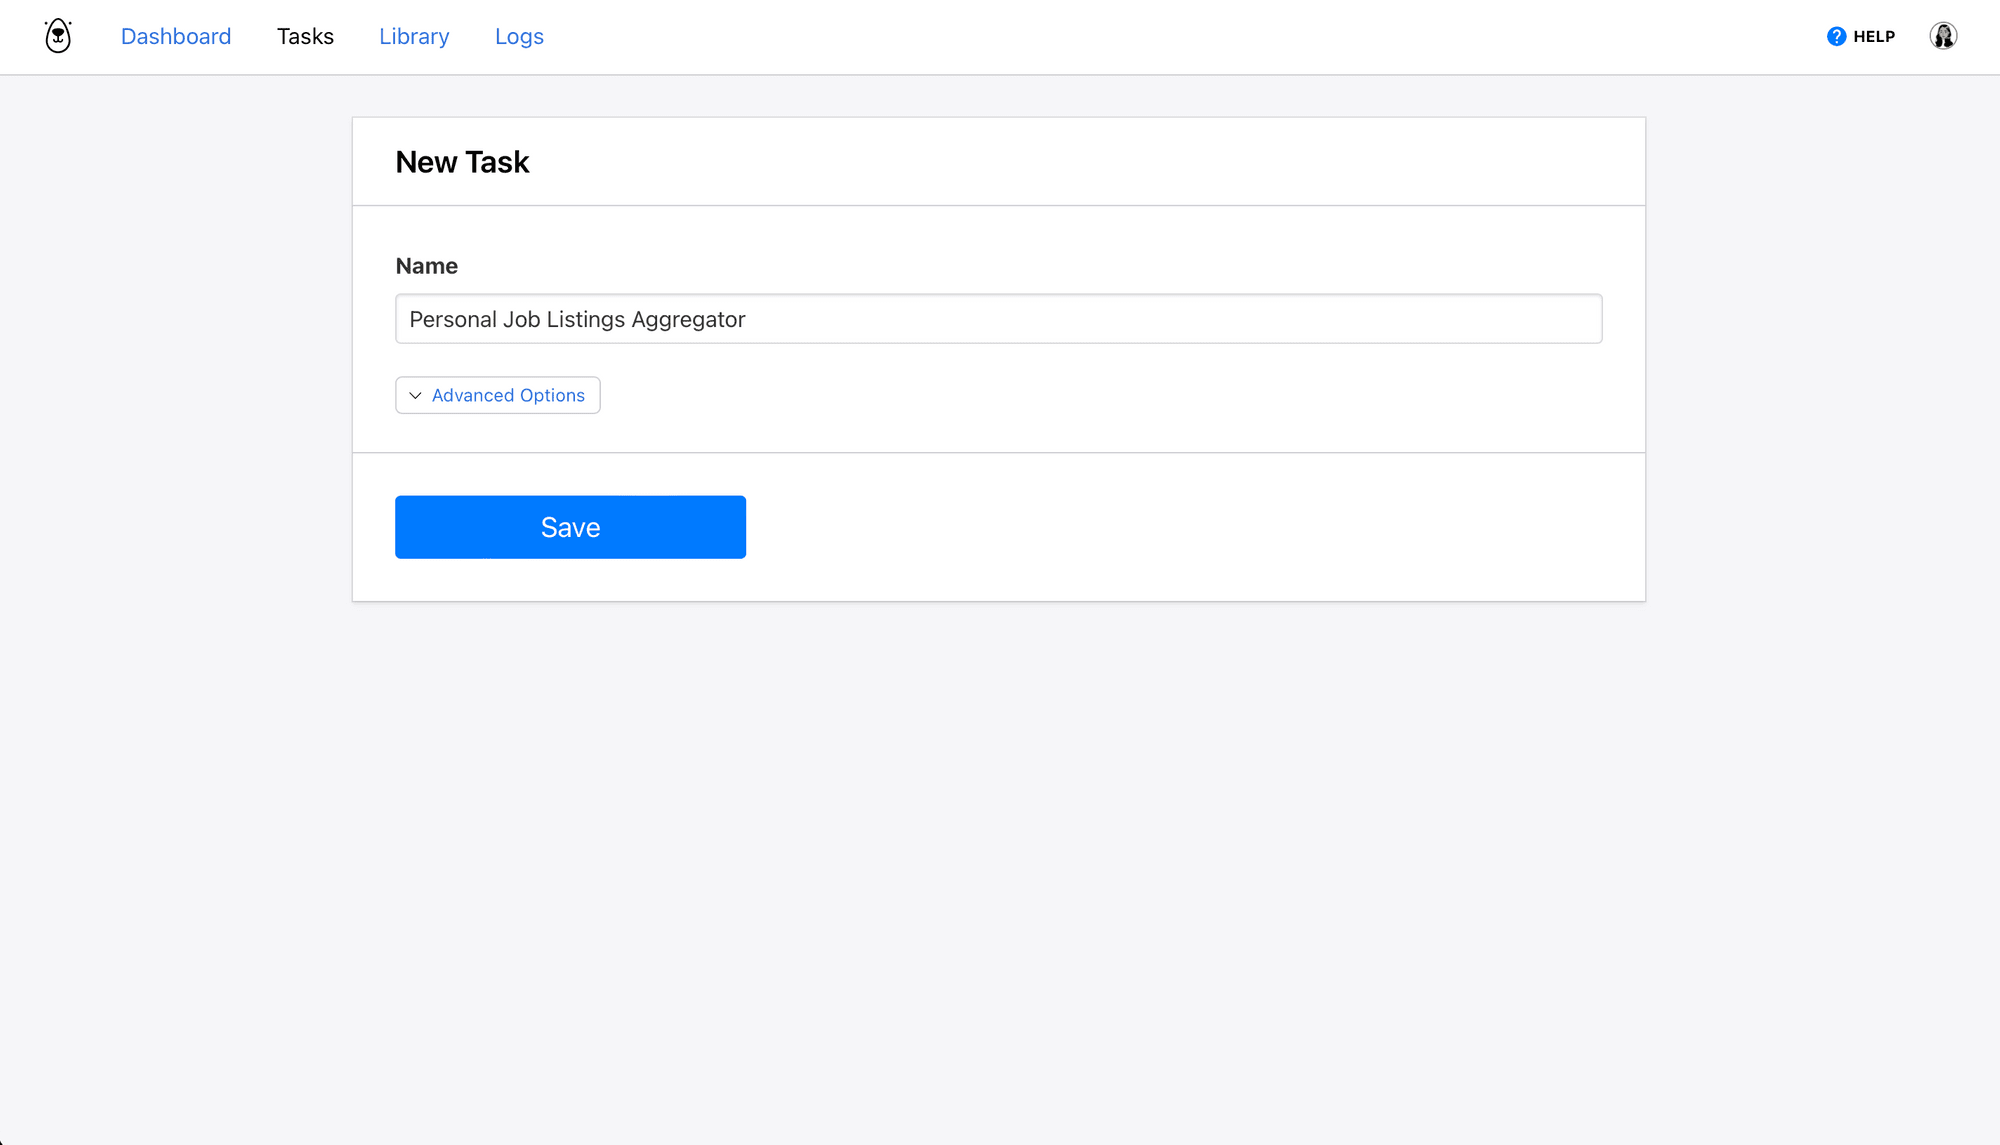
Step 1: Go
This step will instruct Browserbear to go to the destination site and wait until it’s loaded.
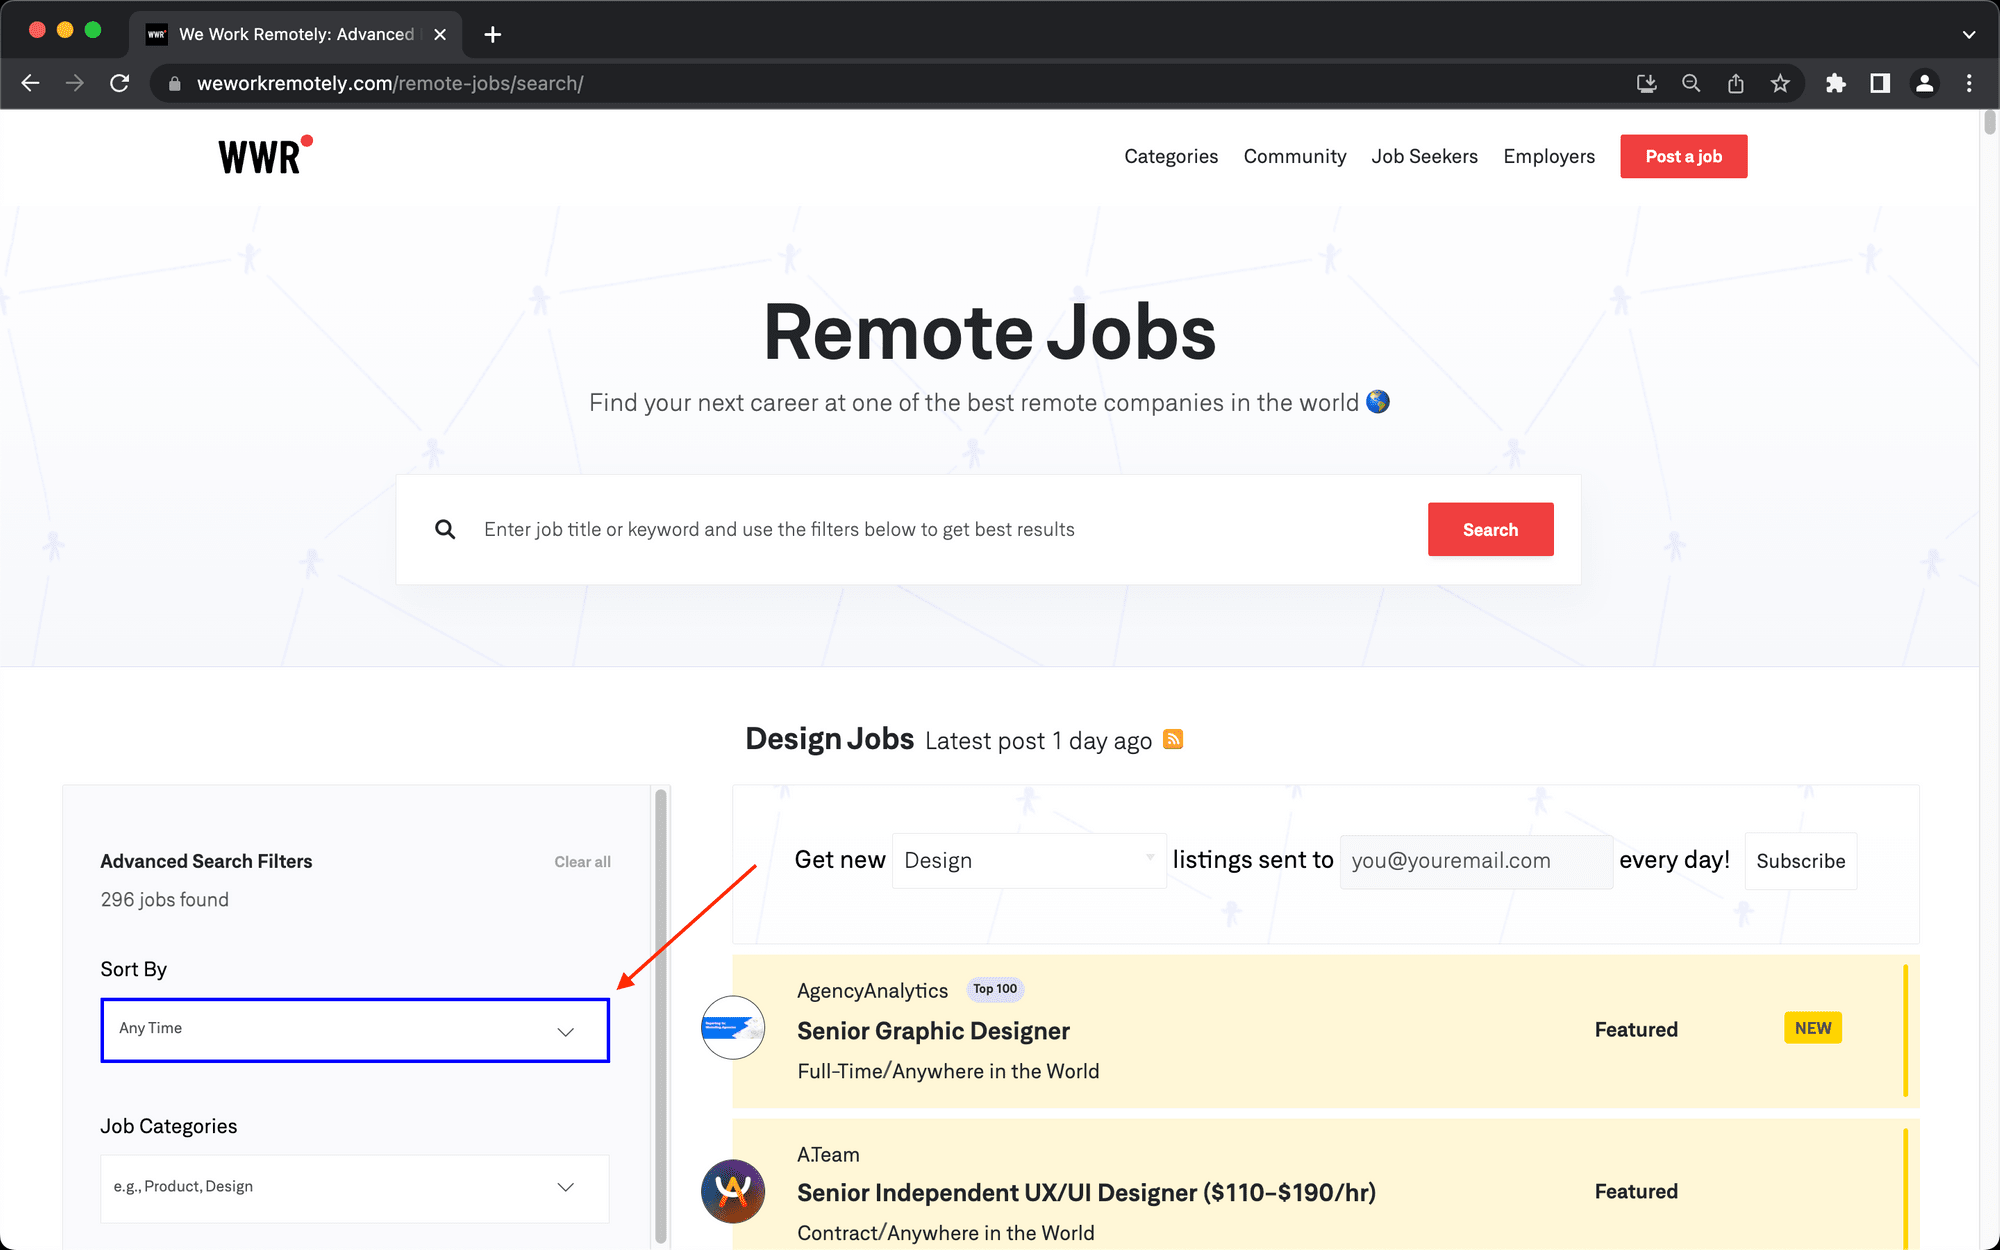
Choose go as the action and insert a URL. We will use https://weworkremotely.com/remote-jobs/search/.
Select networkidle as the wait instructions.
Click Save.
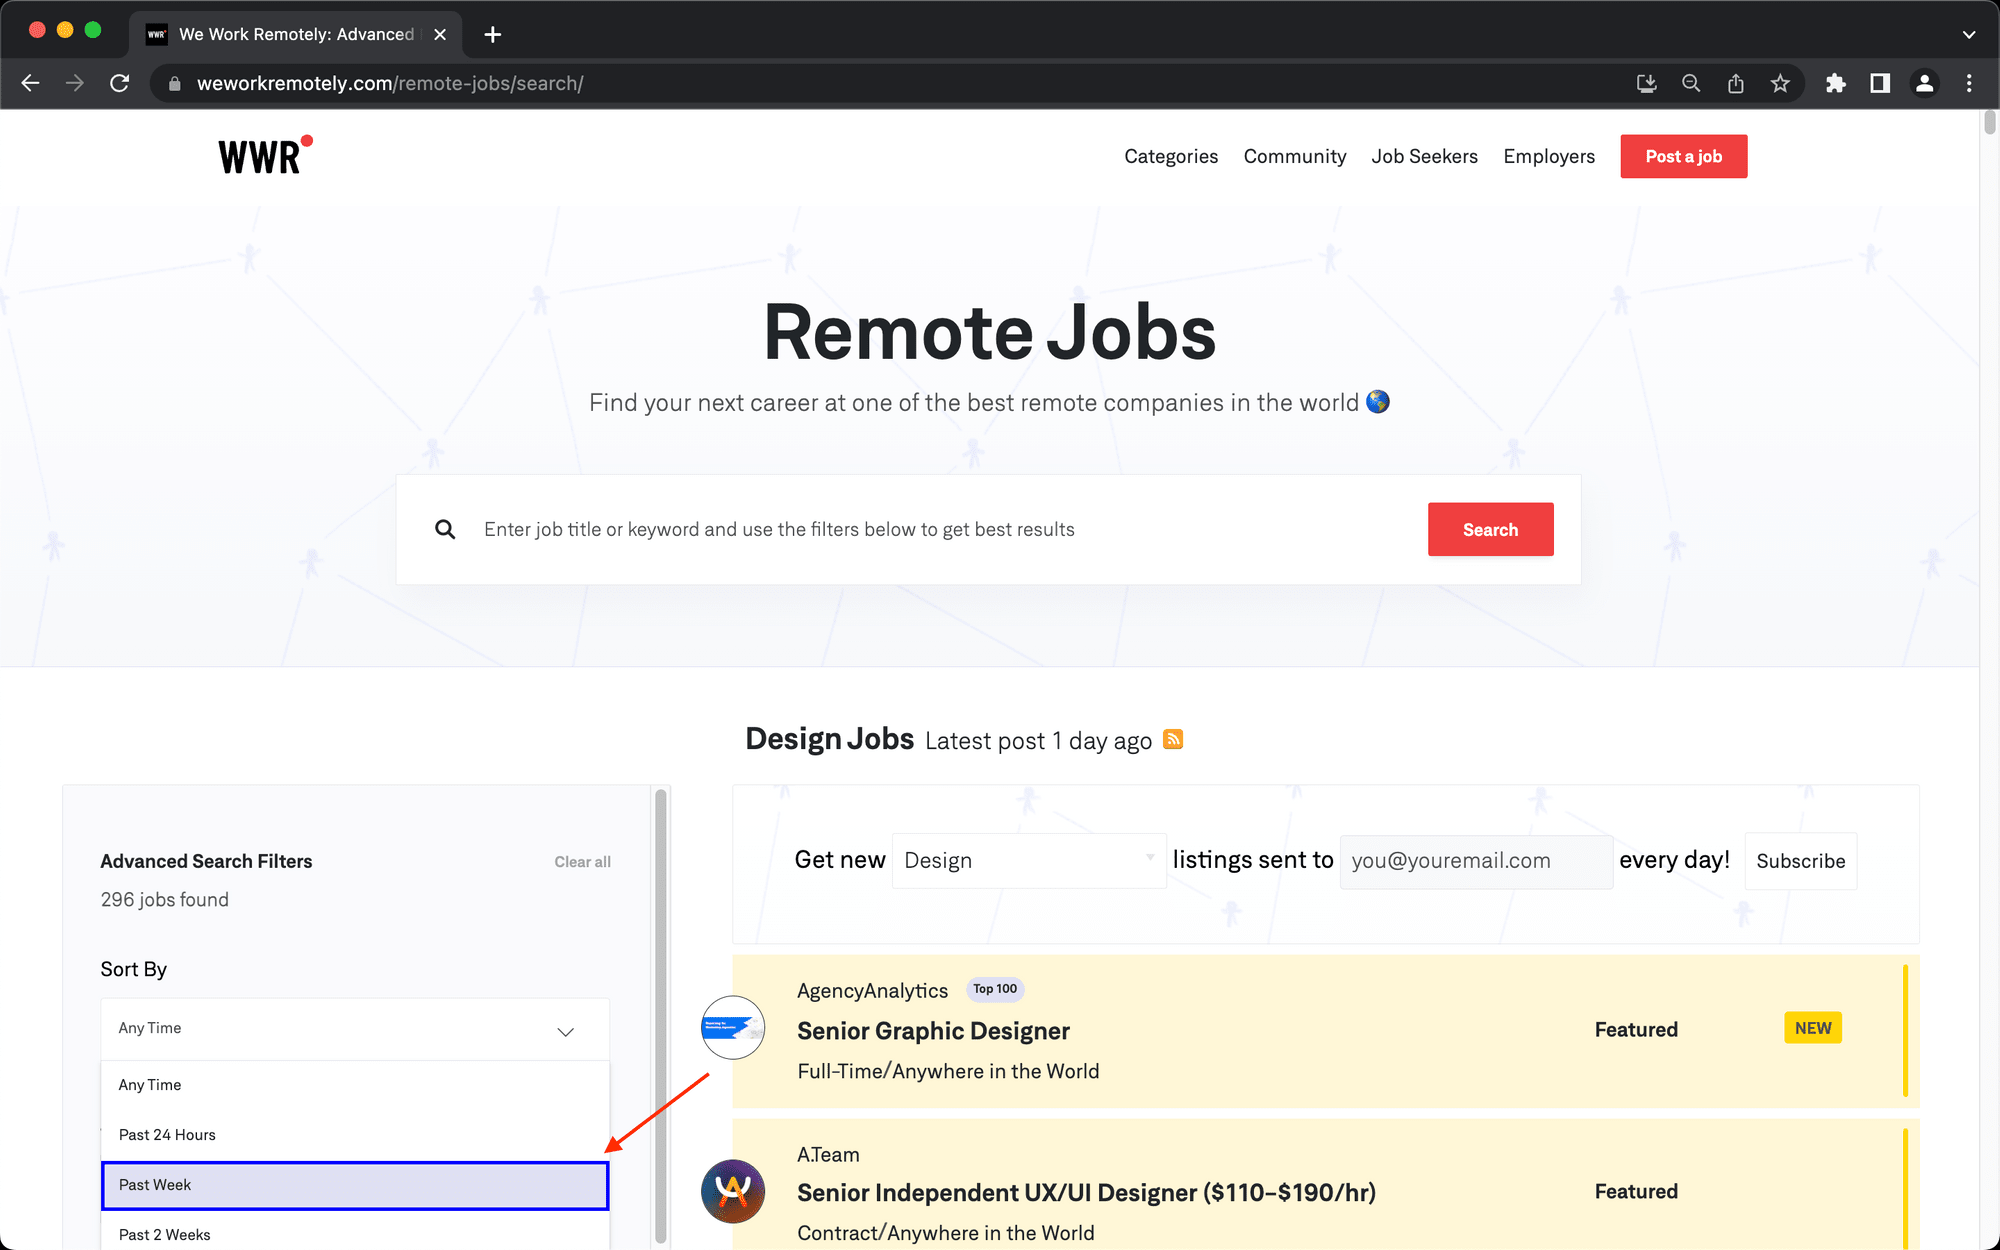
Step 2. Click
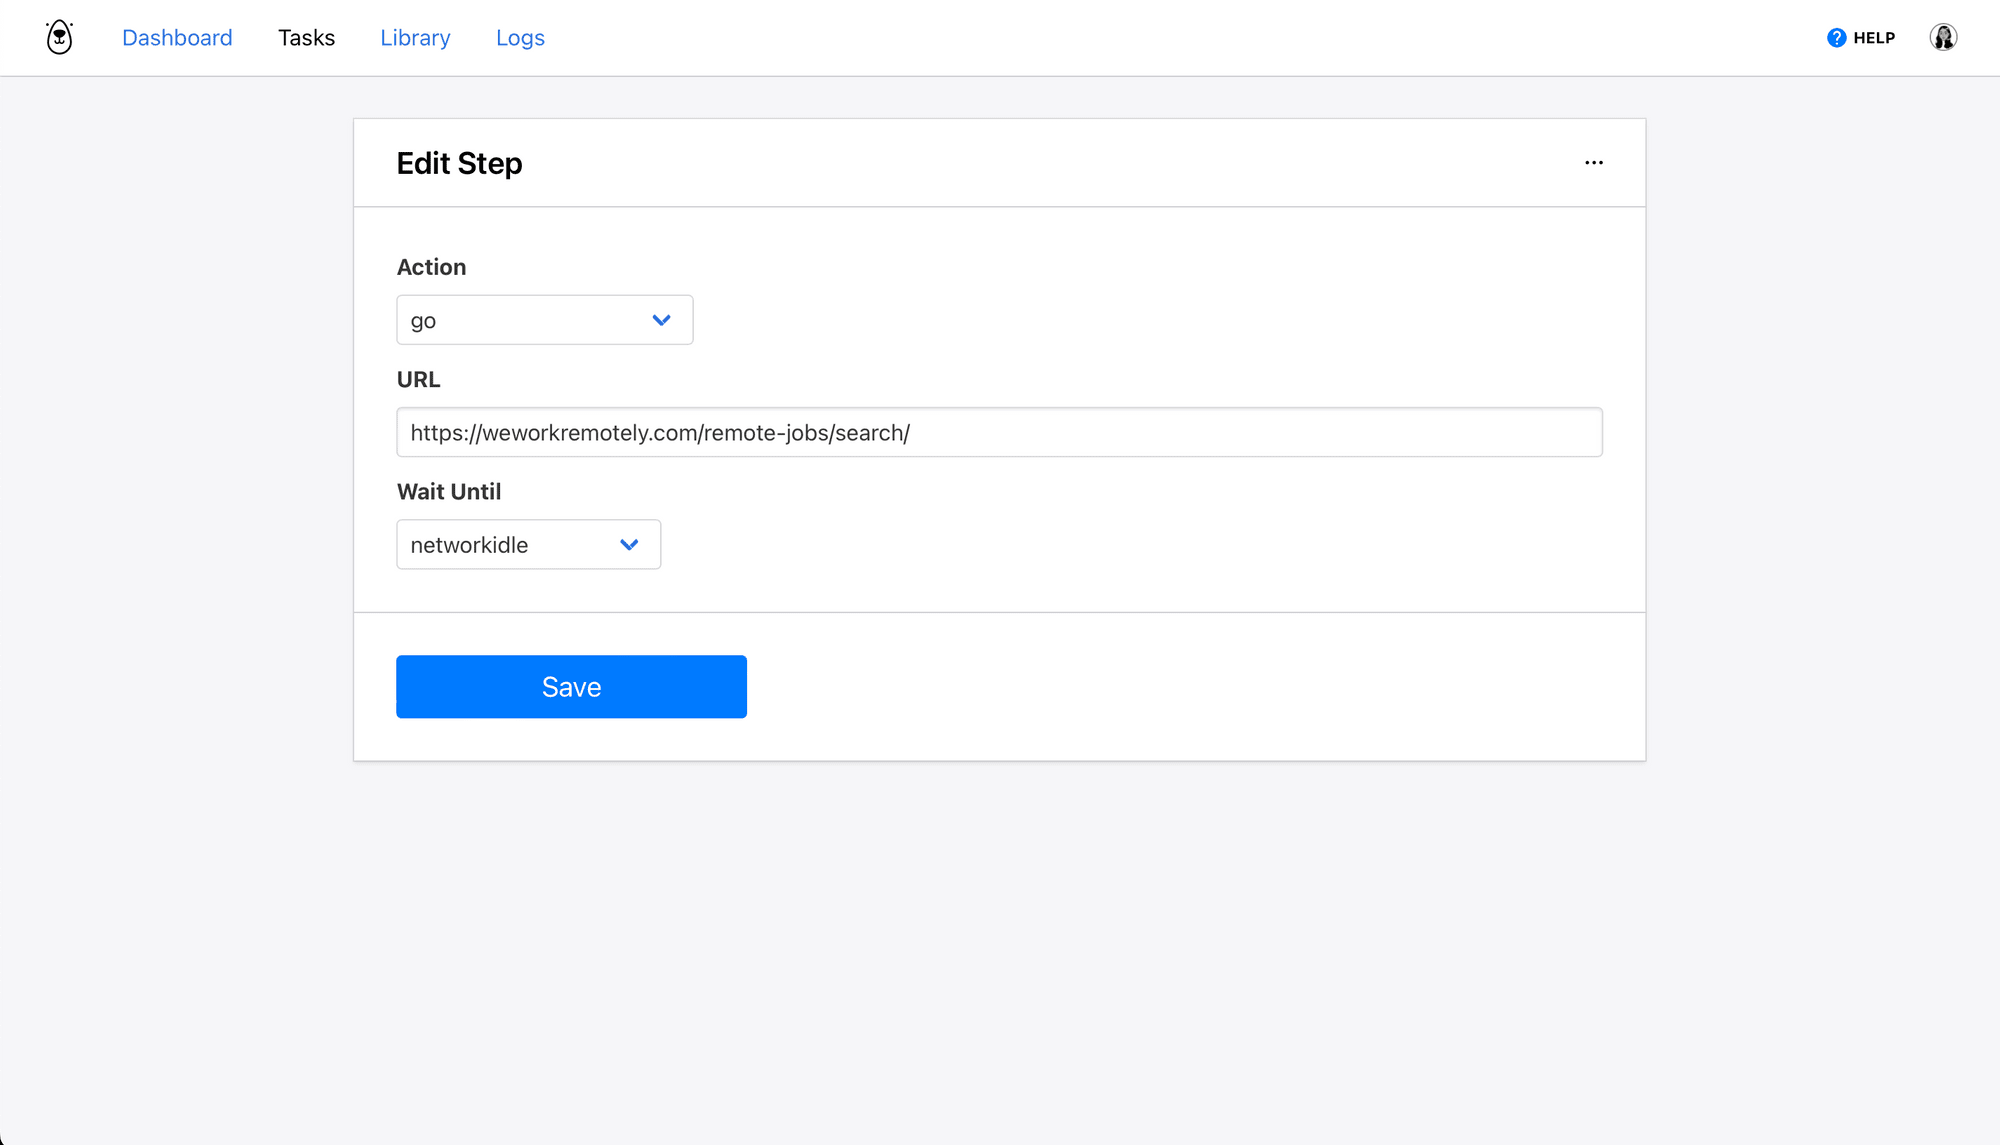
The next few click actions will filter job listings to fit your requirements. We’ll sort for Full-Stack Programming listings created in the past week.
Choose click as the action and insert the config for the Sort By filter button acquired with the Browserbear Helper Chrome extension.
Follow the instructions in our article A Nocoder’s Guide to the Browserbear Helper (Element Selection) if you need help using the tool.
Click Save.
Step 3. Click
Choose click as the action and insert the config for the Past Week option under the Sort By filter.
Click Save.
Bear Tip 🐻: If the site results are loading too quickly for you to copy the config, use the Chrome DevTools to throttle network speeds.
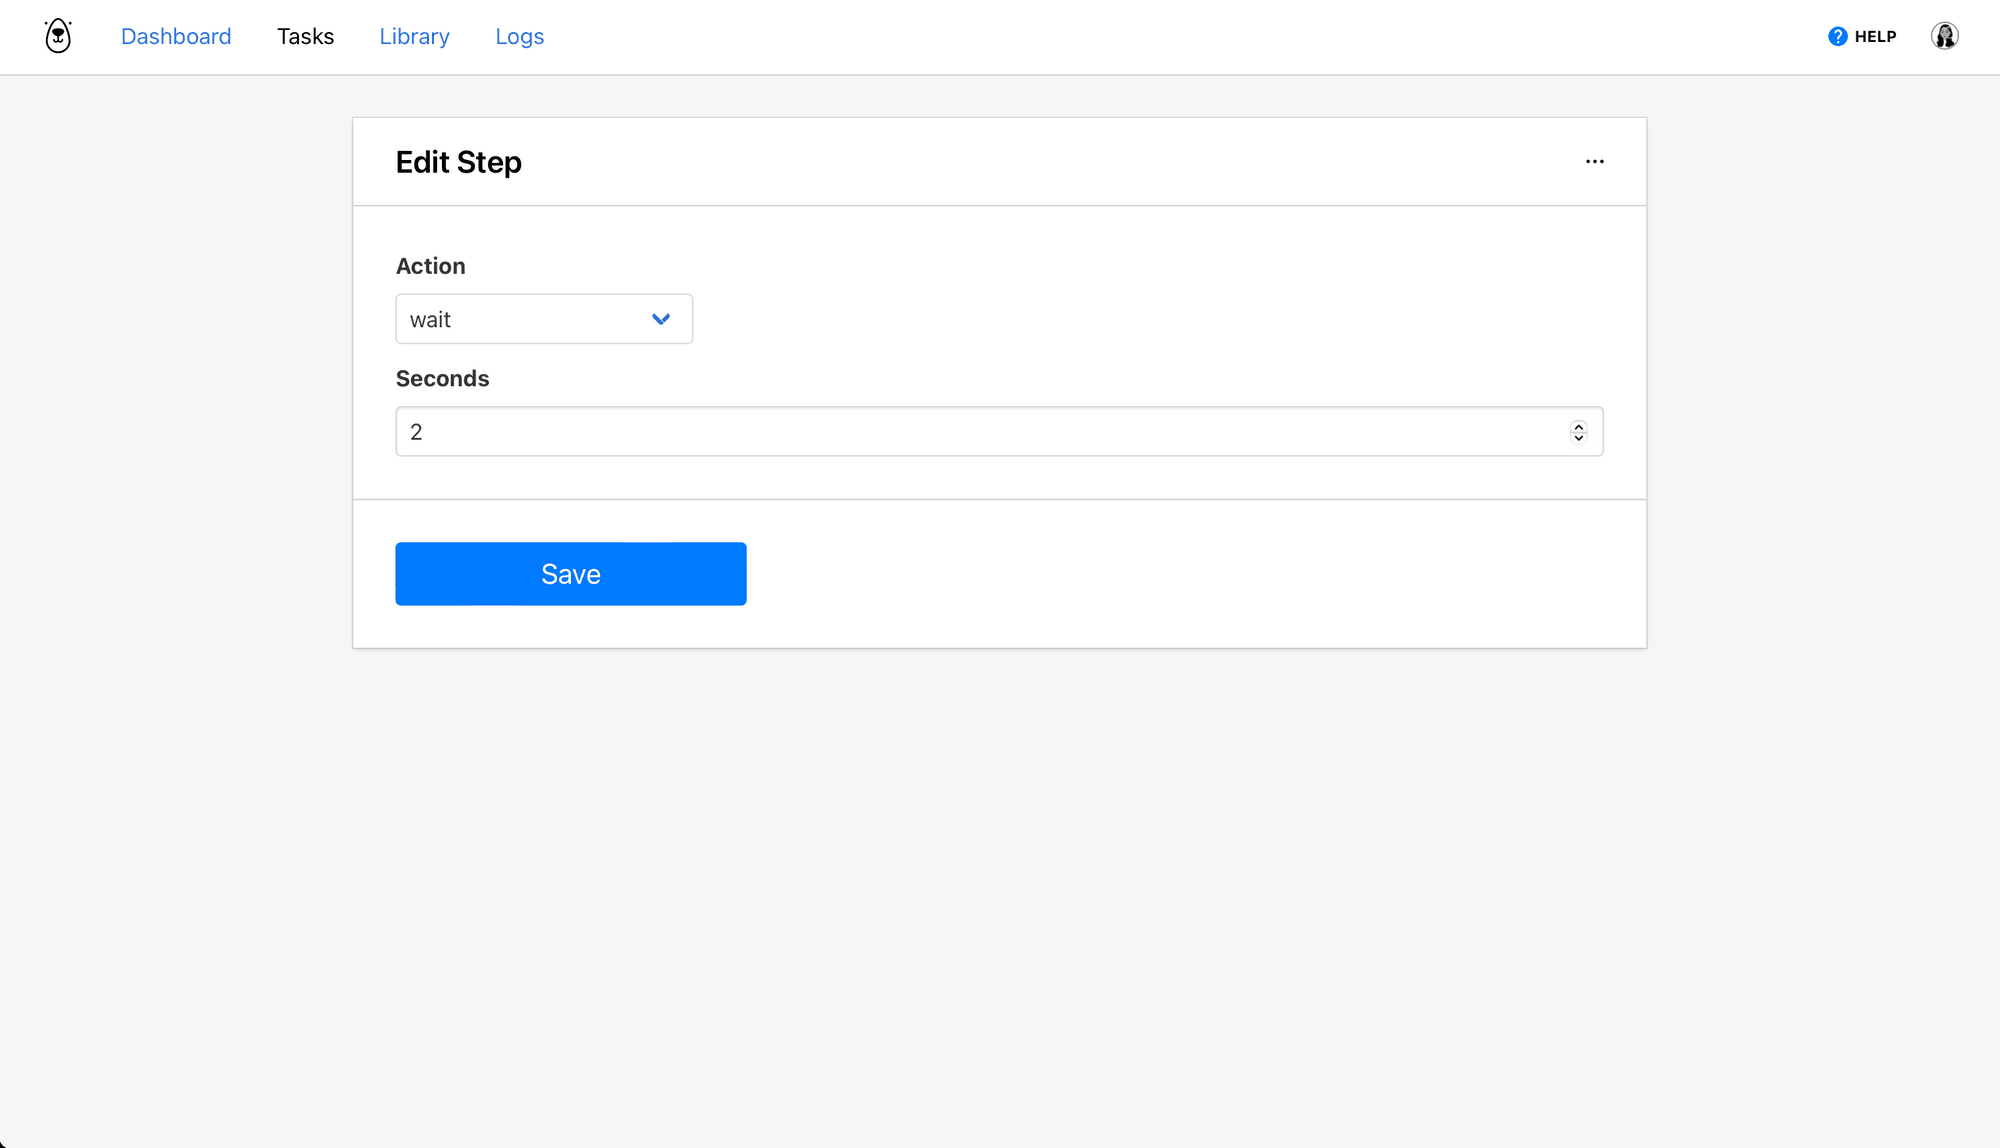
Step 3. Wait
When a filter is applied, the site needs a few seconds to load the applicable listings. We’ll use an action to allow it some time before proceeding with the next step.
Choose wait as the action and insert 2-3 seconds as the wait time.

Click Save.
Step 4. Click
Choose click as the action and insert the config for the Job Categories filter button.
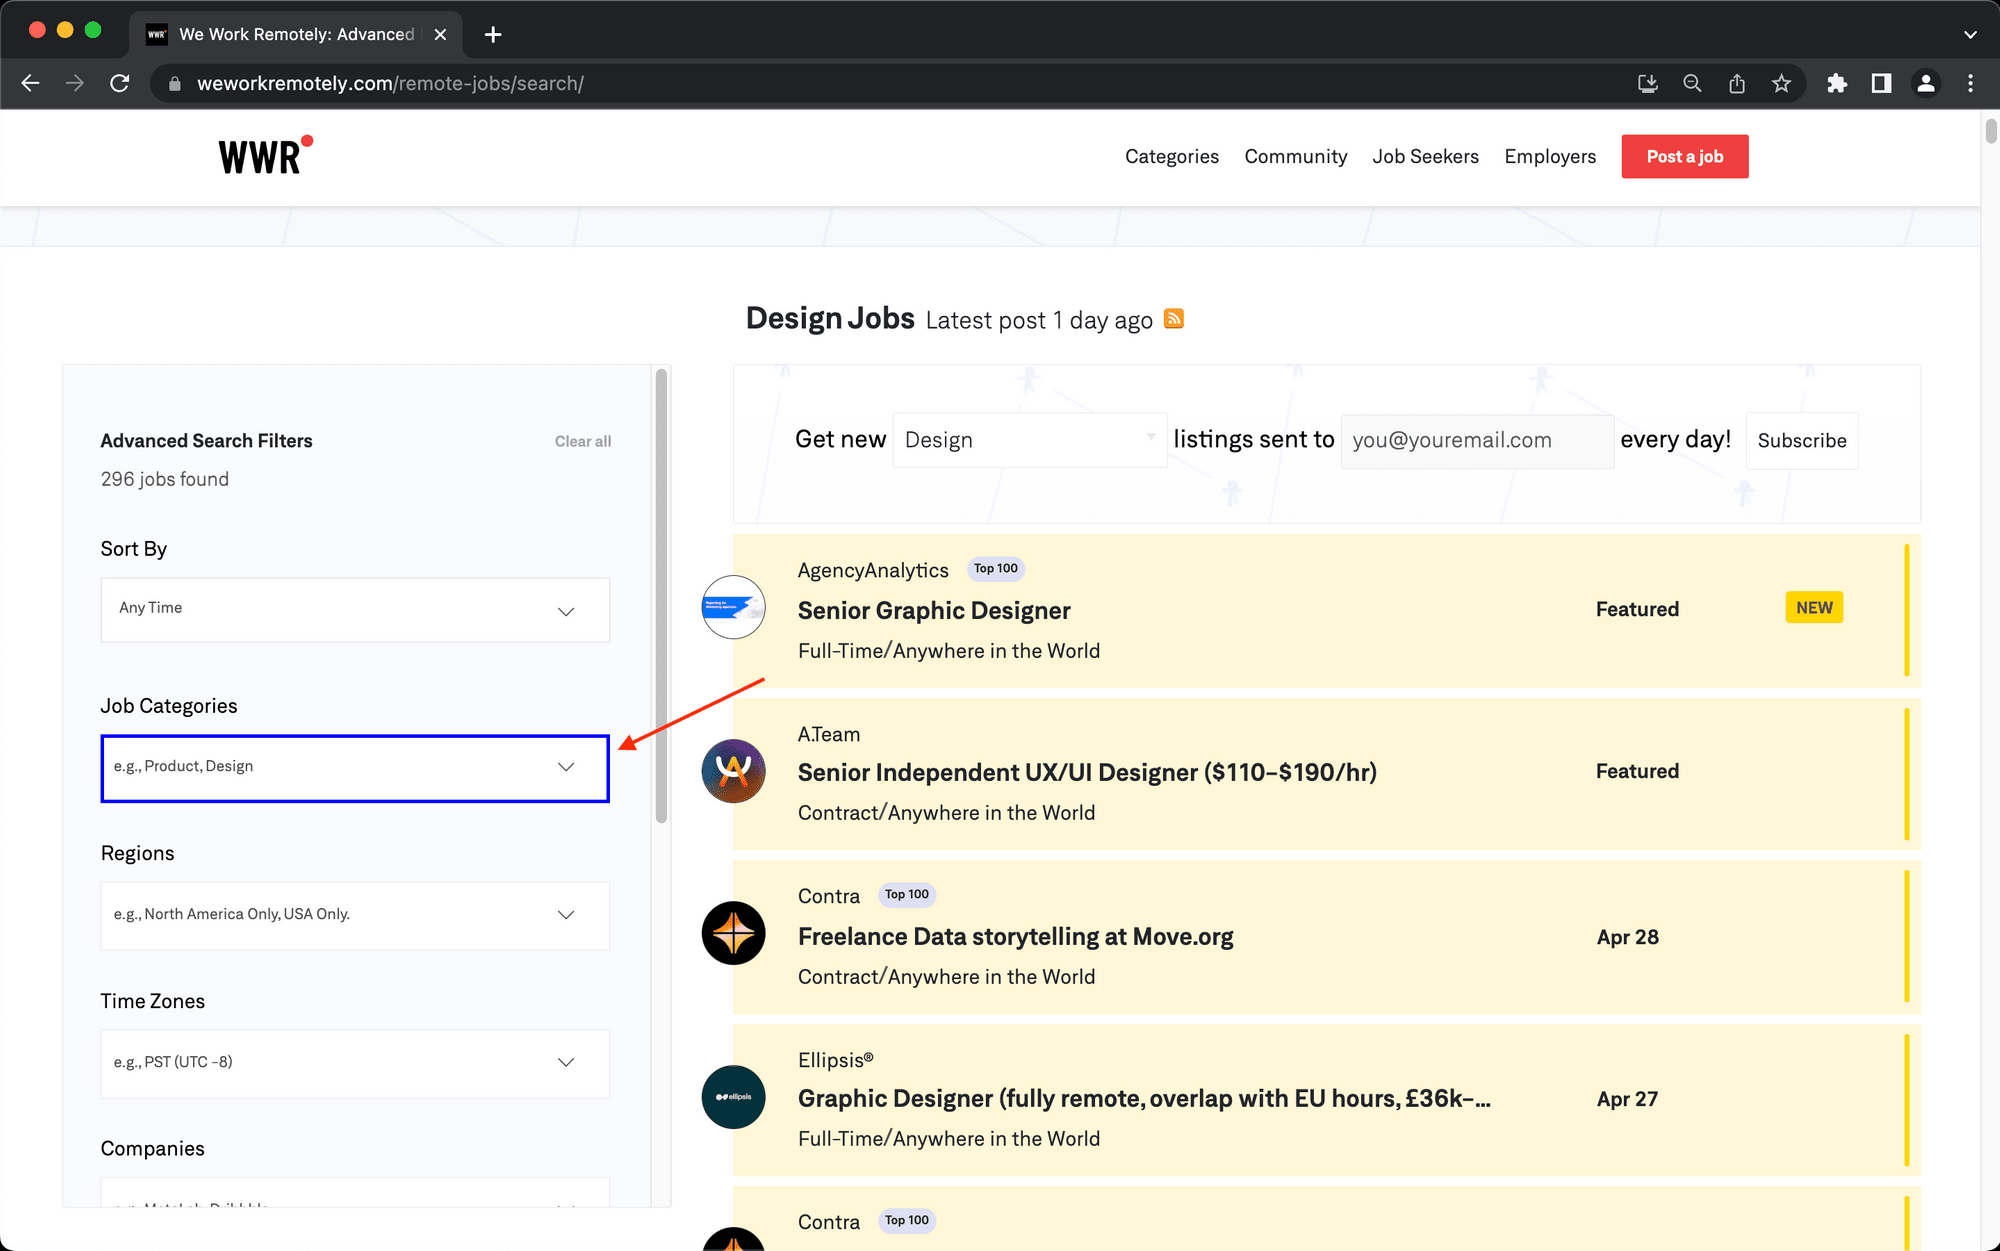
Click Save.
Step 5. Click
Choose click as the action and insert the config for the Full-Stack Programming option under the Job Categories filter.
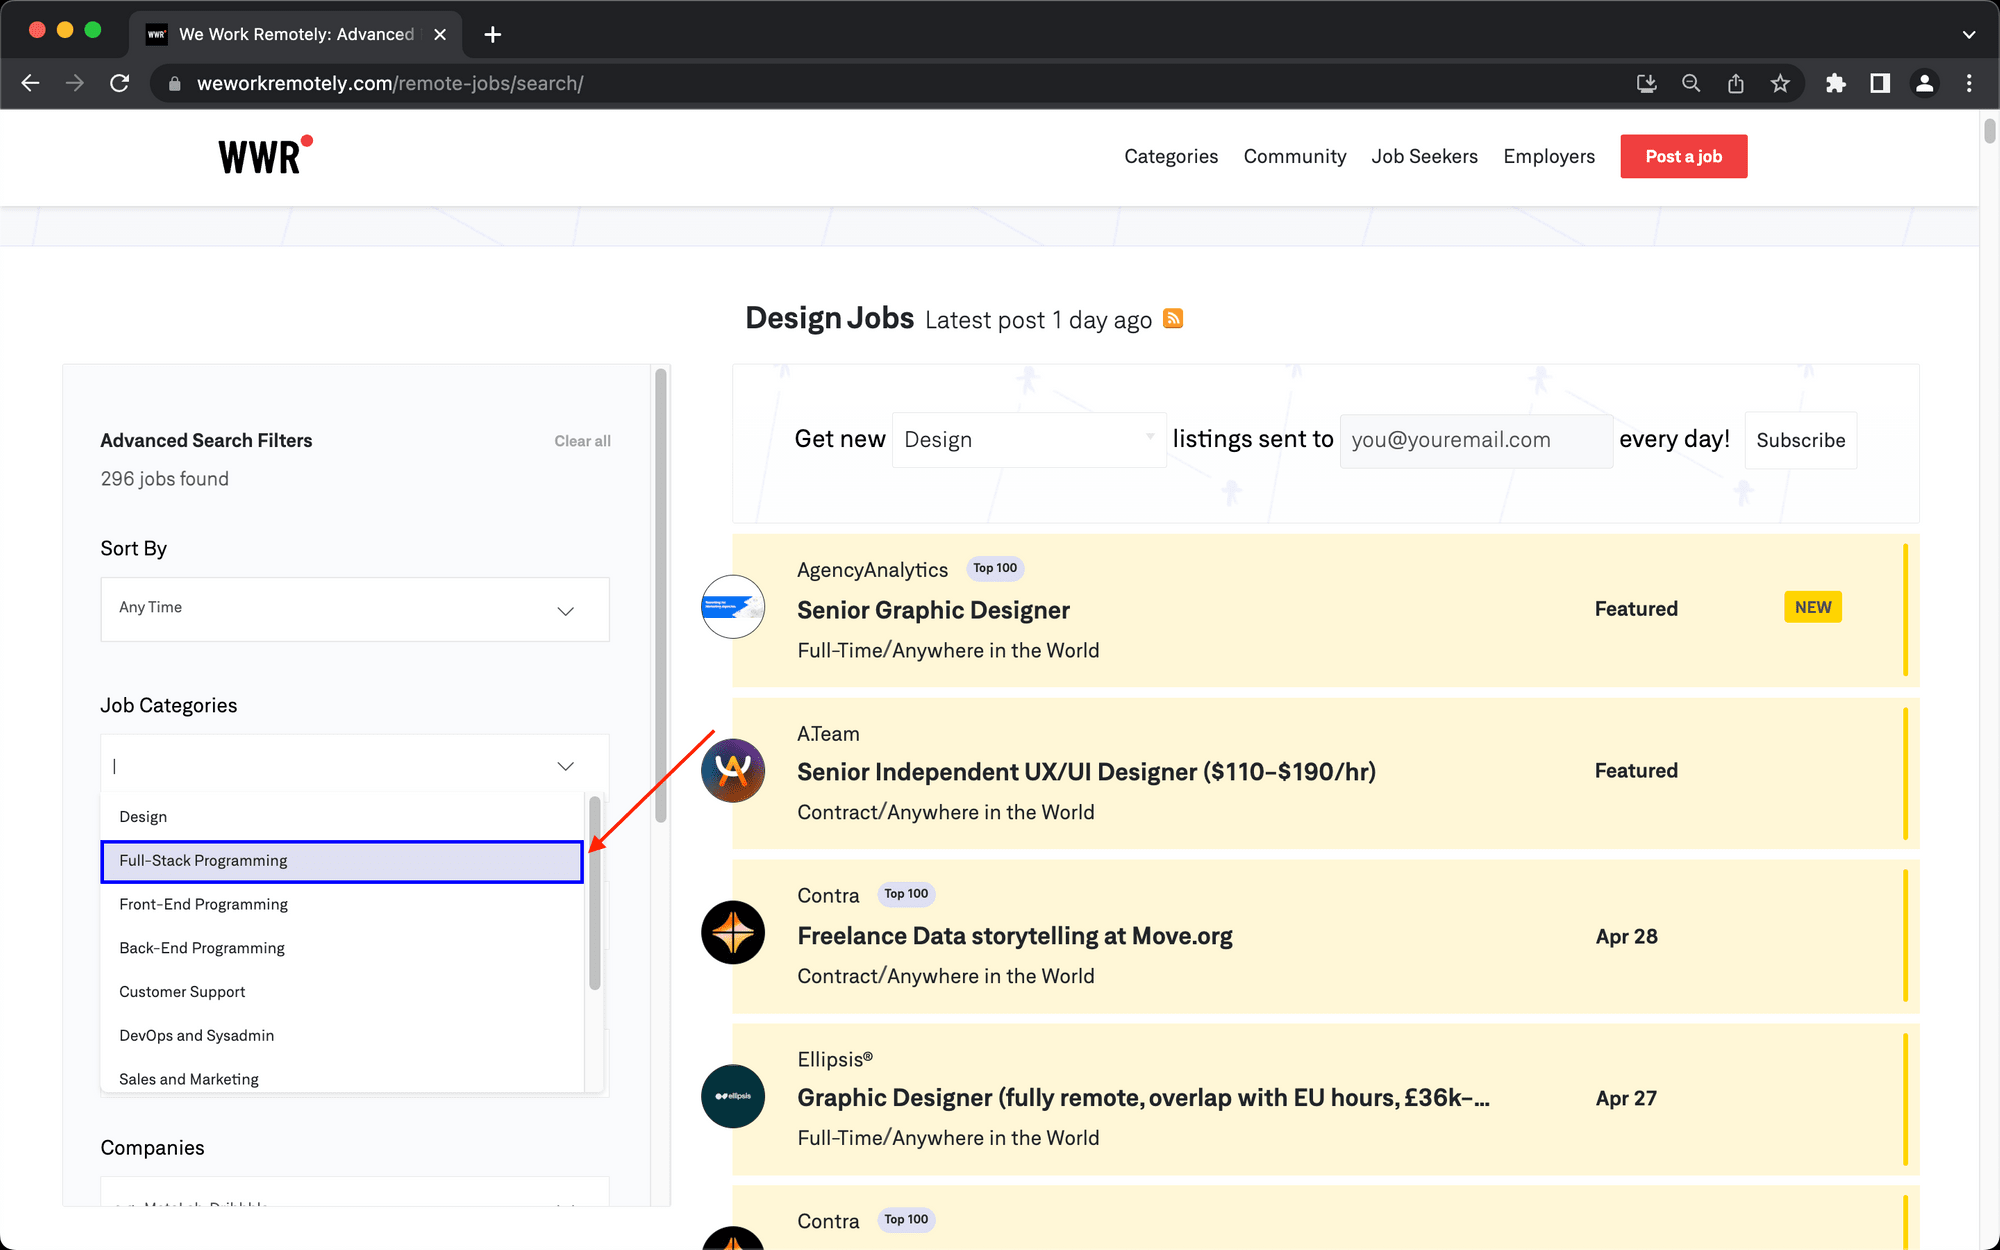
Click Save.
Step 6. Wait
Choose wait as the action and insert 2-3 seconds as the wait time.
Click Save.
Step 7. Save Structured Data
This step will save the job title and file path to the full listing, making it easy for you to scrape each of these pages individually later on.
Choose save_structured_data as the action and insert the config for parent containers in the Helper section.
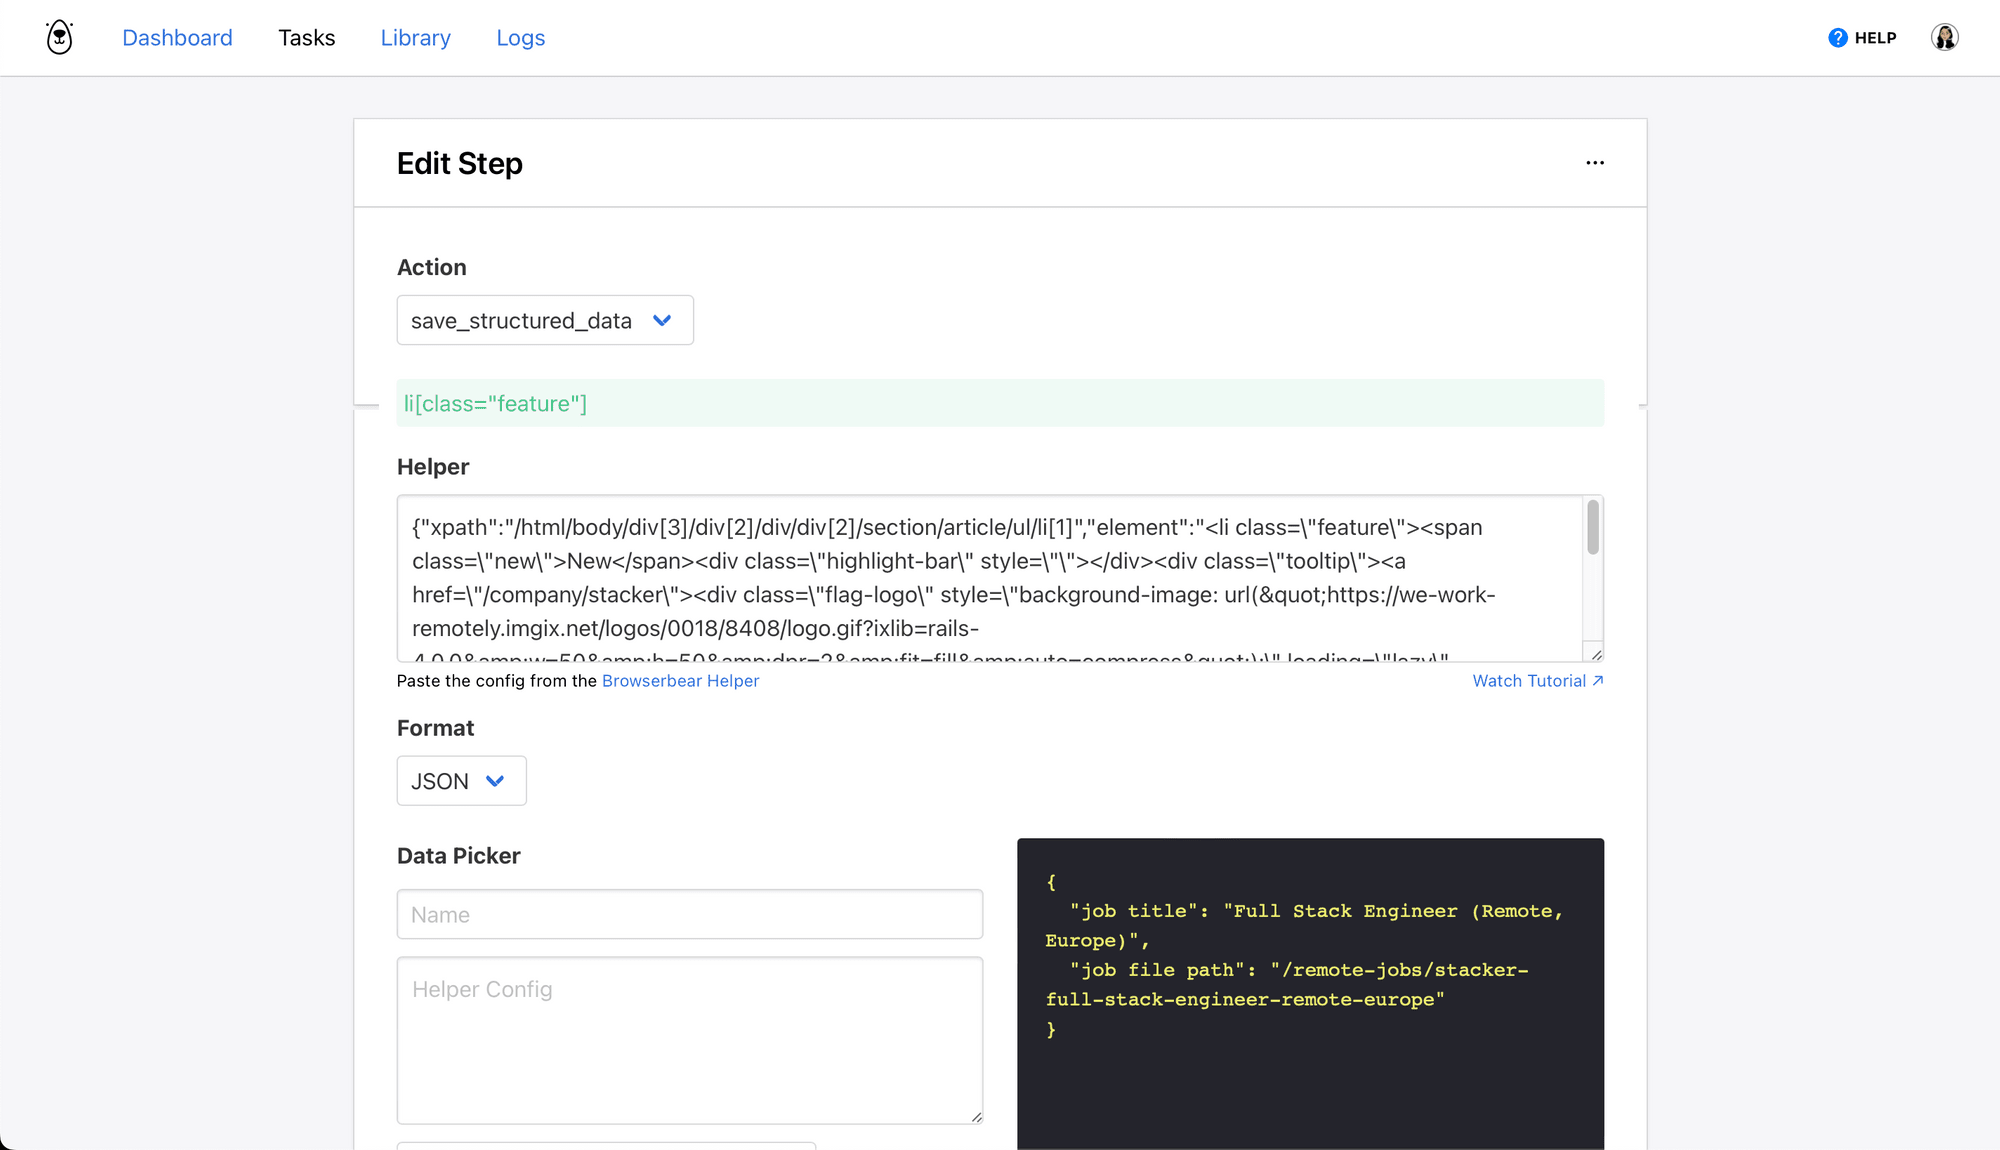
You can then define each individual HTML element and set it up using the Data Picker.
Click Save. The full task should look something like this:
Return to your task page, then click Run Task to test your automation and make sure Browserbear is able to scrape job titles and file paths from the site.
Bear Tip 🐻: If you are encountering blocking issues by sites with bot protection, try using the Randomize User Agent, Randomize Fingerprint, or Proxy features.
Create a Browserbear Task to Scrape Listing Details
While still logged into your Browserbear account, create a new task and set up the following actions:
Step 1. Go
Choose go as the action and insert the URL of an individual job listing. We will override this link using Zapier later on to apply the same scraping formula to dozens of webpages.
Select networkidle as the wait instructions.
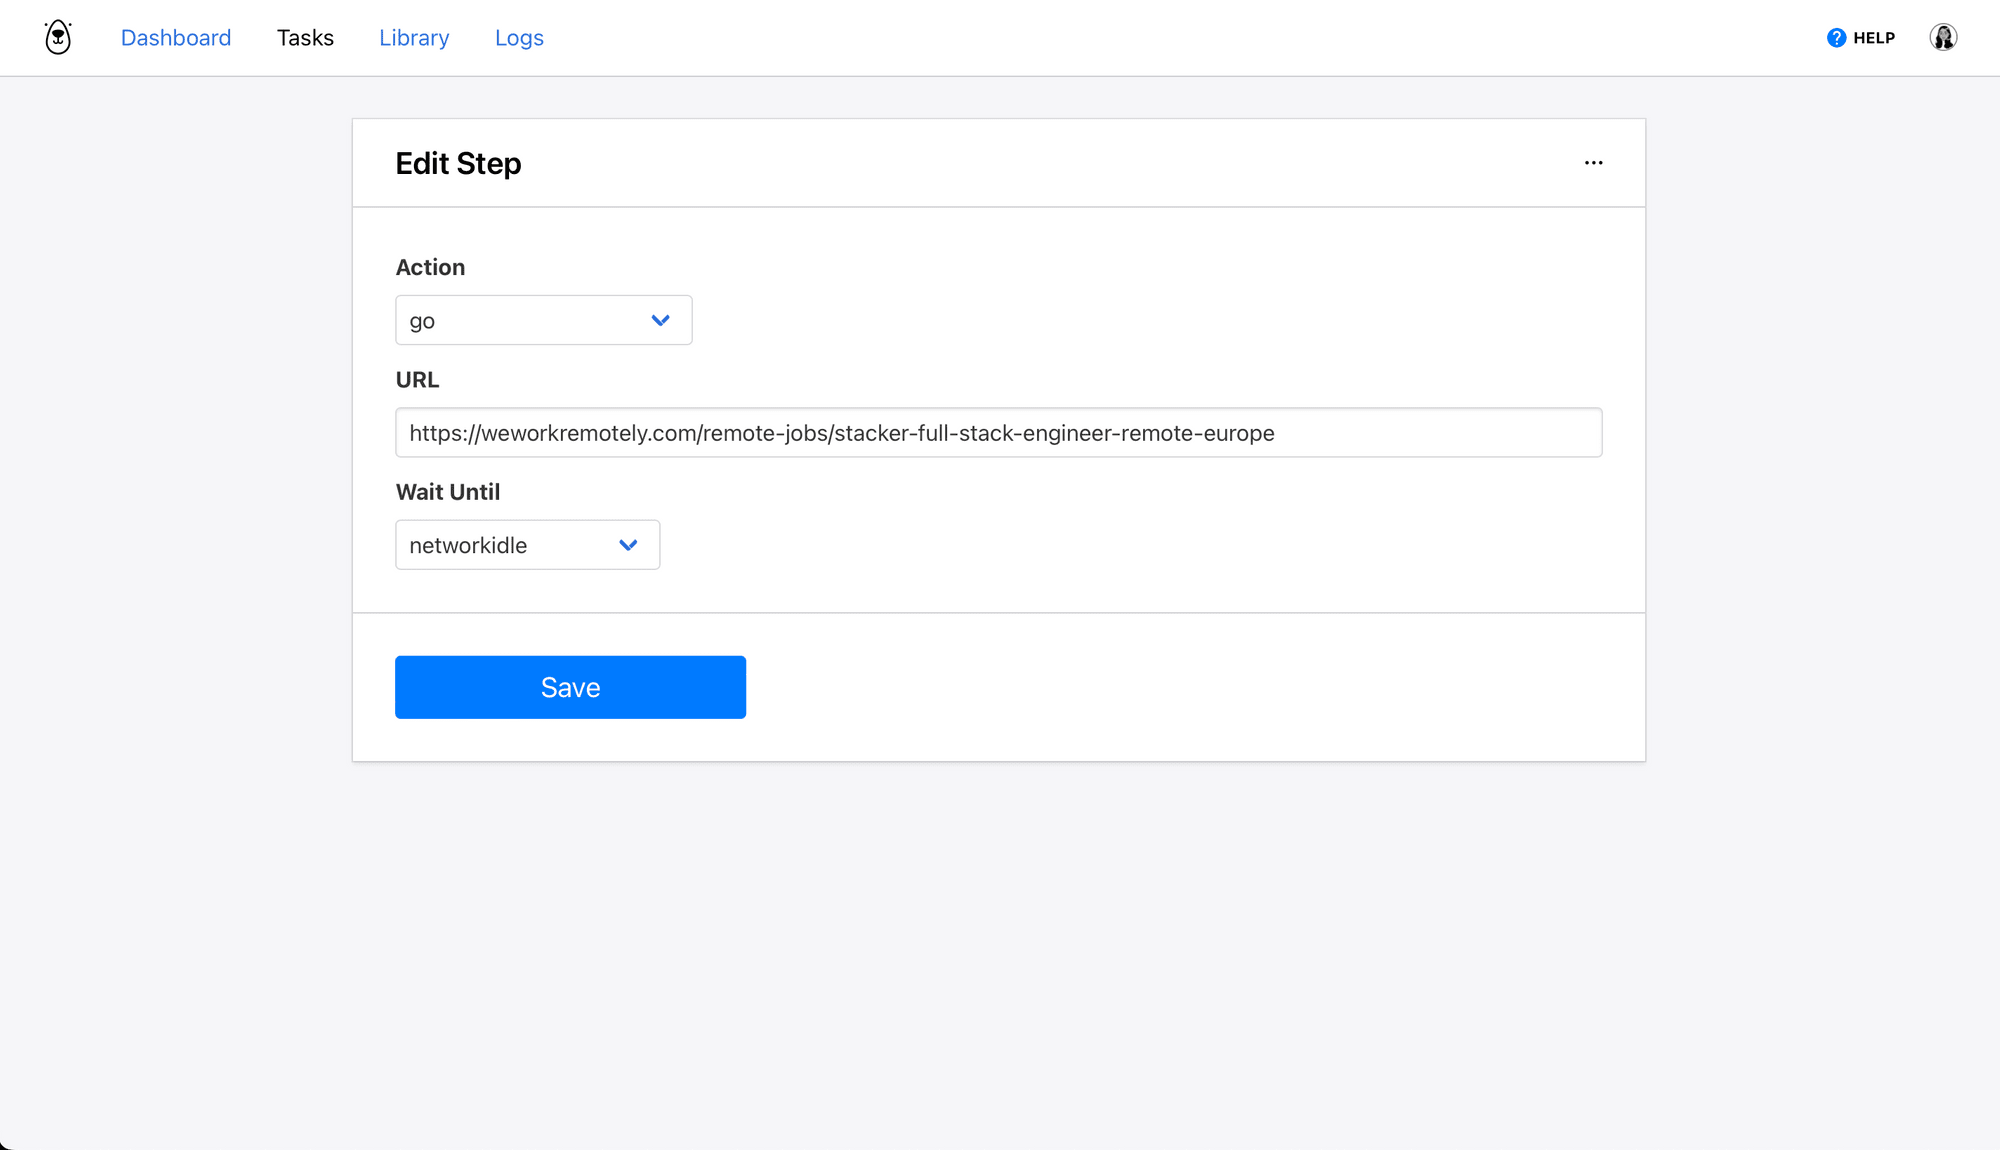
Click Save.
Step 2. Save Structured Data
This step will save the details needed from each listing—you simply need to use the data picker to decide which HTML elements you want scraped.
Choose save_structured_data as the action and insert the config for parent containers in the Helper section.
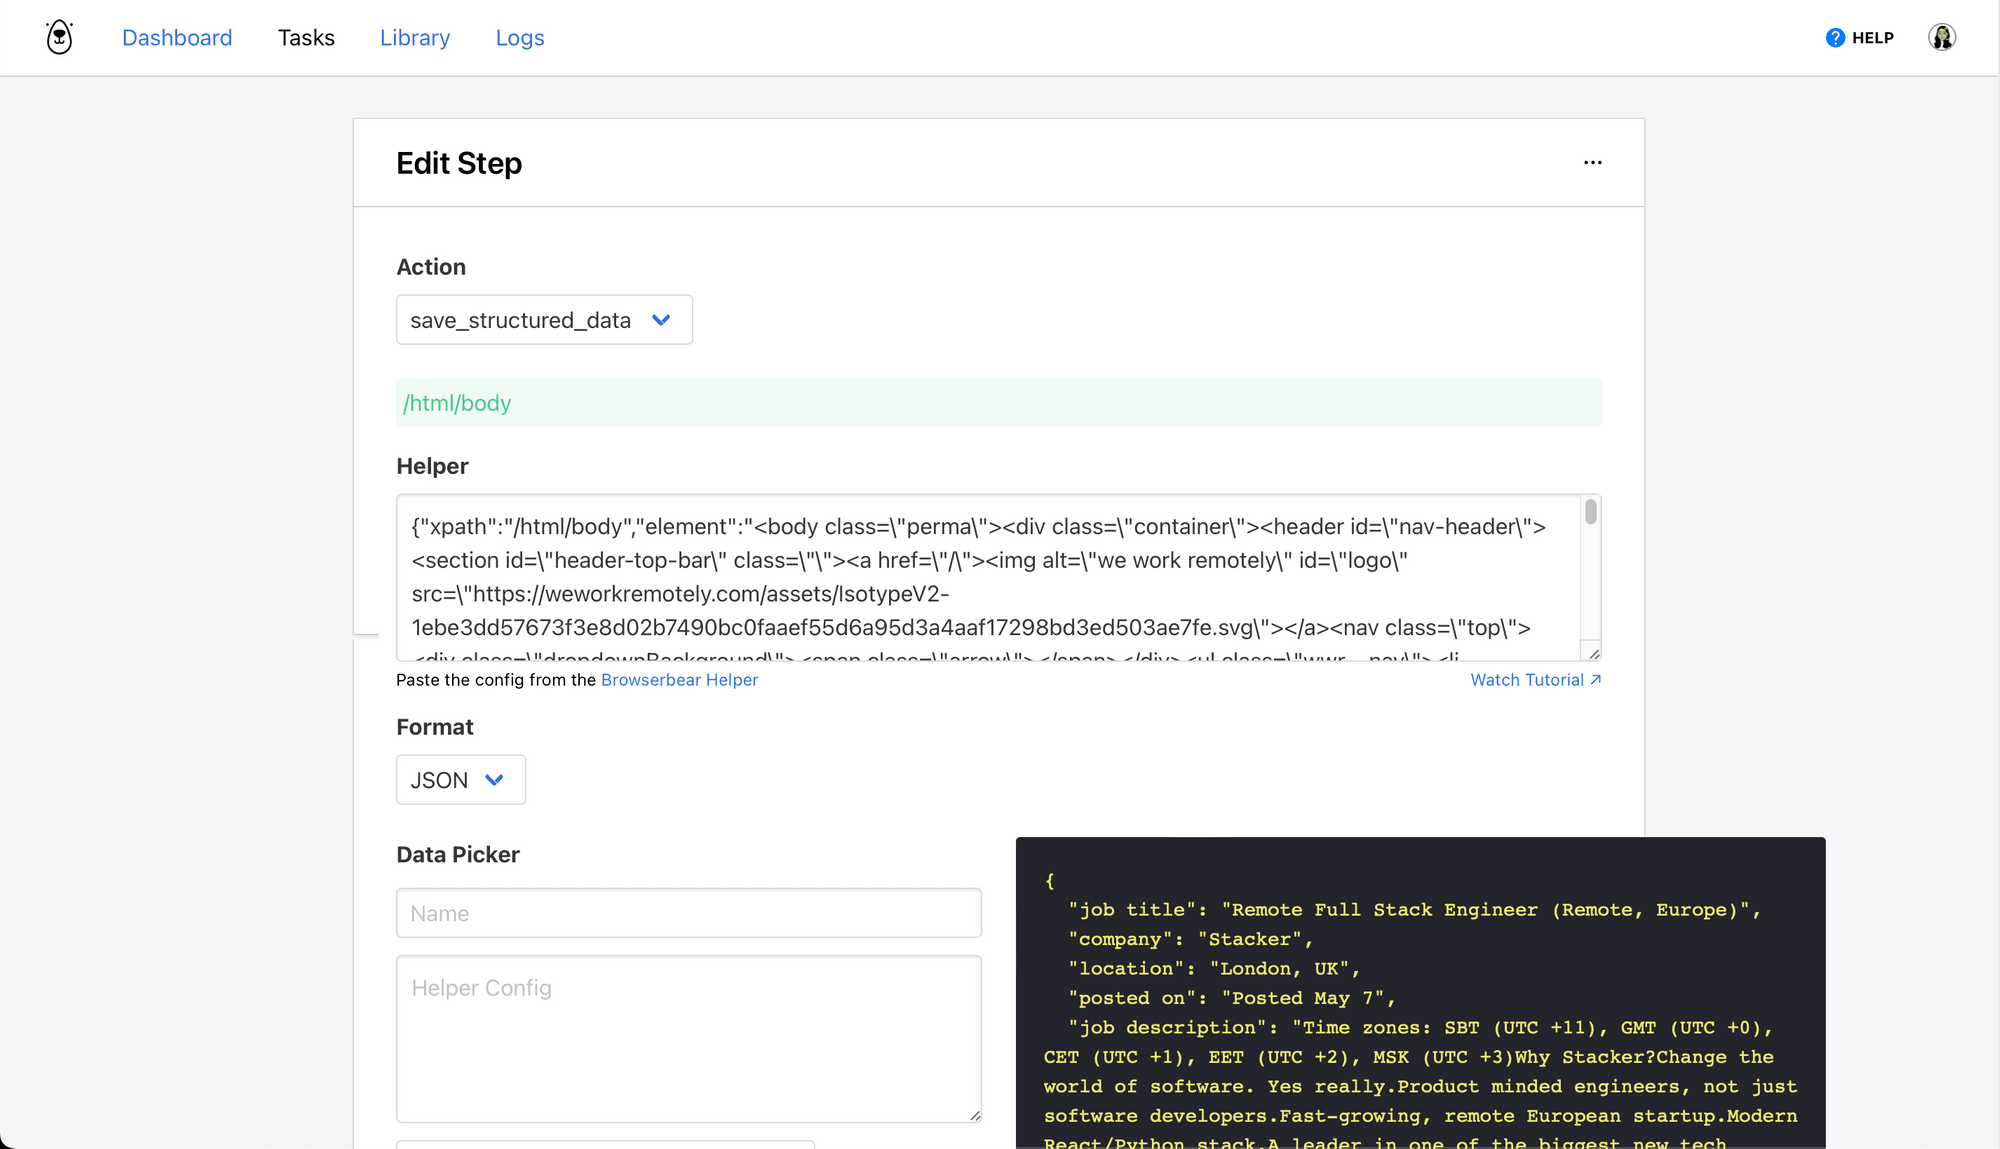
Add each individual element using the Data Picker, taking care to specify the type of data you need scraped (text, link, image, etc.).
Click Save. The full task should look something like this:
Return to your task page, then click Run Task to test your automation. Upon checking the log, you should be able to see all the details you selected from the listing.
Your Browserbear tasks are now ready—now we set up a series of zaps to send data between programs.
Set up a Zap to Scrape Links on a Schedule
The first zap will instruct Browserbear to run your link scraping task on a schedule.
Log into your Zapier account, click + Create Zap , and set up the following events:
Trigger: Every Week in Schedule by Zapier
Choose Schedule by Zapier as the app and Every Week as the event.
Specify the frequency at which you would like your automation to run. In this example, we will be using weekly.
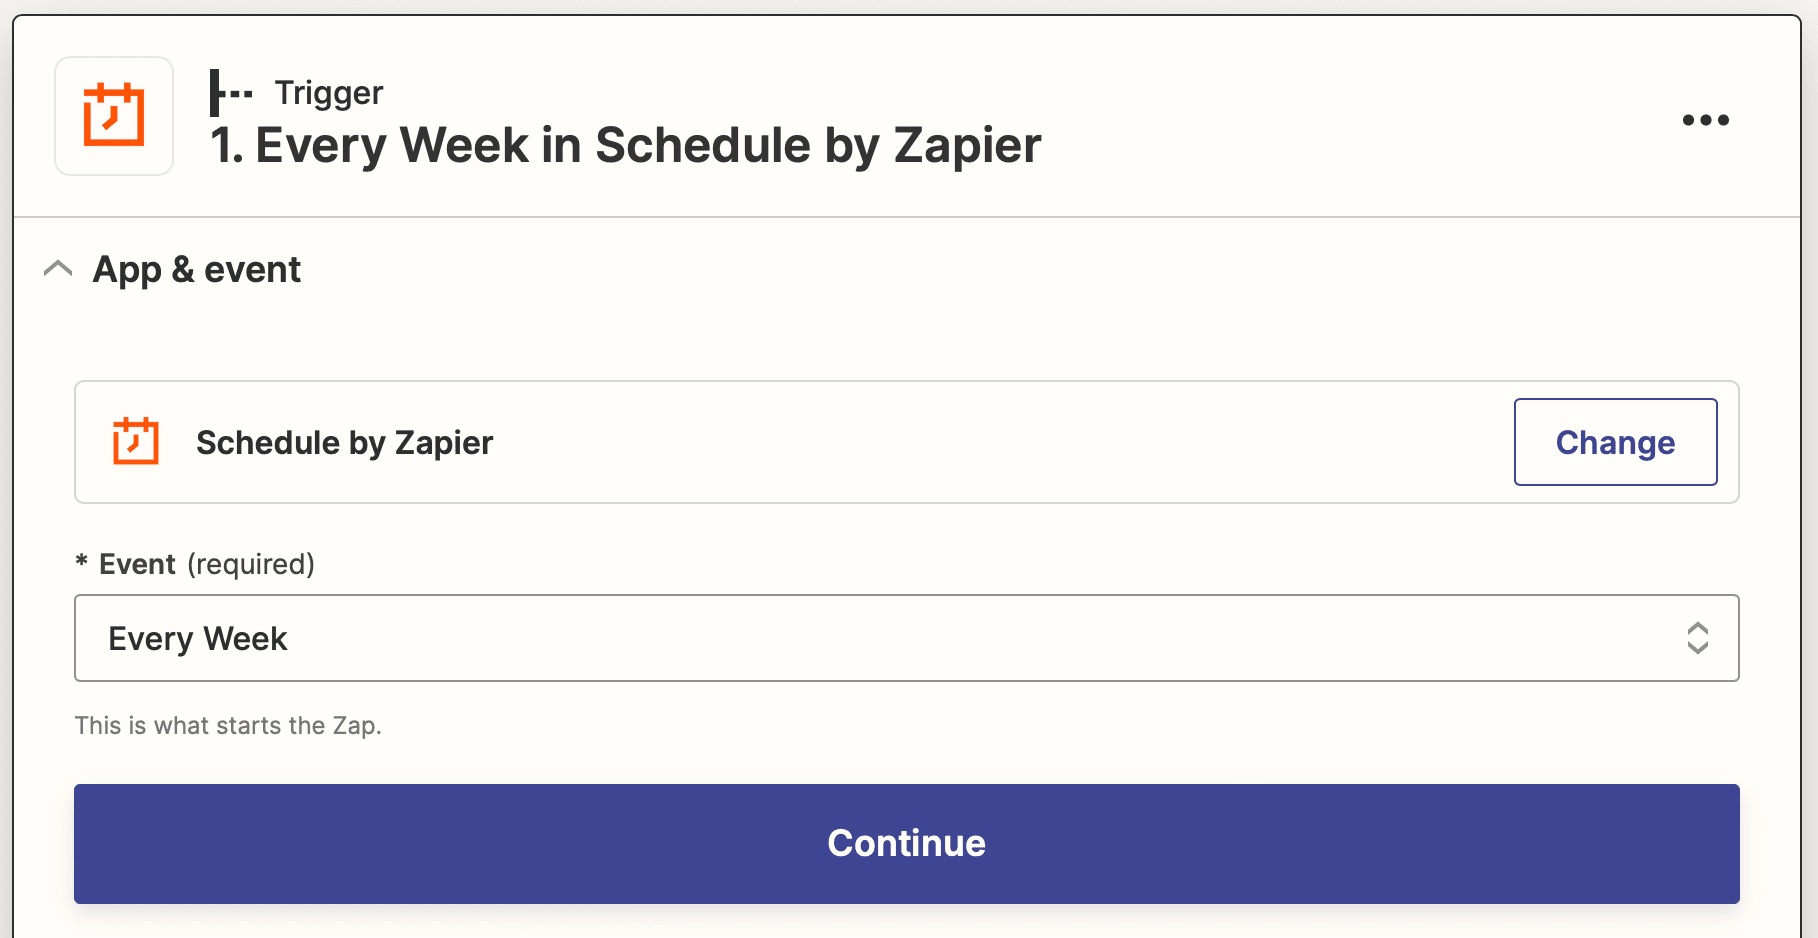
Test the trigger, then continue.
Action: Create Run in Browserbear
Choose Browserbear as the app and Create Run as the event. You’ll need to connect your Browserbear account using your API key.
Select your link scraping task.
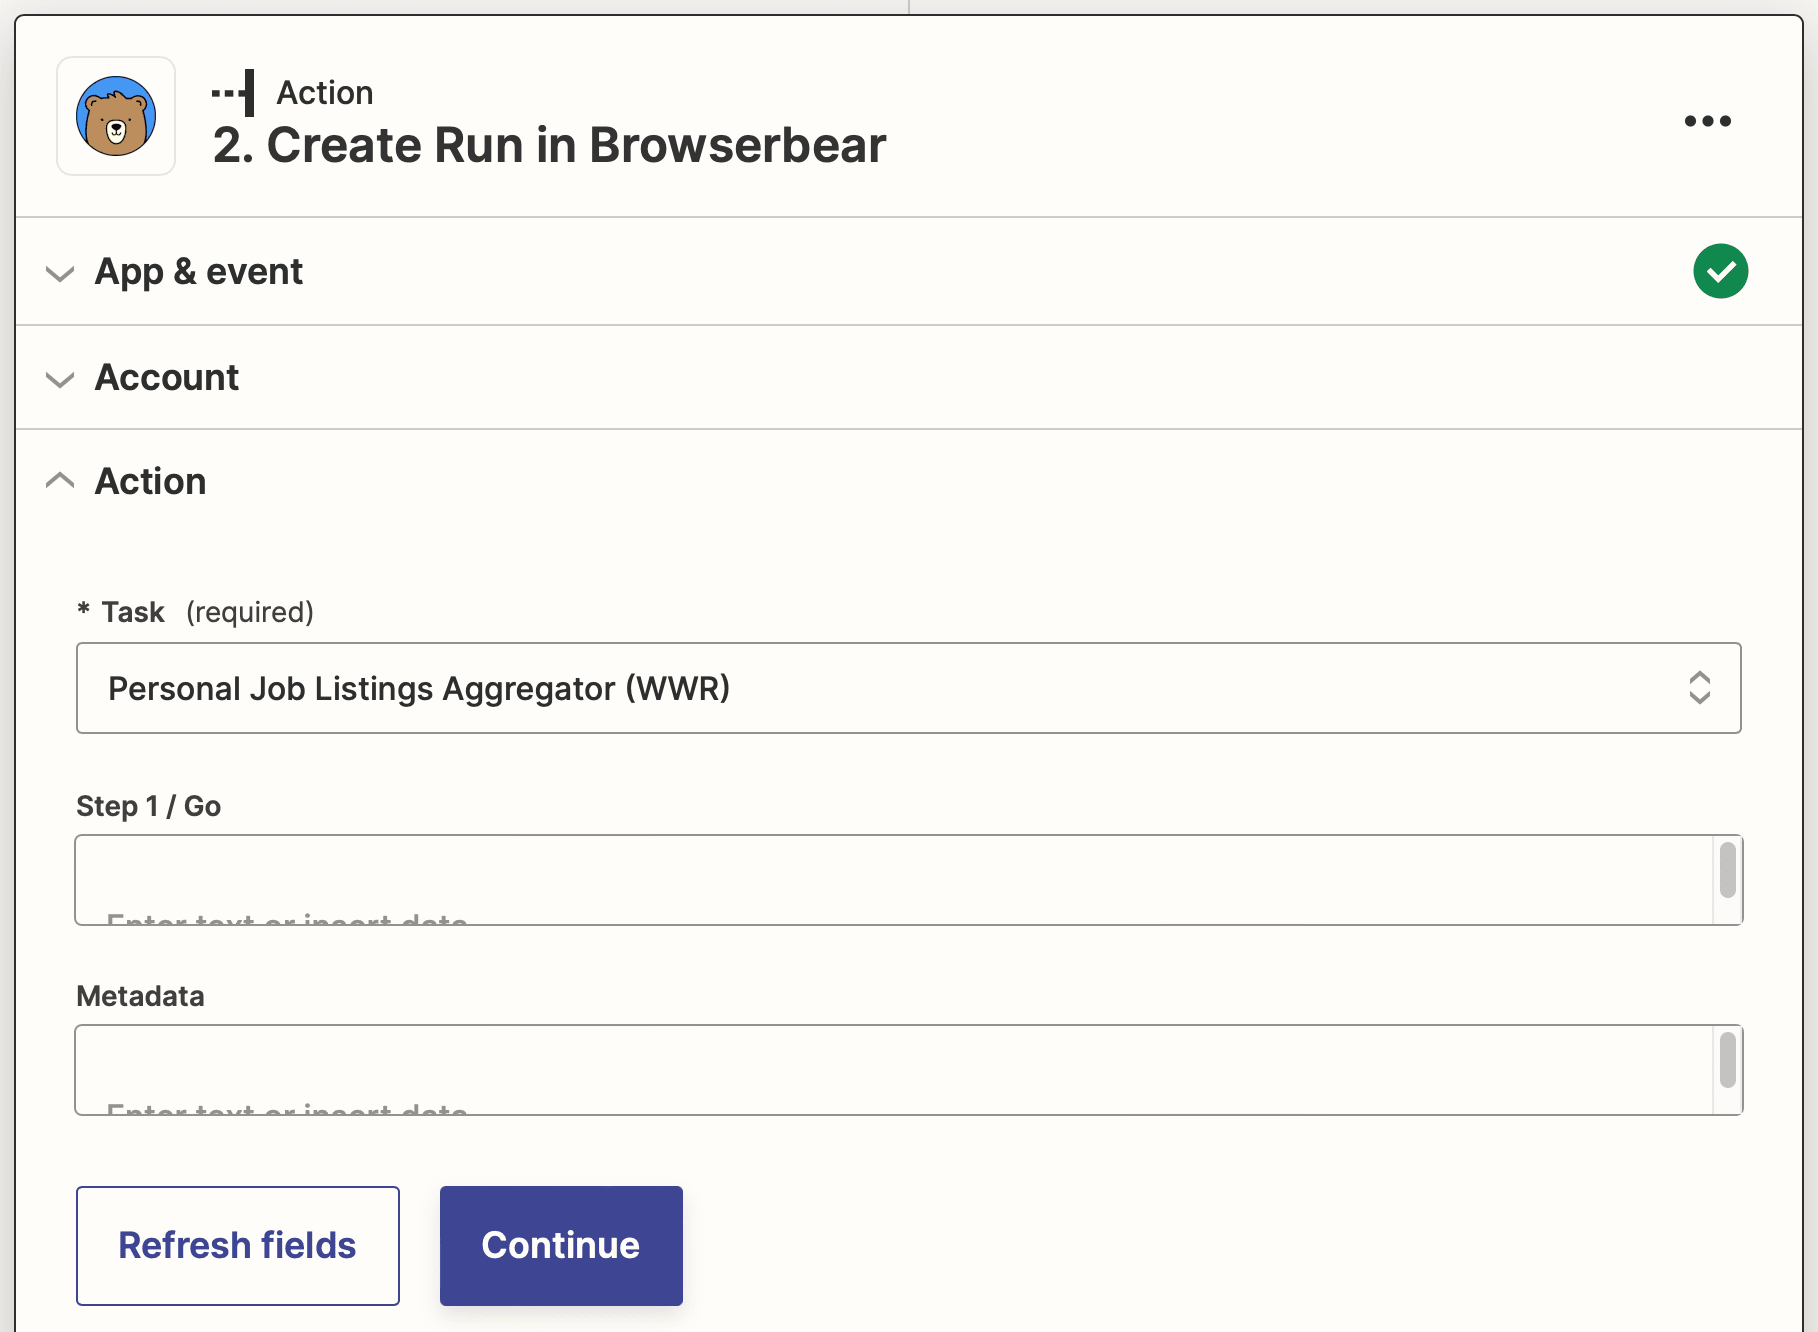
Test the action, then save your zap.
Set up a Zap to Send Links to Airtable
This zap will trigger when a run is completed in Browserbear, sending the output to your Airtable base.
Click + Create Zap , and set up the following events:
Trigger: Run Finished in Browserbear
Choose Browserbear as the app and Run Finished as the event. Your account should already be connected, so proceed to select the URL scraping task.
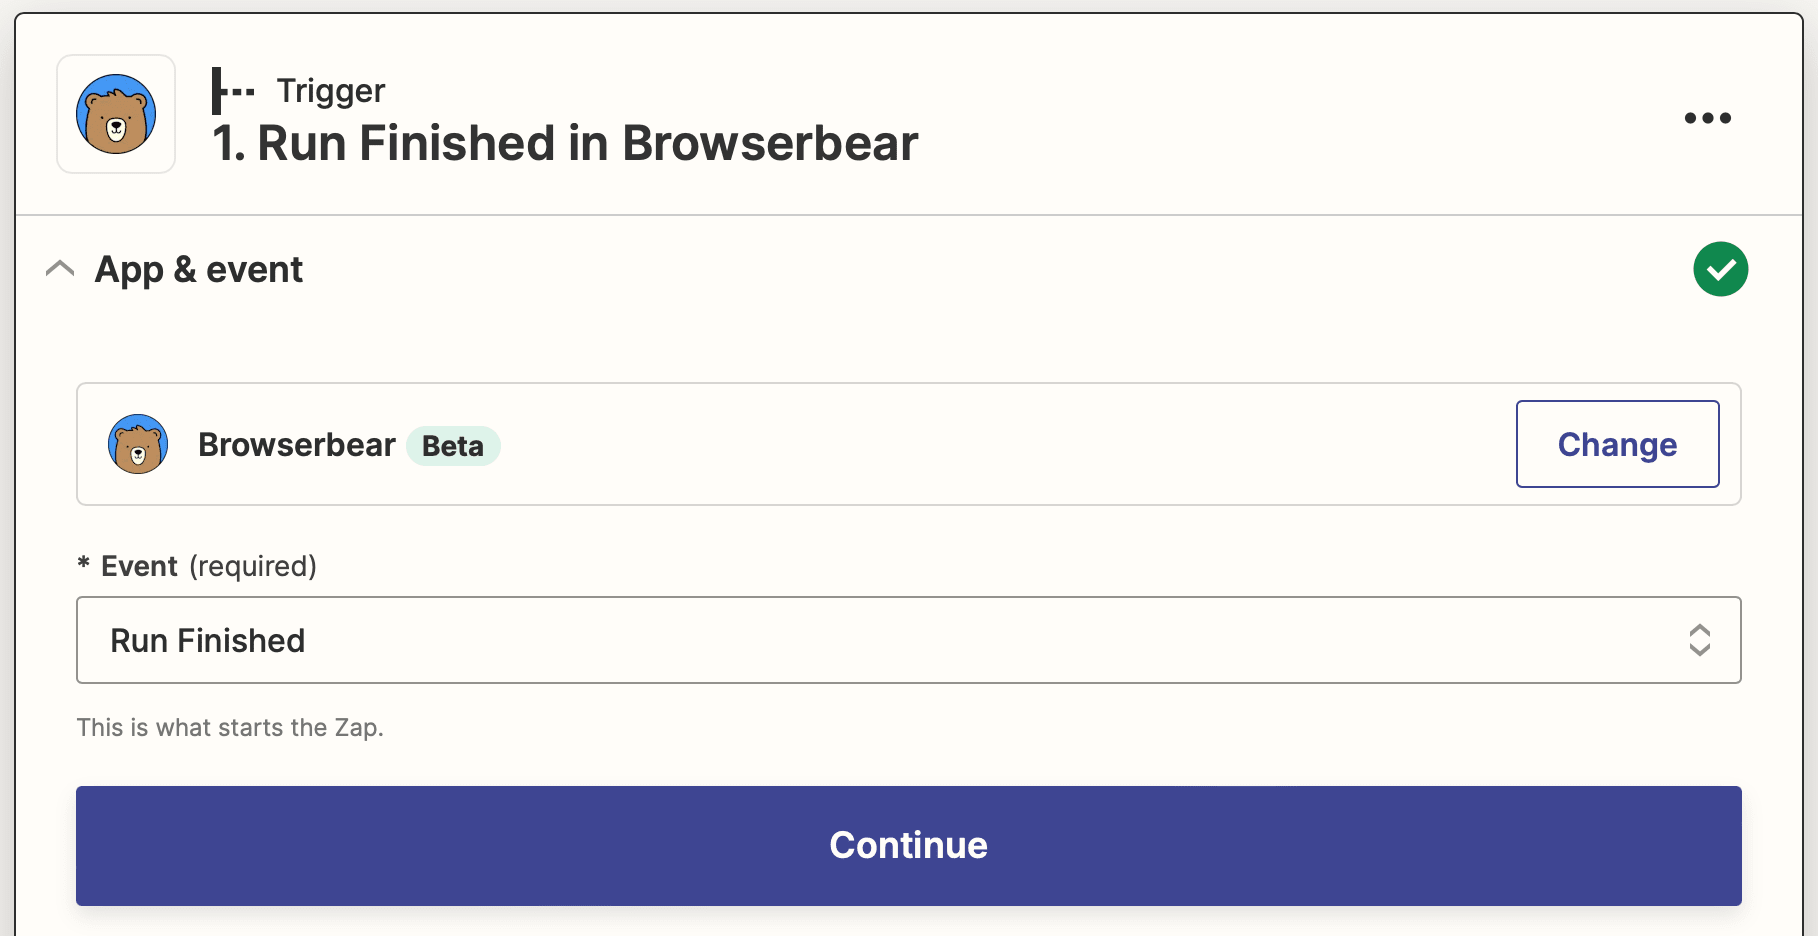
Test the trigger, then continue.
Action: Create Records (With Line Item Support) in Airtable
Choose Airtable as the app and Create Records (With Line Item Support) as the event. If you haven’t connected your account yet, do so using the API key found on your Account page.
Set up the action by choosing the base and table you created, then mapping the job title and file path outputs to their associated Airtable fields.
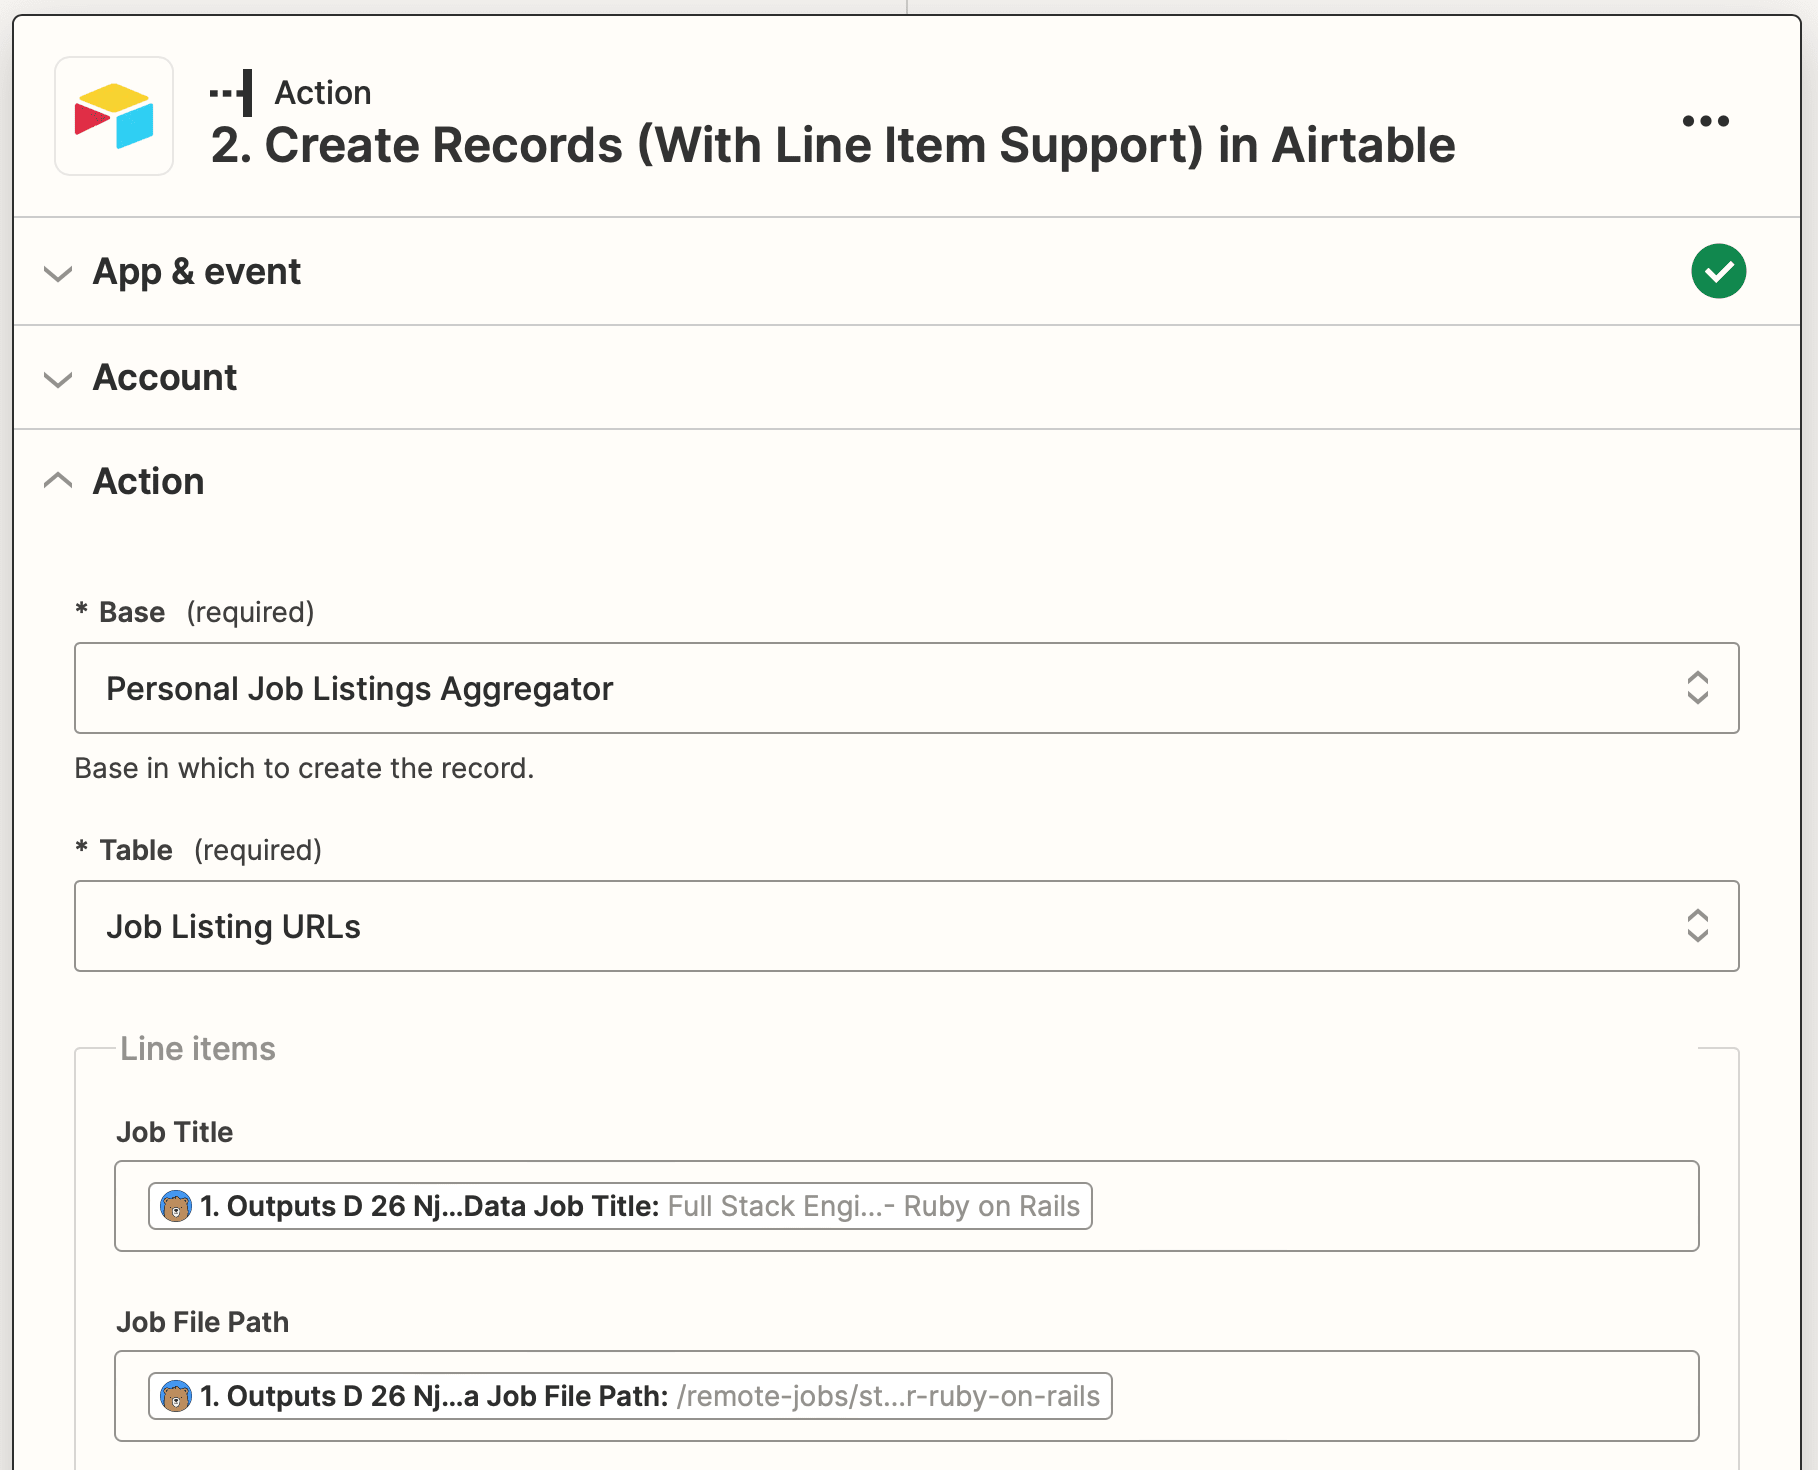
Test the action to ensure records are successfully created.
You should notice the Job URL field populating itself with links created from the file paths being deposited into the newly created records.
Set up a Zap to Scrape Job Details from Links
This zap will take the links from the previous scraping step and visit them individually, scraping the details you specified with the data picker.
Click + Create Zap , and set up the following events:
Trigger: New Record in Airtable
Choose Airtable as the app and New Record as the event. Select the associated base and table.
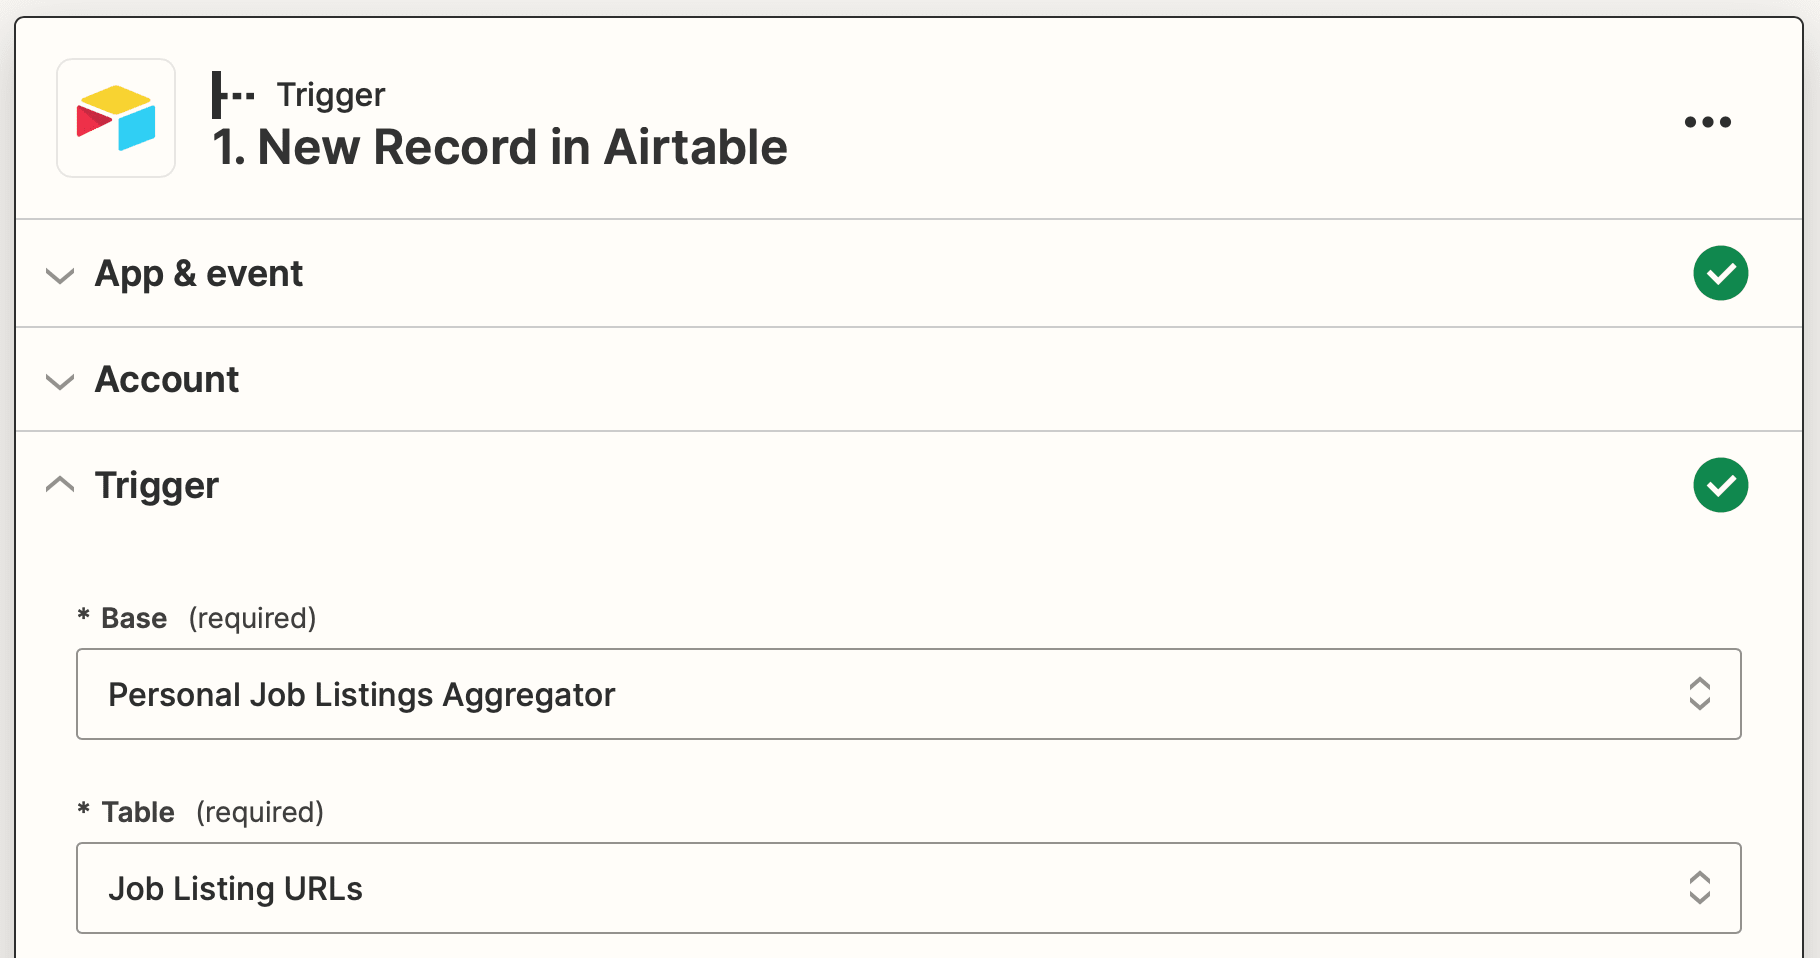
Test the trigger, then continue.
Action: Create Run in Browserbear
Choose Browserbear as the app and Create Run as the event.
Set up the action by choosing your listing scraping task, then inserting the dynamic job URL data source into the Step 1 / Go field and the record ID into the Metadata field.
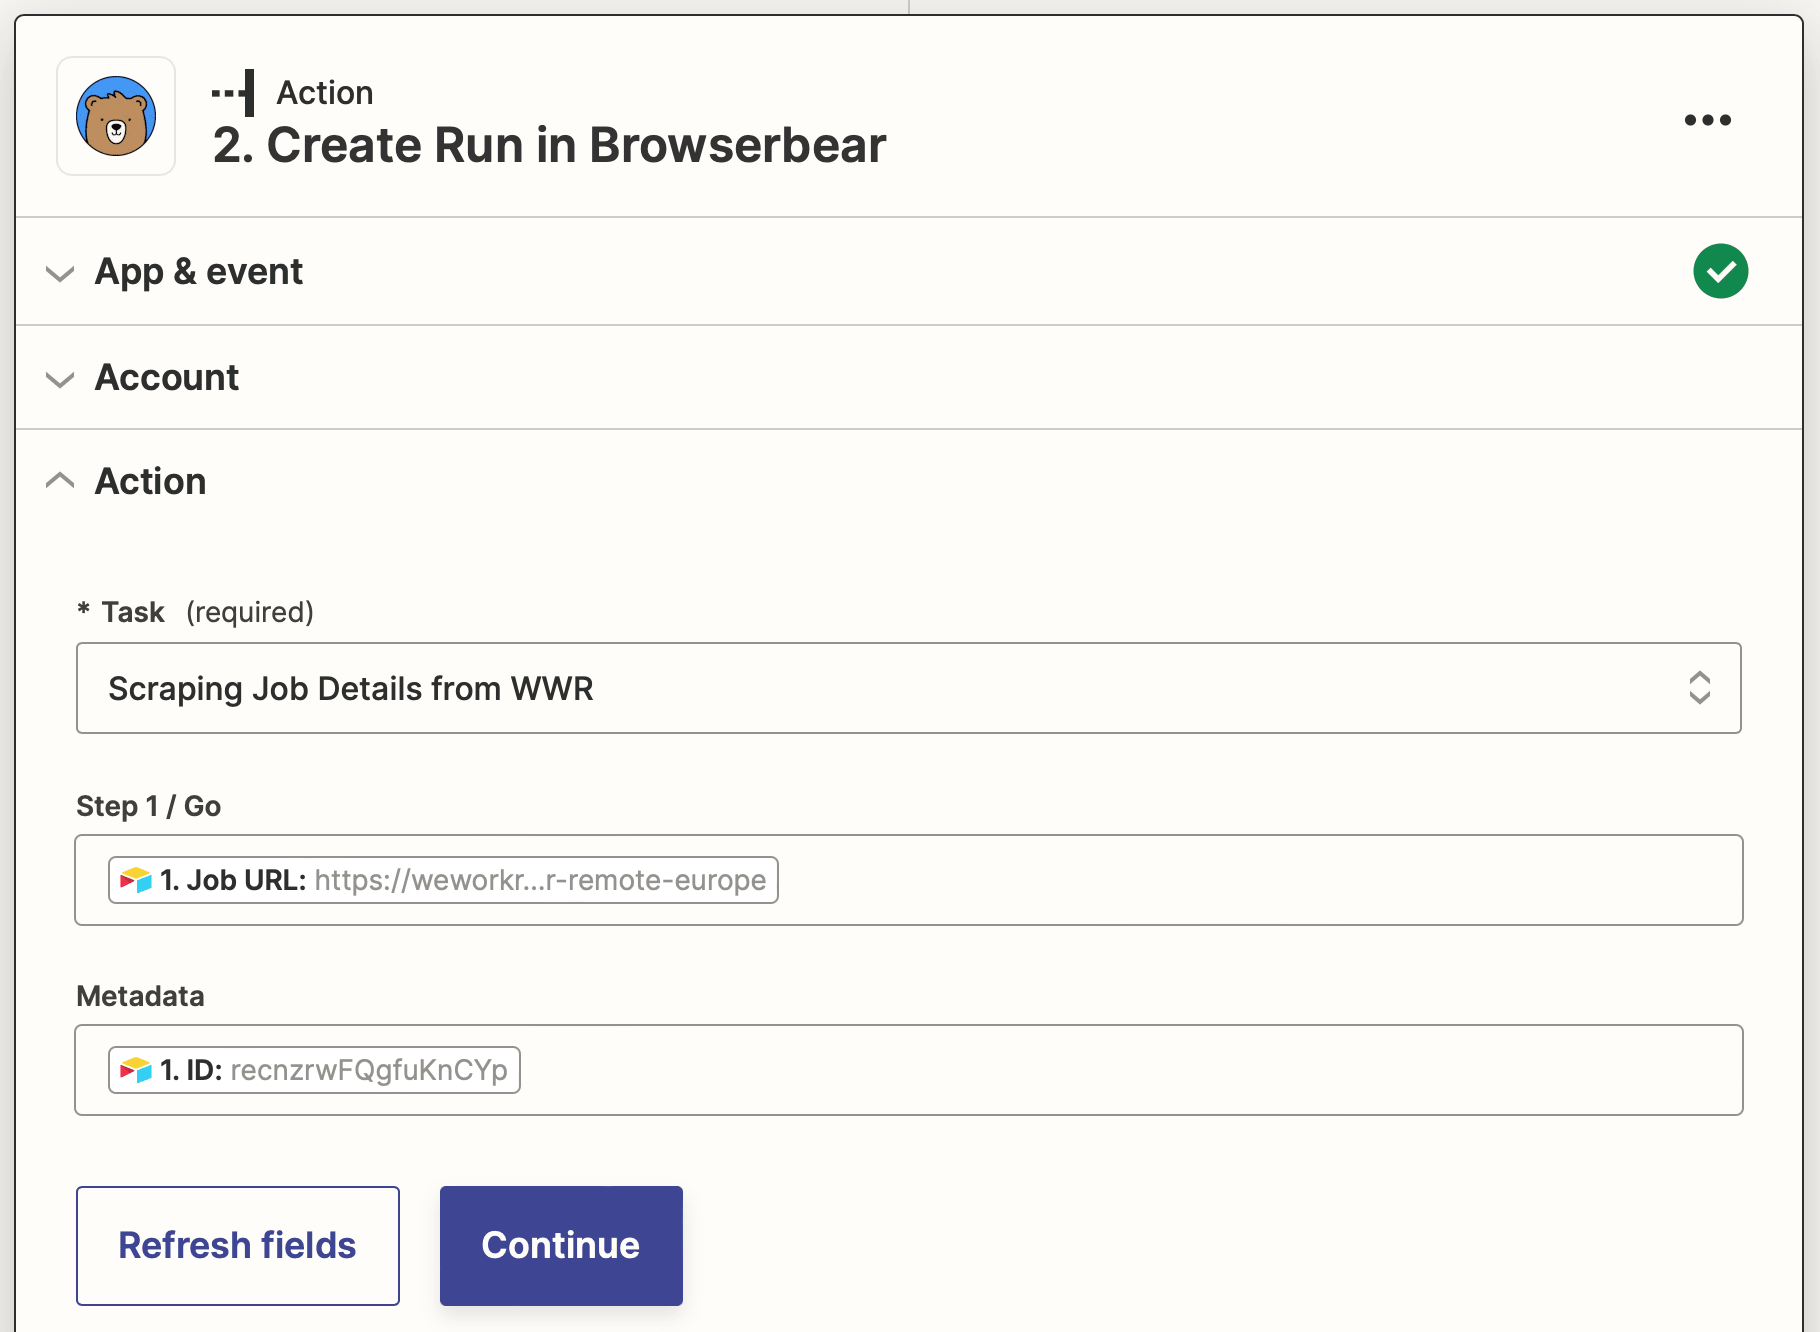
Test the action to ensure job details are accurately scraped.
Set up a Zap to Save Job Details to Airtable
This zap will send scraped job details to be stored in your Airtable base when a task run is completed.
Click + Create Zap , and set up the following events:
Trigger: Run Finished in Browserbear
Choose Browserbear as the app and Run Finished as the event. Select your job detail scraping task.
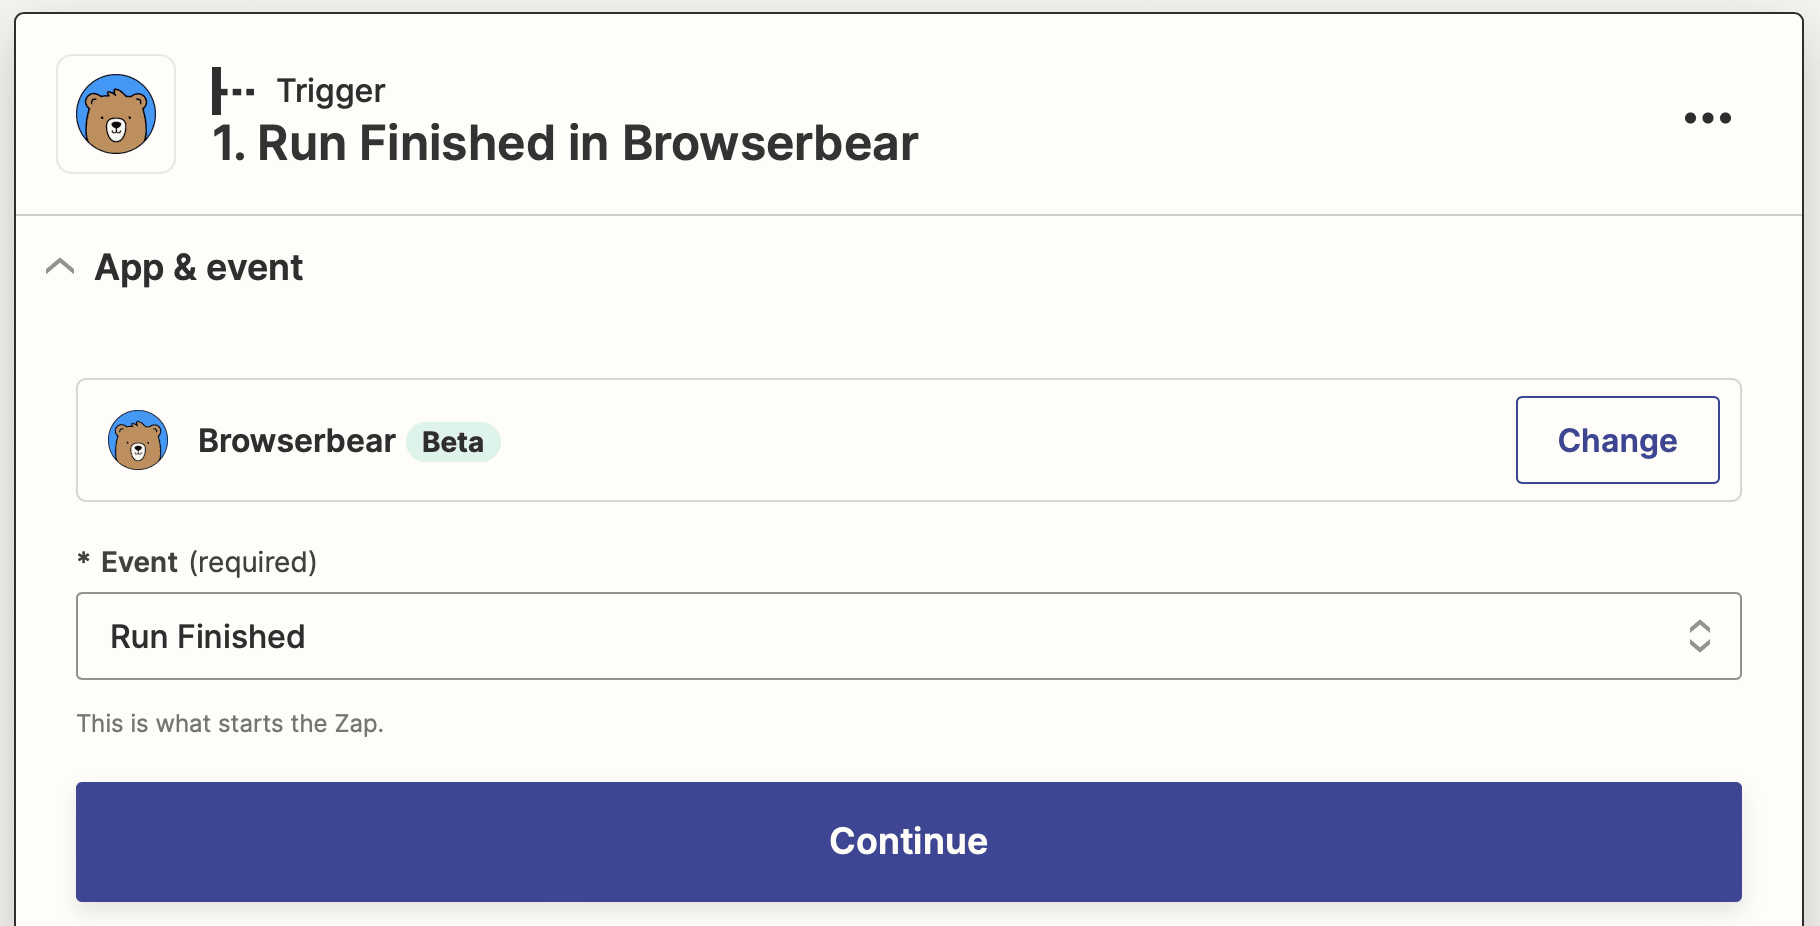
Test the trigger, then continue.
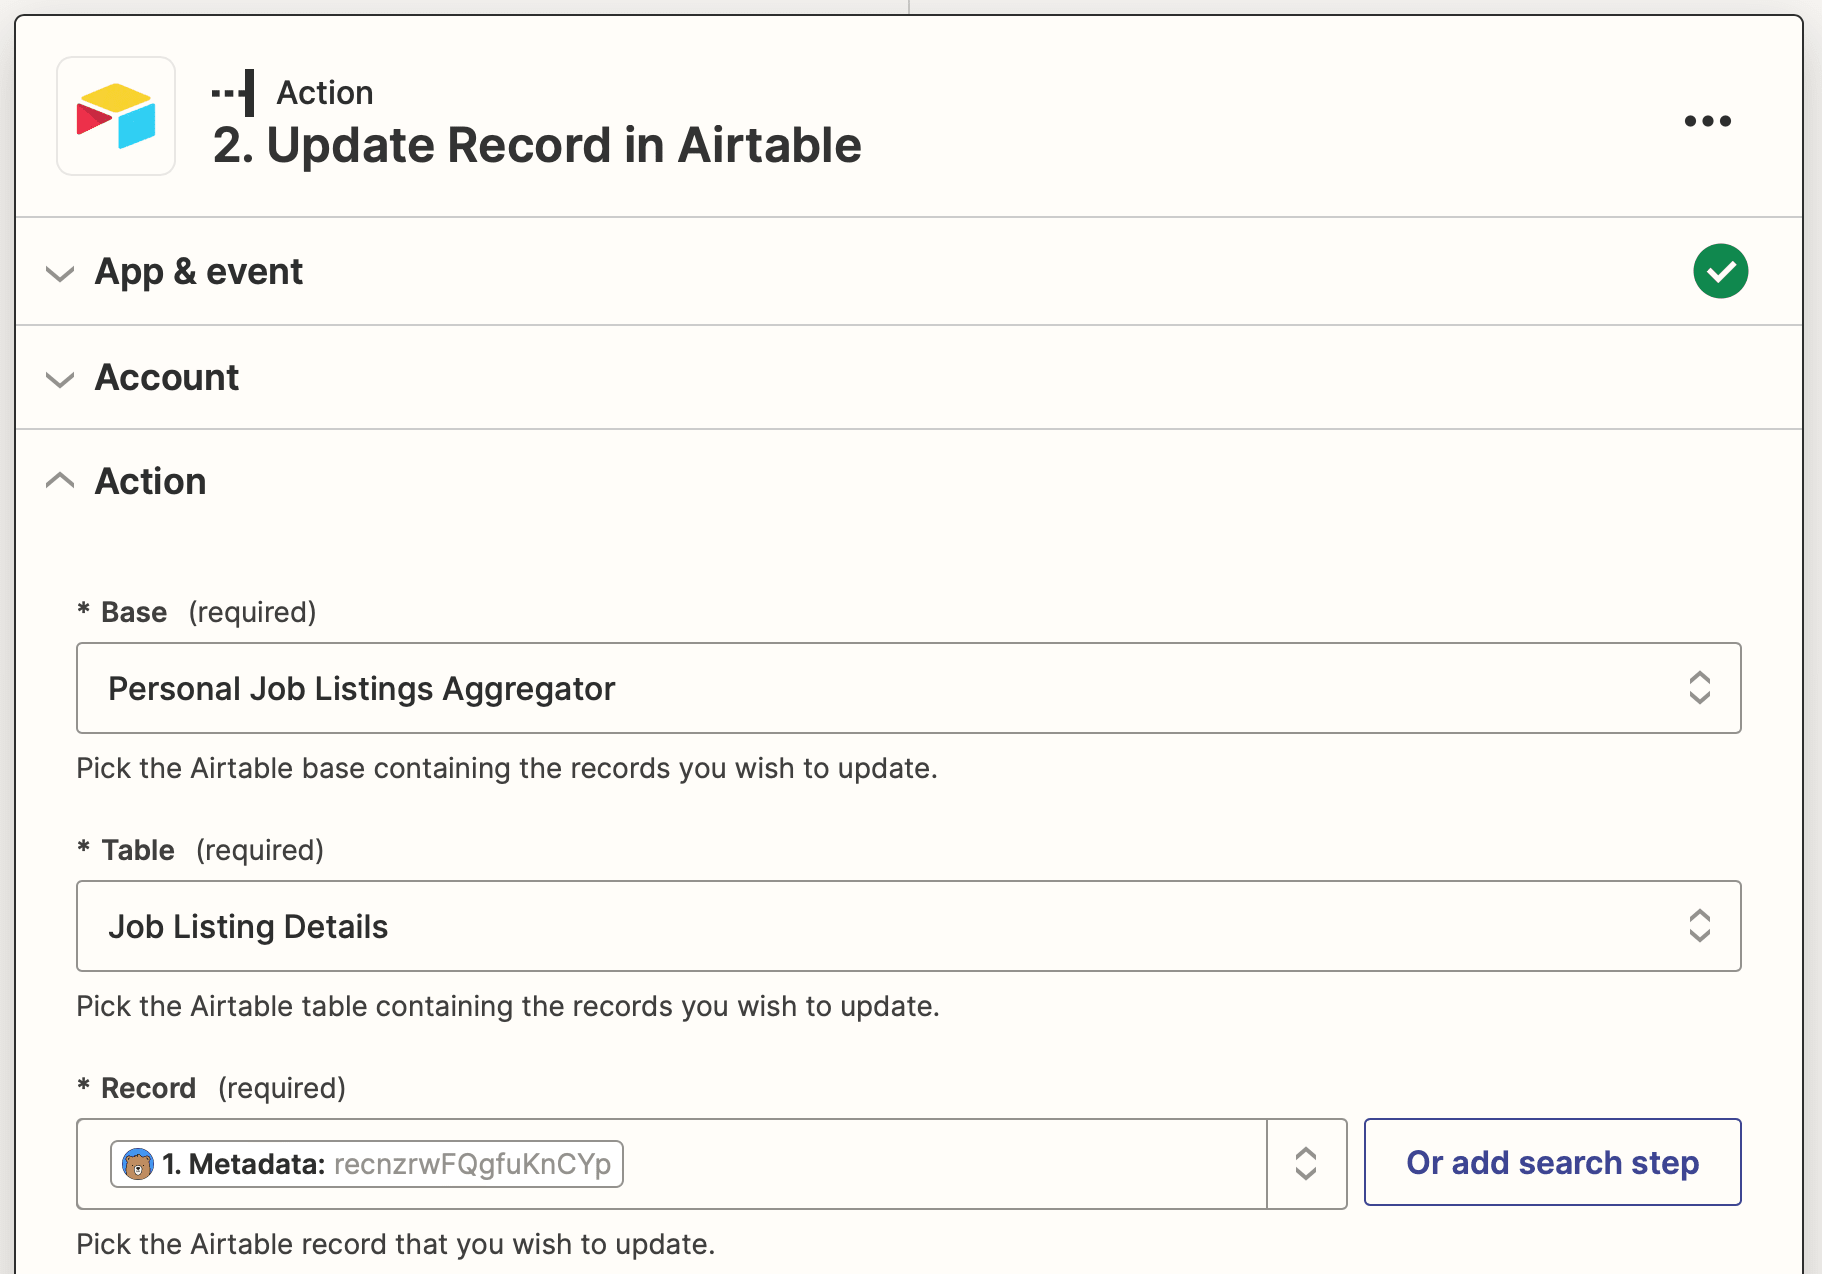
Action: Update Record in Airtable
Choose Airtable as the app and Update Record as the event.
Set up the action by selecting the correct base and table, then identifying the record using the metadata saved with the task run. Map the scraped job details to their corresponding Airtable fields.
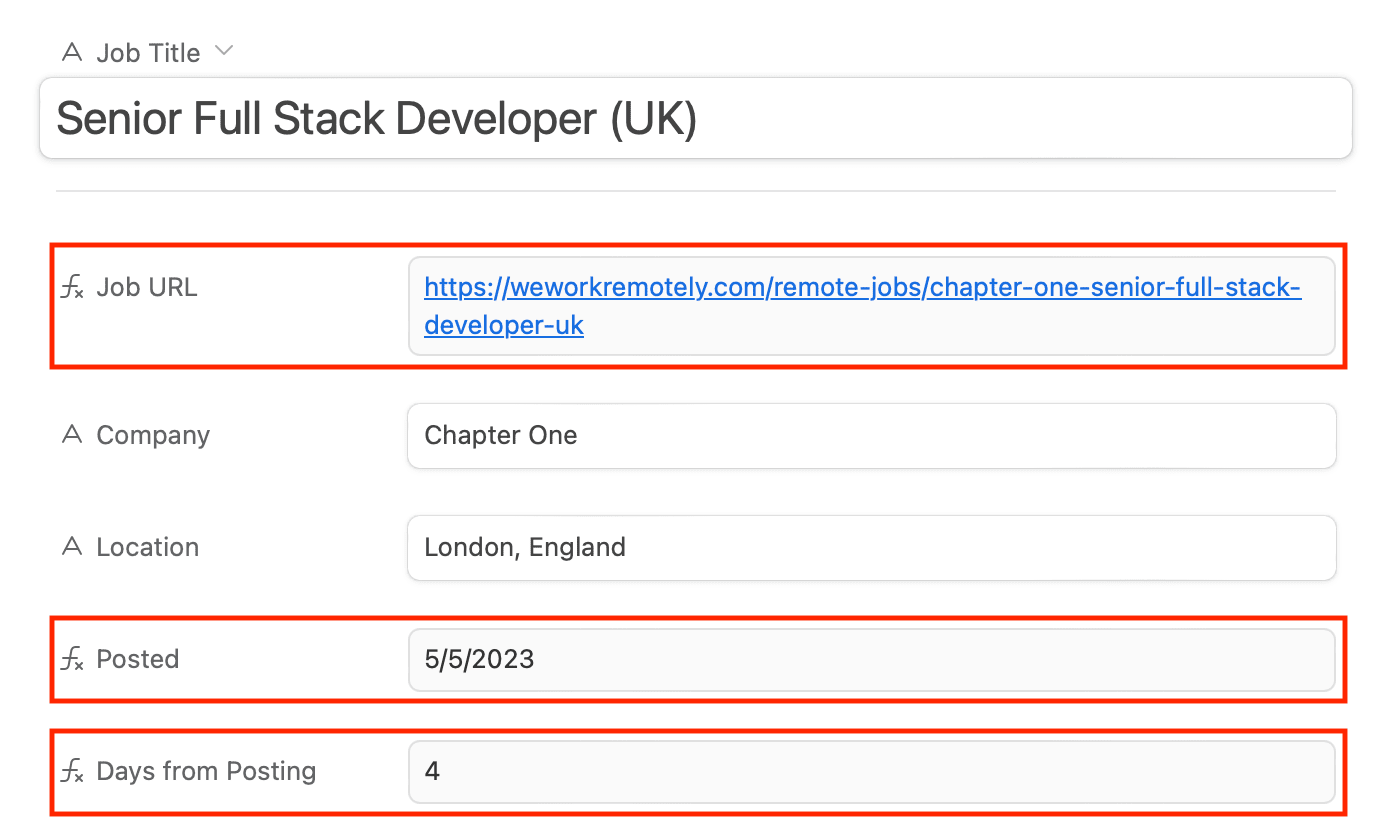
Test the action. You should see the fields of your test record populating itself, including the formula fields that identify the listings posted in the last week.
Your final database view for recently posted job listings should look something like this:
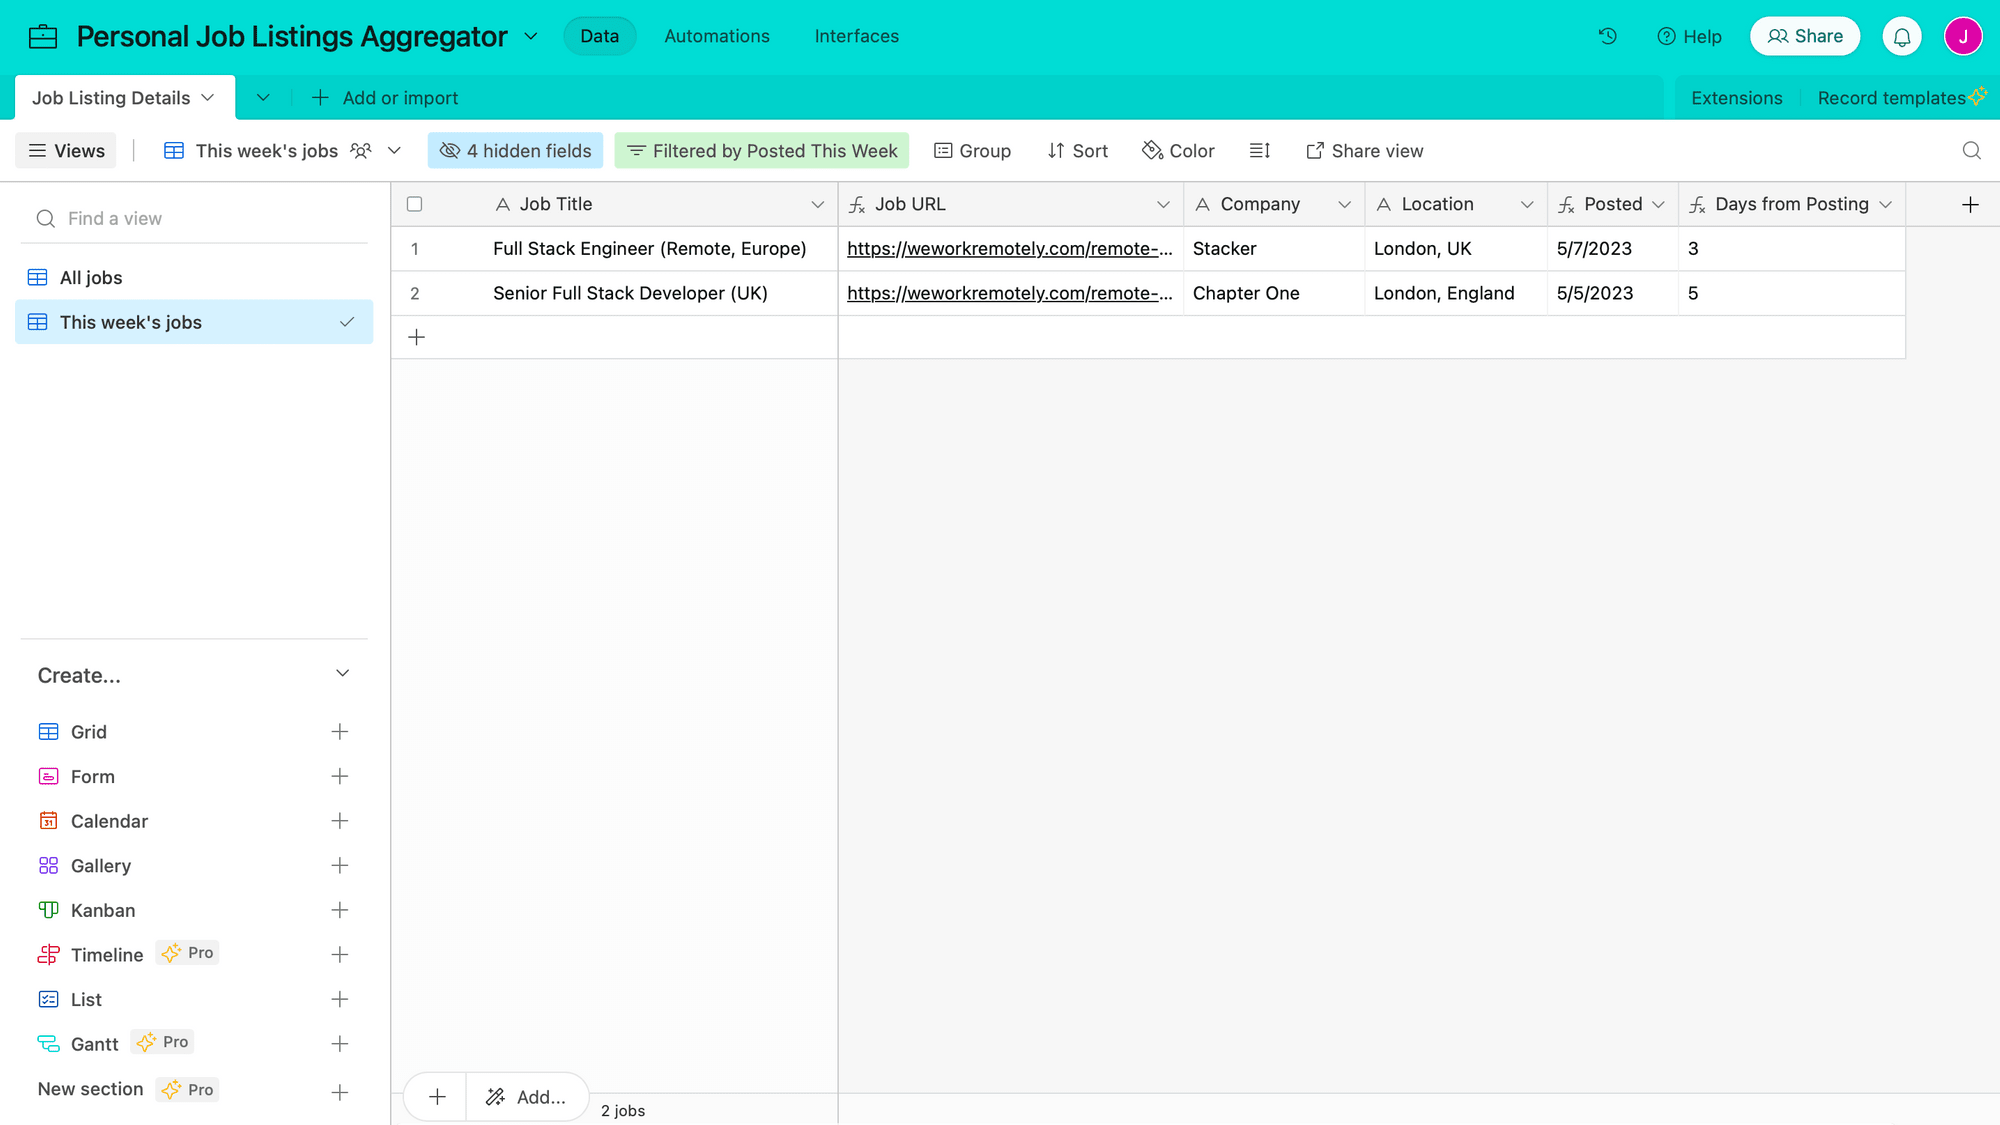
Easy to view, easy to use and integrate into a more comprehensive workflow!
Automate Scraping Job Listings
Browsing through dozens of jobs just to find the few that fit your conditions is time-consuming. Fortunately, you can use a browser automation tool to sift through everything for you. Make the task as simple or as complex as you want—you can always add more filters to get more accurate results.
Some ways you can use your scraped listings are:
- Send a roundup in an email newsletter every week
- Create a niche job board
- Update a Discord channel with new listings
There are so many possibilities that just require you adding onto this workflow and making it suit your needs.
