
A Nocoder’s Guide to the Browserbear Helper (Element Selection)
Contents
Part of setting up a browser automation task is identifying the elements that need to be interacted with, whether they are buttons, images, or text fields. The more accurately an element is selected, the more reliably you will get the expected automation output.
You can identify a webpage element in several ways. One of the better known ways is XML Path Language (XPath), which is a language used to identify an element in an XML document. Similar to CSS selectors in HTML documents, XPath expressions can be used with a variety of languages and libraries.
Browserbear uses XPath expressions to identify elements on a webpage so you can set up tasks that run the same way every time. To help you collect those expressions without having to dive into advanced code, we have the Browserbear Helper Chrome extension. In this article, we’ll go over the basics of how this Helper tool works and how you can use it to set up tasks.
What is Browserbear?
Browserbear is a scalable, cloud-based browser automation tool that allows you to automate a variety of browser tasks, such as saving structured data, testing websites, and capturing screenshots.
Using Browserbear, you can easily automate actions based on specific conditions by creating a task and triggering it using the REST API or no-code tools such as Zapier and Make. By integrating this task with other tools, you can save, manipulate, and optimize your data. This frees you from manual, repetitive work and allows you to focus on more important tasks.
What is the Browserbear Helper Chrome extension?
The Browserbear Helper is a Chrome extension that helps users select elements on a webpage and grab configs to set up browser automations. The tool is easy to use and suitable for nocoders.
Browserbear actions that require helper configs are:
- Click
- Save Structured Data
- Assert
- Dropdown
- Enter Text
- Save Attribute
- Save HTML
- Save Image
- Save Text
- Scroll into View
- Wait for Selector
Alternatively to using the Helper extension, you can right-click the element, click Inspect , right-click the element from within the inspector, then click Copy Element or Copy XPath. The resulting config can be used in Advanced Mode as the Locator.

Of course, locating the selector or writing your own expression takes more time. It’s best to start with the Browserbear Helper and only default to manual selection if you need something more specific or when the website layout requires a different path to identify the correct elements.
How to Use the Browserbear Helper
The Browserbear Helper works on Chrome browsers and is an extension you can activate and deactivate as needed. To use it to retrieve helper configs, follow these steps:
Step 1. Download the Chrome Extension
Go to the Chrome Web Store and click Add to Chrome to download the Browserbear Helper extension.
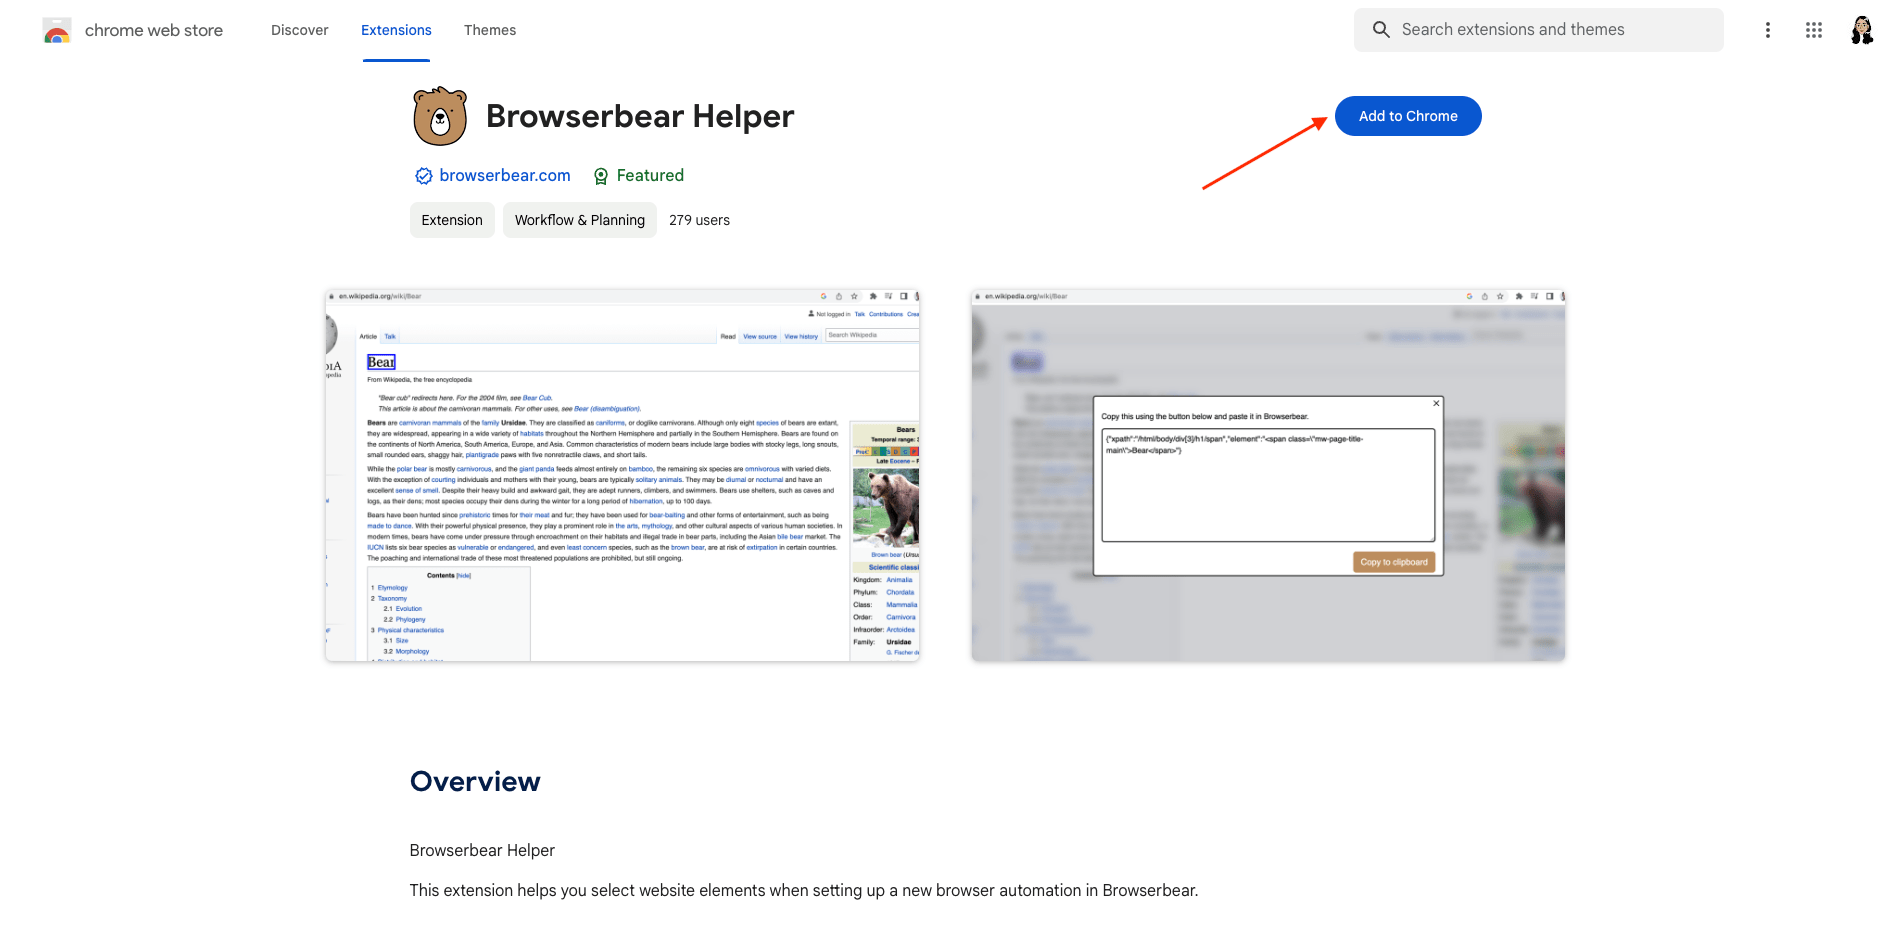
Aside from Google Chrome, you should be able to use the Helper on any Chromium-based browsers such as Brave, Opera, and Vivaldi.
Step 2. Load Your Destination Site
Go to the site you will be performing a browser action on and load the specific page containing the element you will be selecting.

Step 3. Activate the Helper Extension
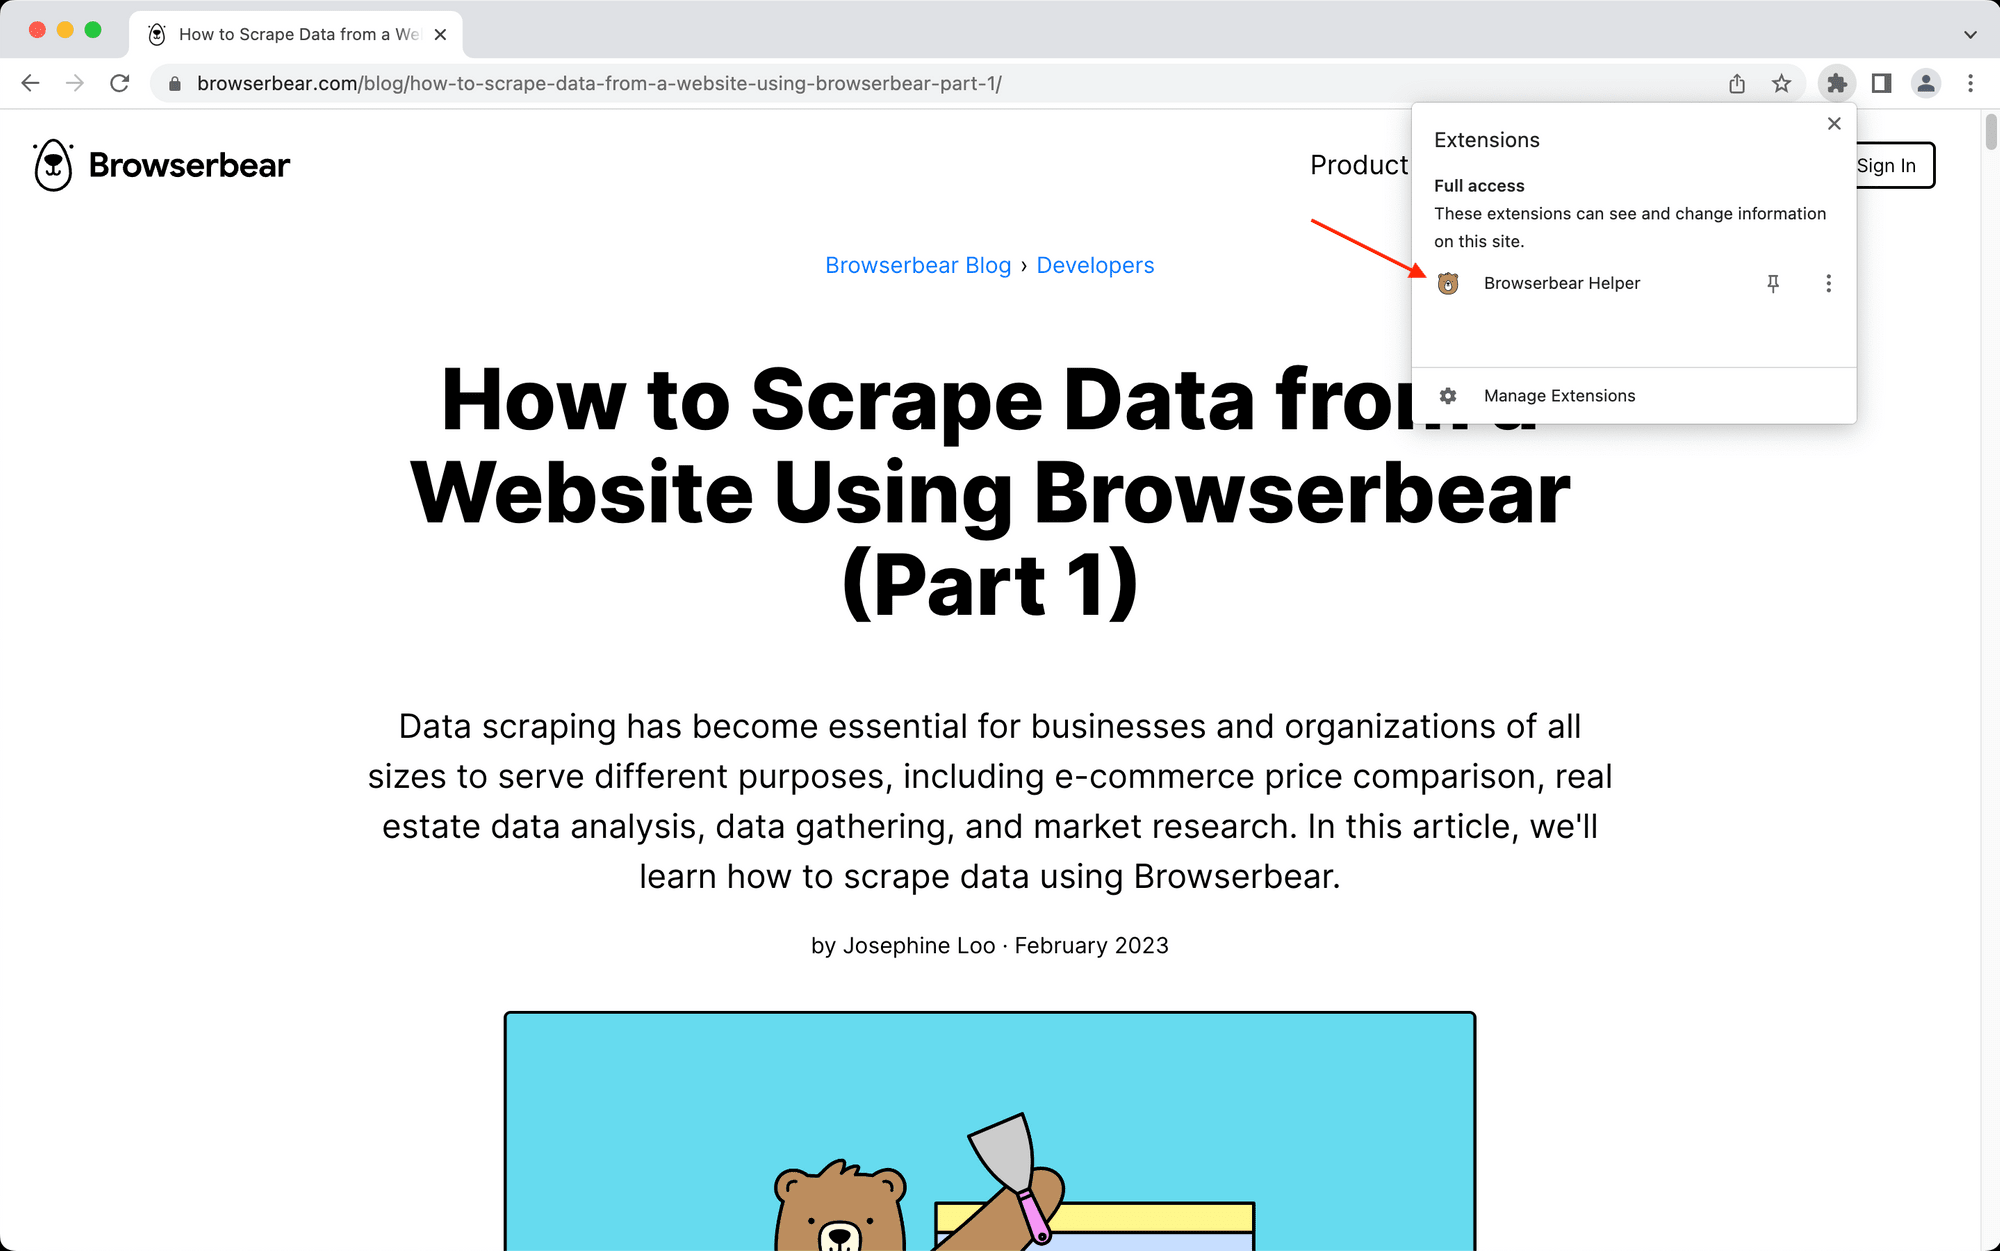
Click on the jigsaw icon on the right side of the Google Chrome toolbar (or navigate to Extensions if you are using a Chromium browser).
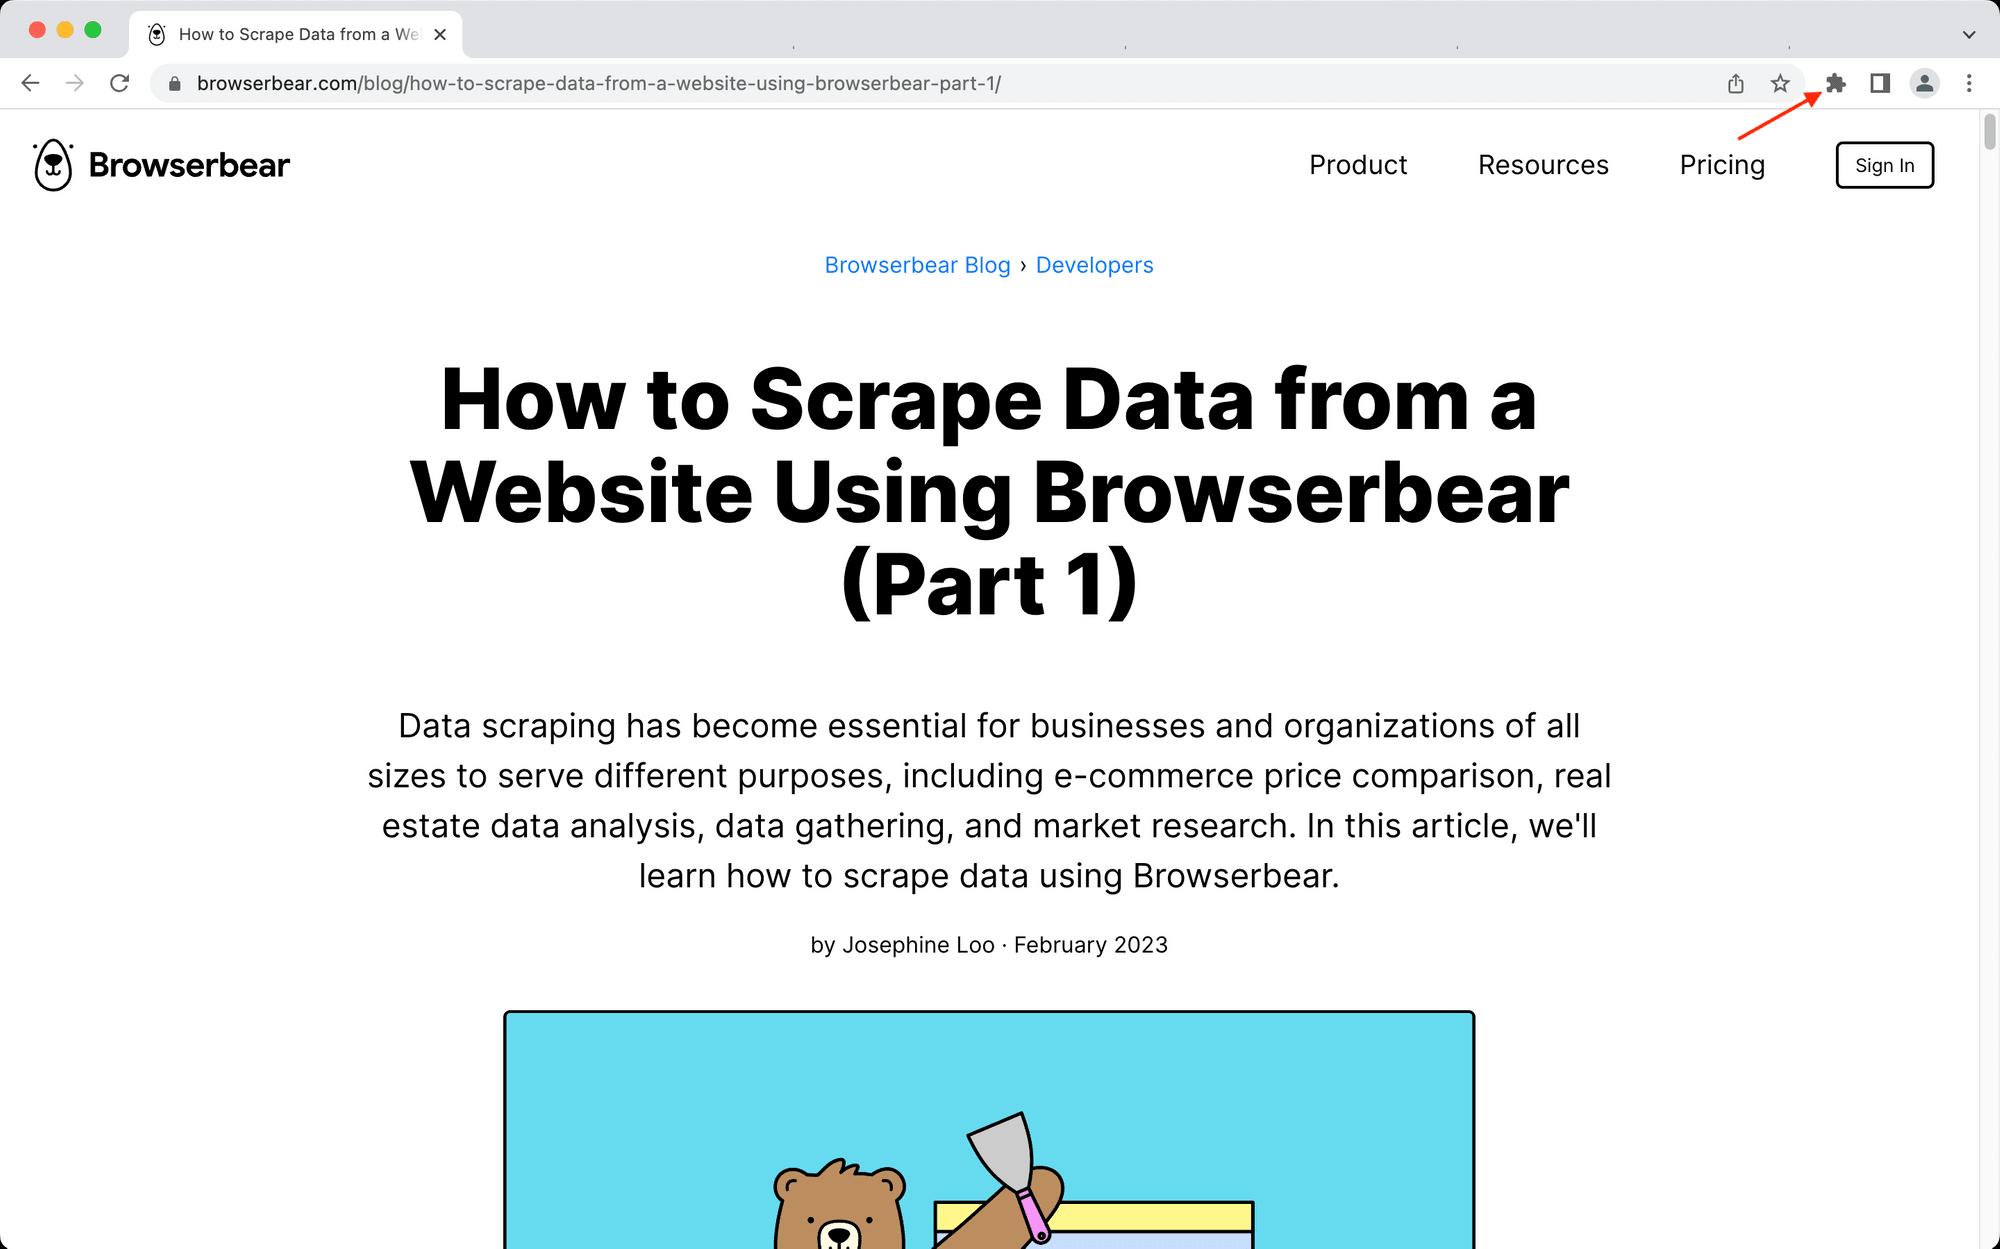
Click the Browserbear Helper extension to activate it.

Step 4. Select the Element
Hover over the element you want to select. You should see a blue outline appear.
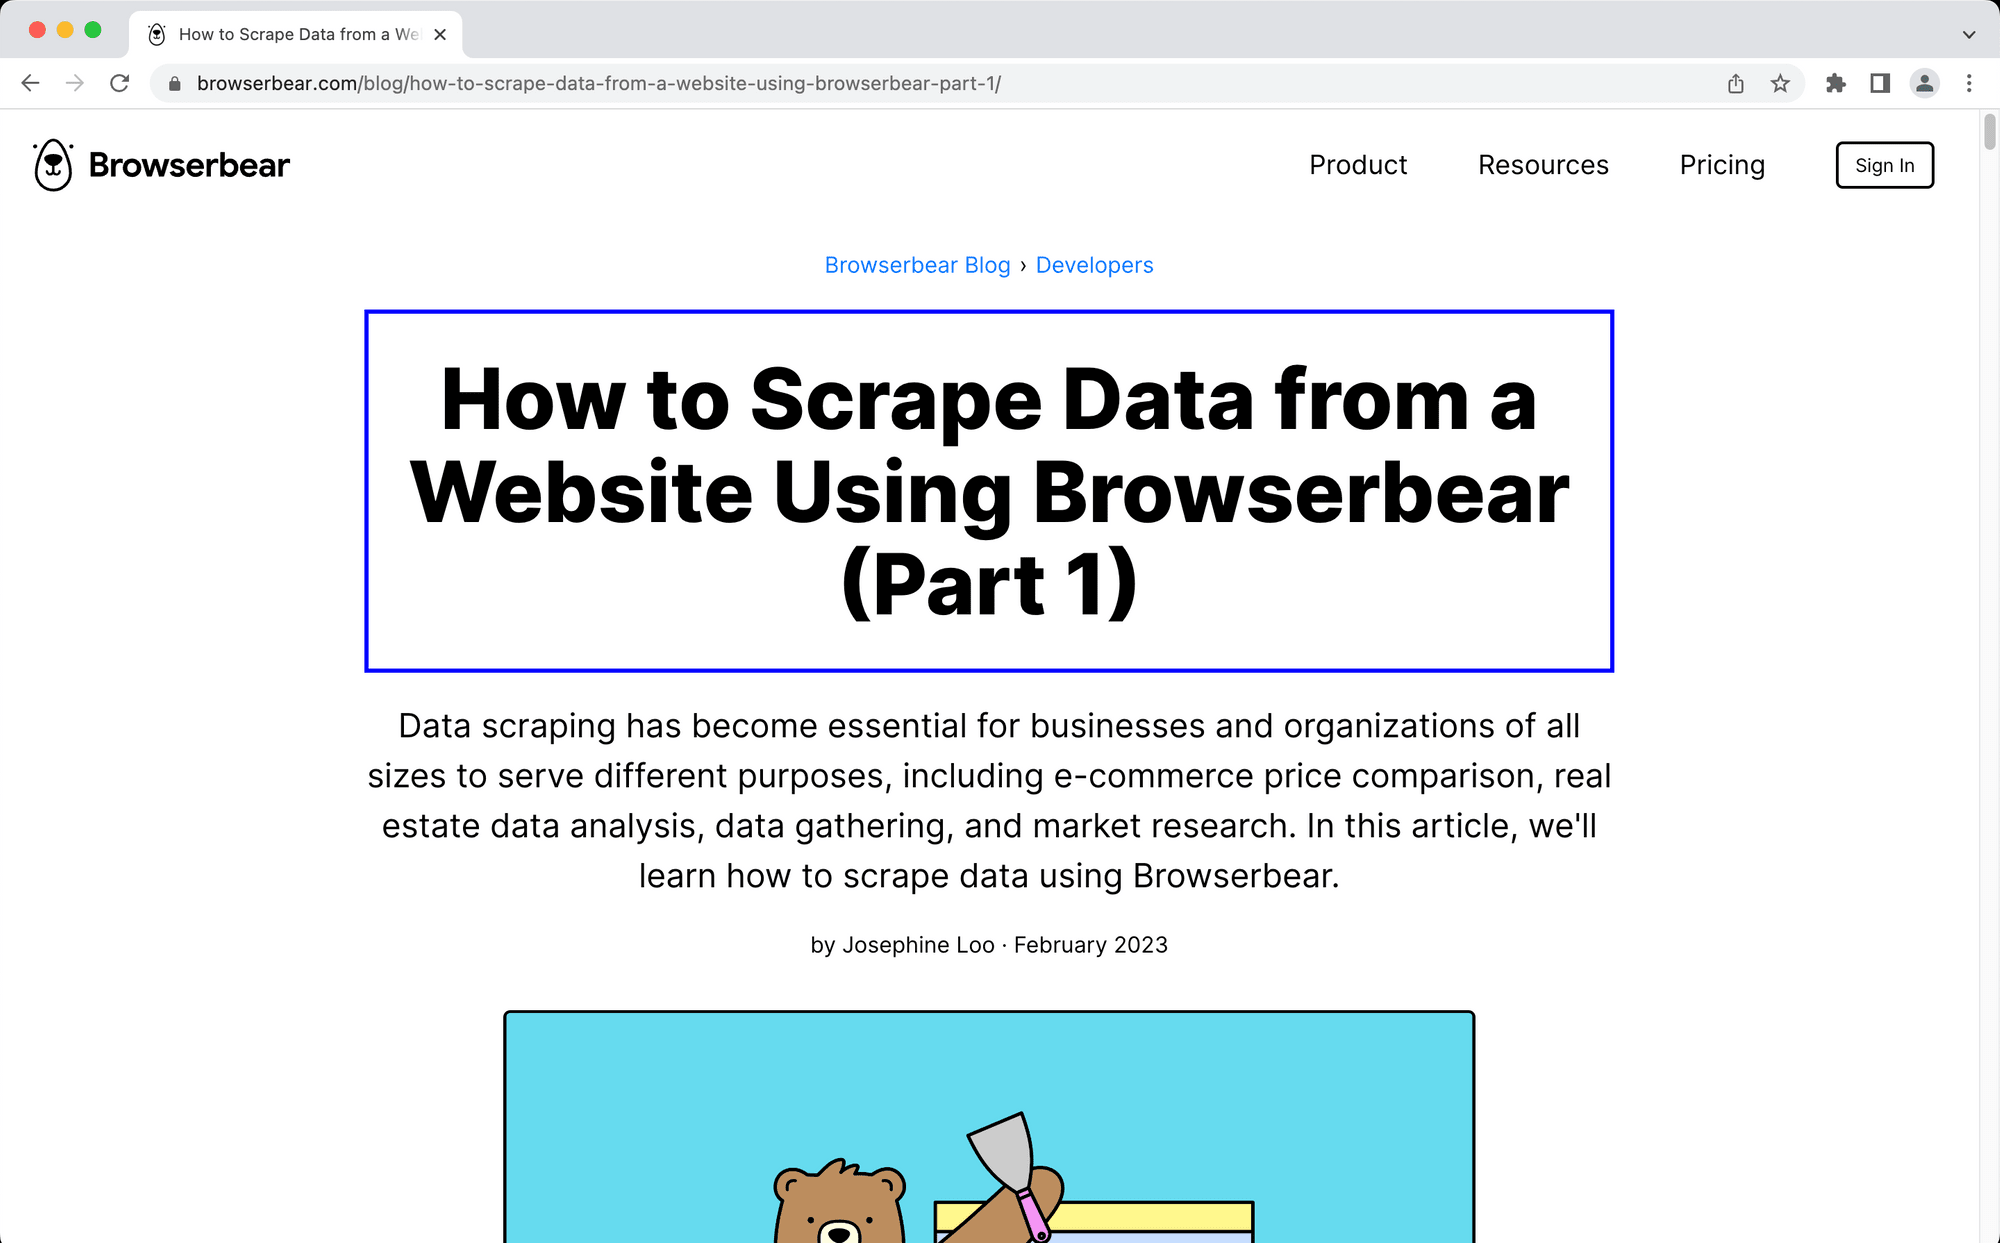
Click the selected element. A window will now pop up with the helper config you need.
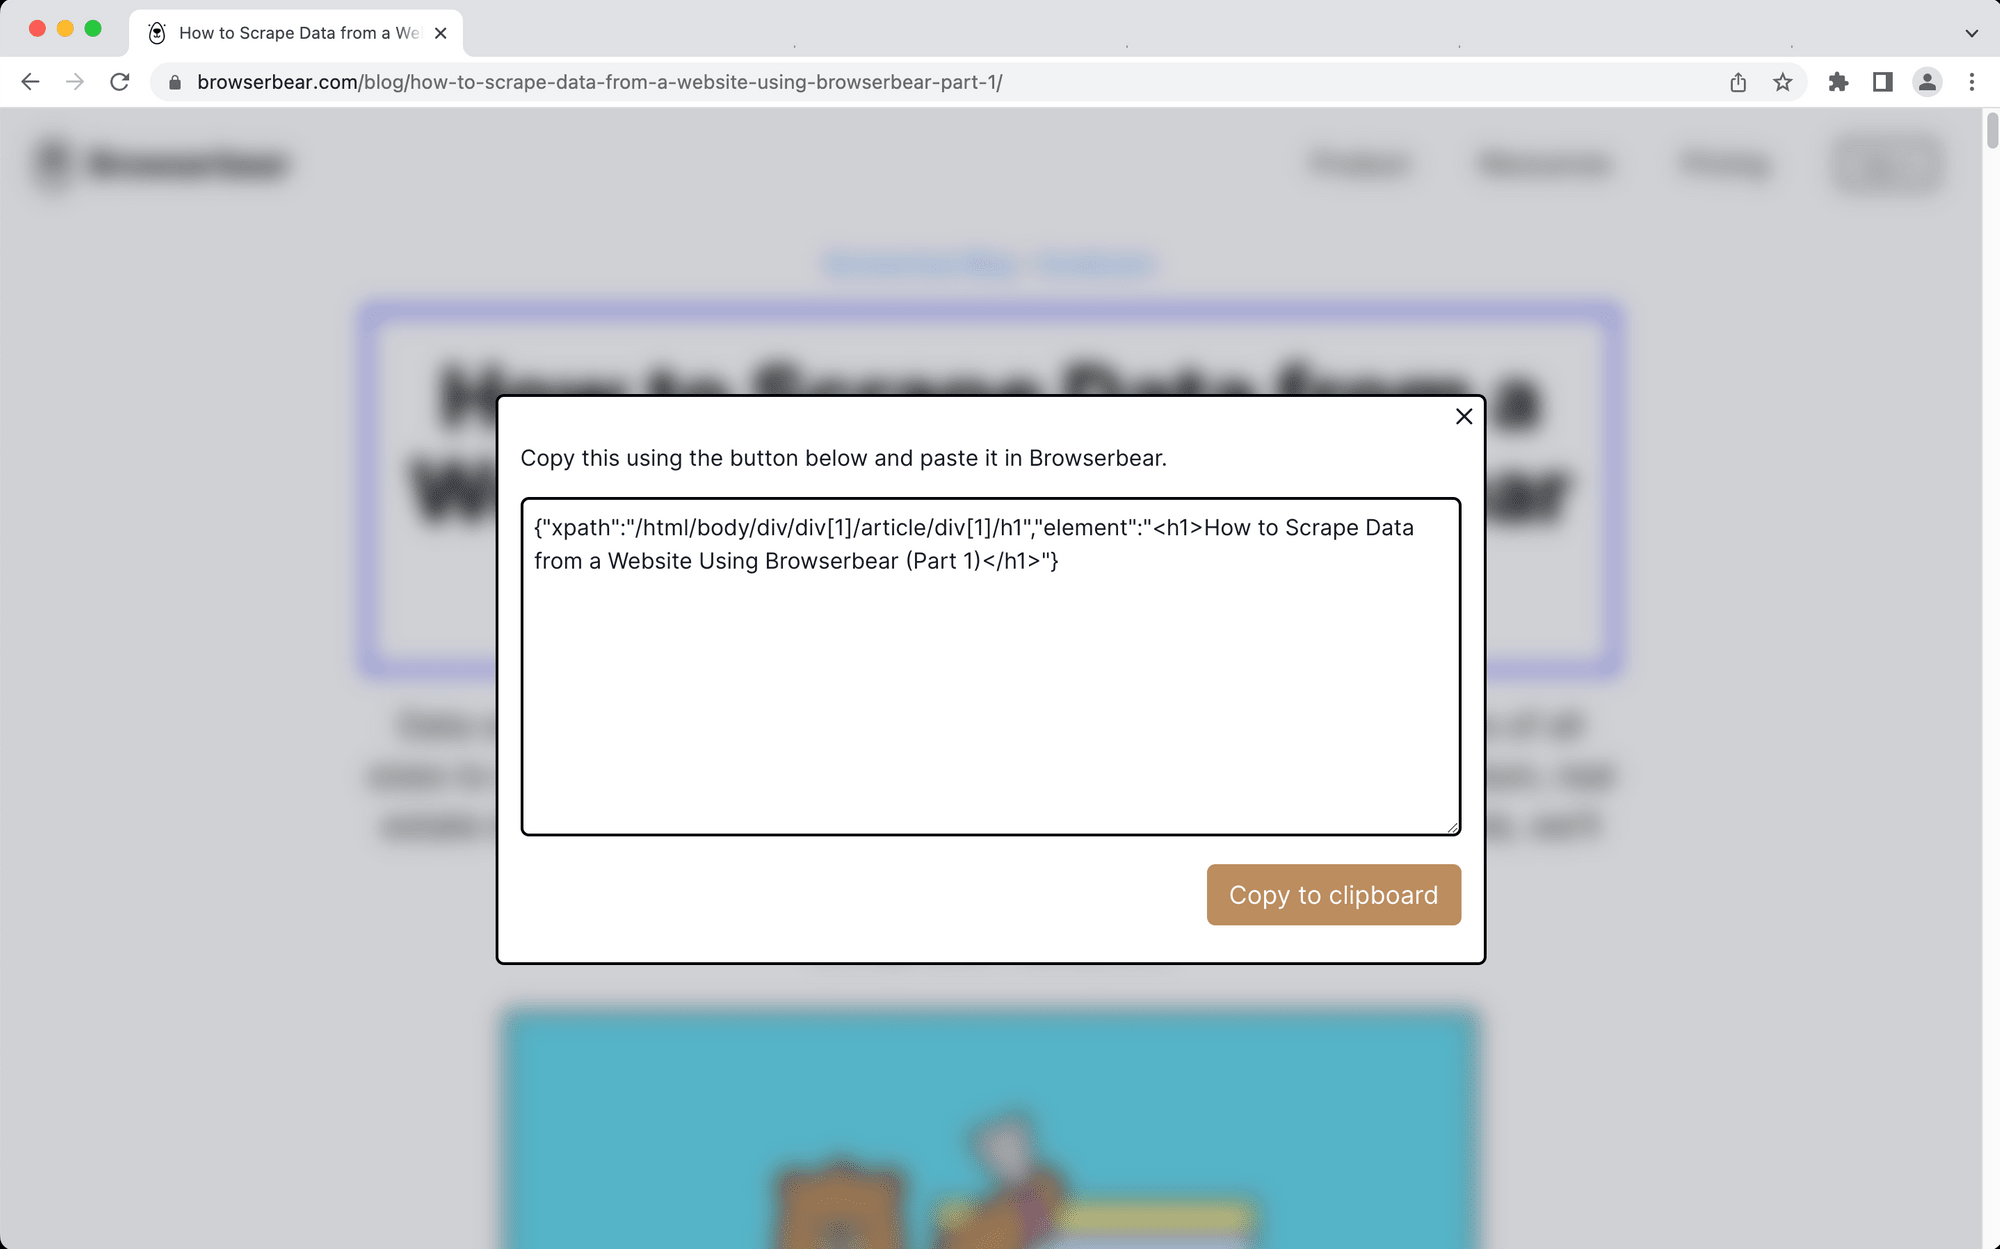
Click Copy to clipboard.
Step 5. Add the Config to Your Task
From your Browserbear task page, click Add Step and select one of the actions that require a helper config.
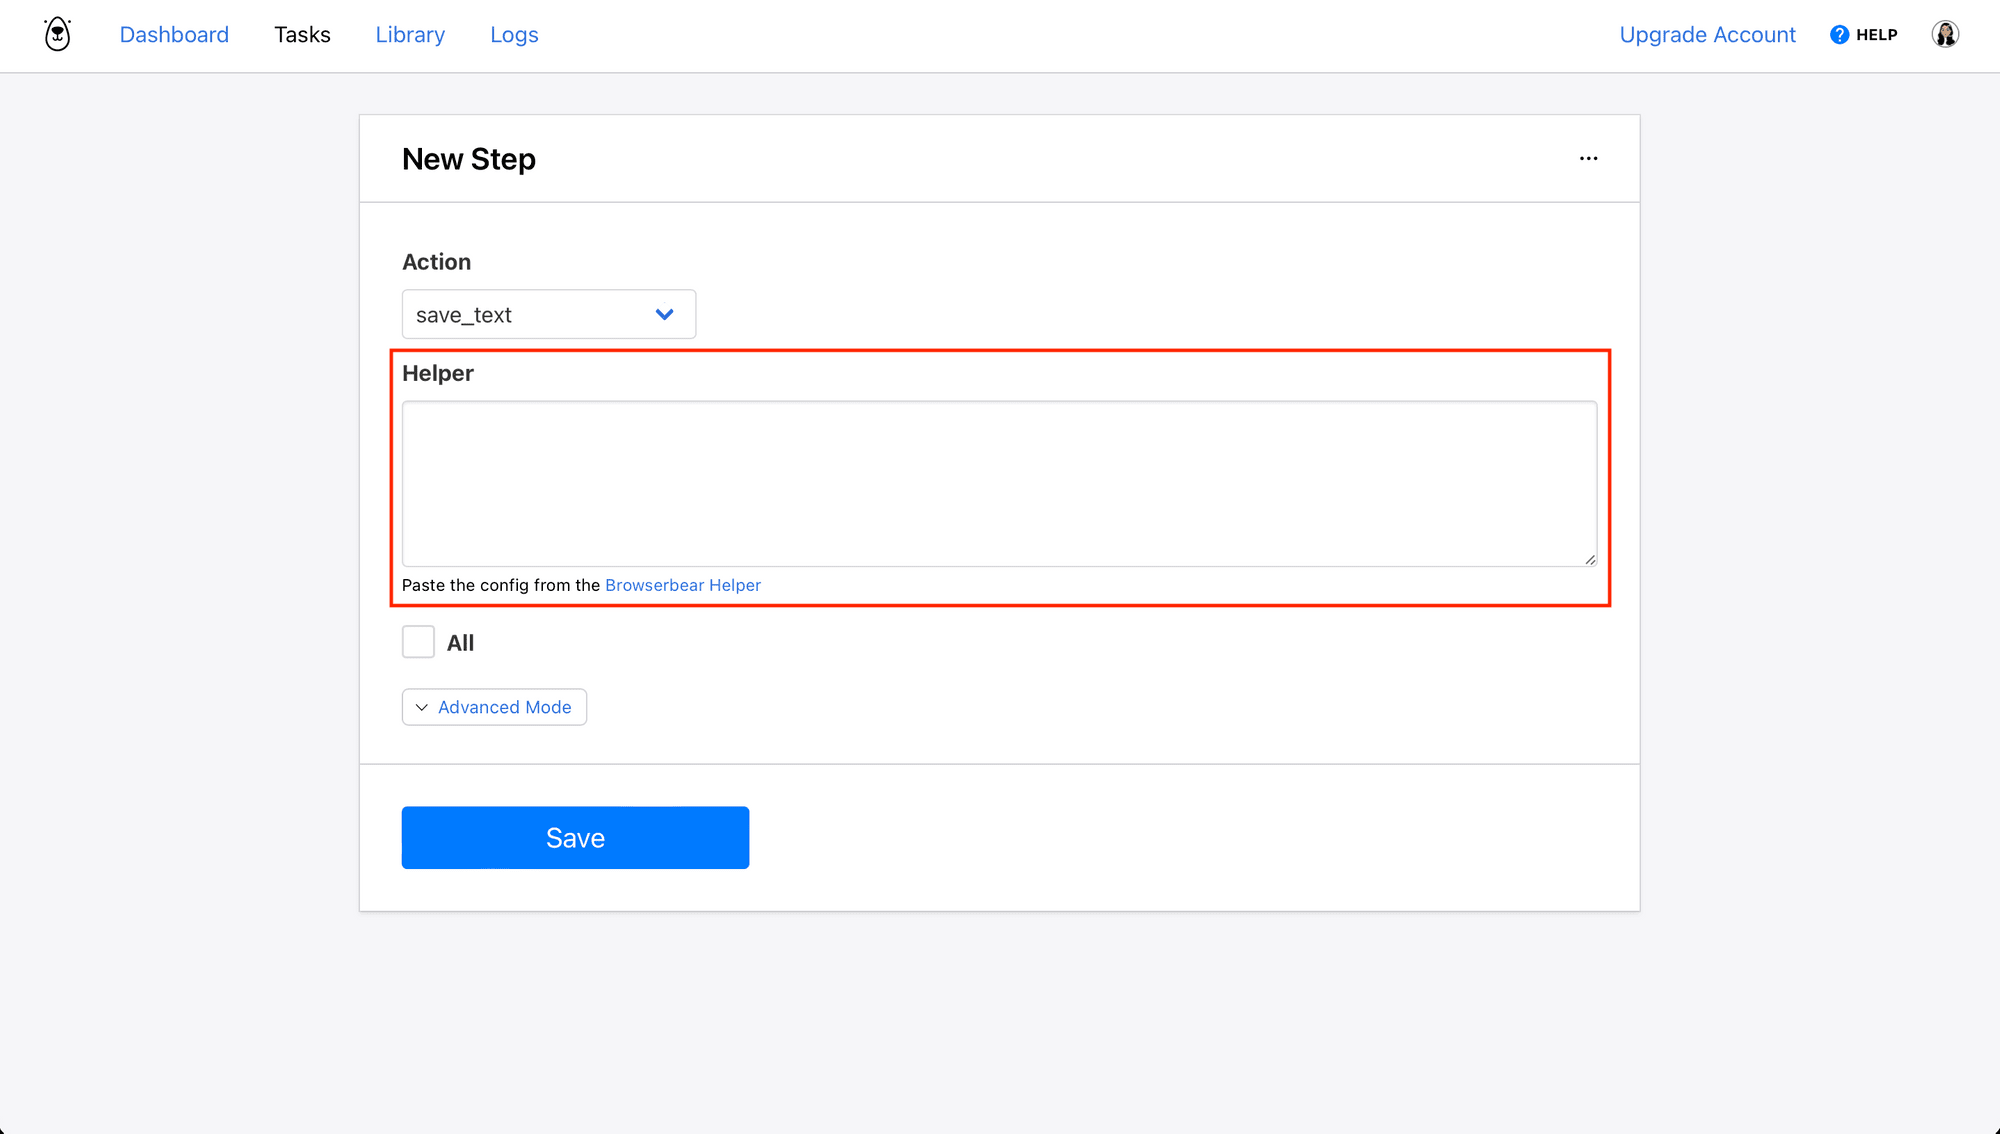
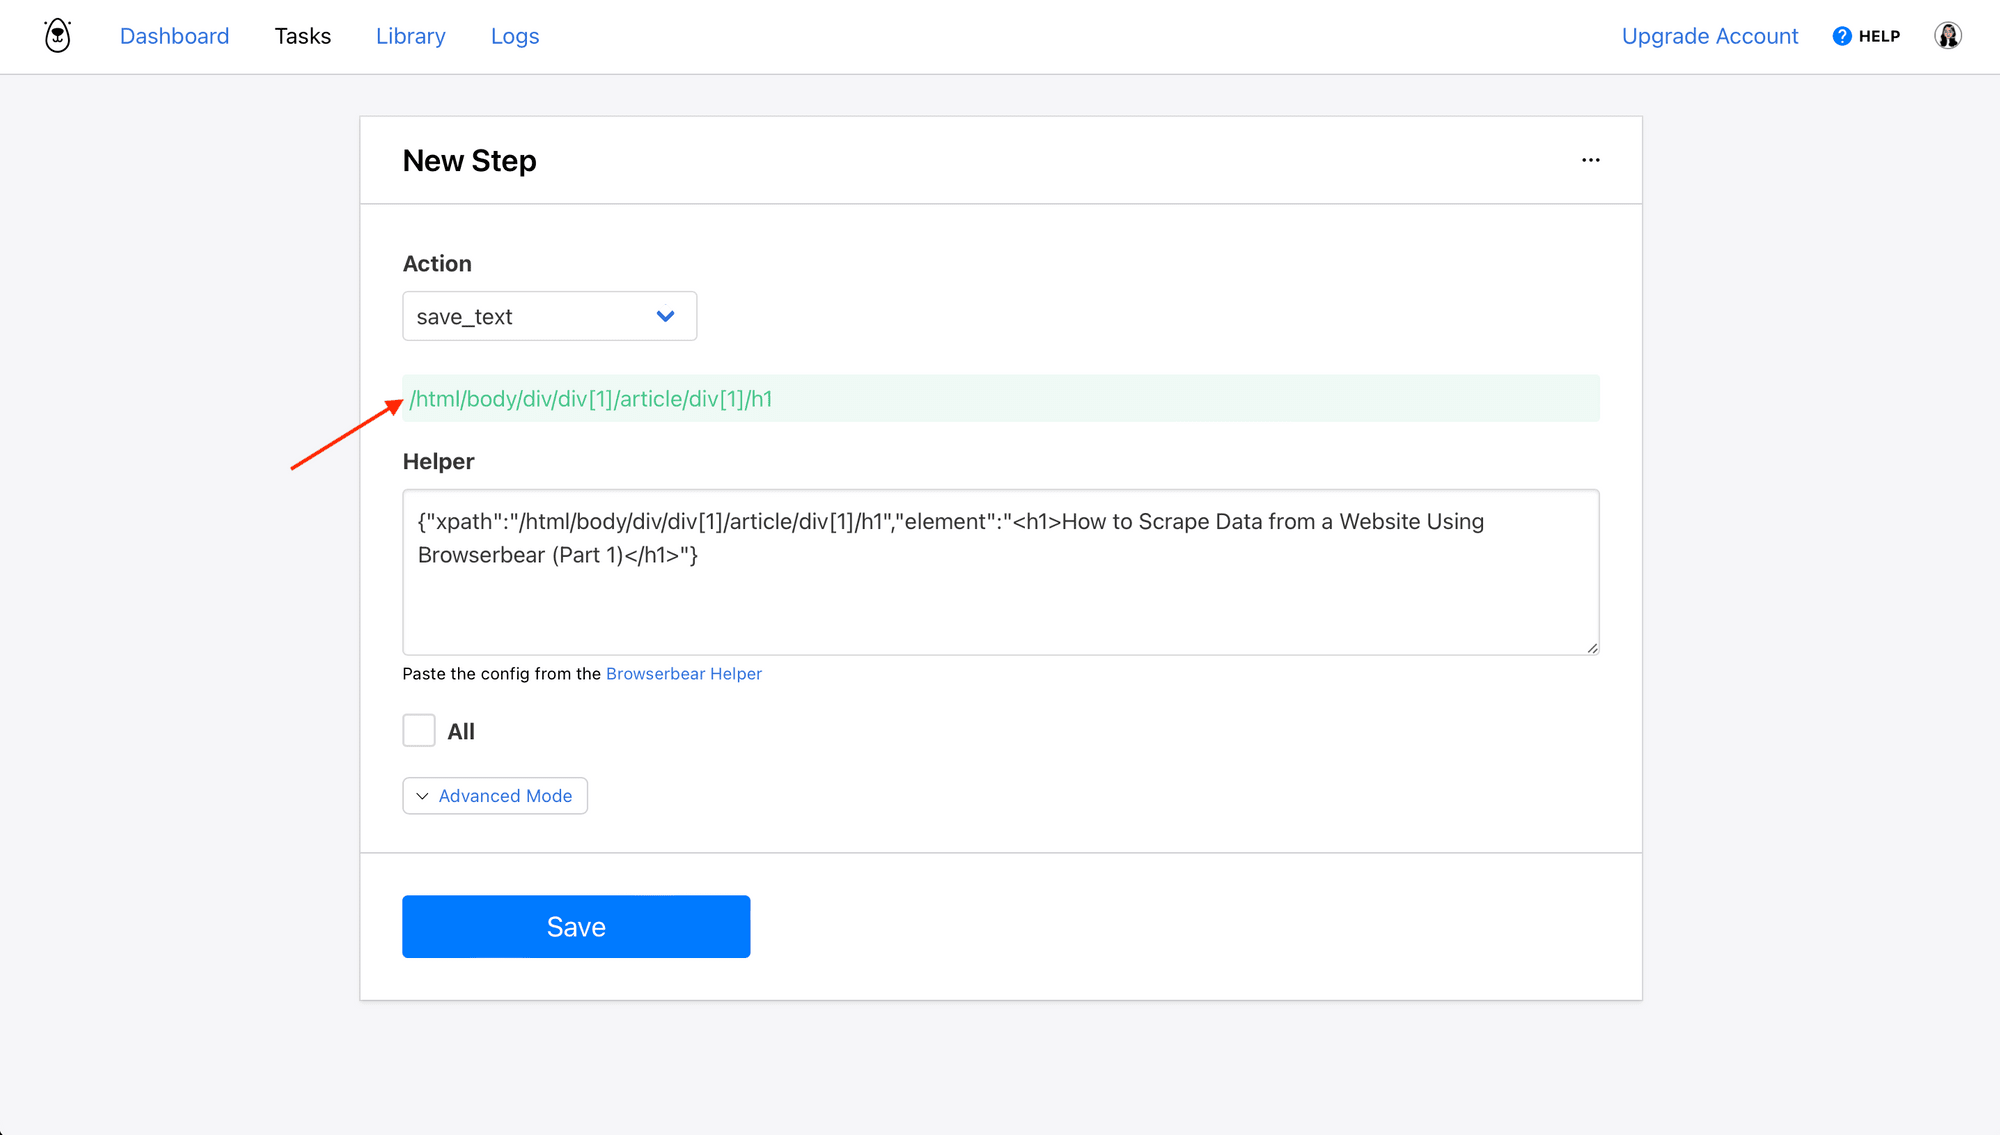
Paste the config from your clipboard into the Helper section. The selected element will show up in green. Sometimes this is the XPath, and other times it's a CSS selector. Browserbear will pick the best option depending on the markup of the element you have chosen.
You can also use Advanced Mode to set up more specific identification instructions.
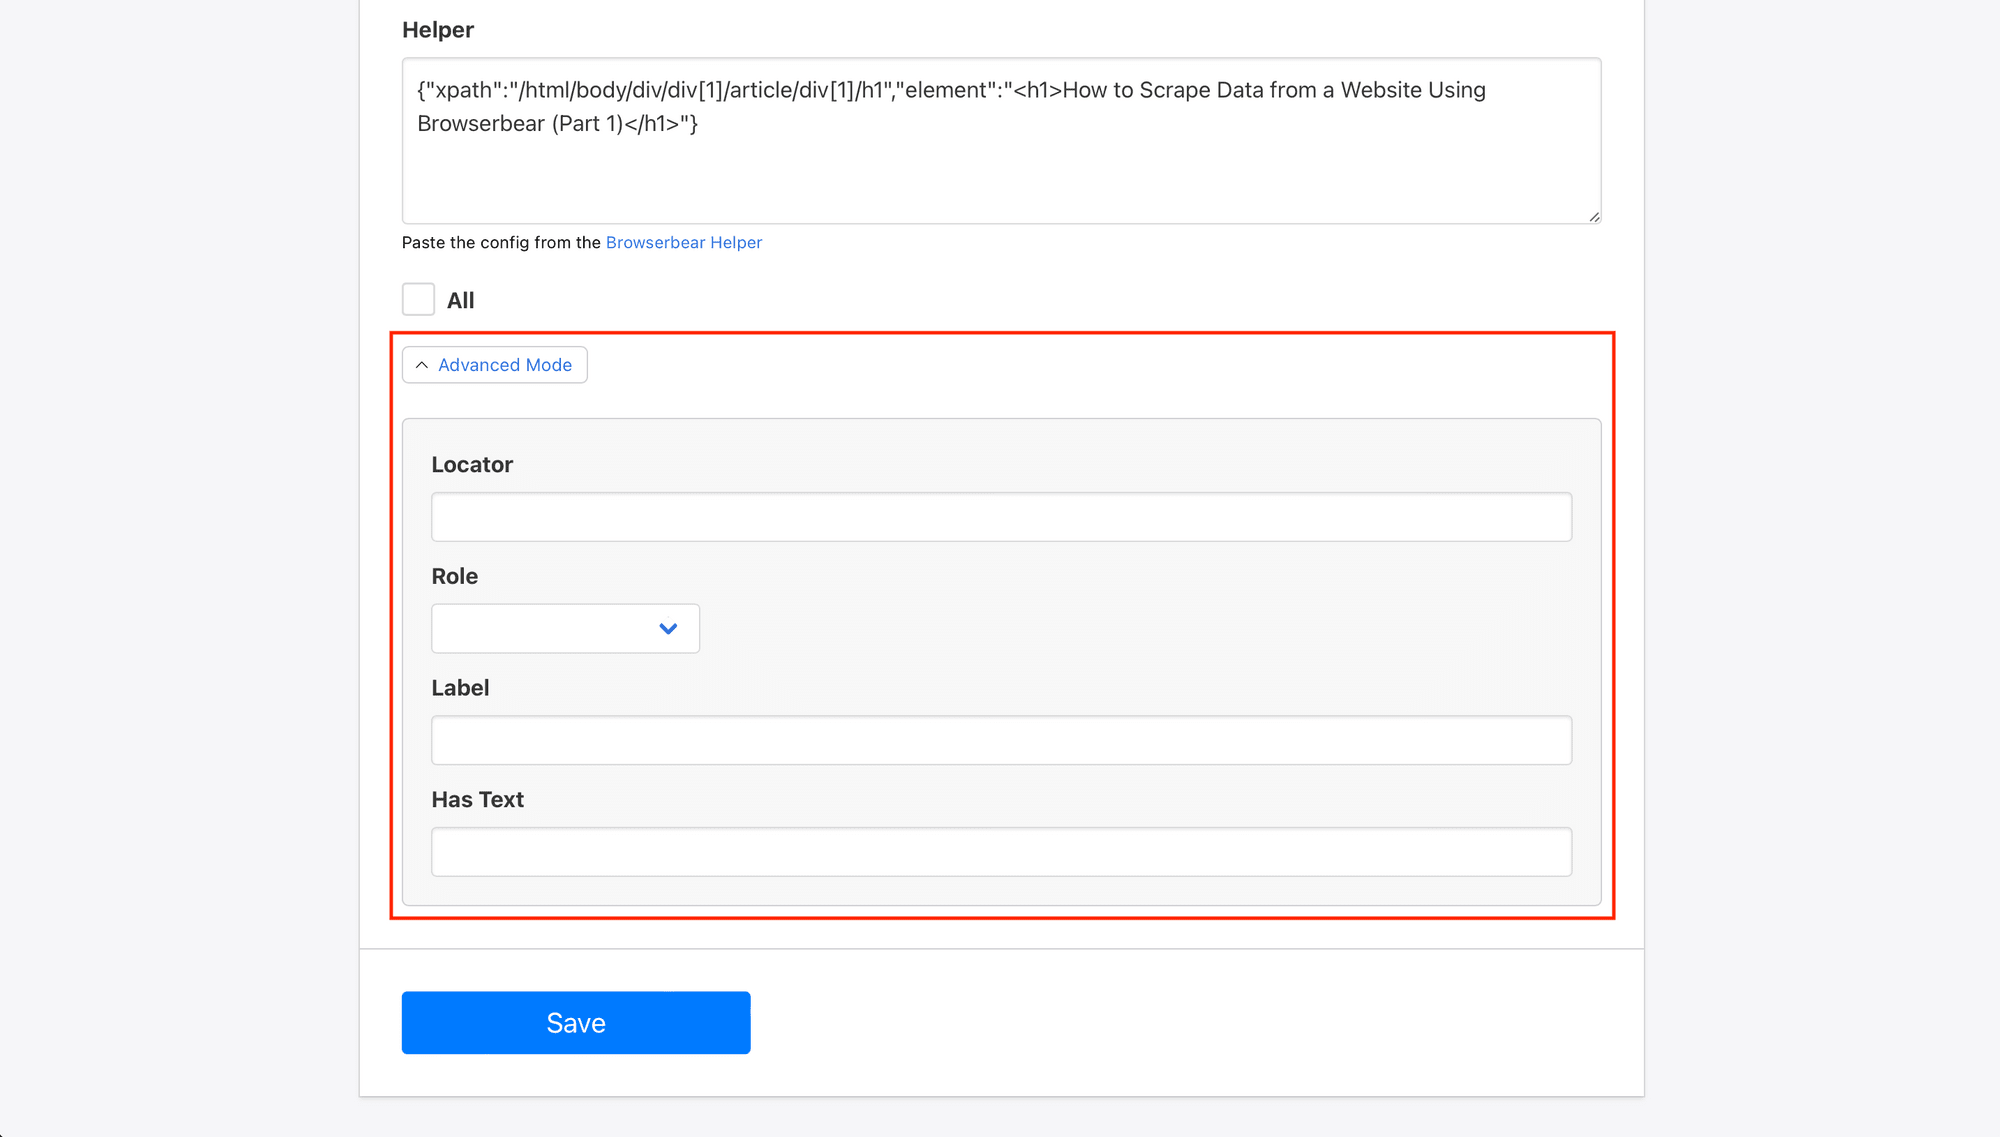
Once you’ve finished setting up the step, click Save.
Step 6. Deactivate the Helper Extension
Return to your browser, click the jigsaw icon (or any other Extensions menu for Chromium browsers), and click the Browserbear extension to deactivate it.
Deactivate the extension to navigate and reactivate it to select additional elements. As you go along, copy and paste each config into the task builder.
Bear Tip 🐻: Move quickly between navigating the webpage and selecting an element with the Helper by going to
chrome://extensions/shortcutson your browser, then setting up a keyboard shortcut that activates and deactivates the extension.
Frequently Asked Questions
Those new to Browserbear and unfamiliar with programming concepts might need a little bit more description to understand how everything fits together to automate a browser task. Let’s break down a few FAQs:
What is an XPath Expression?
XPath (XML Path Language) is a syntax used to address an element on an XML document (markup language). An expression looks something like this:
/html/body/div/div[1]/article/div[1]/h1
Elements selected can be text, images, buttons, menus, and all sorts of items. An XPath expression essentially gives the instructions of where you can find a specific element so that you can interact with it.
Bear Tip 🐻: Learn more about XPath in this article!
What is a CSS Selector?
CSS (Cascading Style Sheets) selectors are used to identify elements on an HTML document in order to style them. Selectors are quiet varied and can look like any of the following:
#id , .class, .class1.class2, element1>element2 element.class, [attribute=value], read-only, first-of-type, *
Each one is an instruction to identify an element according to id, class, type, attribute, and so on.
What’s the Difference Between XPath and CSS Selectors?
XPath and CSS selectors are both locator expressions used to identify a specific element on a web page. However, they have some key differences:
- XPath traverses XML documents, while CSS selectors use HTML.
- CSS selectors work unidirectionally and can only traverse from parent to child, whereas XPath is bidirectional.
- CSS selectors tend to perform faster than XPath, and they are easier to learn.
XPath and CSS selectors are both used in a wide variety of programming languages, including Java, C#, Python, JavaScript, and more. They are also commonly used locators, making them both good choices for automation.
Locate Elements Quickly and Easily
Programming is constantly evolving, and there will always be more than one way to build a tool or describe a element. You can use different syntax, create custom tags and attributes, and work with a different combination of libraries. But when working with automation, accuracy and machine-readability are crucial. Using a tool like Browserbear Helper can help you address elements quickly and easily, but still with precision.
For step-by-step instructions on using the Helper to build browser automation tasks with Browserbear, check out the following articles:
👉🏽 How to Create Automated Web App Login Tests with No Code
👉🏽 How to Automatically Send Structured Data to Airtable
👉🏽 How to Automatically Scrape Website Data and Save to Notion (No Code)
