
How To Build a Bot That Automatically Sends Industry Insights To Slack
Contents
Staying current in your industry can set you apart professionally, enhance your workflow, and give you a competitive advantage. While staying informed about new developments and technologies is key, the process can be time-consuming and challenging to prioritize.
Instead of letting your professional skills stagnate, automate the curation of industry insights by setting up a browser automation task to scrape trusted resources and send updates directly to your Slack inbox. This saves time and helps you stay updated effortlessly.
Automating the process of sending yourself scheduled industry insights can be done in under 15 minutes with a few apps, yet it will save you valuable time every single day. The method we will use is simple and can easily be adapted to your needs.
What You Will Create
A compilation of updates from trusted resources will make it easier to stay on top of recent happenings in your industry. We’ll use a simple browser automation task to fetch the latest news, then deposit it into a beautifully formatted message for your inbox.
The tools you’ll use for this are:
- Browserbear : To extract the most recent news from a variety of sites
- Slack : To receive a compilation of industry updates
- Zapier : To trigger actions in different programs based on pre-specified commands
By the end of this tutorial, you should be able to enjoy regularly scheduled industry updates right in the convenience of your Slack inbox.

Let’s get started.
Create a Browserbear Task to Extract the Latest News
One task can instruct Browserbear to navigate to several different websites, extracting needed information from each one so you can compile the news you need.
Log into your Browserbear account (or create a free trial account if you don’t have one—no credit card required! 🎉). Go to the Tasks tab, then click Create a Task.
You will now be able to insert a starting URL, such as:
https://www.nocode.tech/stories/latest
It’s easiest to use a blog or news page, although you can choose the resource of your choice.
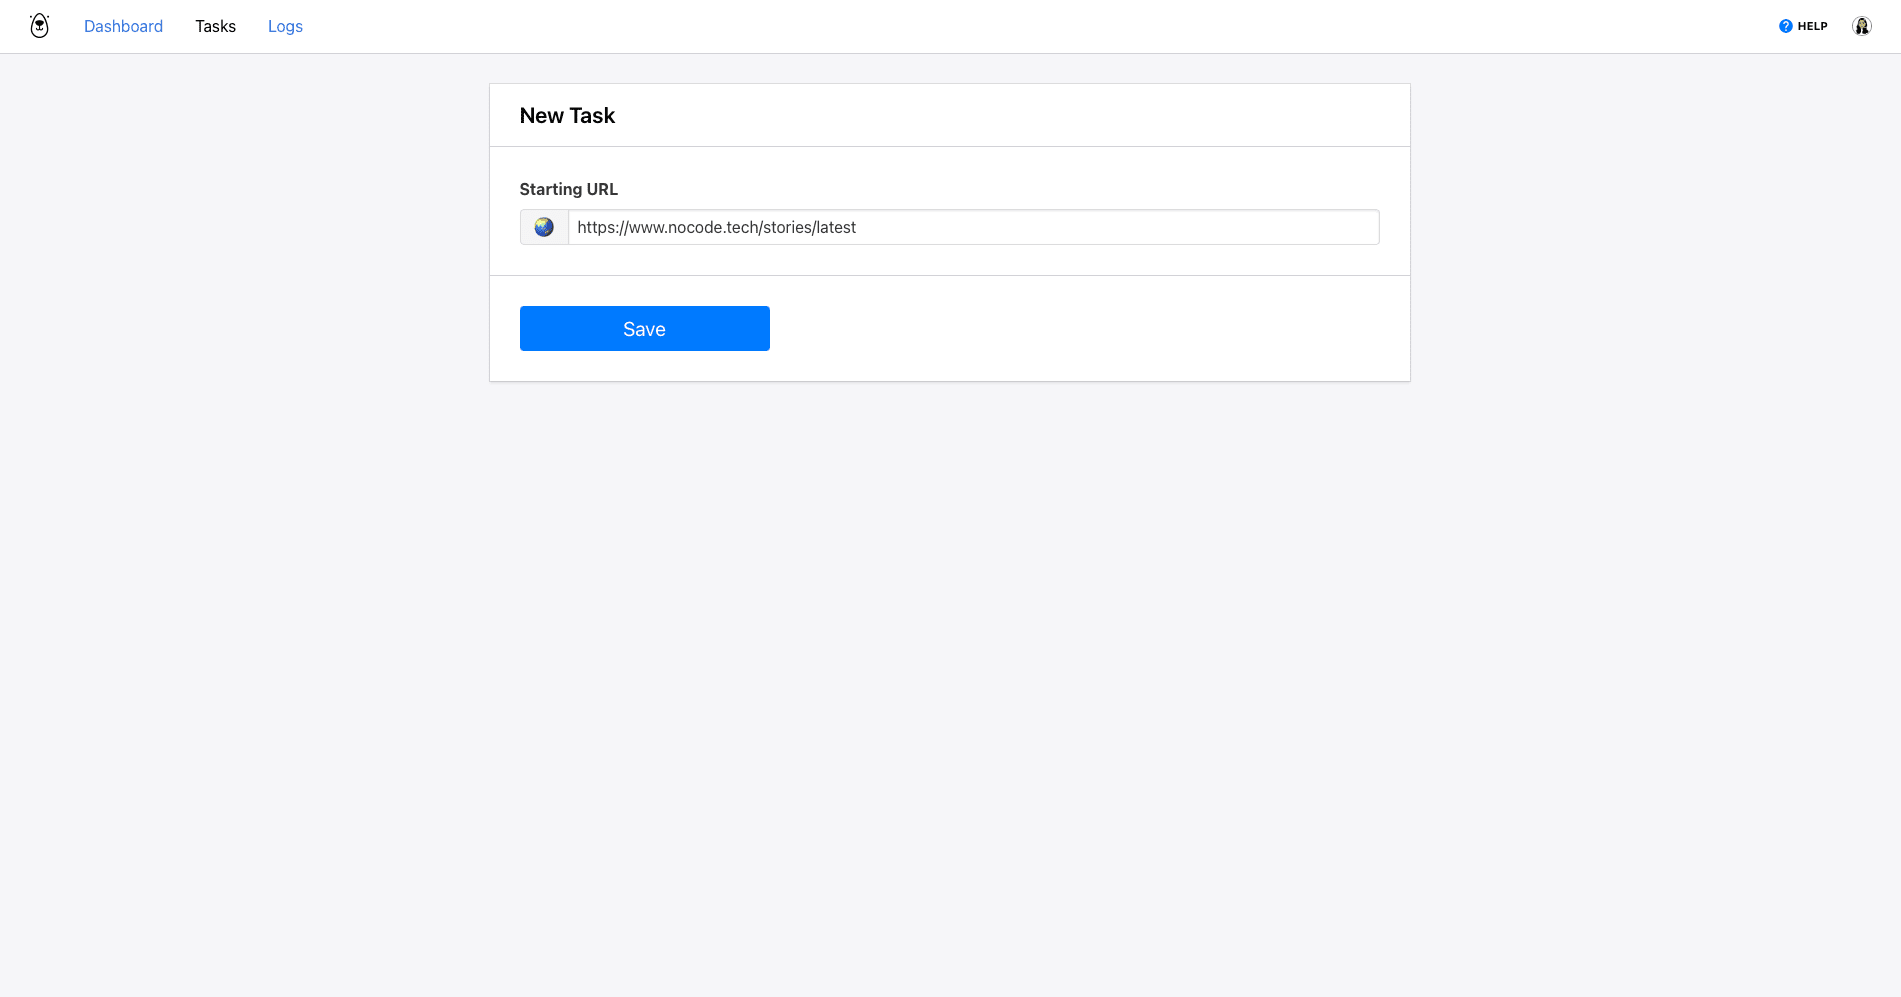
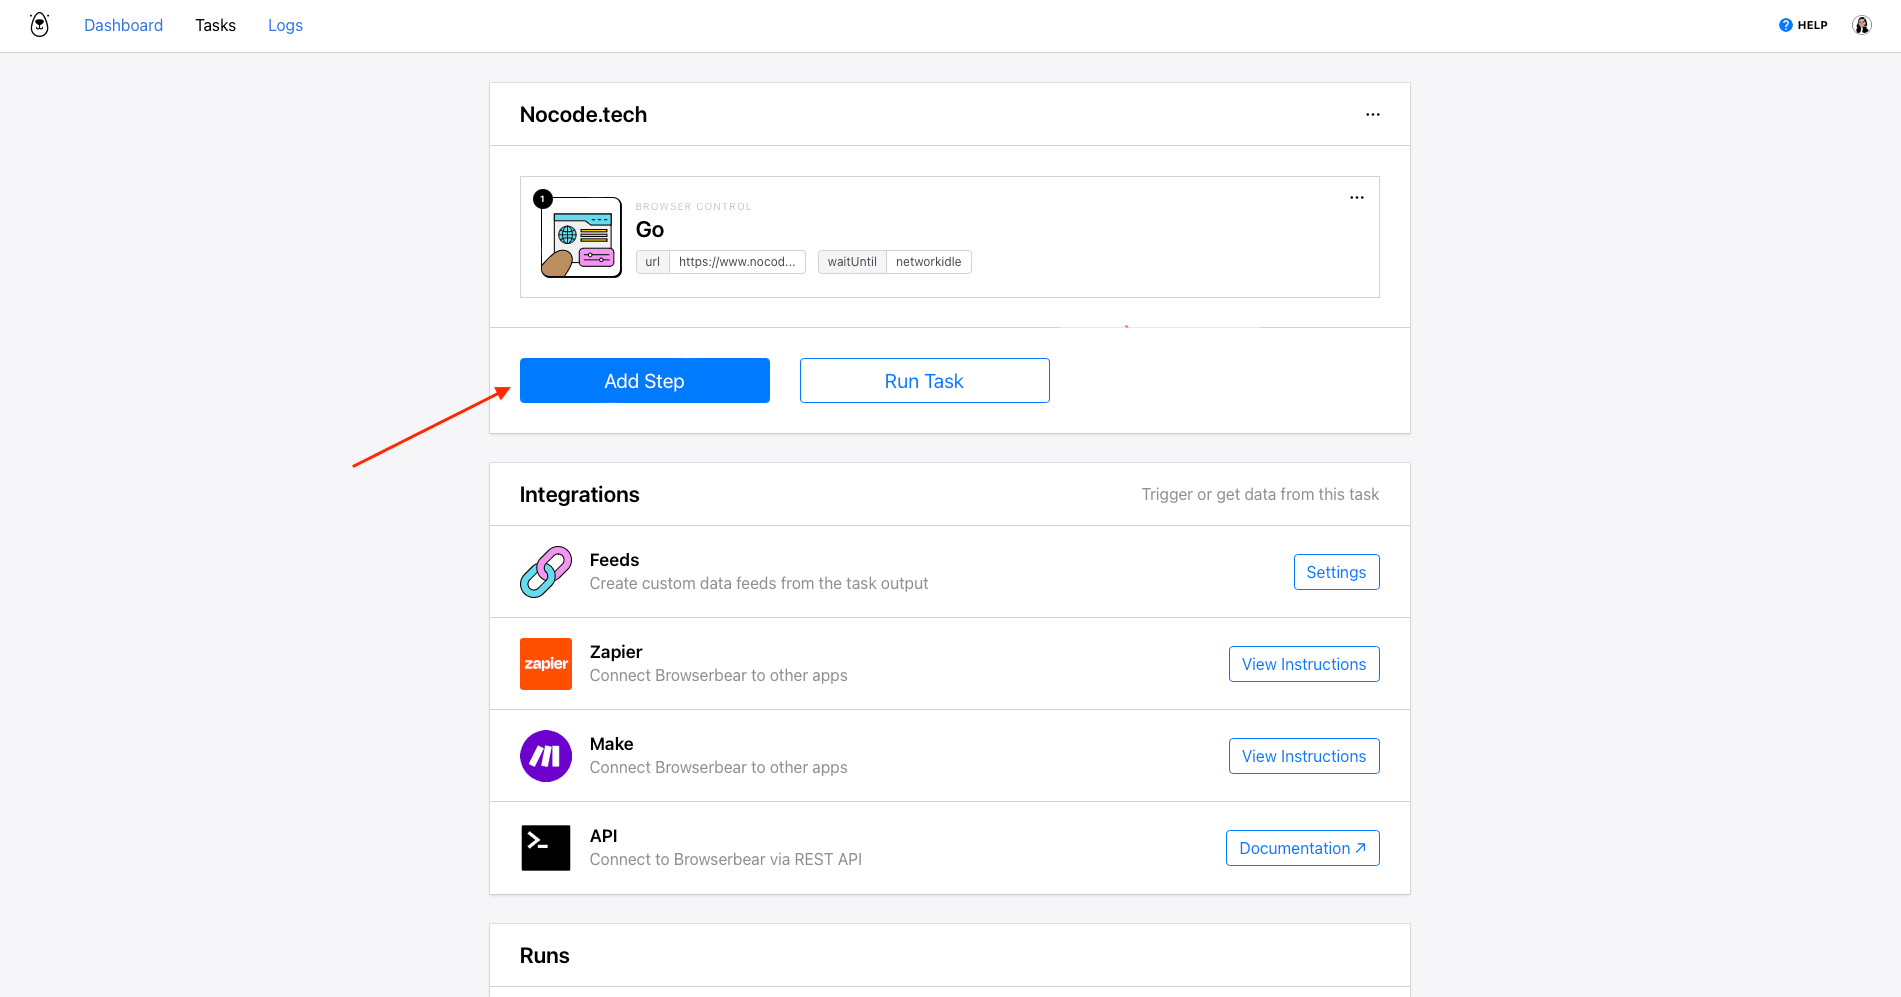
After clicking Save , you’ll be on a task page where you can add additional steps, run your automation, and view completed runs.

You can rename your task and edit the settings by clicking the three-dot menu next to the title and selecting Edit Task.
Add on to your task by going to the task page, then clicking Add Step.
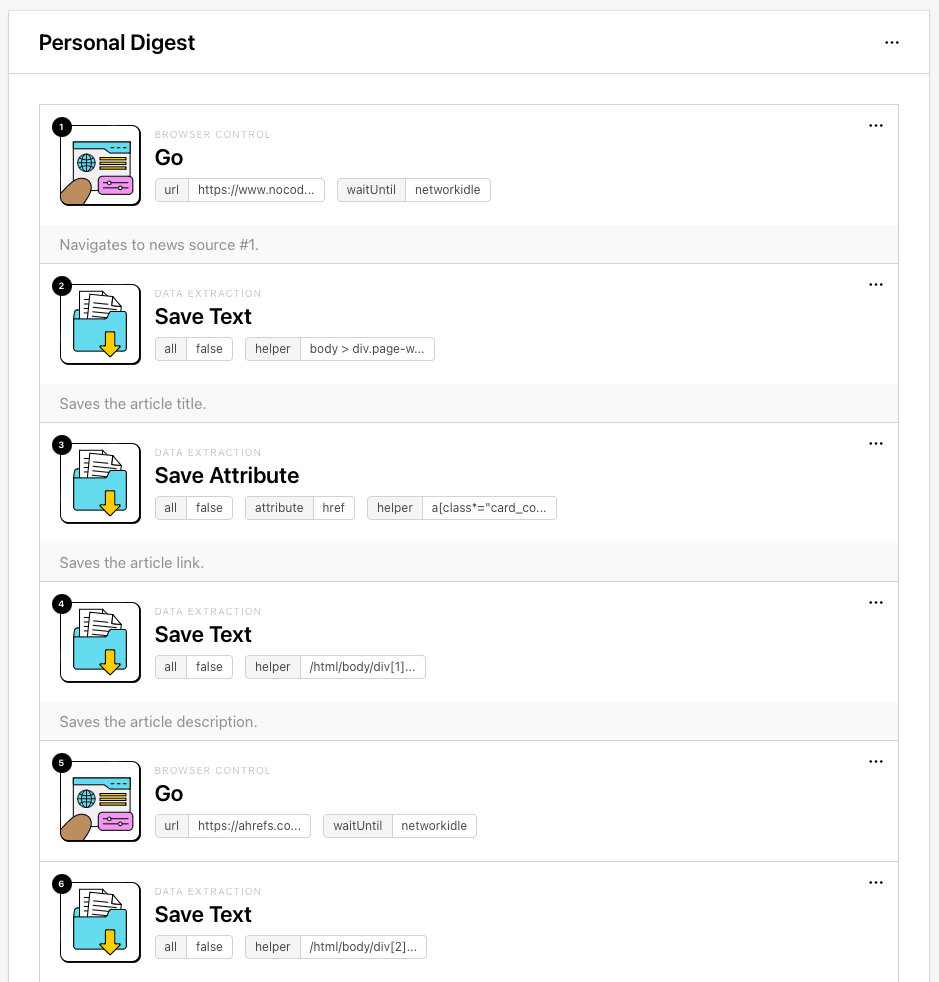
In this example, we will be extracting the latest blog title, description, and link. The steps we’ll be setting up to accomplish this are:
Step 1. Go
The starting URL you placed will already be added as the first step: Go. You can edit this by clicking the three-dot menu and make changes to the wait settings if needed.
Networkidle is the default wait instructions and the safest setting, but you can try the load or domcontentloaded settings if you are scraping basic elements, want to reduce wait time, or are experiencing timeout issues.
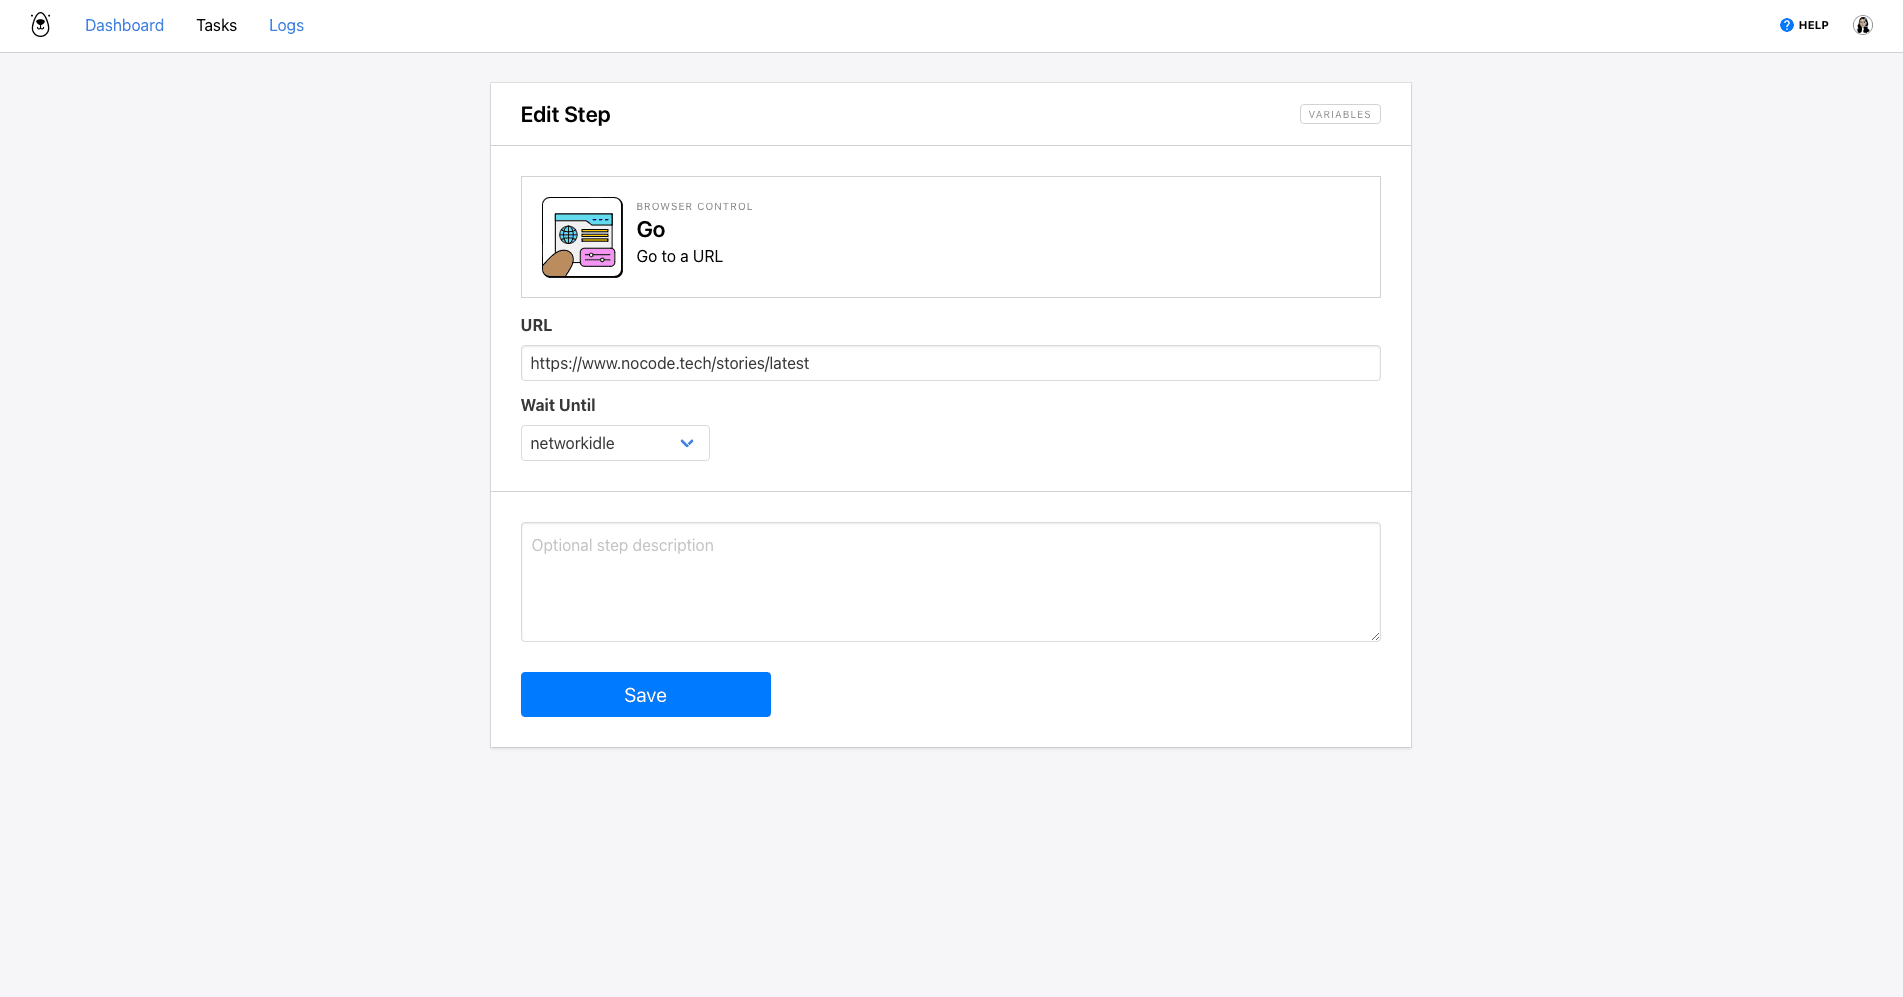
Adding a step description can be helpful for organizing longer tasks, especially when there are repeating actions.
Step 2. Save Text
The next step will save the title of the most recently published article on the site. Add a new step and choose Save Text as the action.
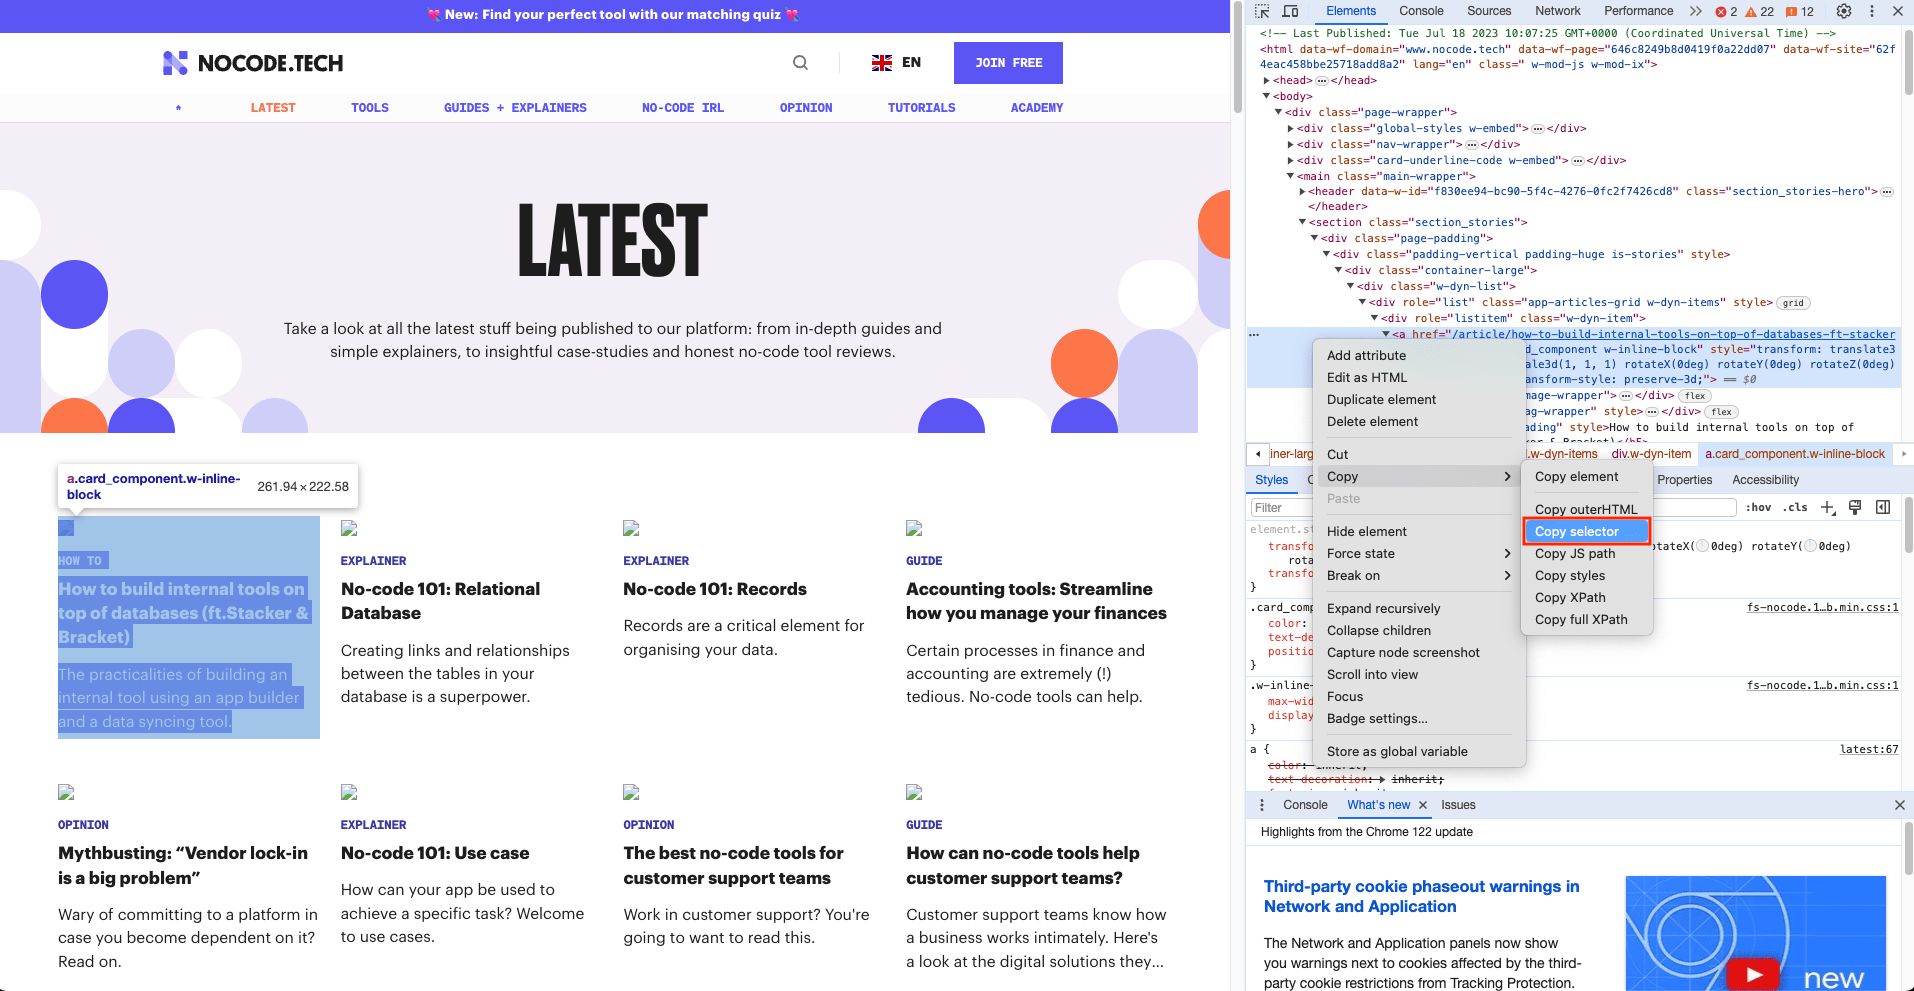
Use the Browserbear Helper Chrome extension to isolate and generate config for the text element, then enter the details in the Helper section of the Browserbear app.
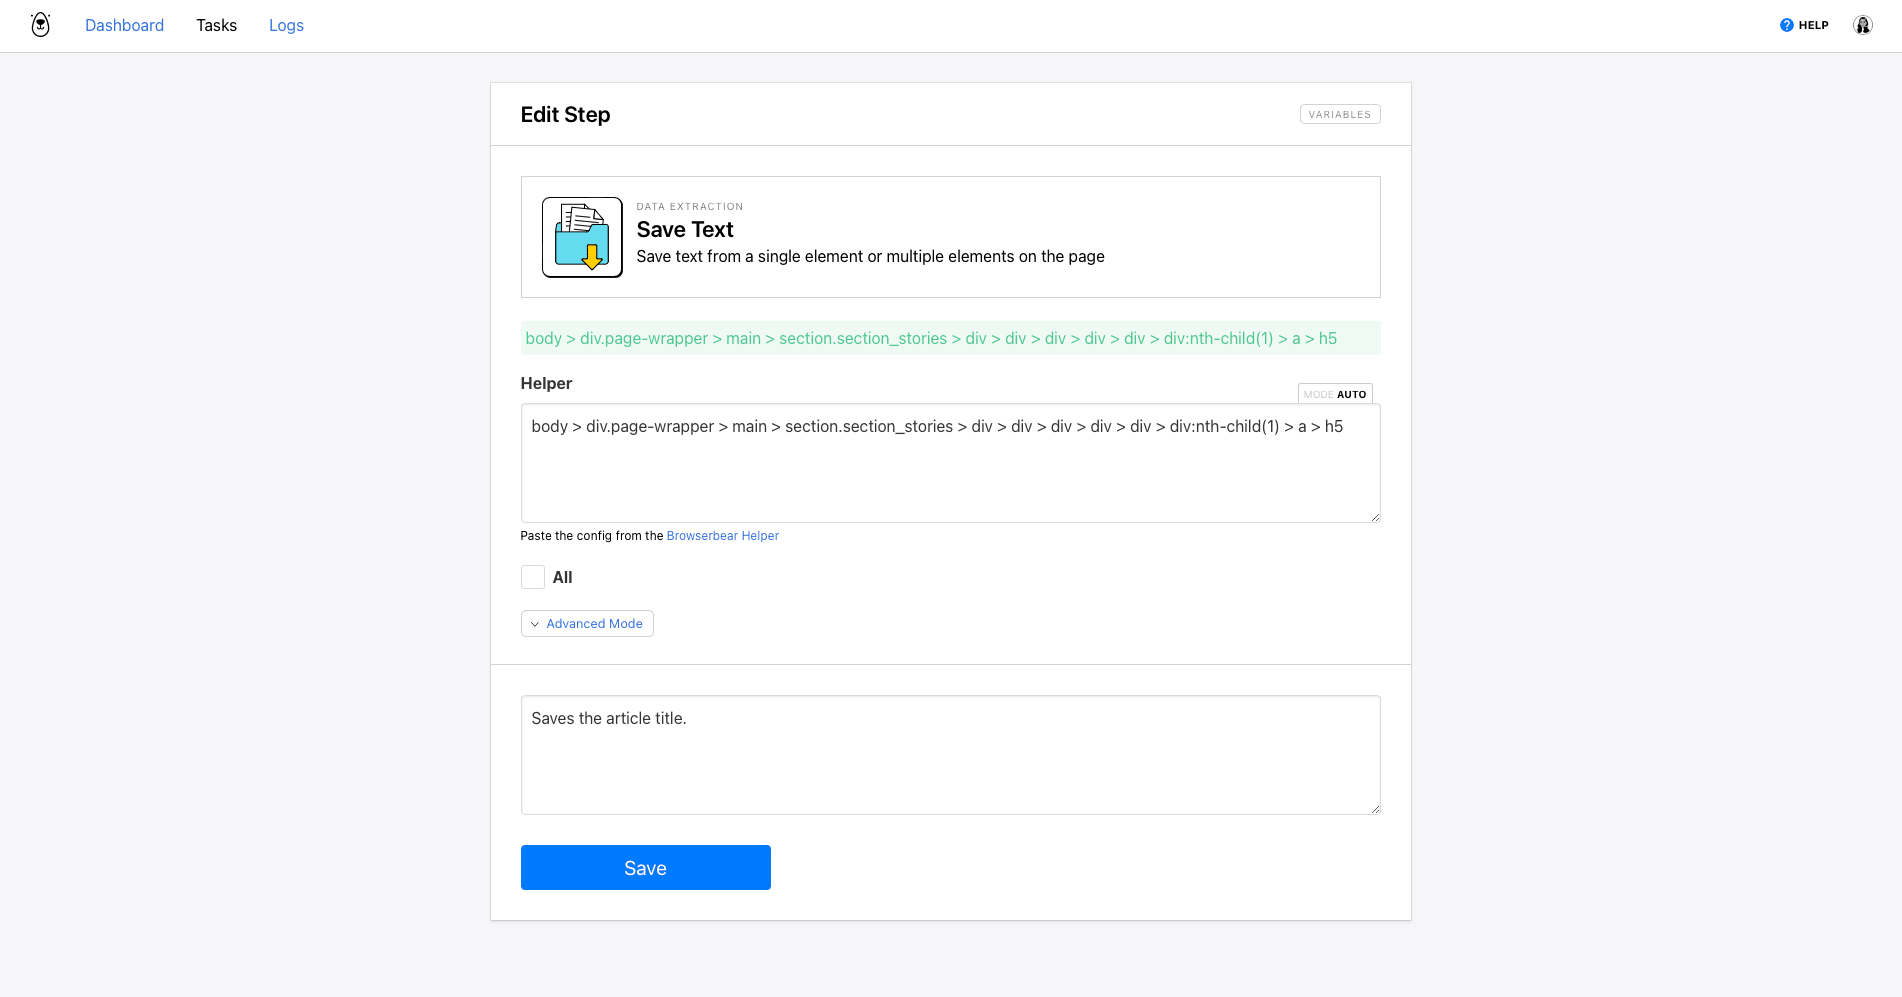
Keep in mind that depending on the site structure, you may need to use more precise selectors to identify the most recent title. If the generated config isn’t working reliably, try using your browser’s Inspector tool to retrieve the CSS selector for that specific element.
Bear Tip 🐻: Learn more about using the Browserbear Helper in this article.
Click Save.
Step 3. Save Attribute
This step will save the link to the article so that you can navigate directly to it from your inbox. Add a new step and choose Save Attribute as the action.
Use the Browserbear Helper extension or manually generate selector config for the link, then insert it into the Helper.
Define the attribute as href, and add a description if desired.
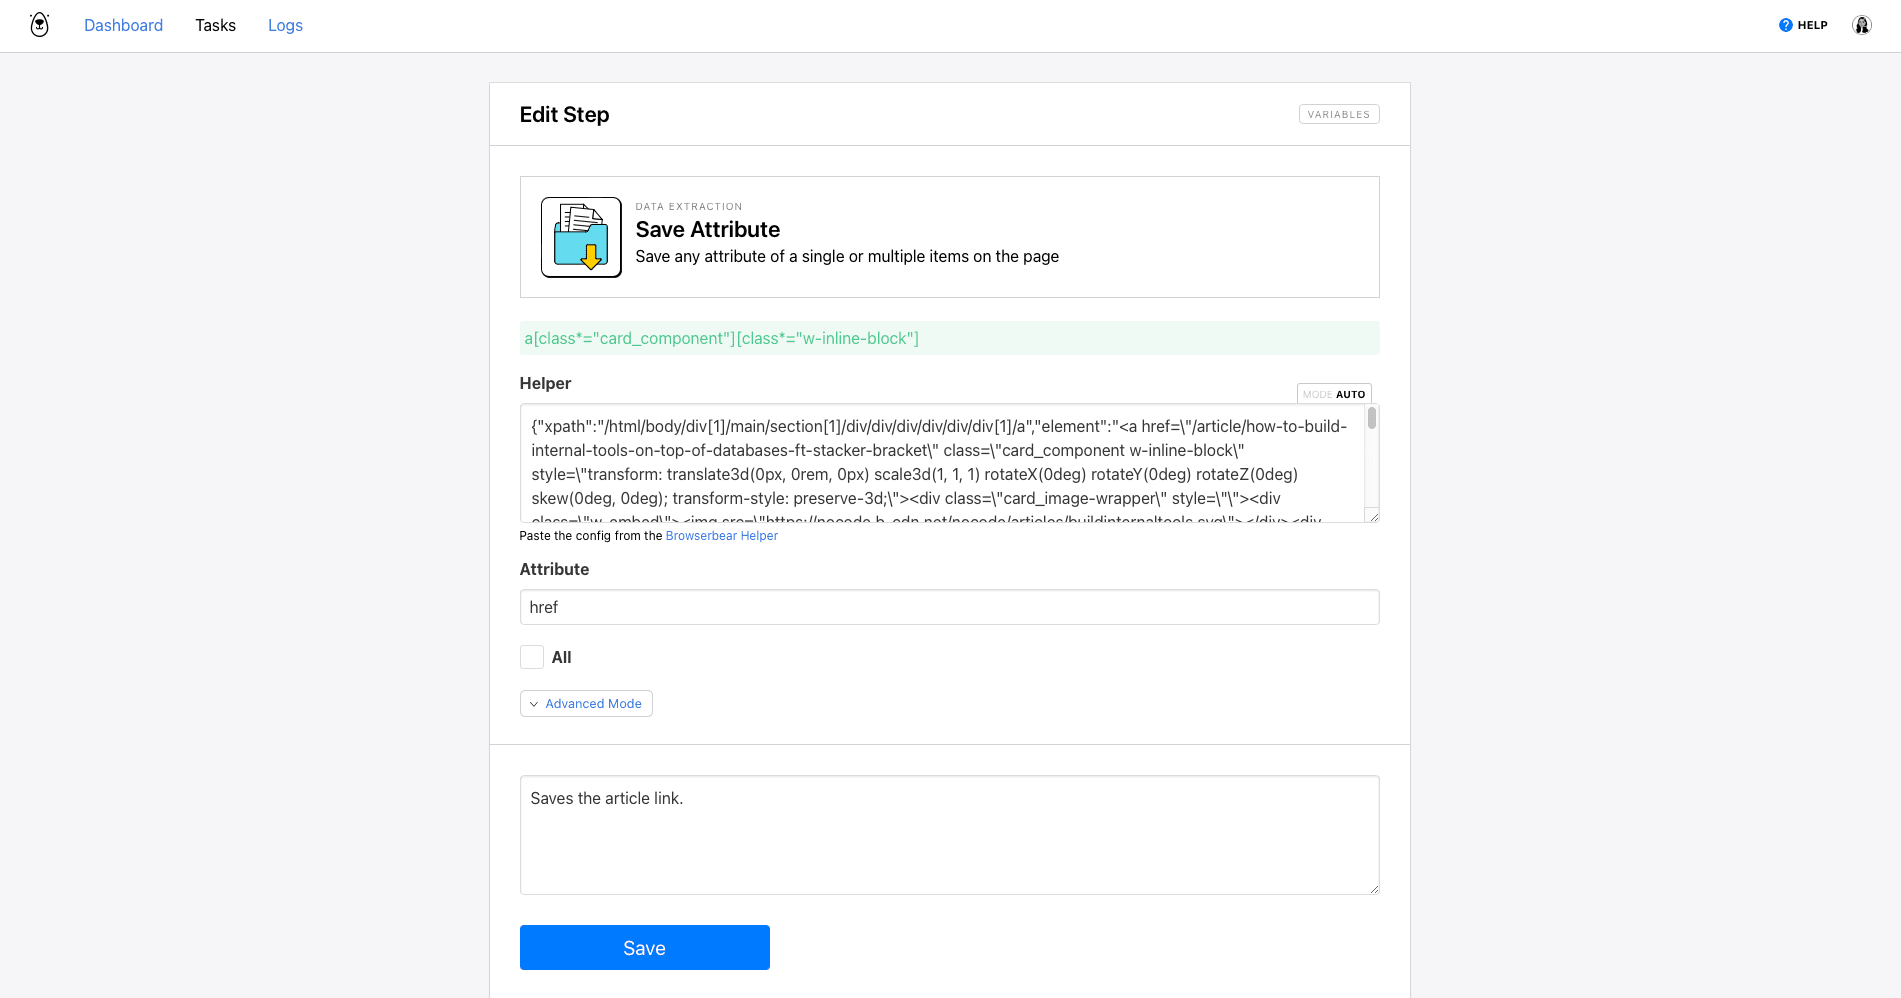
Click Save.
Step 4. Save Text
Now, we’ll set up a step to save the article description so you have a preview in your inbox. Add a new step and choose Save Text as the action.
Use the Bannerbear Helper extension or manually generate selector config for the text element, then insert it into the Helper.
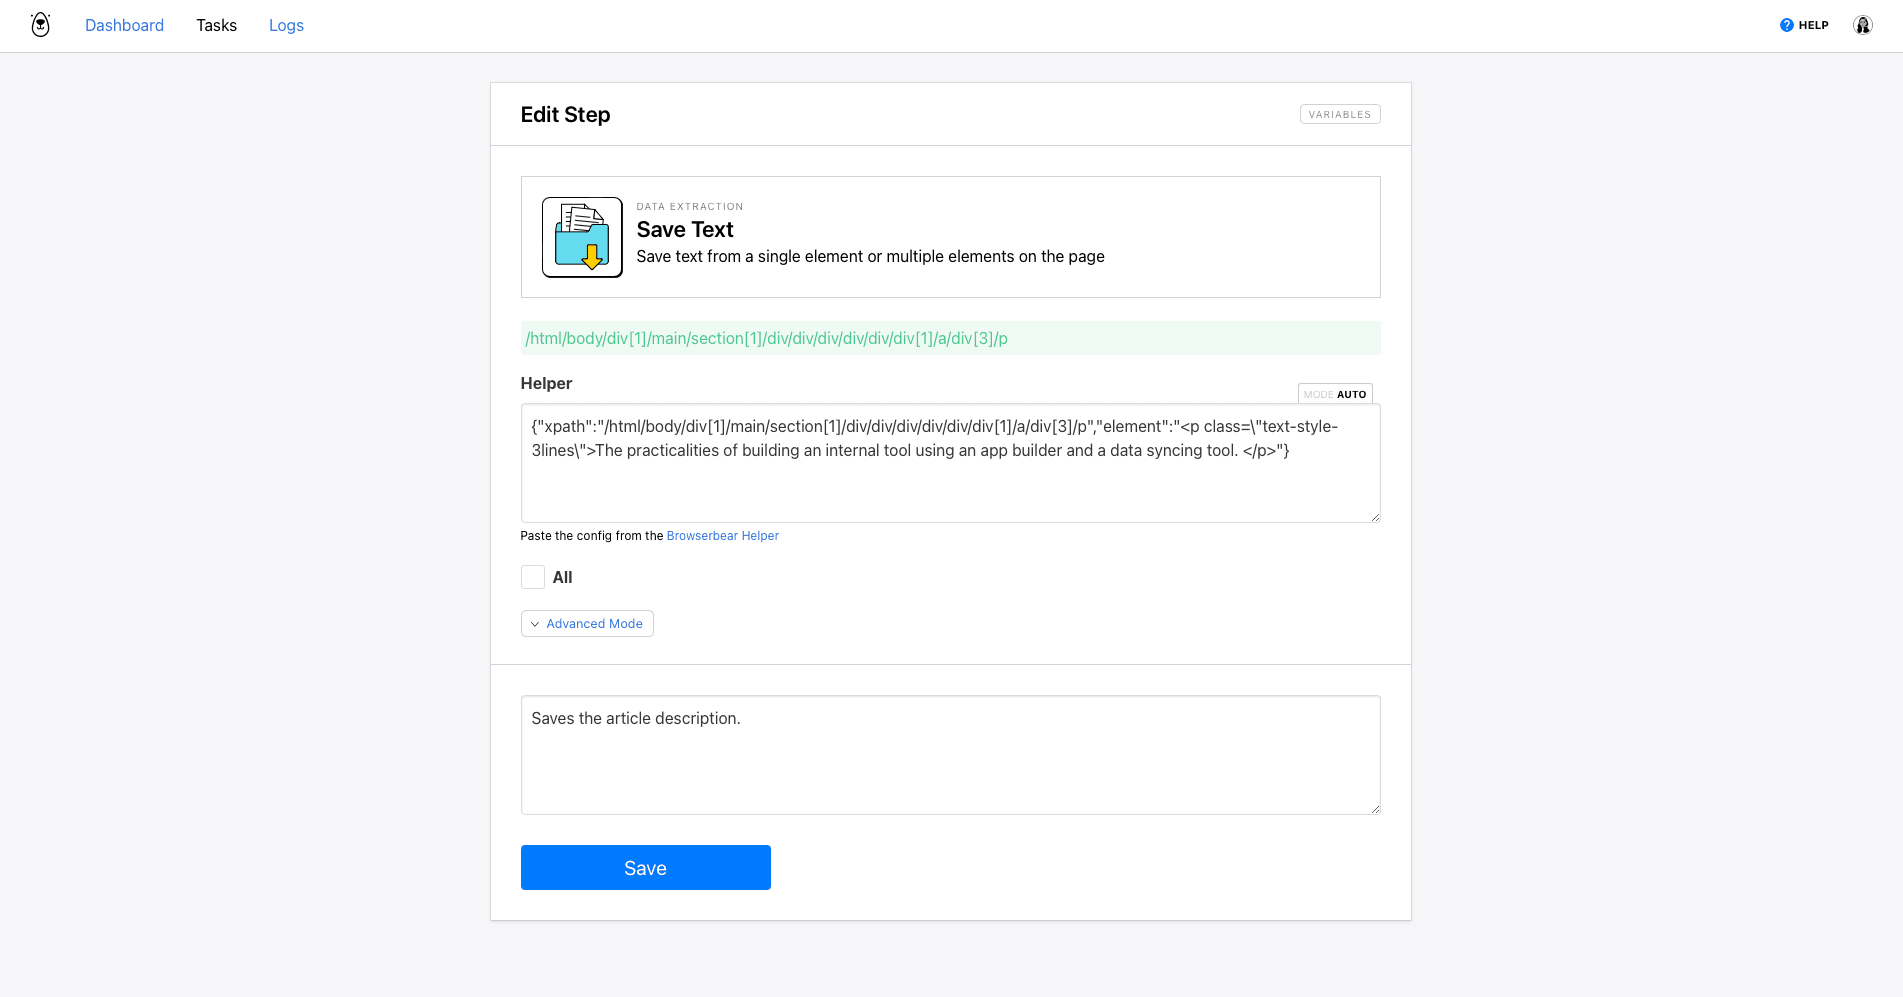
Click Save.
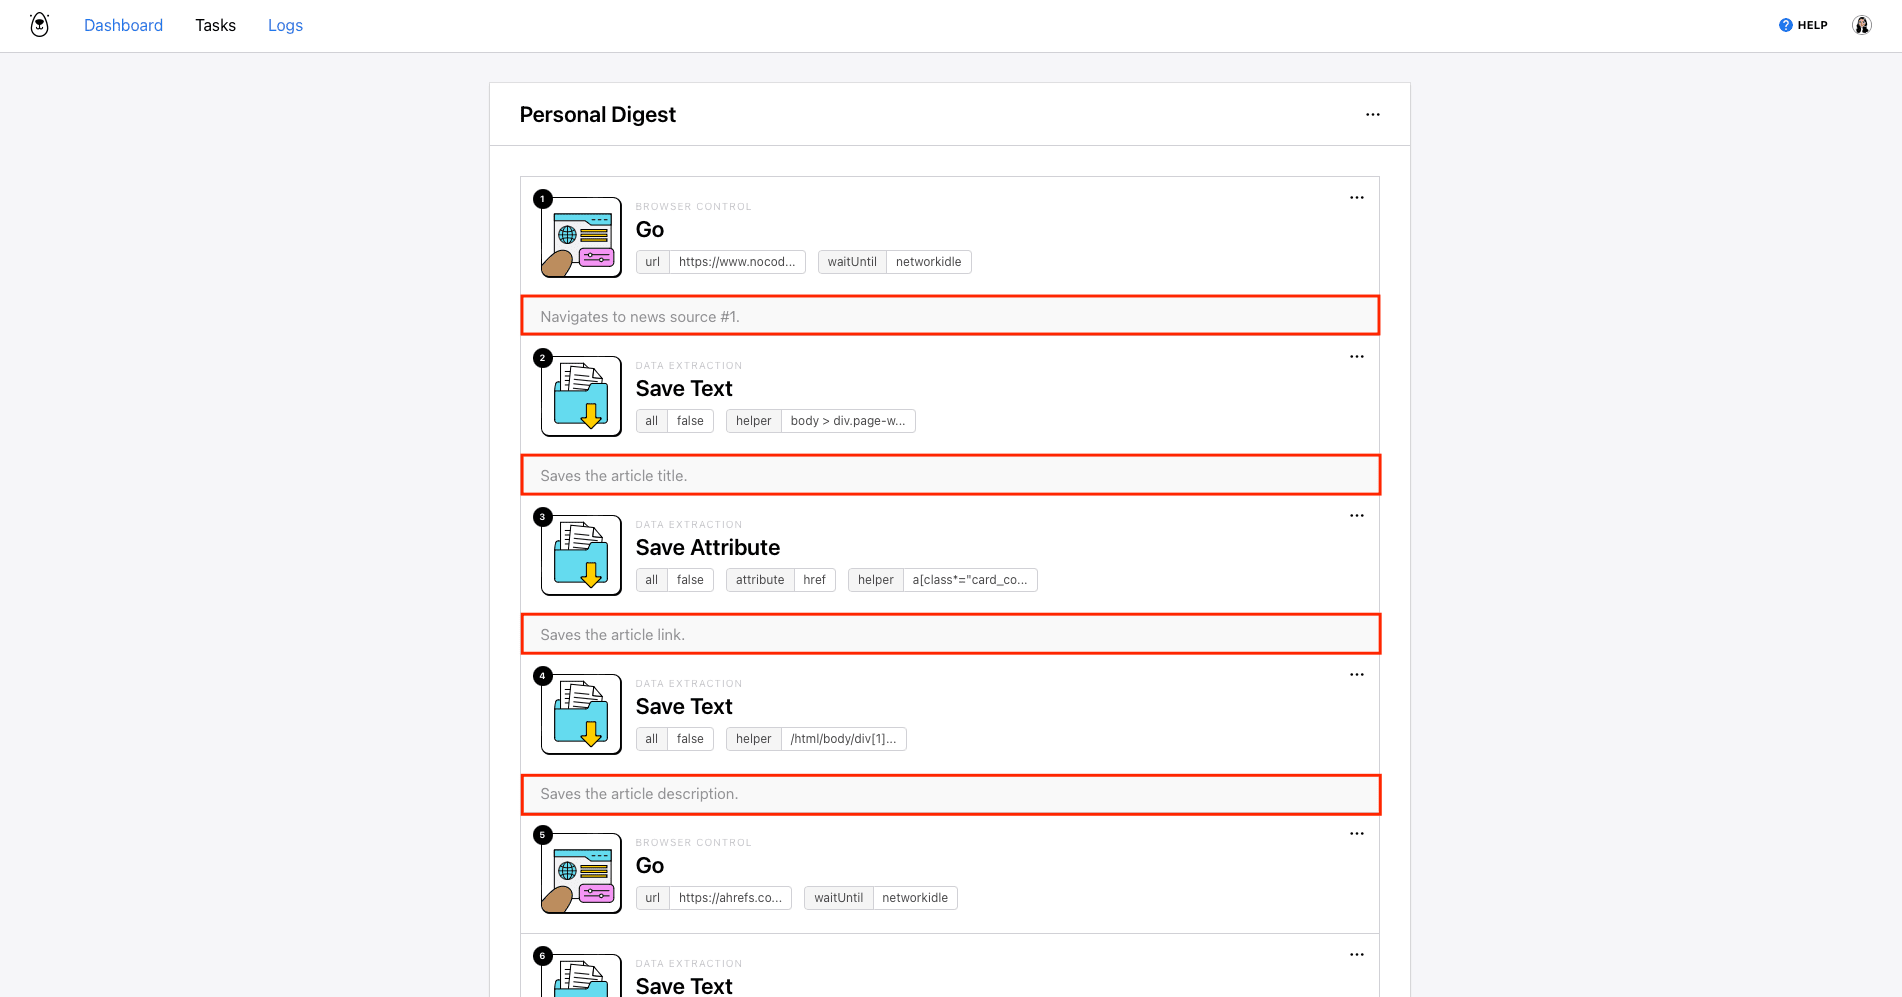
Repeat these steps for as many sites as you’d like. Be sure to test the process and review the results. You might have to modify Helper configs to ensure only the latest updates are being identified and scraped.
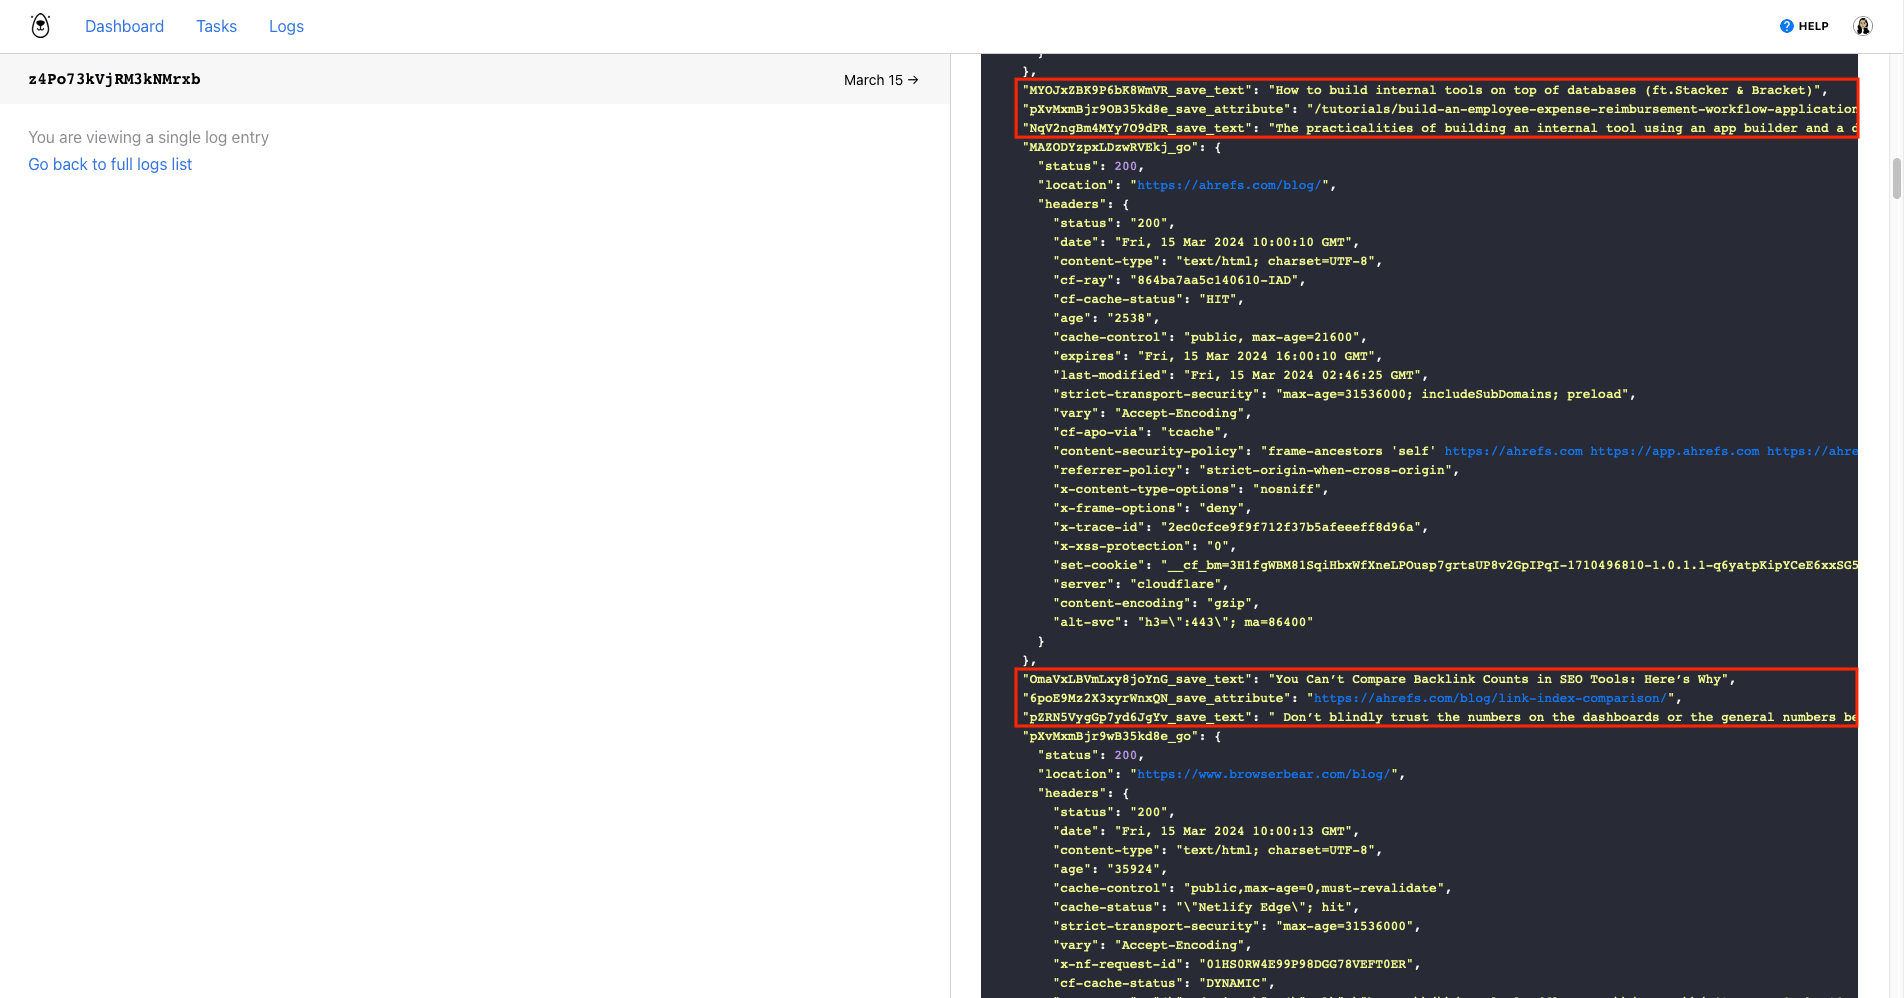
Your final task should look something like this…
…and yield an output log that looks something like this:
Bear Tip 🐻: Your personal newsletter can include a variety of media. While it may be more common to link news articles or blog posts, you can also link photos and videos or even extract full bodies of text.
Set up a Zap to Launch Browser Automation
A simple two-step zap will launch your browser task on a schedule so that you always get to read the newest updates. Log into your Zapier account, click + Create , then set up the following events:
Trigger: Every Week in Schedule by Zapier
Choose Schedule by Zapier as the app and Every Week as the event.
Set up the trigger by selecting the day of the week and time you’d like the task to run.
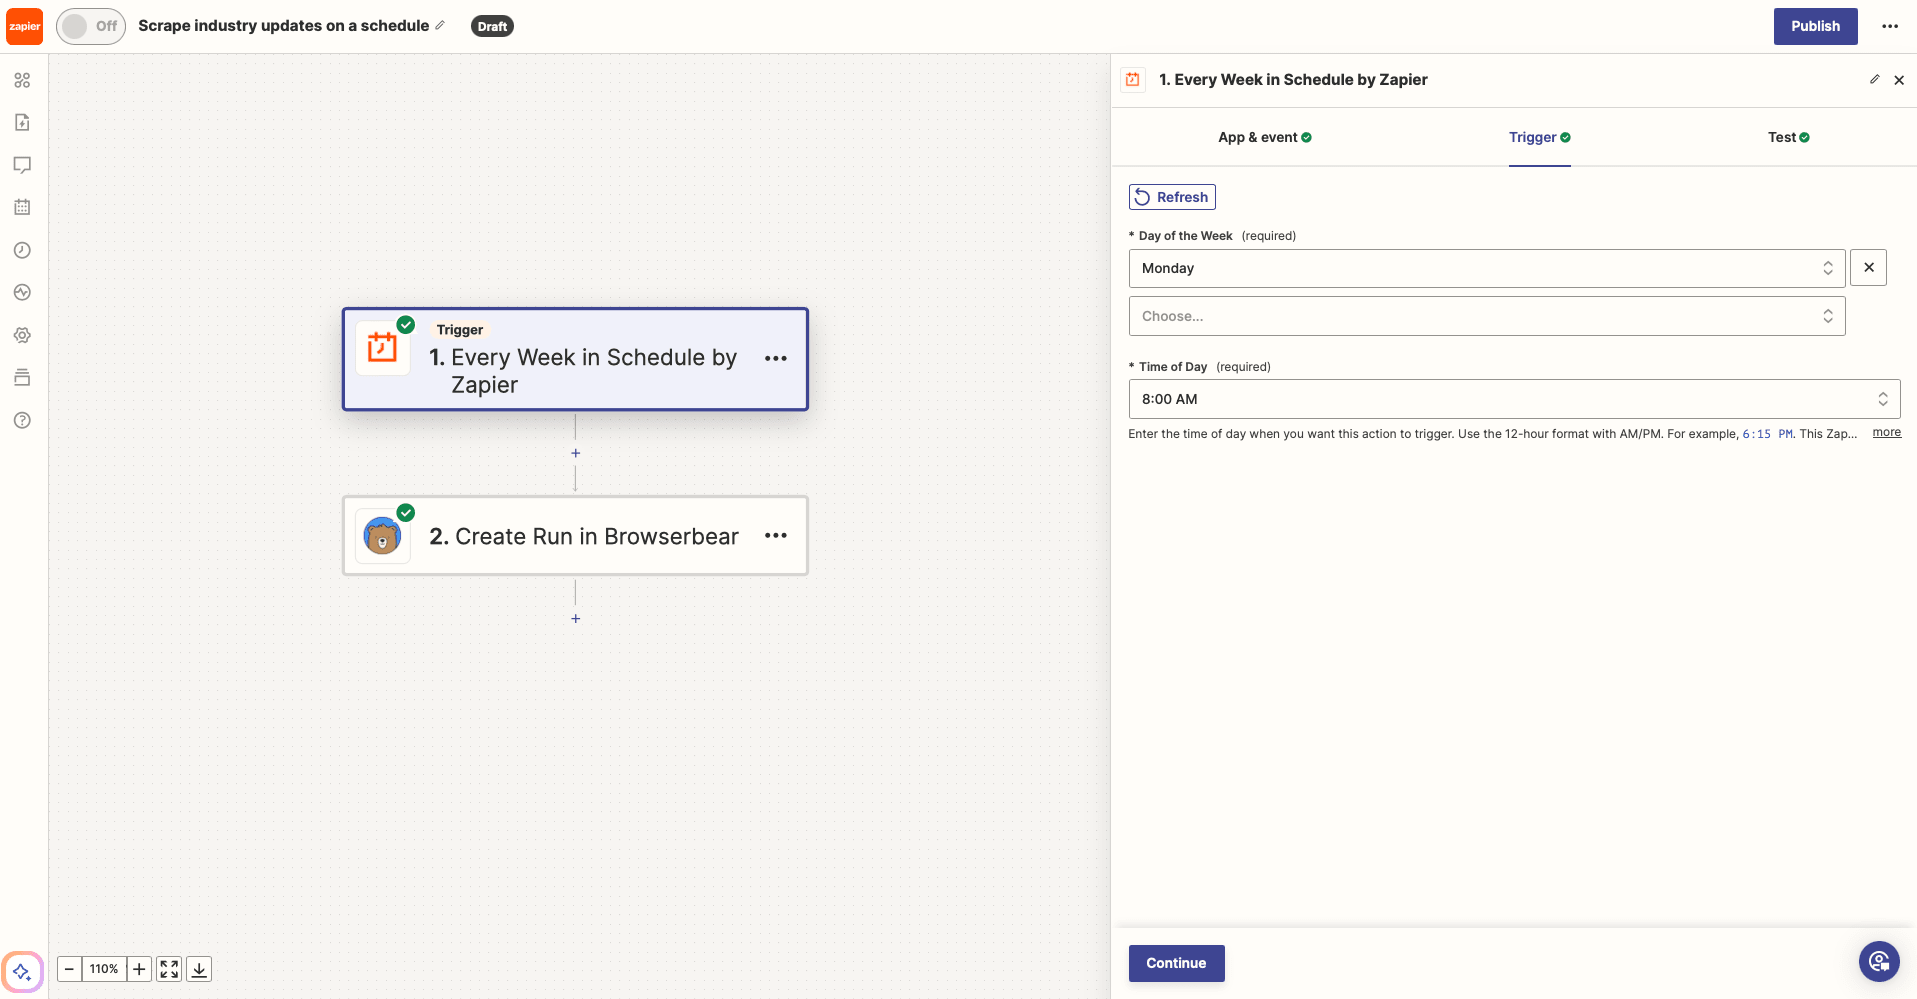
You can choose a higher or lower frequency, depending on how often you’d like to read industry news from your inbox.
Test the trigger, then continue.
Action: Create Run in Browserbear
Choose Browserbear as the app and Create Run as the event. You’ll need to connect your Browserbear account using your API key.
Select your scraping task. As your URLs are already set up in Browserbear, you shouldn’t have to provide any additional information.
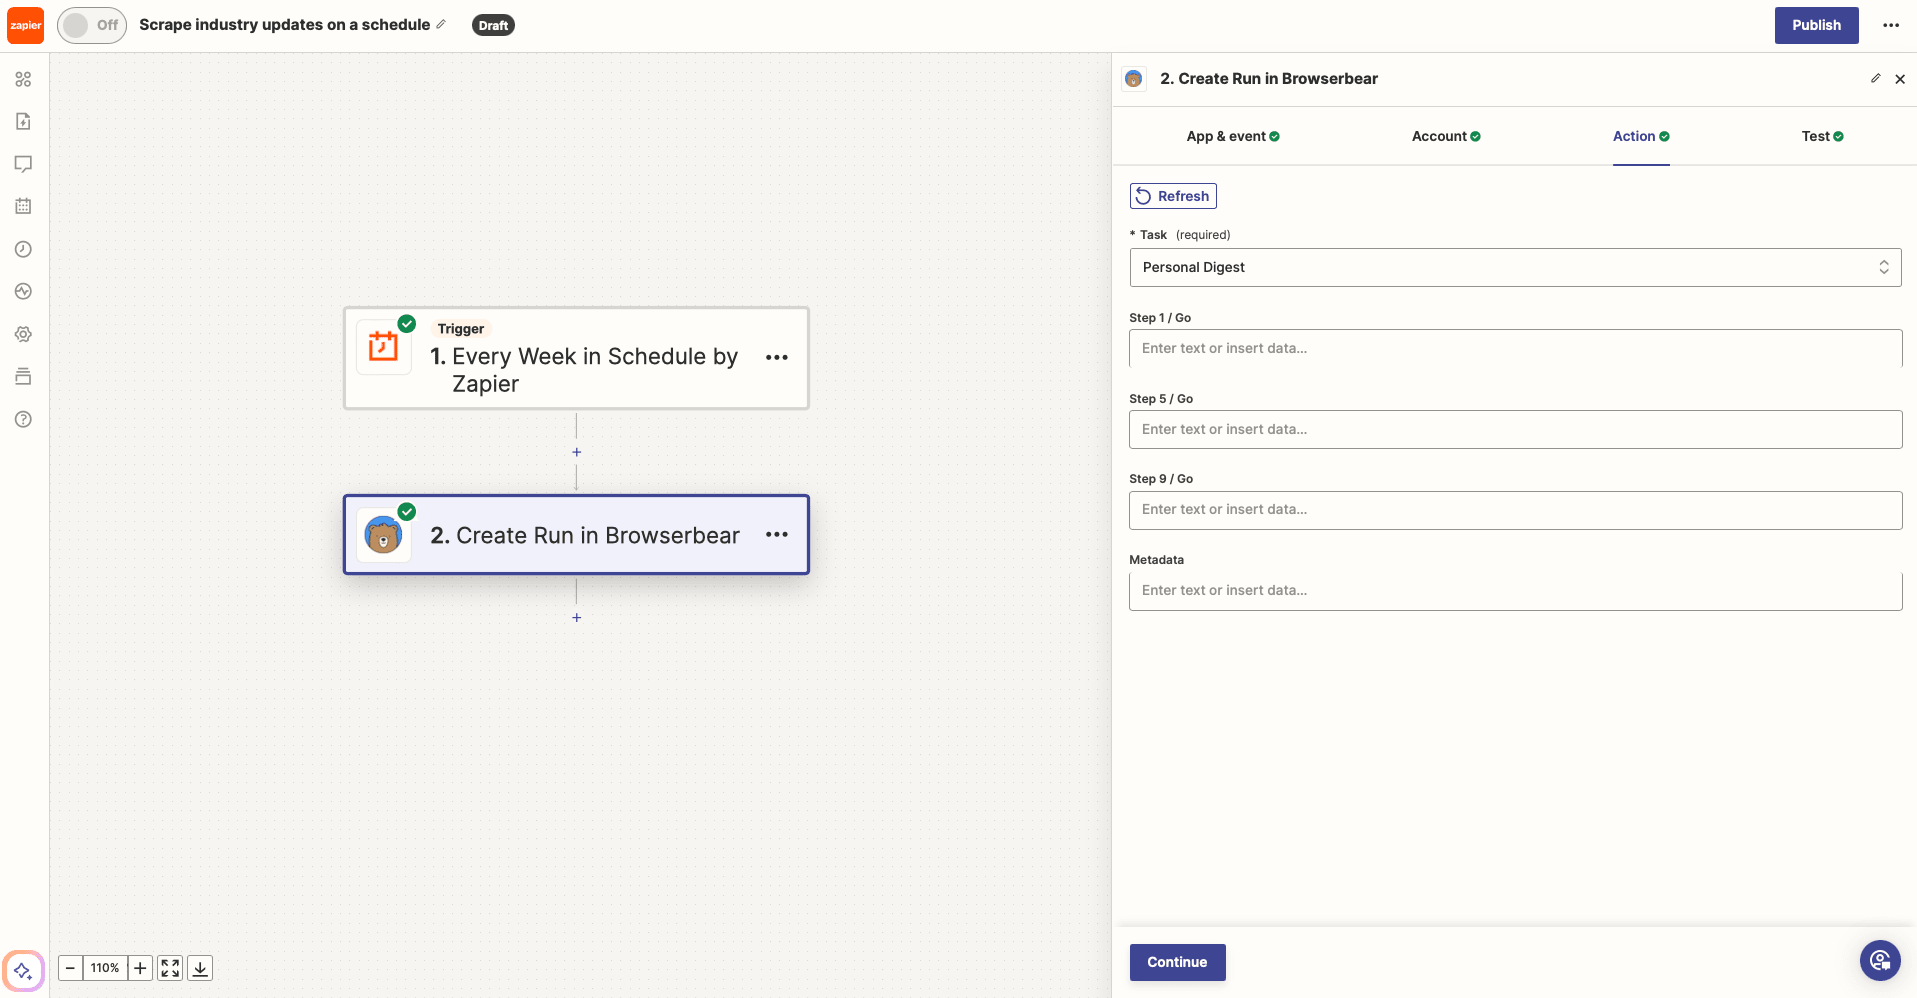
Test the action, and check your Browserbear log to ensure the task works as expected. Click Publish to take it live.
Set up a Zap to Send Messages to Slack
This zap will retrieve the output data from a completed task run and send it to your Slack inbox, formatted and ready to be viewed.
Create a new zap, then set up the following events:
Trigger: Run Finished in Browserbear
Choose Browserbear as the app and Run Finished as the event.
Set the trigger up by selecting the corresponding task.
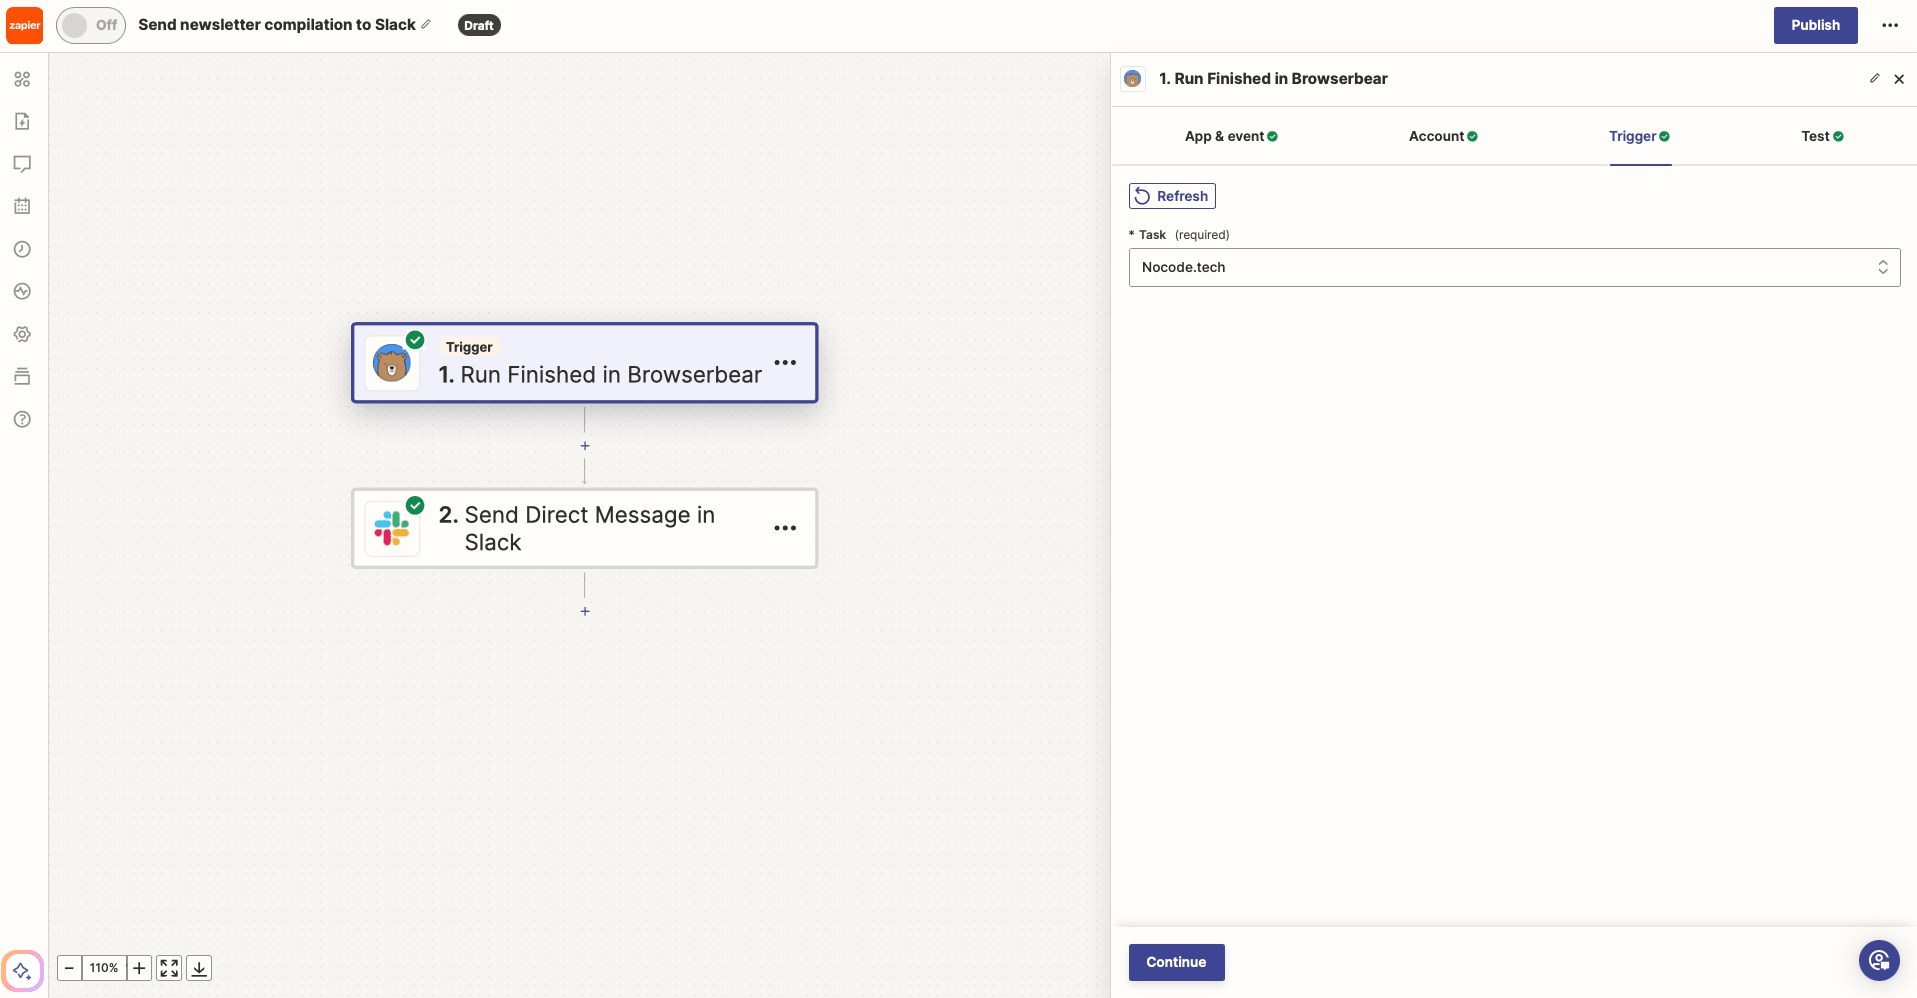
Test the trigger.
Bear Tip 🐻: Depending on your output, you might choose to format data in Zapier to prepare it for the next step.
Action: Send Direct Message in Slack
Choose Slack as the app and Send Direct Message as the event. If you haven’t connected your Slack account yet, you may be prompted to do so.
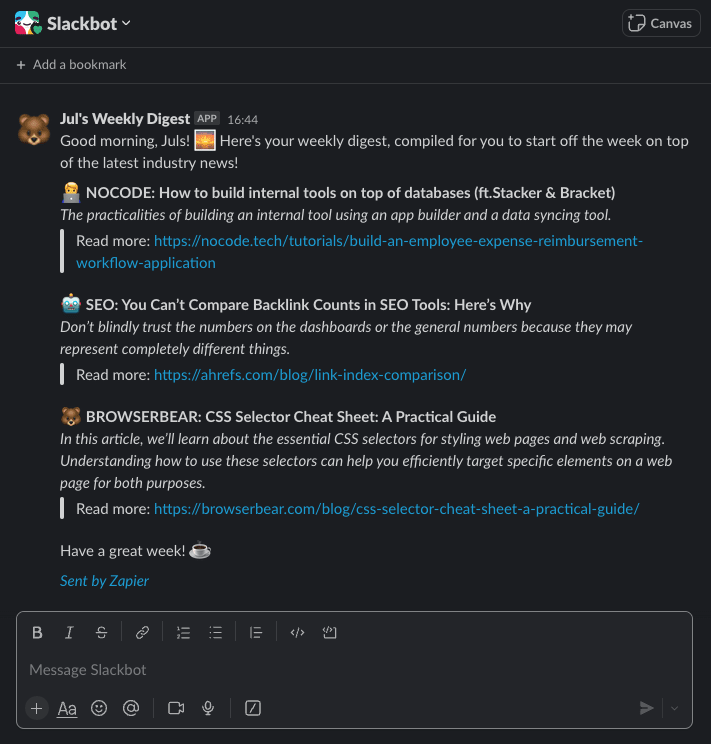
Set up the action by choosing a recipient and customizing the message body. You can also personalize the message to be sent by a custom bot with its unique name and icon.

Test the action. You should see your personalized insights appear directly in your Slack app.
When you’re happy with your zap, click Publish to take it live.
Customize Your Insights with Browser Automation
Automating your personal newsletter can save you valuable time daily. Easy access to your favorite resources reduces the friction of searching for information and helps you stay updated without too much effort.
Staying on top of industry trends is valuable for your professional life, and it also builds habits of a lifelong learner. There’s no one correct way to do it—in fact, here are a few other ideas for making the automation your own:
- Create a curated list with a team and send it to a Slack channel to benefit from other recommended resources
- Automate newsletters with a different focus on different days of the week
- Schedule delivery on a day you can set aside time to absorb and apply what you learn
- Get more out of Notion by creating a new page or database item with the latest news so you can take notes as you read
- Automatically add news as team meeting discussion topics to engage and apply new concepts
Automatically extracting and delivering curated news to your Slack inbox is just the beginning. You can take the process as far as you’d like. As long as you benefit from the convenience of your personal newsletter, the time you spend setting up the workflow is time well spent!
