
How to Create an Auto-updating Database from Extracted Data
Contents
Data drives informed decision-making. Data analysts, researchers, business owners, and plenty of other roles include the task of seeking quality information to improve performance. But when it comes to large volumes of data collected from trusted sources, manual work can be time-consuming and unnecessary.
The implementation of efficient systems streamlines data retrieval, enabling you to focus on making decisions instead of data collection. Other benefits of using an auto-updating database include:
- Maintaining a document archive even when after website removal
- Organizing data using a unique system
- Sharing access with team members
- Only collecting needed information
- Tracking trends over time
This article will guide you on automating the collection and storage of both text data and downloadable assets using nocode tools.
What You Will Create
An automatically updated archive of important resources you often refer to can save time and resources in your professional and personal life. This tutorial will teach you how to scrape trusted sites for resources you need, then deposit it into a cloud database.
We’ll be using The World Bank’s UNHCR Microdata Library as the data source in this example, but you can adapt the method to other sites that fits your use case.
The tools you’ll need to scrape, download, and store data are:
- Browserbear : To extract information from websites
- Google Drive : To store downloaded assets (PDFs, spreadsheets, etc.)
- Google Sheets : To store text information and links to assets
- Zapier : To automate processes across apps
By the end of this tutorial, you should have an automation that stores extracted data on Google Sheets, making it easy for you to find relevant publications when you need them.
We’ll start with building each individual component of the process, then set up Zaps to tie them all together.
How to Automate a Spreadsheet to Store Extracted Data (Text & Files)
The goal of this automation is to extract, store, and sort data with minimal manual intervention. We’ll use a handful of apps for this, starting with a browser task that retrieves data matching your requirements.
Create a Browserbear Task to Scrape Data
A single Browserbear task will save links to individual publication pages, then open each one to extract the needed information:
- Date of when the page was last updated
- Publication title
- Publication abstract
- Producers
- Topics
- Downloadable assets (eg. PDFs or spreadsheets)
We will use assert and if commands to decide whether to proceed depending on whether a publication matches our requirements. This ensures high-quality output and eliminates inconsistency when the information is sent to a spreadsheet.
Log into your Browserbear account (or create a free trial account if you don’t have one—no credit card required! 🎉). Go to the Tasks tab, then click Create a Task.
You will now be able to enter a starting URL:
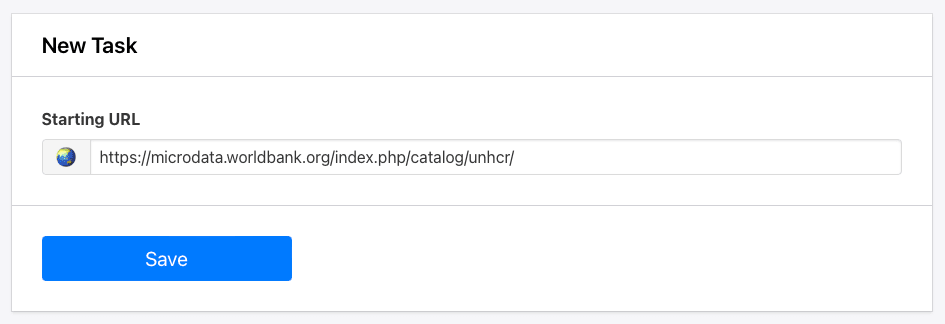
Click Save.
Now, you’ll be on a task page where you can add more steps and view completed runs. Set up the following steps:
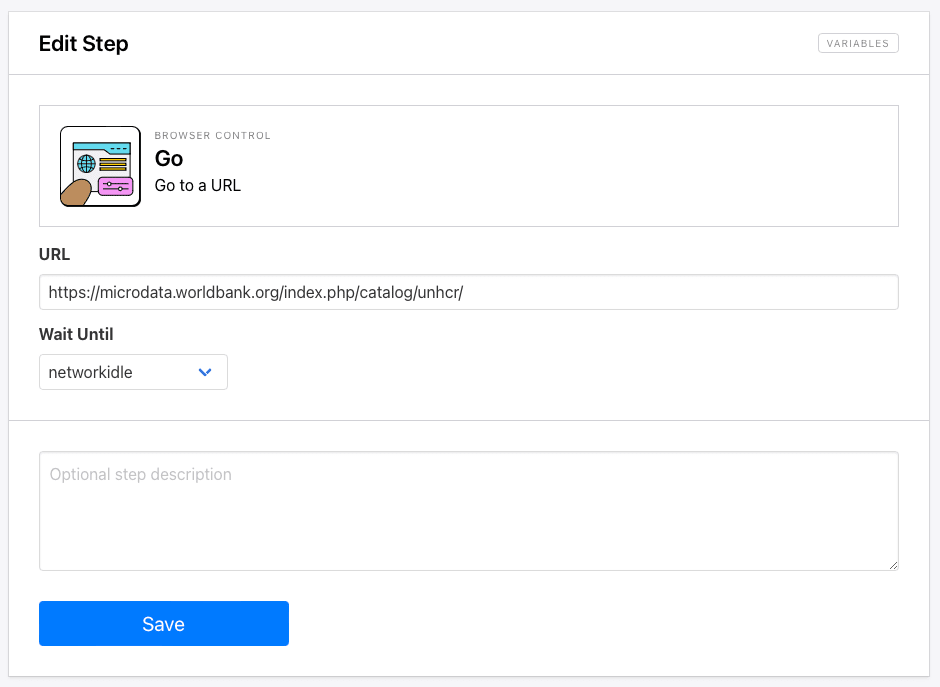
Step 1. Go
The starting URL you placed will already be added as the first step: Go. We’ll be using a URL that already leads to UNHCR publications so we don’t have to perform a search with browser actions.
https://microdata.worldbank.org/index.php/catalog/unhcr/
If you’re planning to scrape several pages with identical structures, your starting URL can be changed to a dynamic field in Zapier.
Networkidle is the default wait instructions and the safest setting in most scenarios. However, the load or domcontentloaded settings are also worth testing if you experience trouble loading the site.
Step 2. Save Attribute
This step will save links to all the studies listed under the UNHCR catalog.
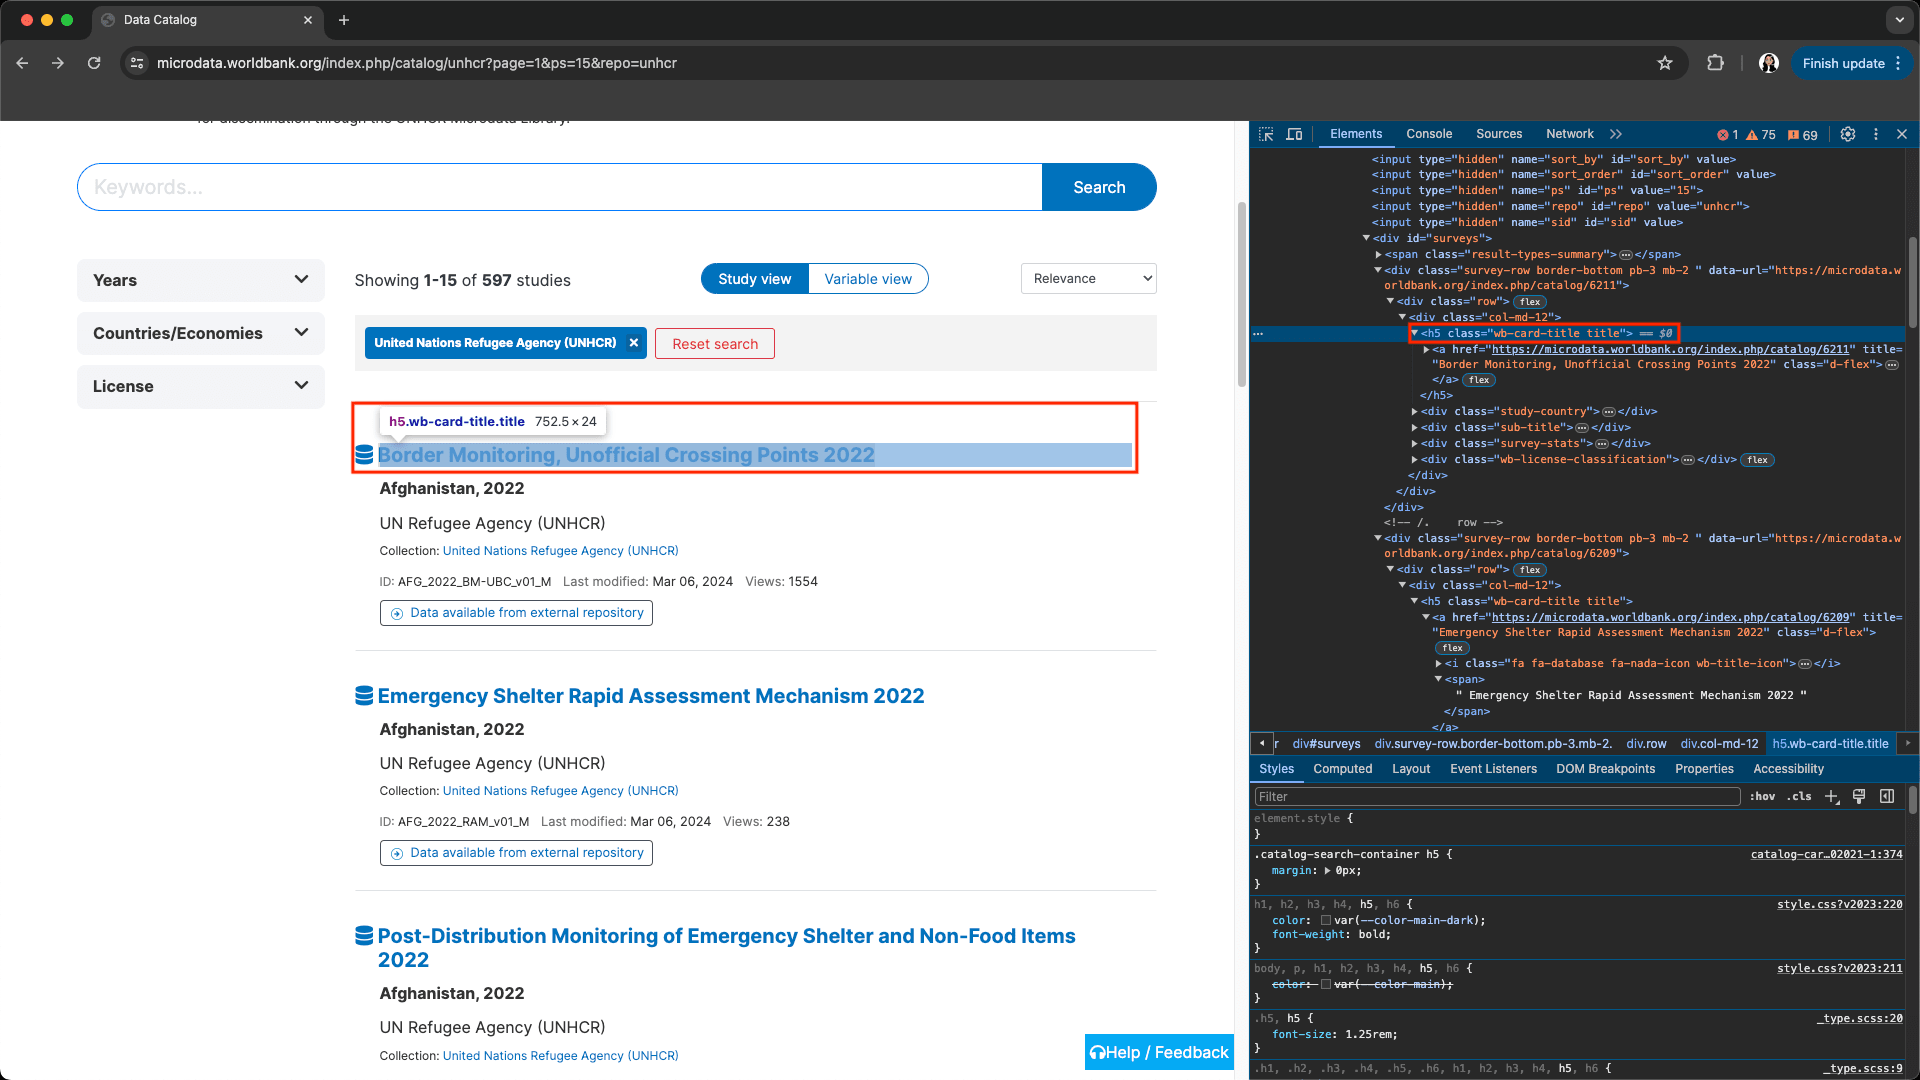
Add a new step and choose Save Attribute as the action. Insert Helper config to help identify the linked study pages—in this case, h5 a. Choose href as the attribute type, and check All so Browserbear extracts all links that match the identifying config.
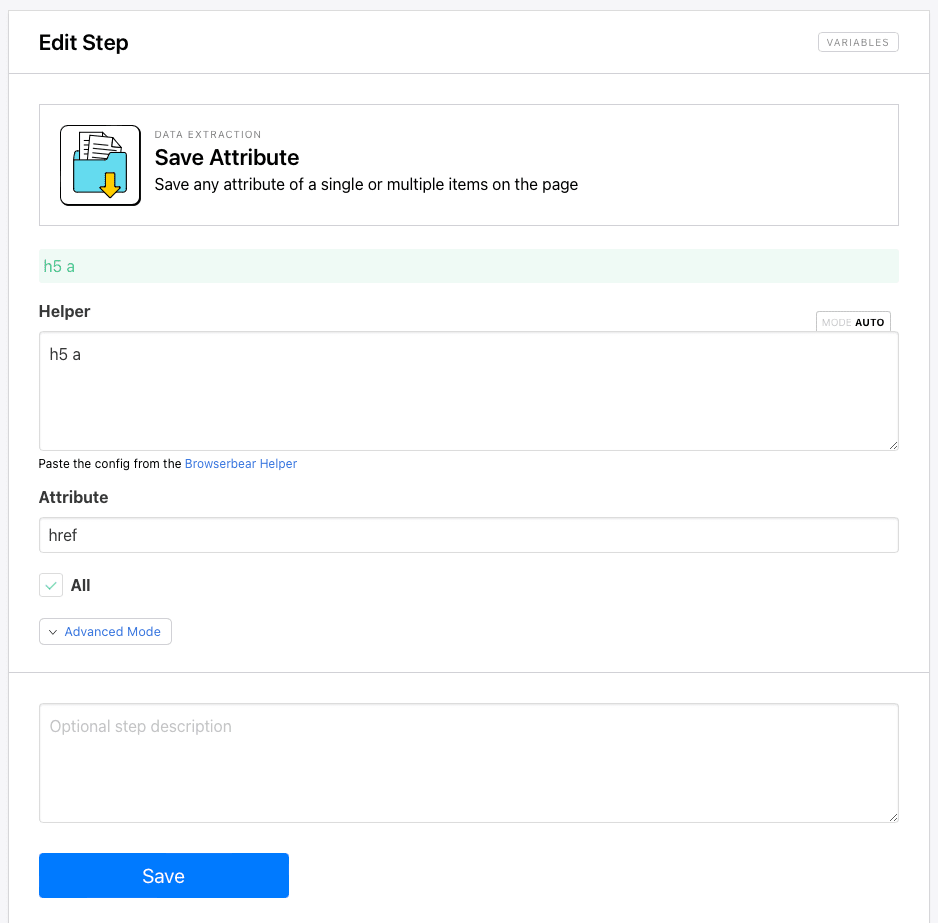
Keep in mind that if you’re using this action to extract many links, you can’t use config that identifies a specific one. Instead, you’ll need to determine the common identifier of all of the links.
In this example, using the browser’s Inspect tool helps us see that each link is classed as h5, so the h5 a config will tell Browserbear that we want all the H5 hyperlinks.
Read our guide to the Browserbear Helper Chrome extension if you need more help generating config.
Bear Tip 🐻: If you would like to automatically extract links from several pages instead of just one, you can build a repeating loop. Learn more in this Academy video tutorial on using data to power a loop.
Step 3. Loop Start
From this step onwards, we’ll set up a big loop that loads each extracted link, decides whether there is a downloadable asset to scrape, then either scrapes information or skips to the next one.
Add a Loop Start step to your task. Choose data as the type and insert a variable to the previous link scraping action.
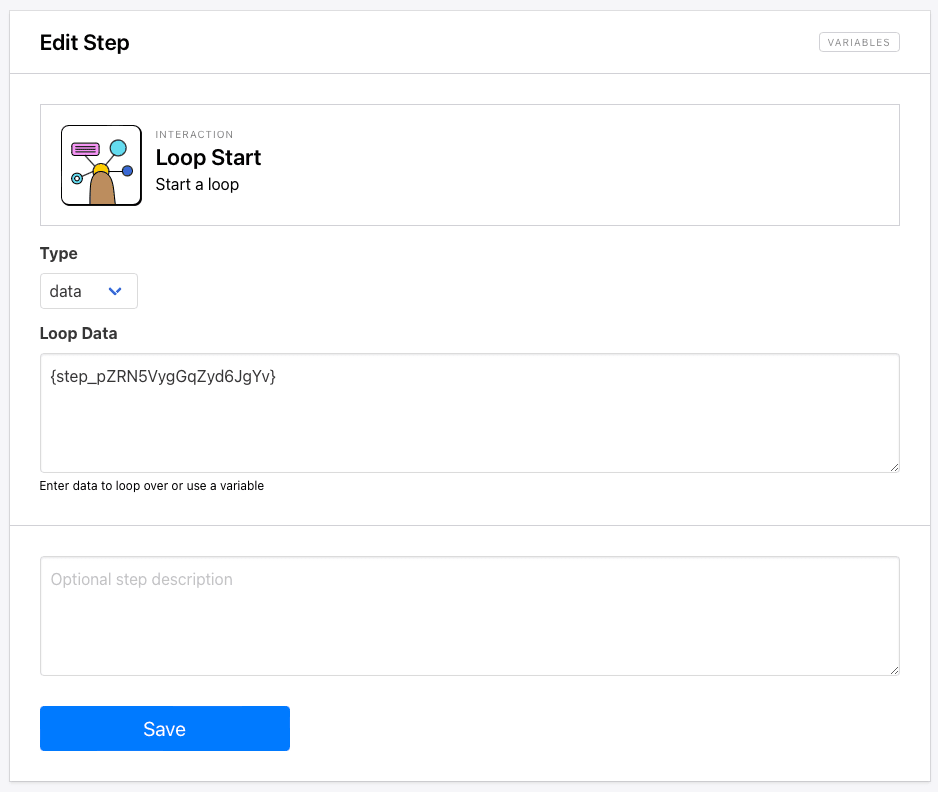
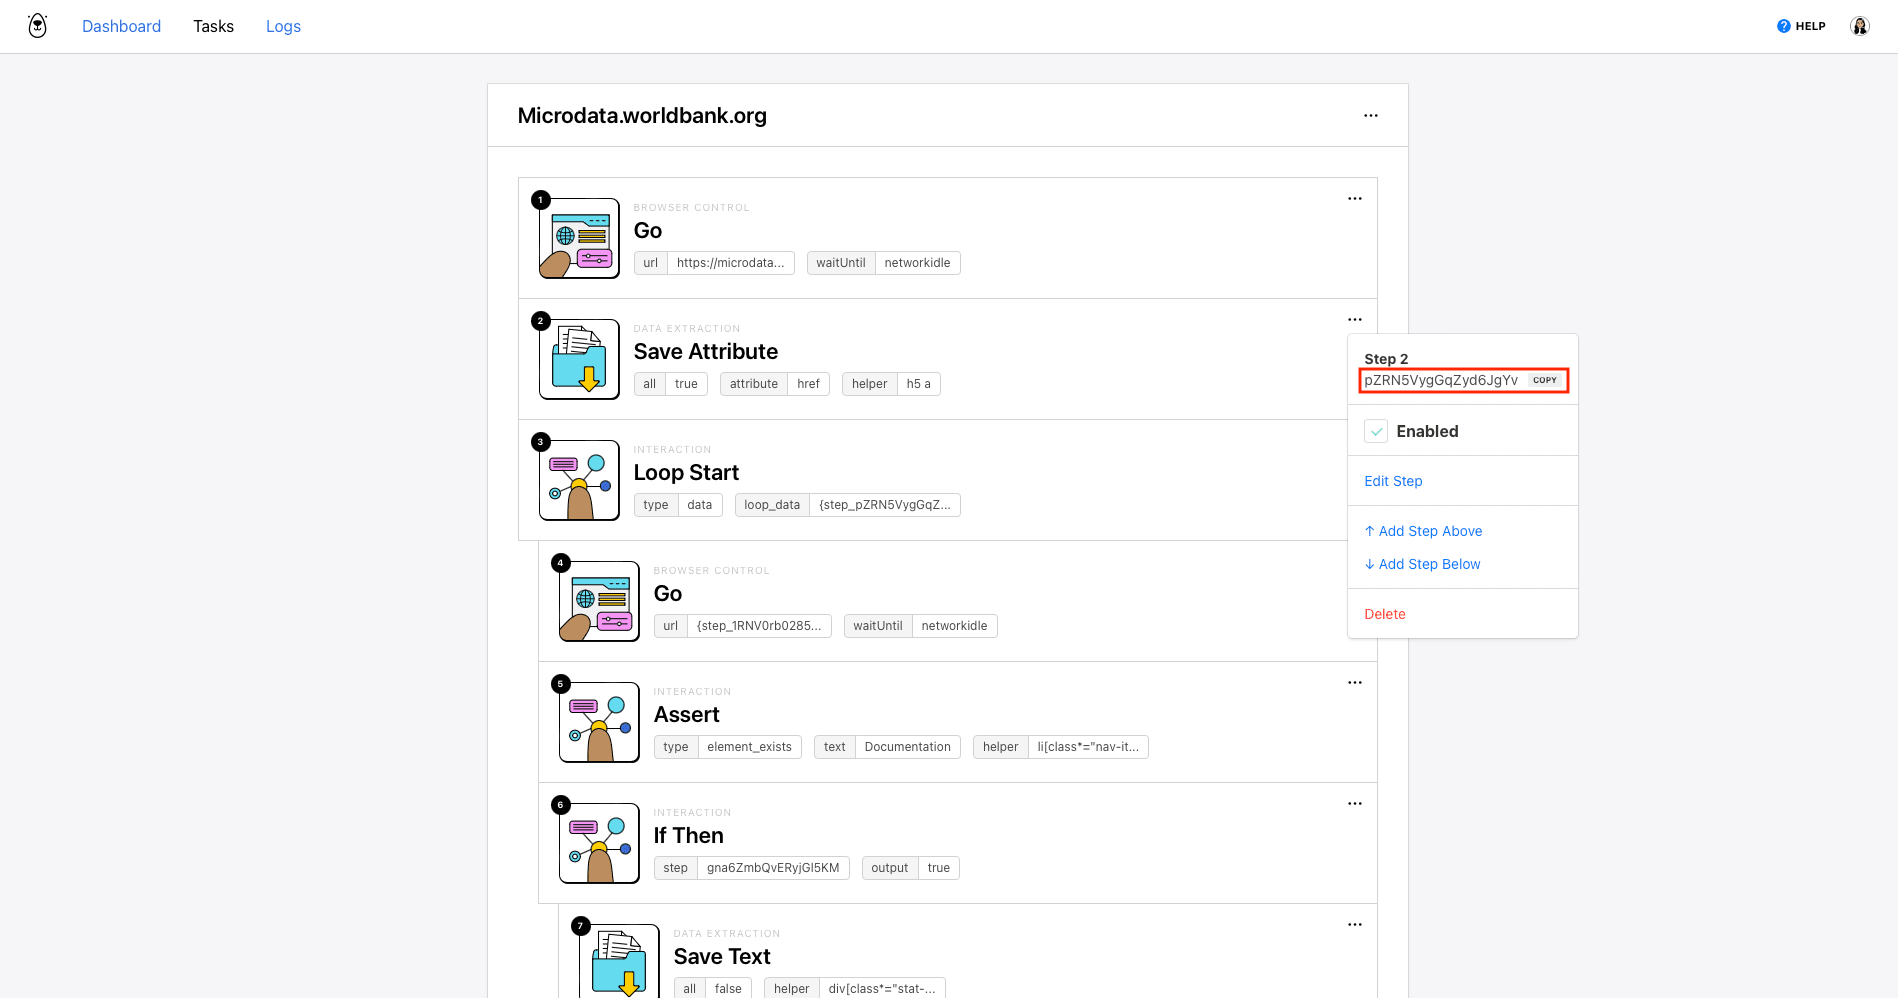
You can use {step_2} as the variable, but it’s best practice to use the step ID, which can be found by clicking the three-dot menu to the side of a step. Using the ID ensures that your steps are still correctly linked even if the order changes.
Click Save.
Step 4. Go
Add a new step and choose Go as the action. Use the loop start action's variable as the URL. Choose networkidle as the wait instructions.
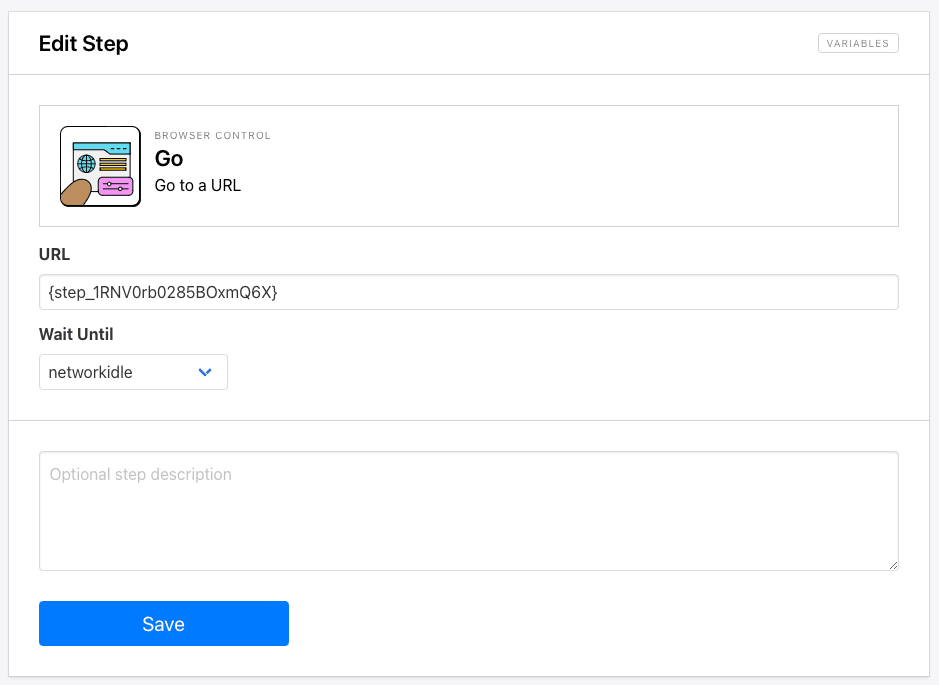
Save your changes.
Step 5. Assert
Since we only want to scrape studies with references in this example, we’ll use an assert step to determine whether or not a page has downloadable assets.
Add an Assert step to your task. Insert Helper config for the Documentation tab, and choose element_exists as the type. We’ll add Documentation as the text to ensure the correct tab is identified.
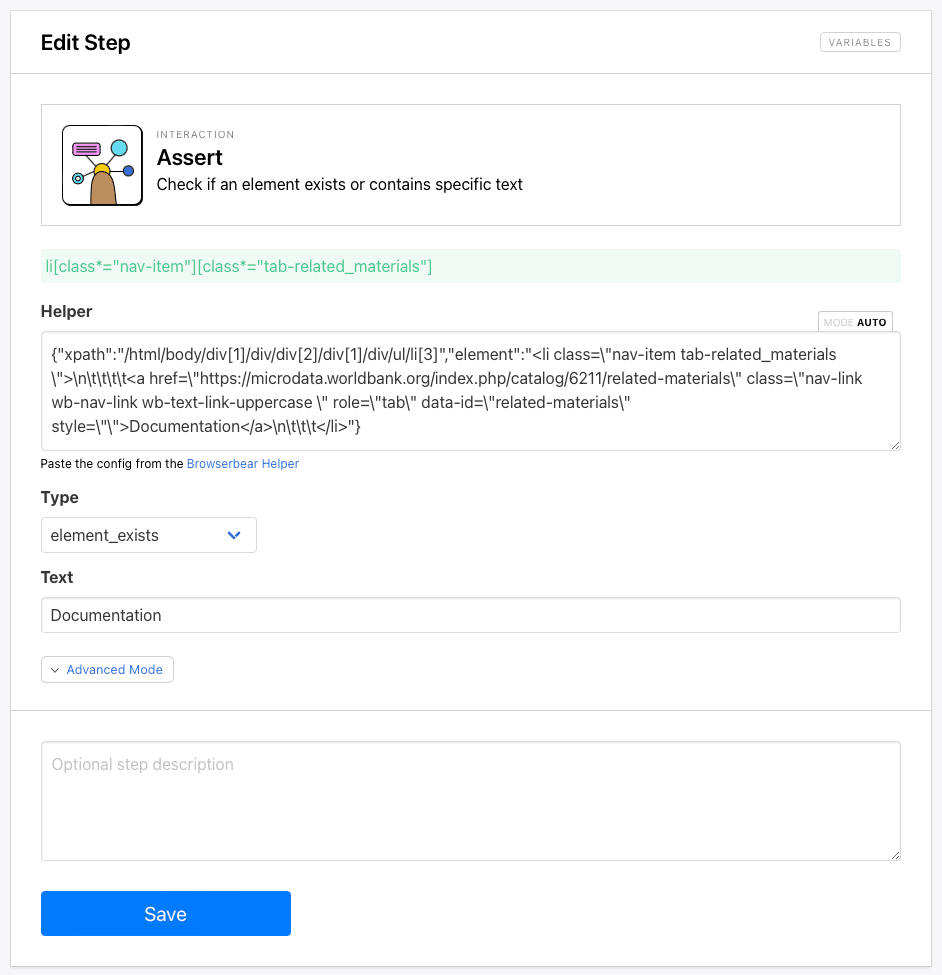
Click Save.
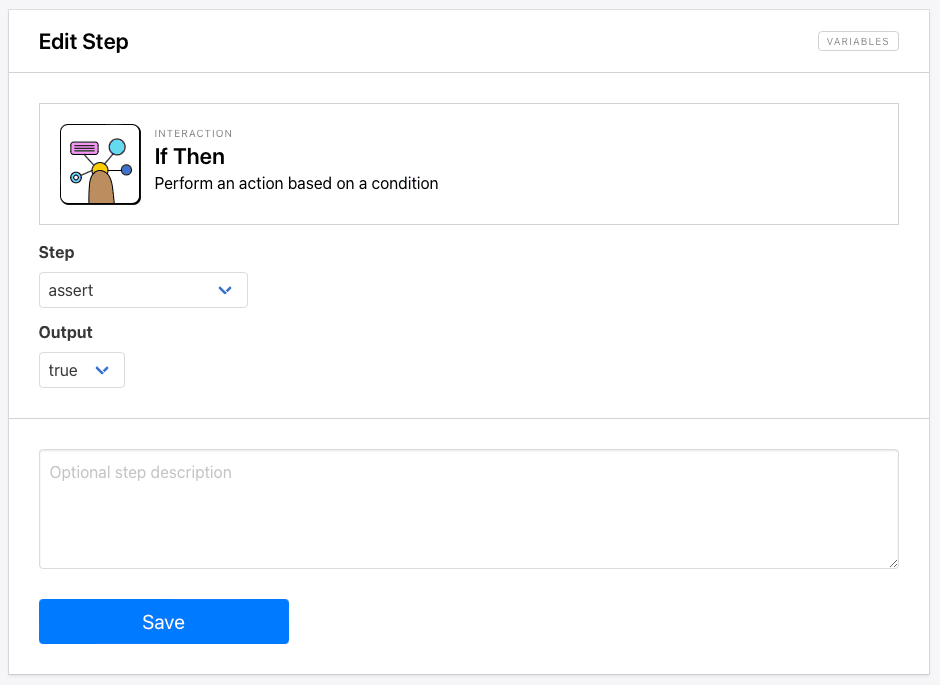
Step 6. If Then
Now, we’ll add a step that sets up an action based on a condition.
Choose If Then as your next step, and select your previous assert step as the condition data. Select true as the condition.

The logic that Browserbear is using to make decisions is now the following: If the Documentation tab exists, we’ll proceed to extract data. If it doesn’t, we’ll move on to the next link.
Step 7. Save Text
Add a Save Text step to your task. Add Helper config that identifies the text container showing when the page was last updated.
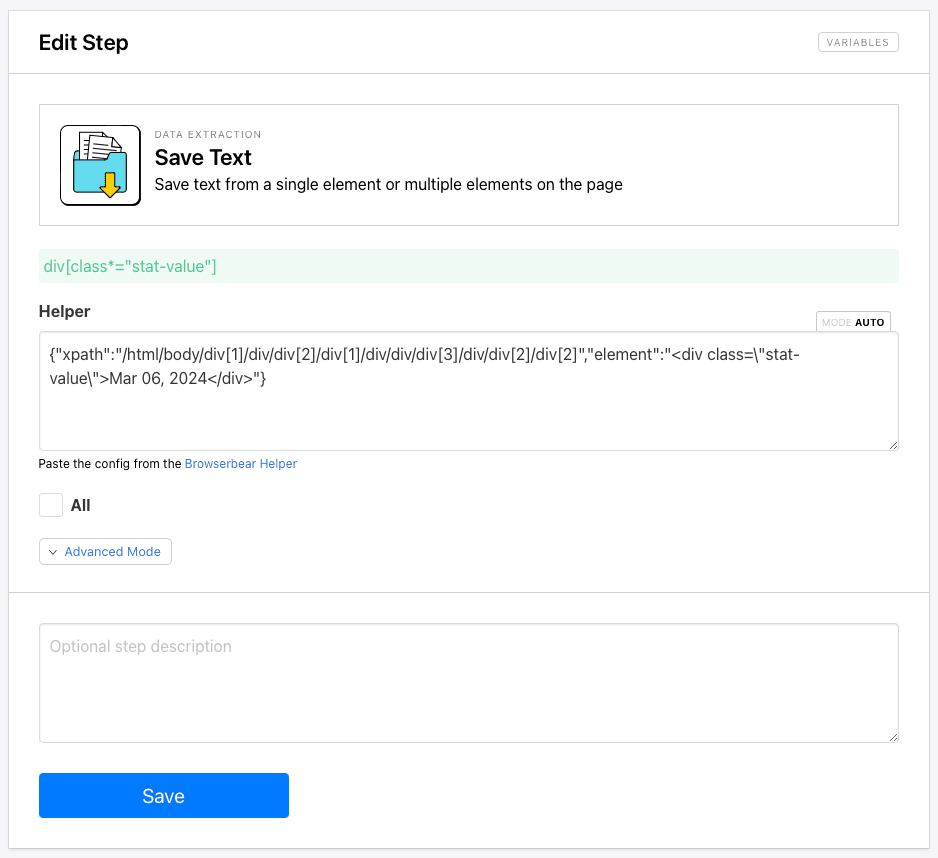
Click Save.
Step 8. If Then
The If Then action only applies the following step to your condition, so we have to repeat it prior to each conditional action we want to take.
Choose If Then as your next step, and select your assert step as the condition data. Select true as the condition.
Click Save.
Step 9. Save Structured Data
This step will scrape a handful of data points from a parent container on each study page.
Add a new step to your task and choose Save Structured Data as the action.
Use the Browserbear Helper Chrome extension to generate config for the parent container of the publication's description, then enter the details for each child element.
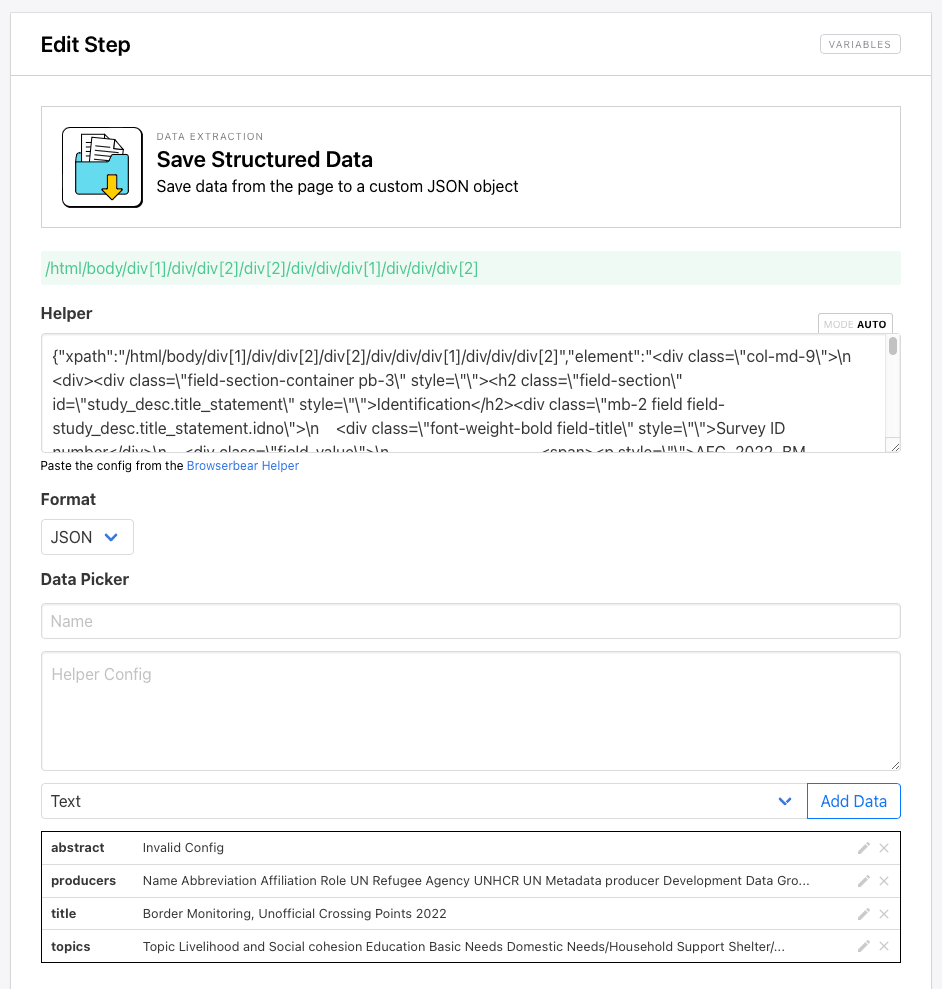
Be sure to click Add Data as you set up each data picker item.
Step 10. If Then
Choose If Then as your next step, and select your assert step as the condition data. Select true as the condition.

Click Save.
Step 11. Click
The next step clicks the Documentation tab so we can download assets.
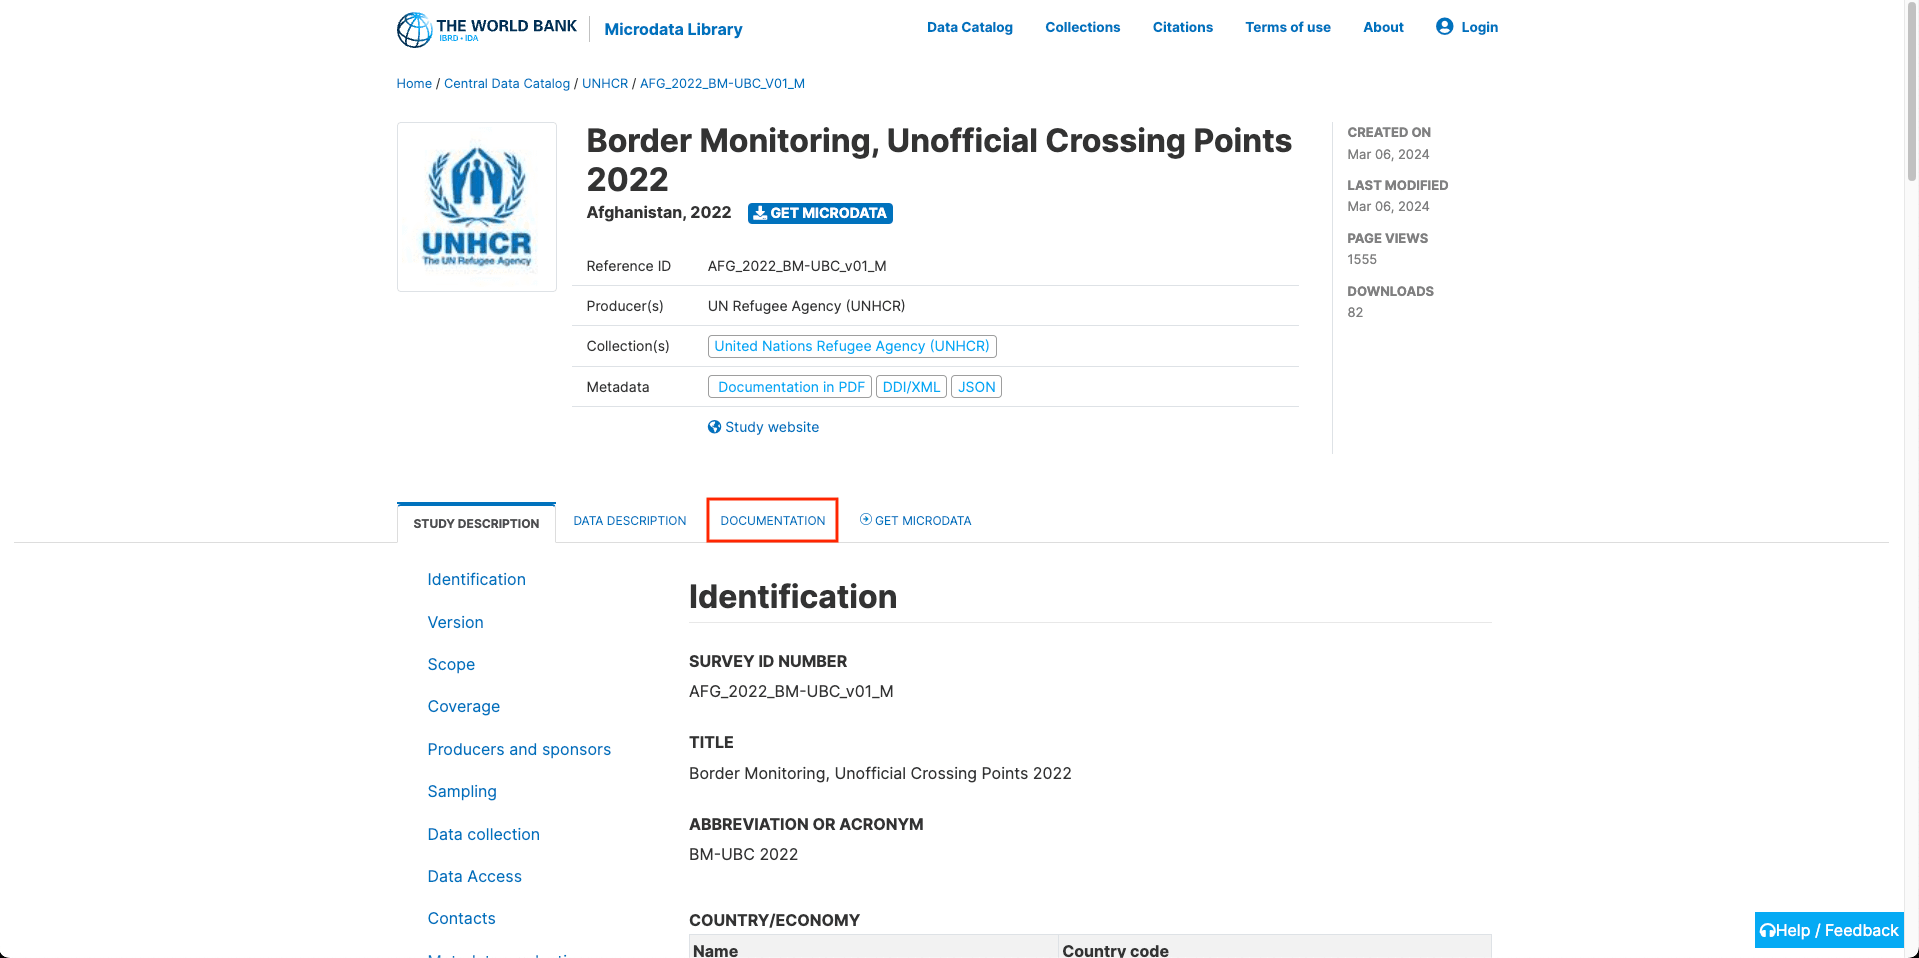
Add a Click step to your task, and insert Helper config for the Documentation button.
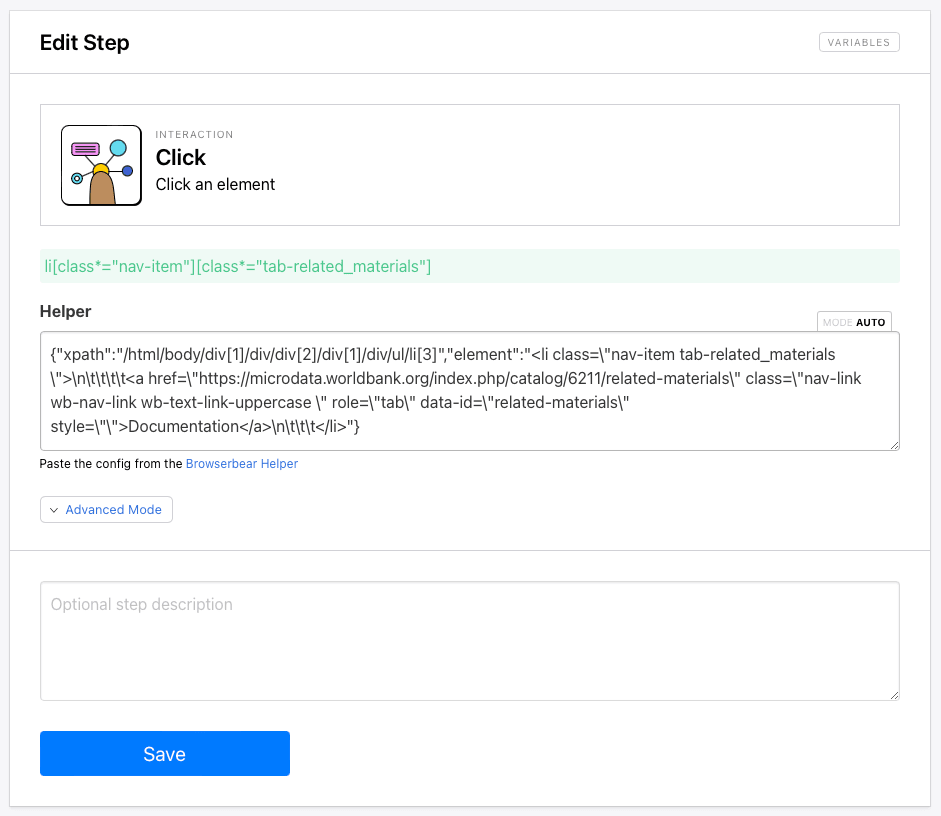
Save your task, then move on.
Step 12. If Then
Choose If Then as your next step, and select your assert step as the condition data. Select true as the condition.

Click Save.
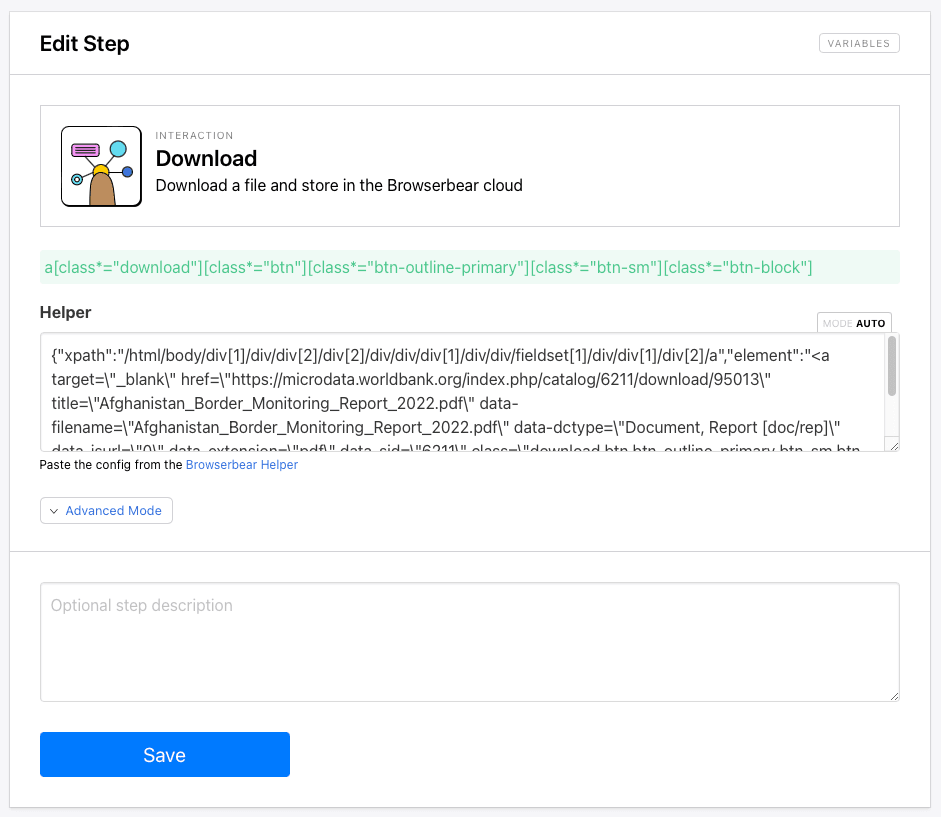
Step 13. Download
The final step downloads resources in a variety of file types, storing it on Browserbear’s servers so you can route it to a storage system of your choice.
Add a Download step to your task. Identify the Download button and generate config.
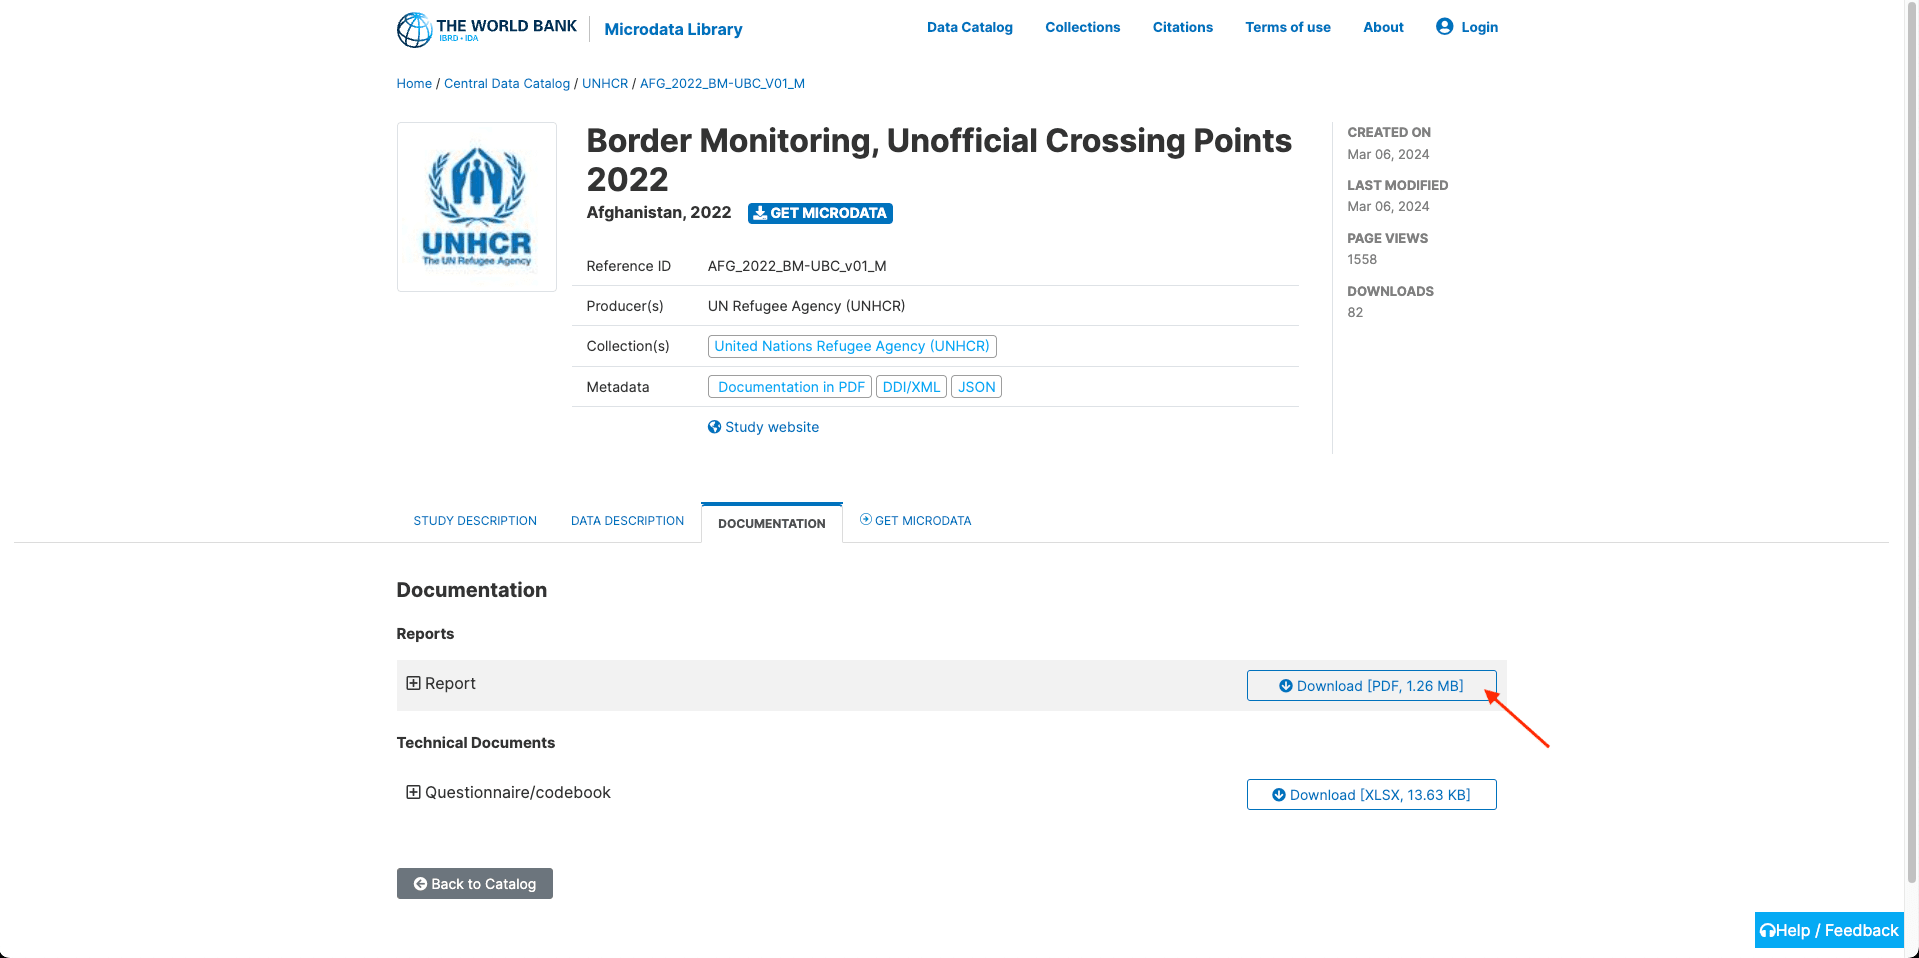
Insert your config into the Helper section of the step setup.
Save your task. It should look something like this:
Run it to ensure it yields expected results, then continue to the next step.
Bear Tip 🐻: Resources downloaded using Browserbear are stored for 24 hours. To have access for a longer period, set up an automation to save these resources in a permanent location like Google Drive, Dropbox, or OneDrive.
Set Up Your Browserbear Task to Run on a Schedule
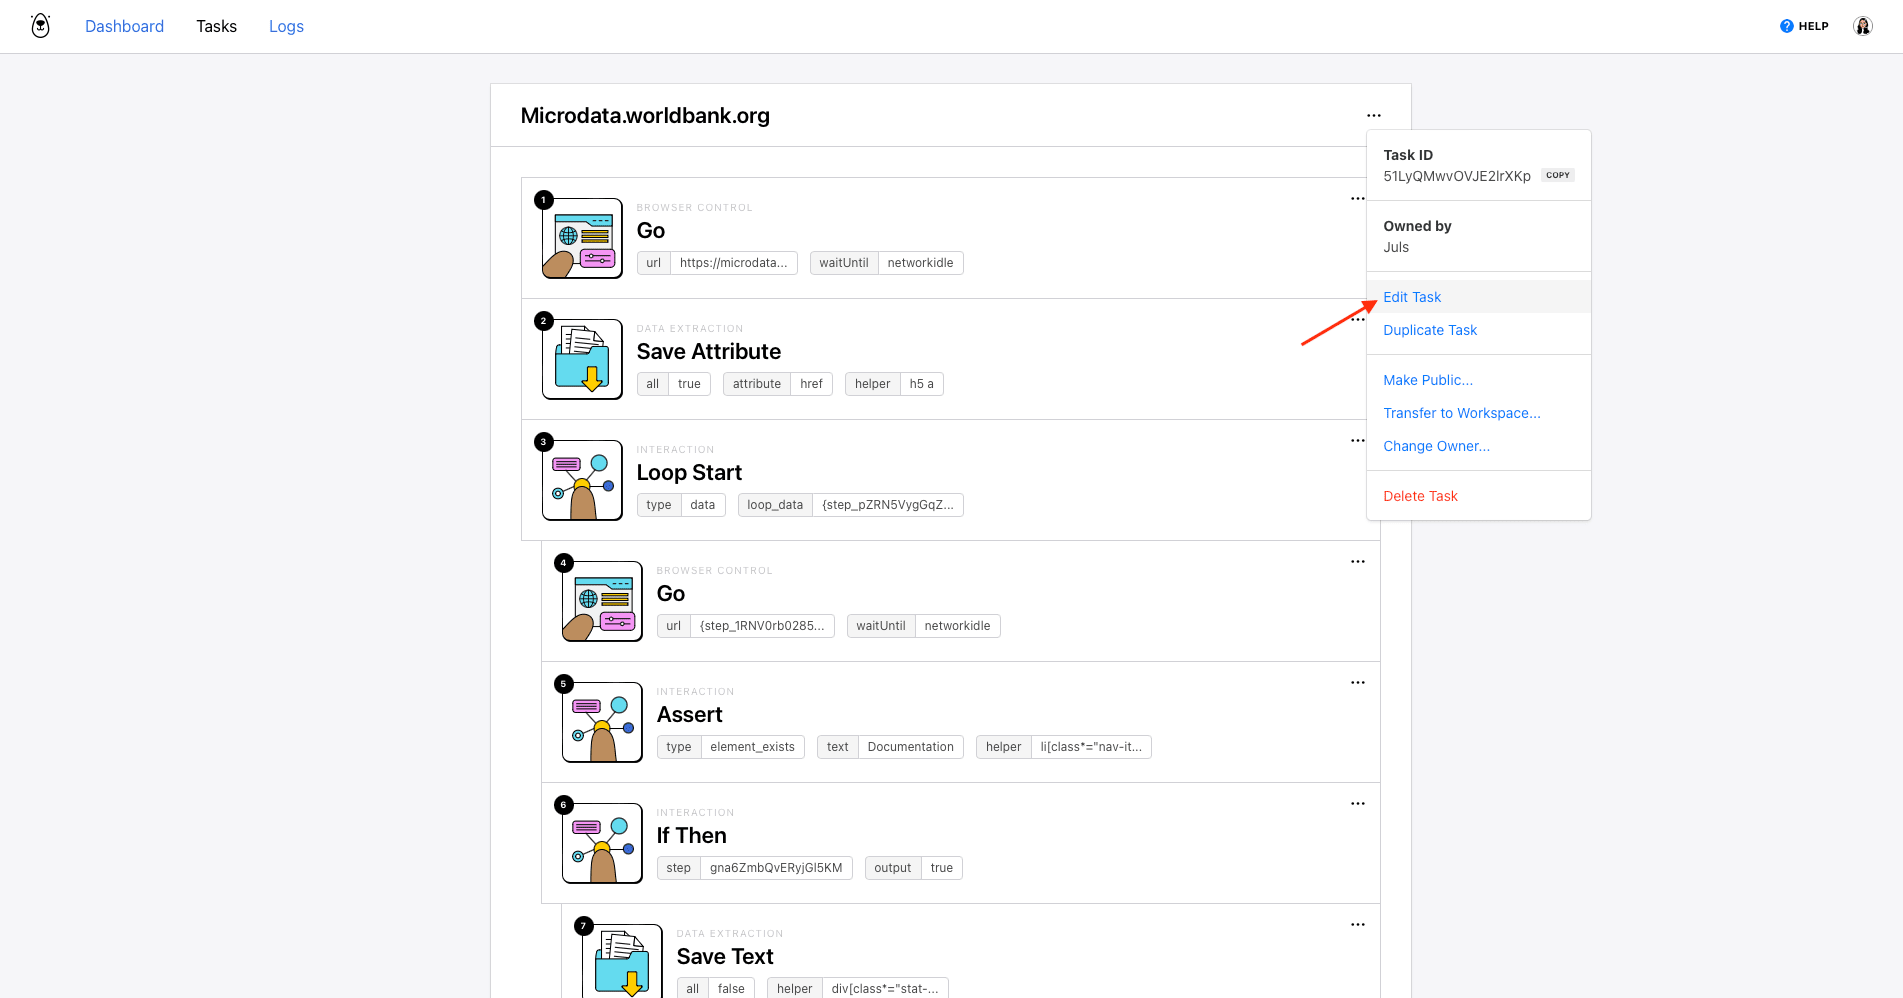
Browserbear has a built-in scheduling feature that you can use to run your task periodically. You can set it up by clicking the three-dot menu on your task page, then clicking Edit Task.
Then, open the Advanced menu and look for the Schedule option.
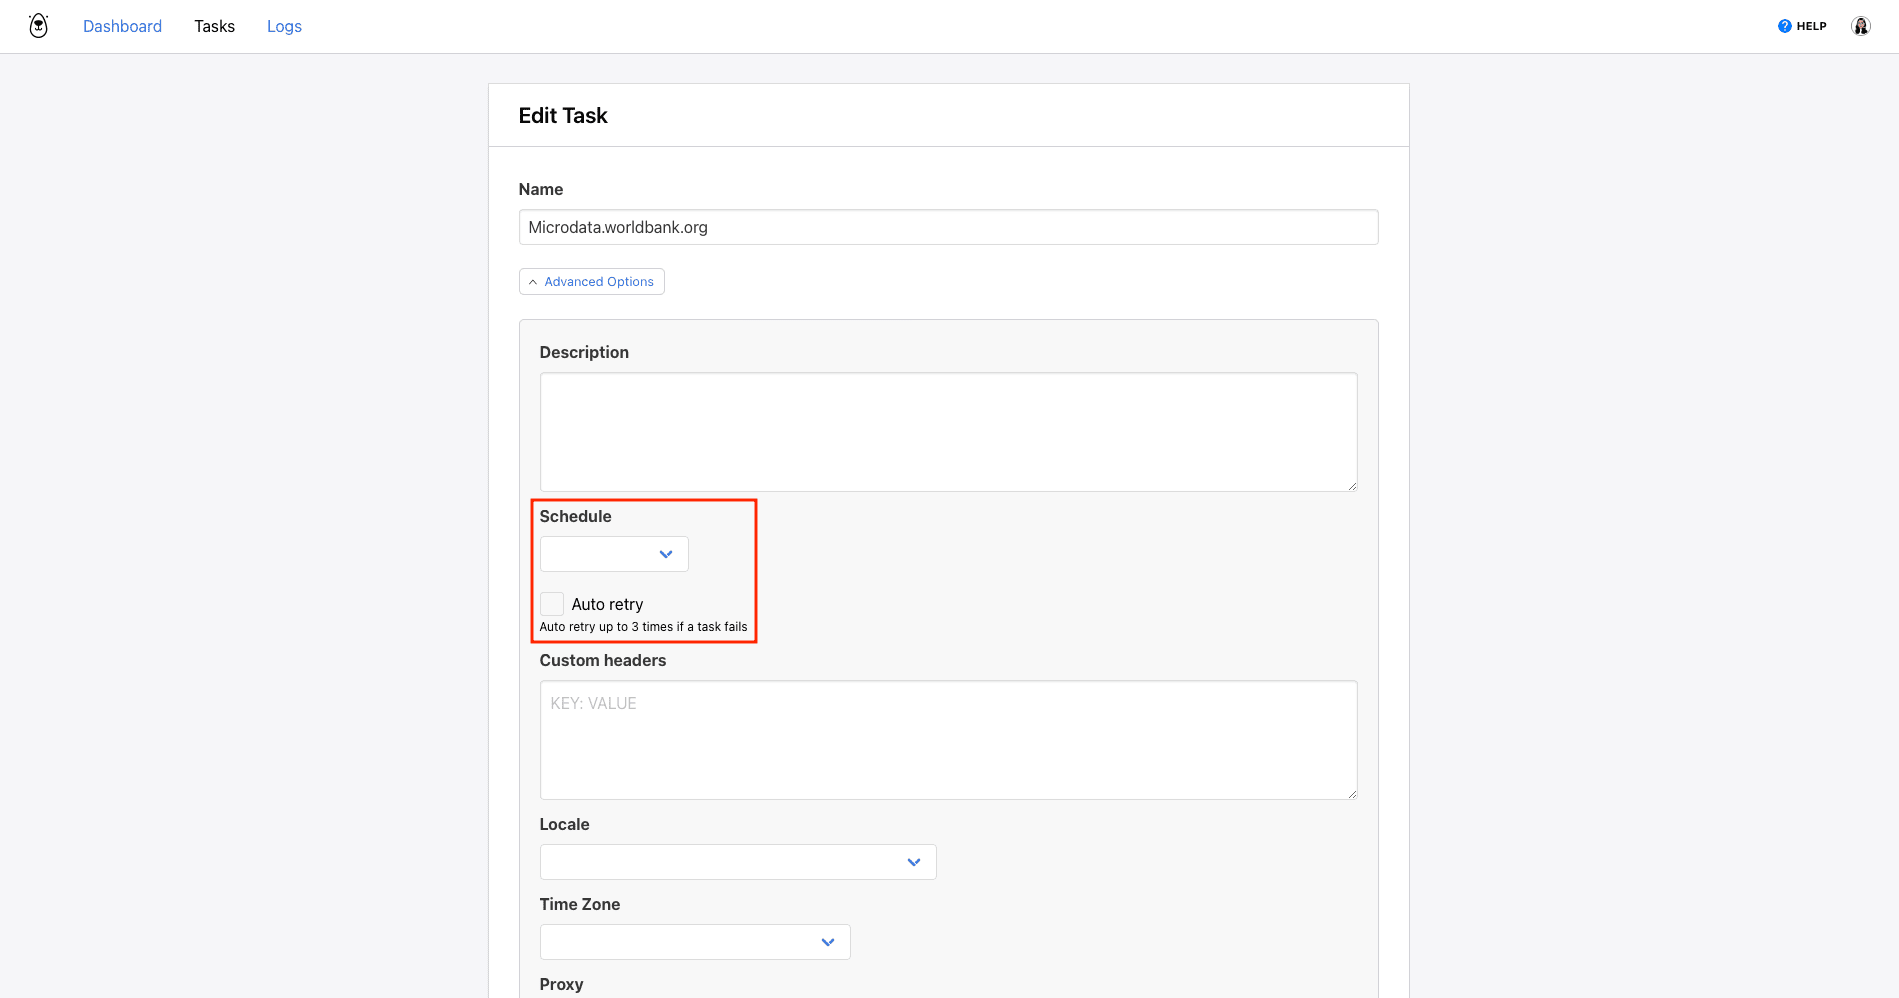
You can choose from the following options:
- Once an hour
- Once a day - runs at 00:00 UTC
- Twice a day - runs at 00:00 UTC and 12:00 UTC
Click Save.
Bear Tip 🐻: If you need to run your task at a different frequency, a simple two-step zap triggered by Schedule by Zapier will get the job done.
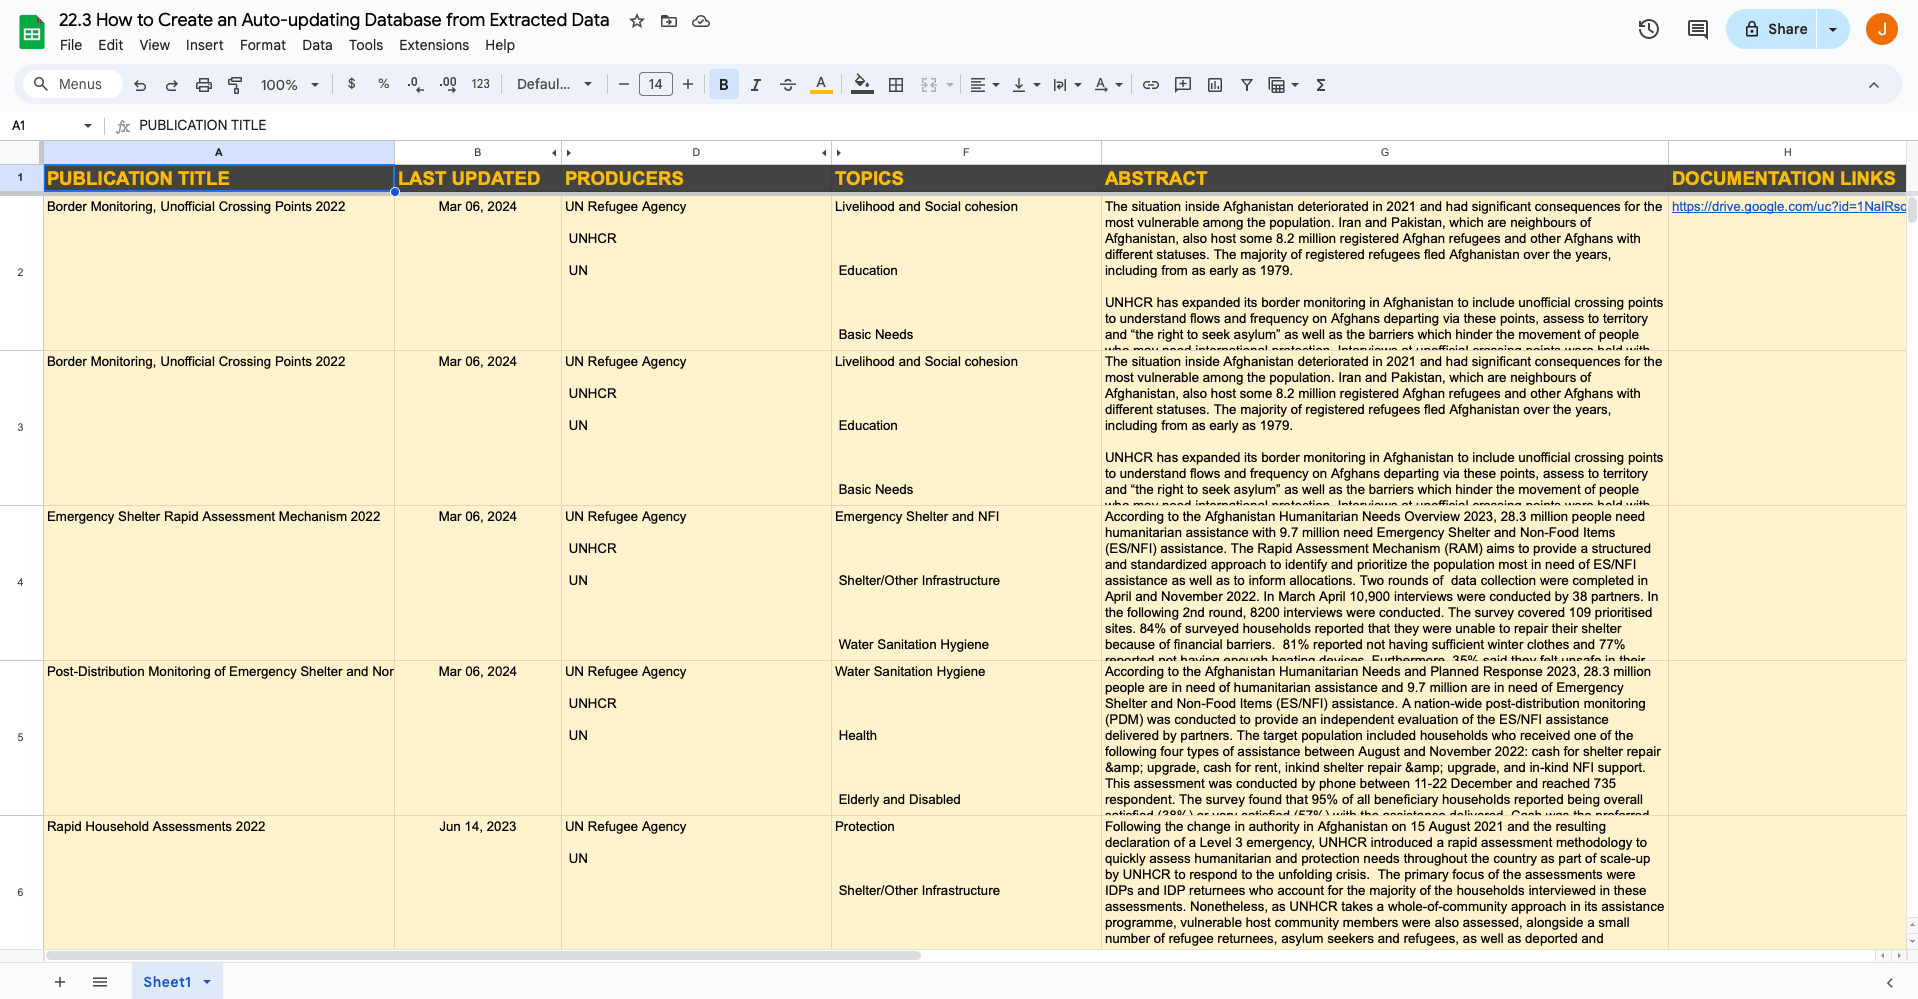
Build a Google Sheets Spreadsheet to Store Data
We chose Google Sheets as this tutorial’s cloud software for data hosting due to its versatile formulas, Apps Script functionality, and ability to easily create multiple new rows at once. You can always adapt this process to use with a different app of your preference.
Log into your Google Sheets account and create a new spreadsheet. We’ll only use one to store data for now, although you an add additional pages for sorting if needed.
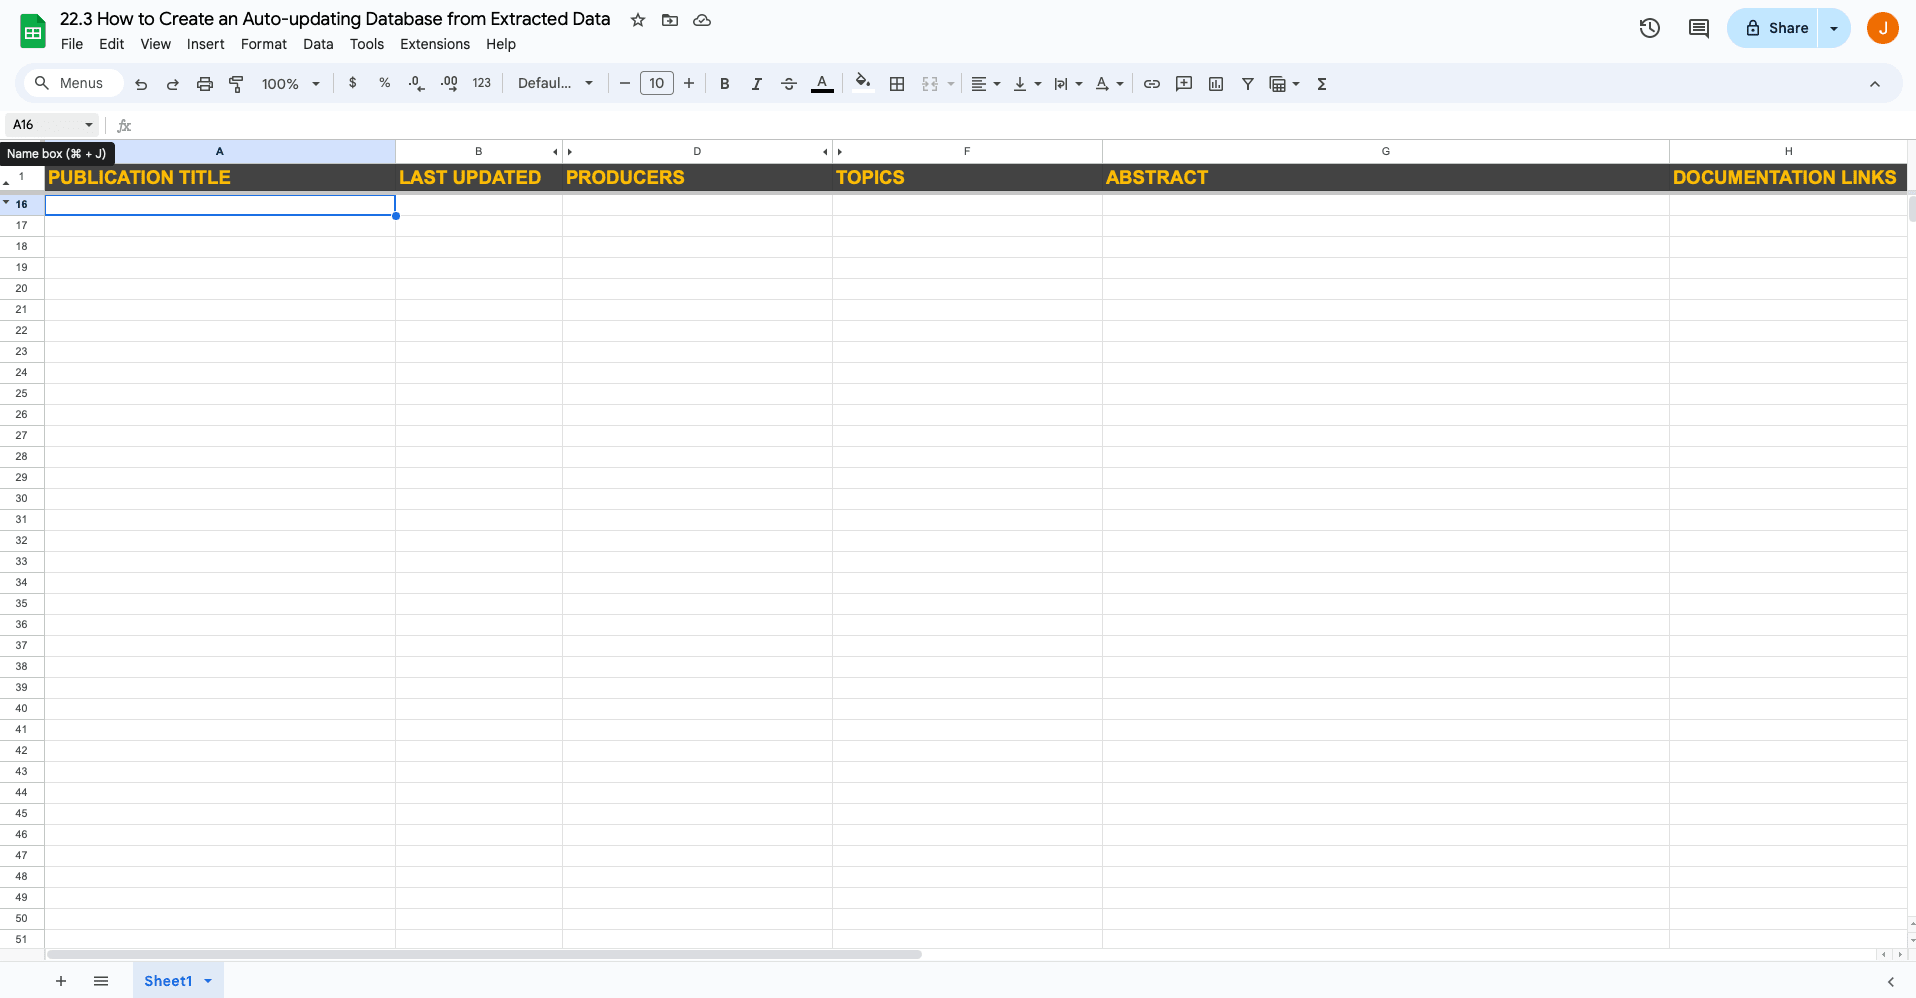
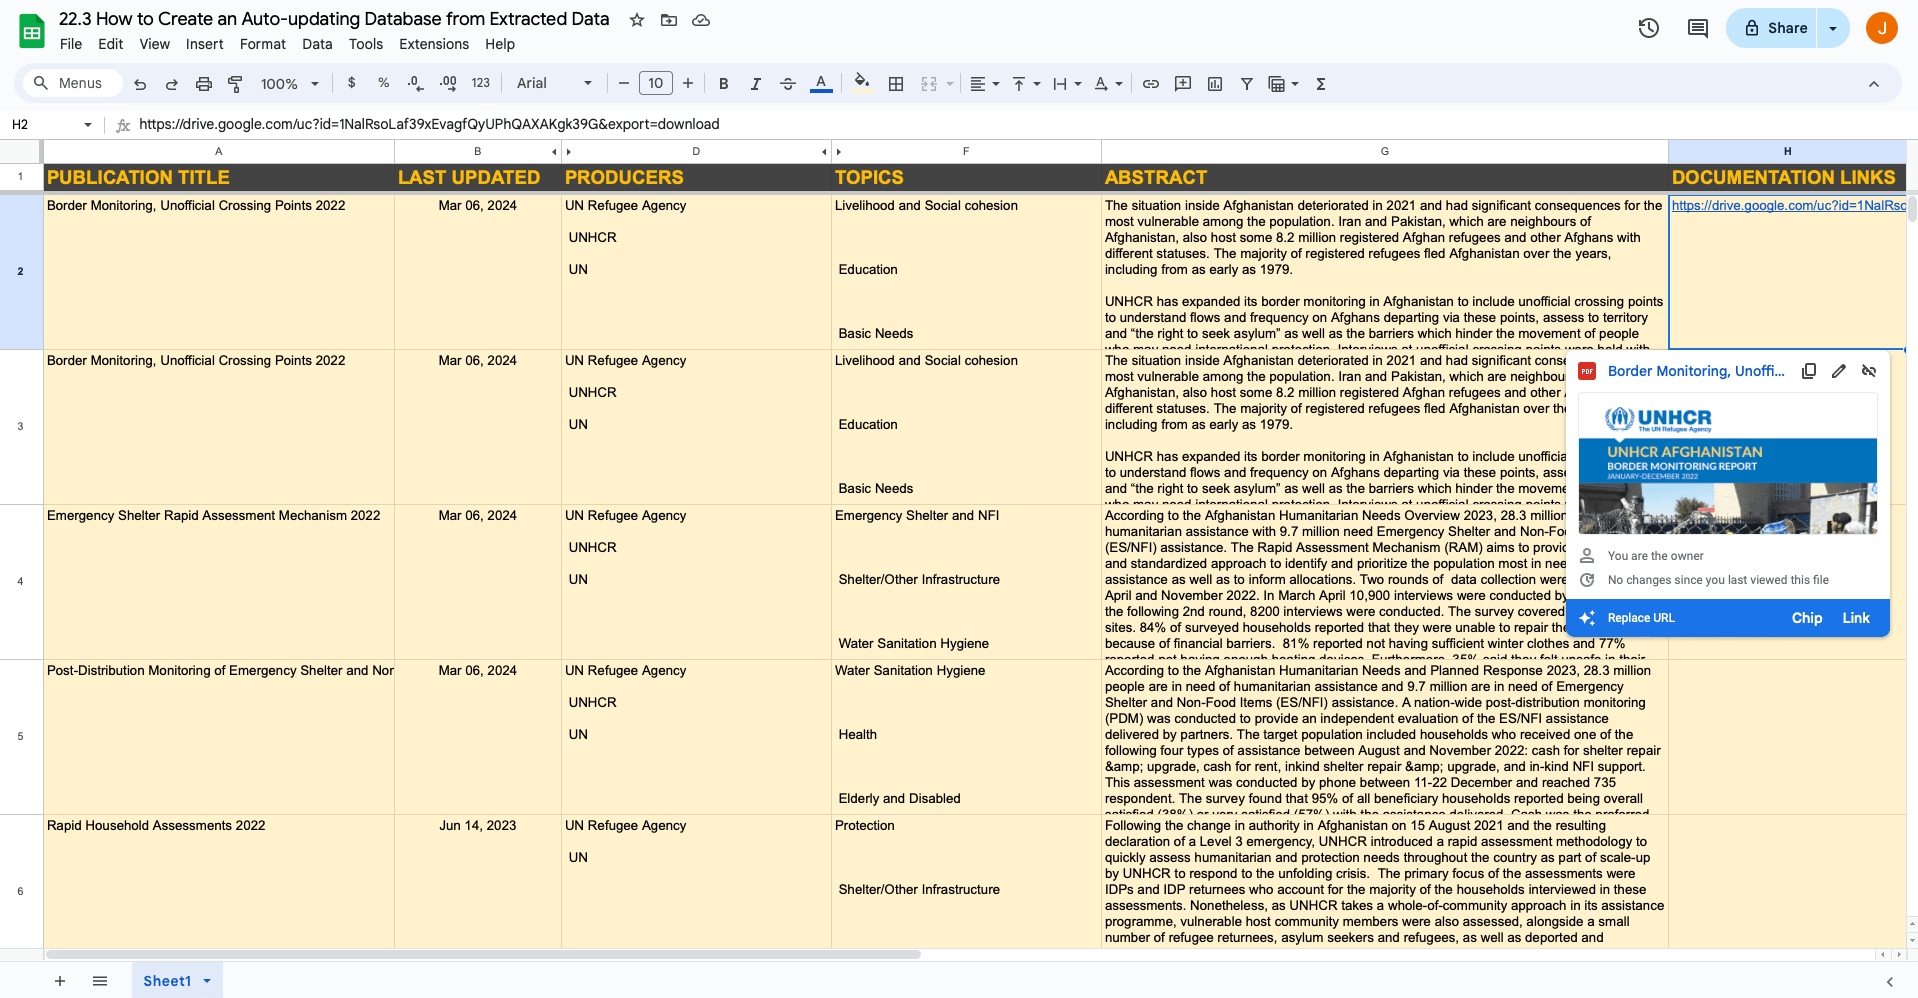
Create headers for:
- Publication Title
- Last Updated
- Producers
- Topics
- Abstract
- Documentation Links
Format them however you’d like.
Consider using formulas, filters, or scripts to help organize and sort your data more effectively. For instance, when working with our scraped Producers and Topics data, you can remove unnecessary table headers by using substituteand trim formulas. This way, you are left with only essential information.
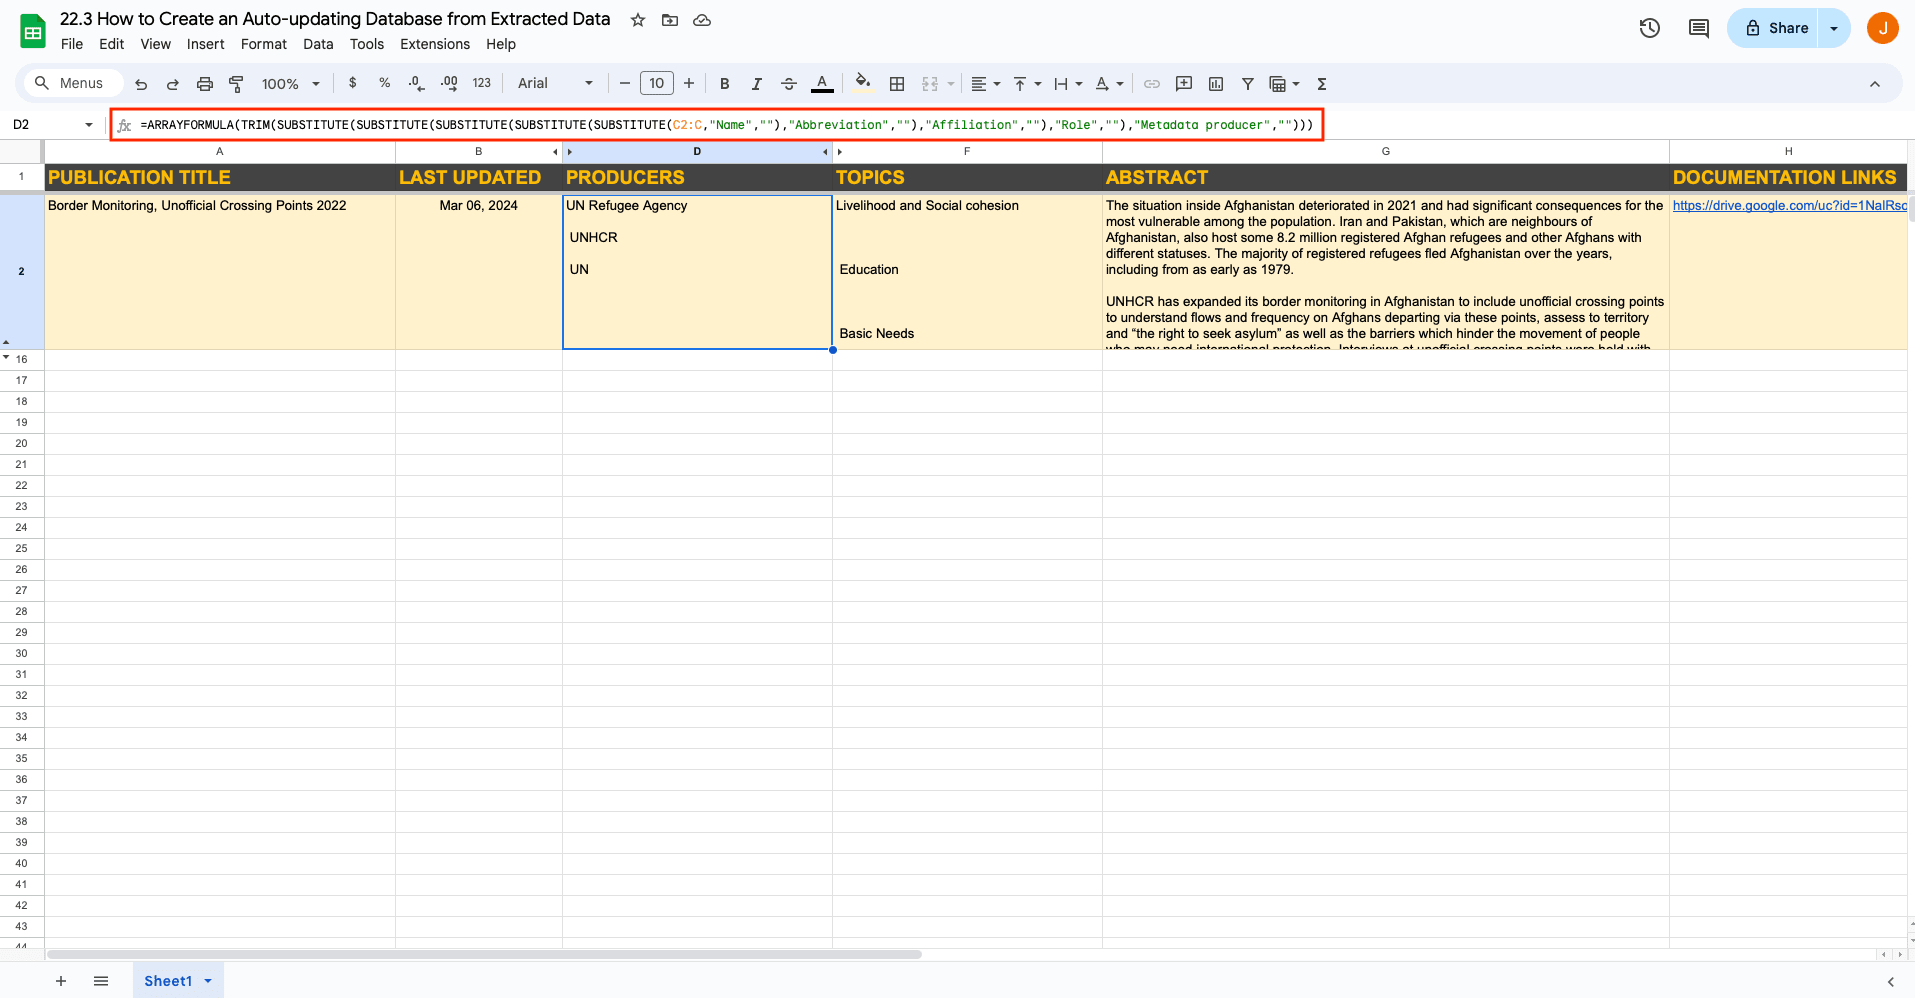
Applying arrayformula to header cells of columns that require formulas is also helpful because it will automatically apply the formula to new rows.
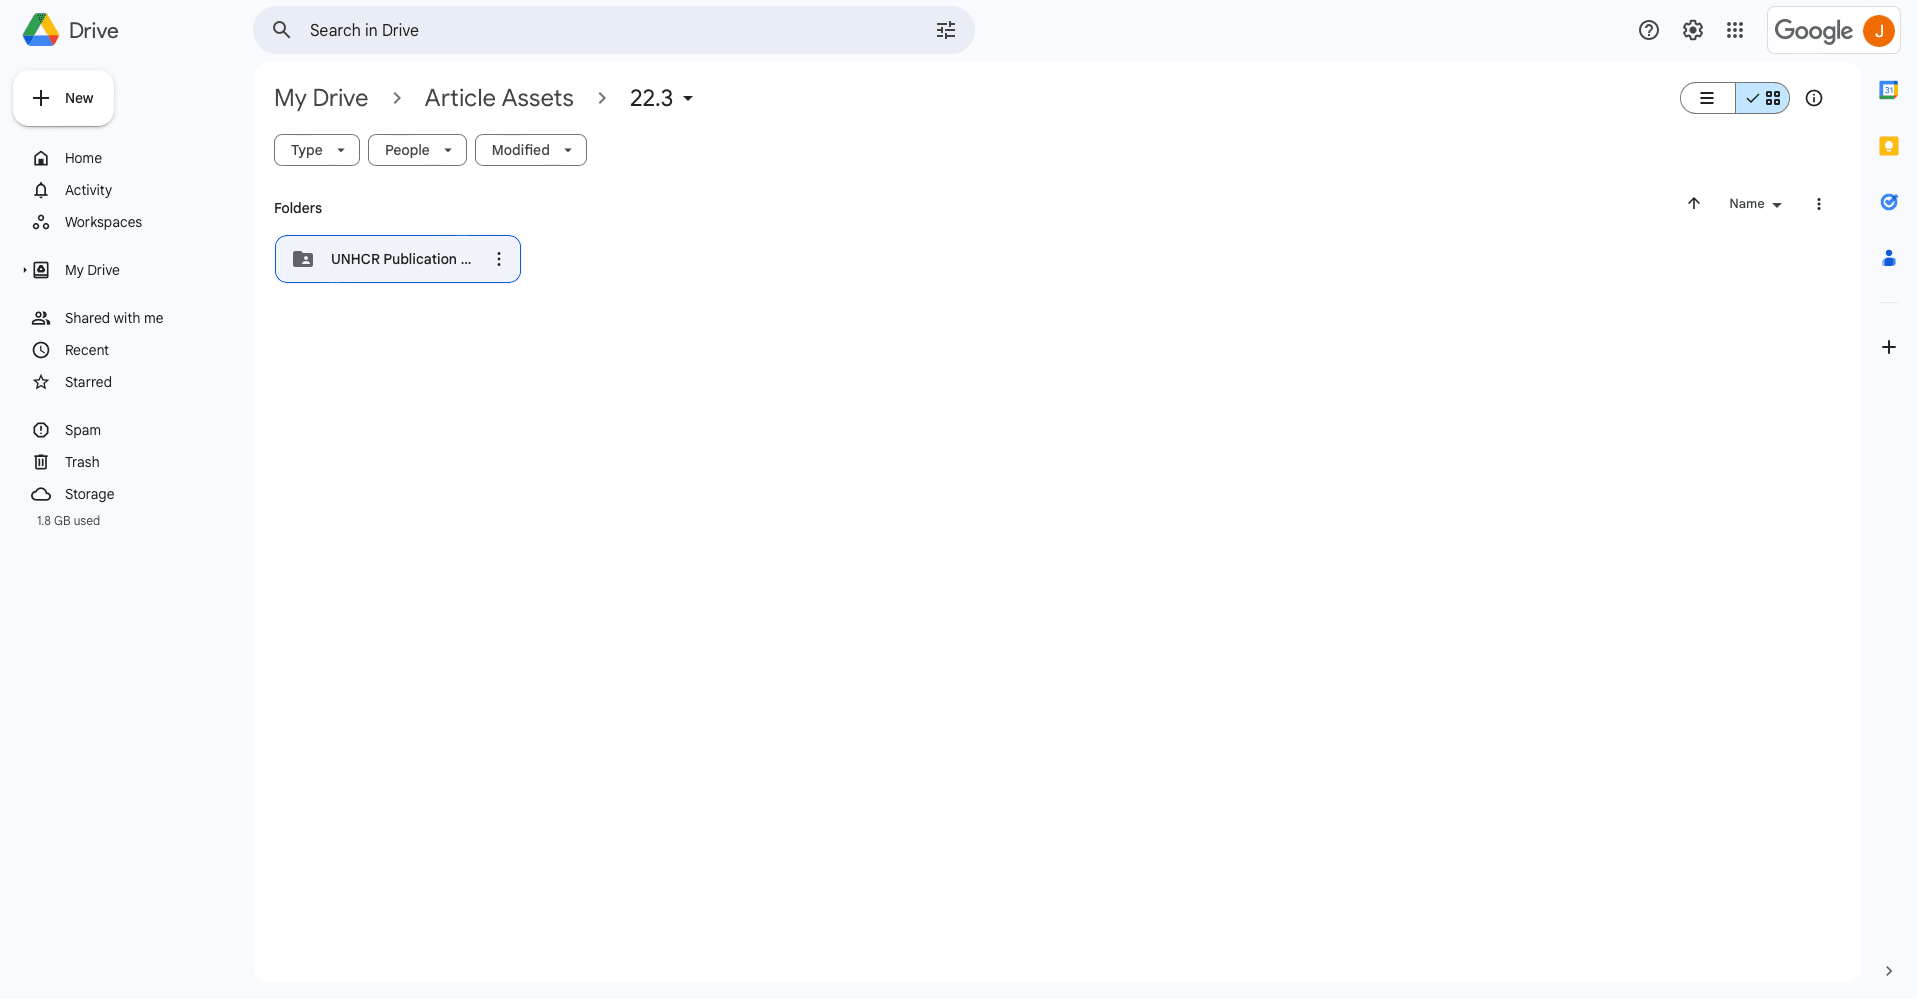
Prepare a Google Drive Folder to Store Downloaded Assets
Since Browserbear downloads are temporary, you’ll need to host downloaded assets elsewhere. We choose Google Drive for this tutorial.
Log into your Google Drive account and create a folder to store the assets.
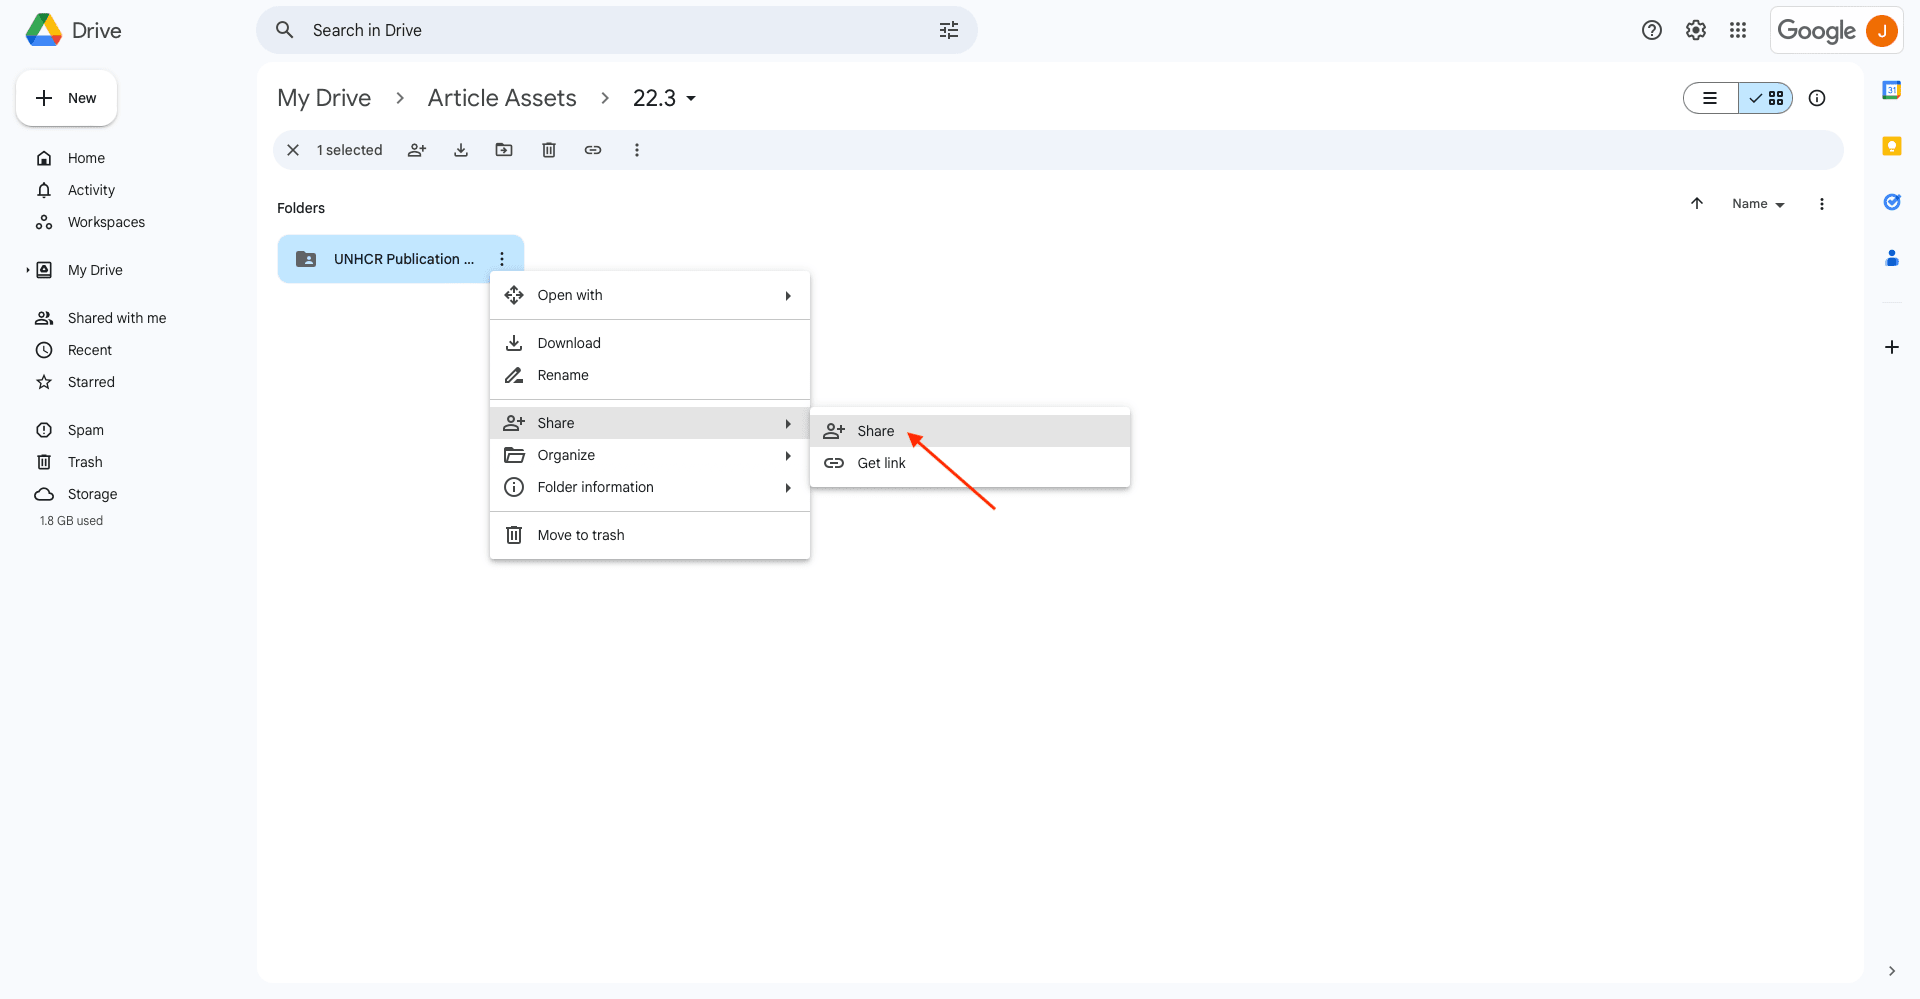
Right-click or click the three-dot menu next to the folder name. Click Share to open the sharing menu.
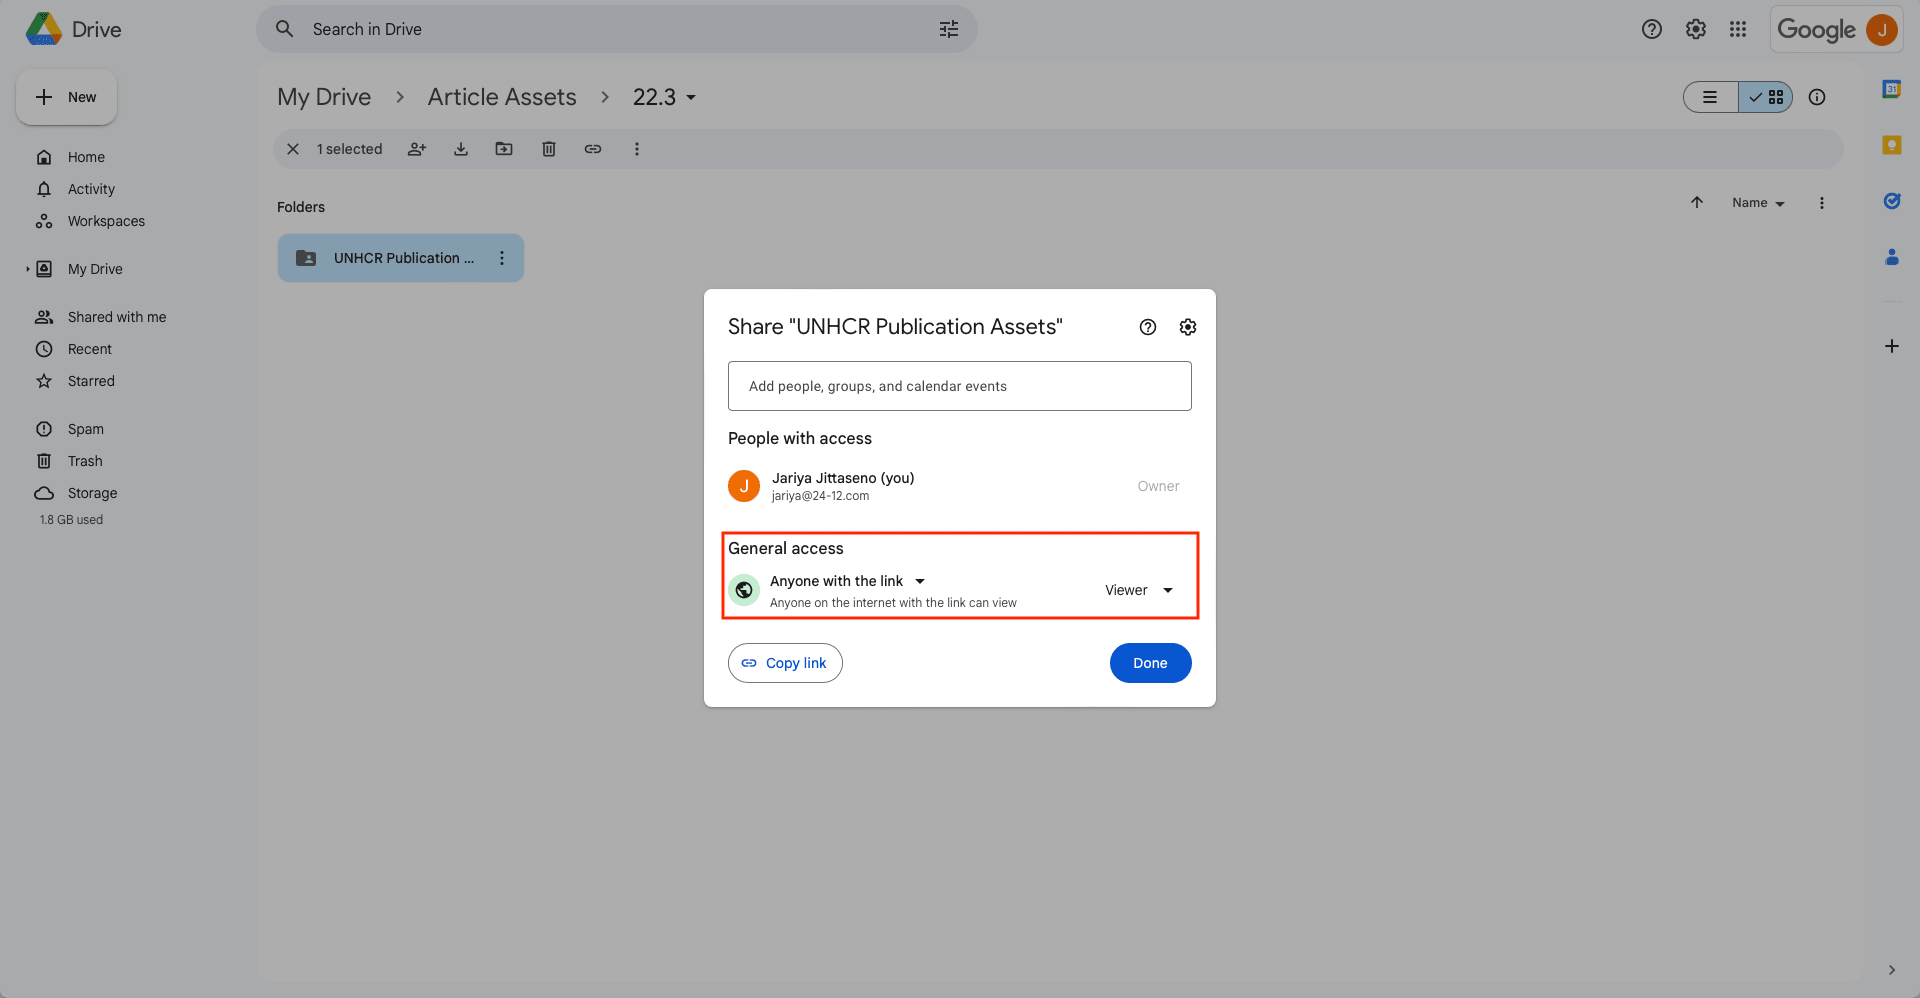
Change the access permissions to Anyone with the link. This ensures Zapier can interact with the folder, upload files, and send links to your Sheet.
Set Up a Zap to Send Extracted Data to Google Sheets
All that’s left is to set up a zap that ties your browser task to your spreadsheet and storage solution.
Log into your Zapier account, and create a new zap. Set up the following events:
Trigger: Run Finished in Browserbear
Choose Browserbear as the app and Run Finished as the event. You’ll need to connect your Browserbear account using your API key.
Once your account is connected, choose the correct task.
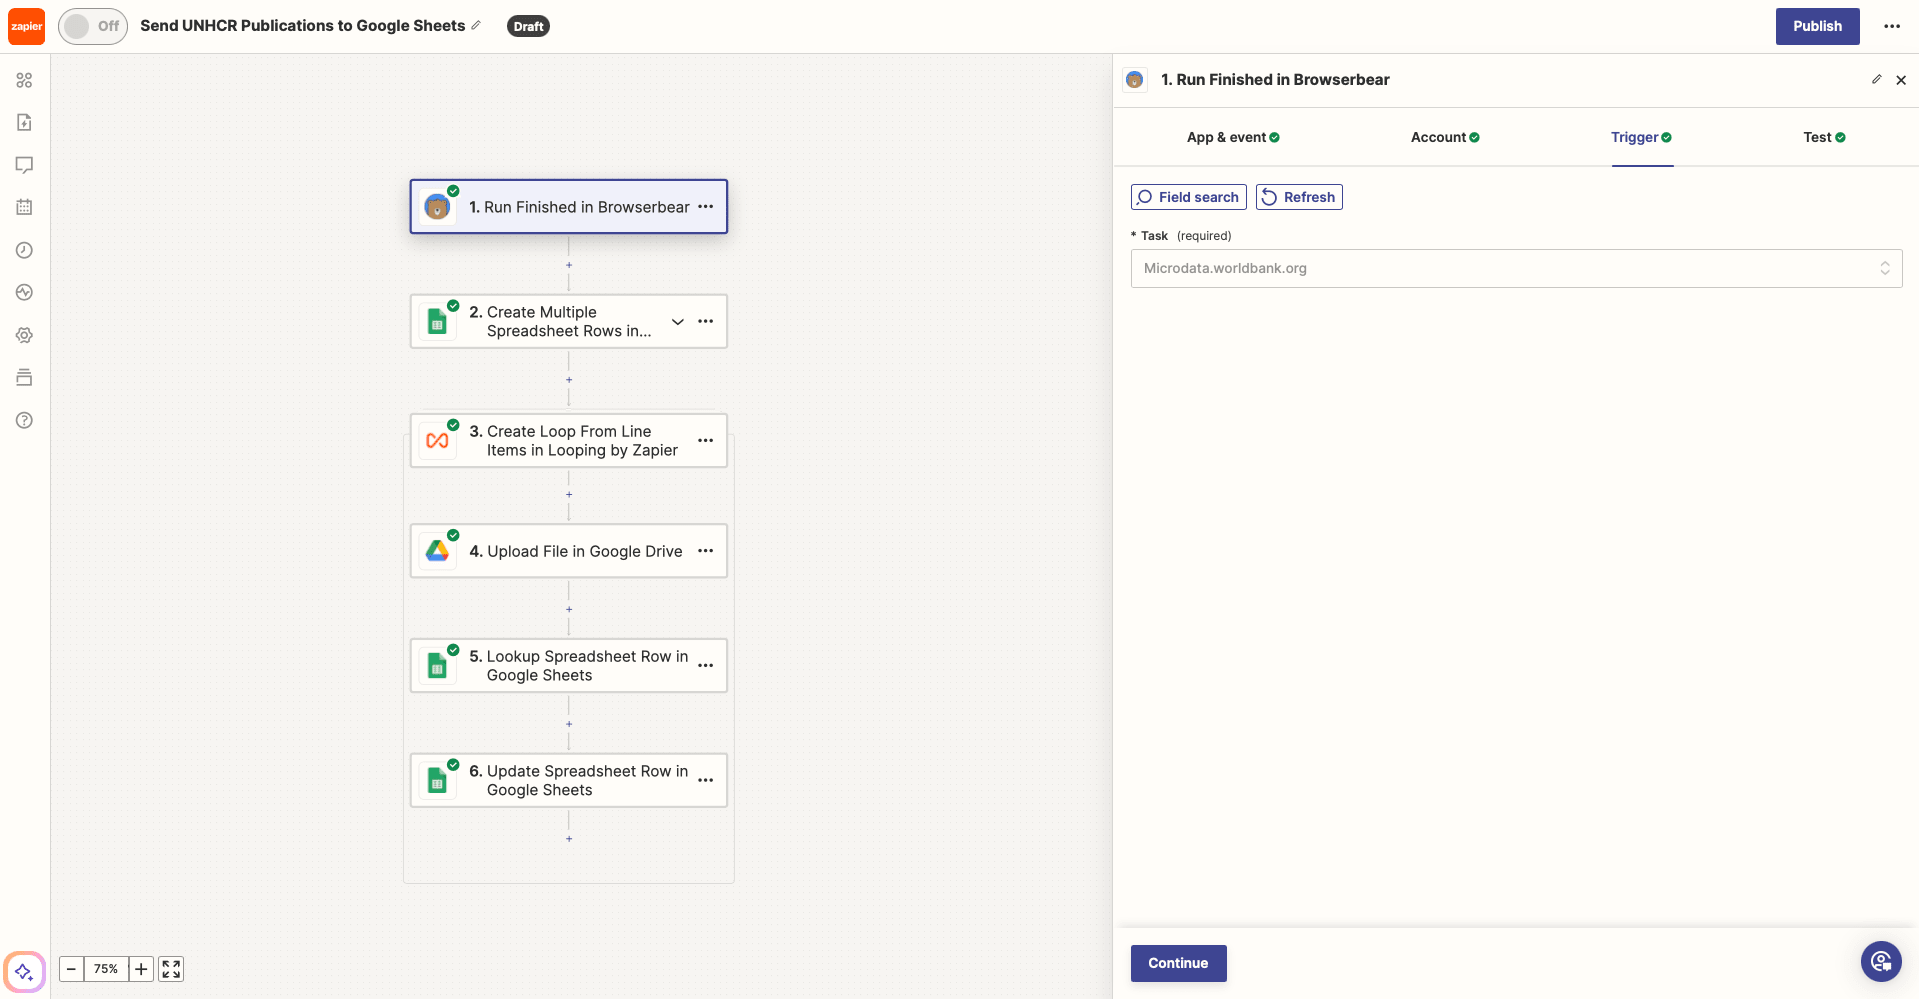
Test the trigger to ensure Zapier is able to retrieve output.
Action: Create Multiple Spreadsheet Rows in Google Sheets
Choose Google Sheets as the app and Create Multiple Spreadsheet Rows as the event. If your Sheets account isn’t connected yet, you will be prompted to do so.
Set up the action by selecting the right spreadsheet and worksheet, then map your task output to their corresponding columns.
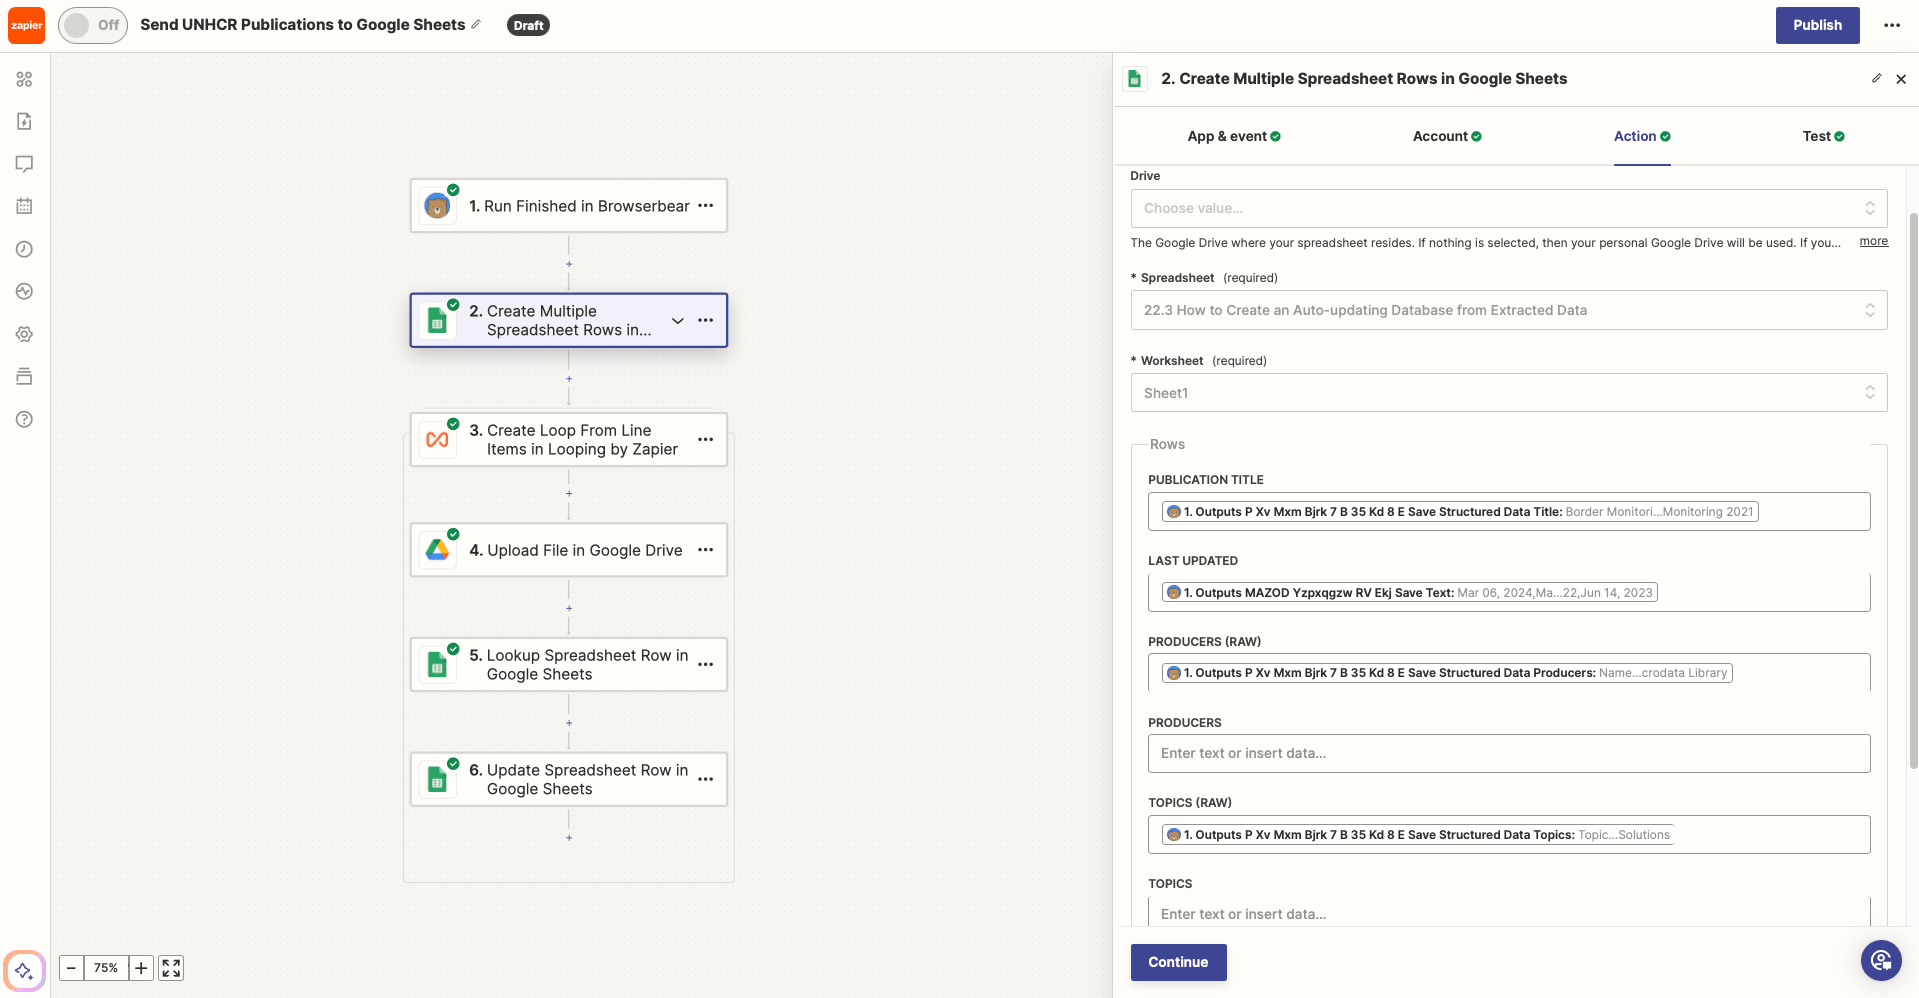
Test the action. You should see your spreadsheet populate itself with scraped output.
Action: Create Loop From Line Items in Looping by Zapier
Choose Looping by Zapier as the app and Create Loop From Line Items as the event.
Set up the action by specifying the values to loop, which will be your publication links and publication titles. Map these output items to their corresponding keys.
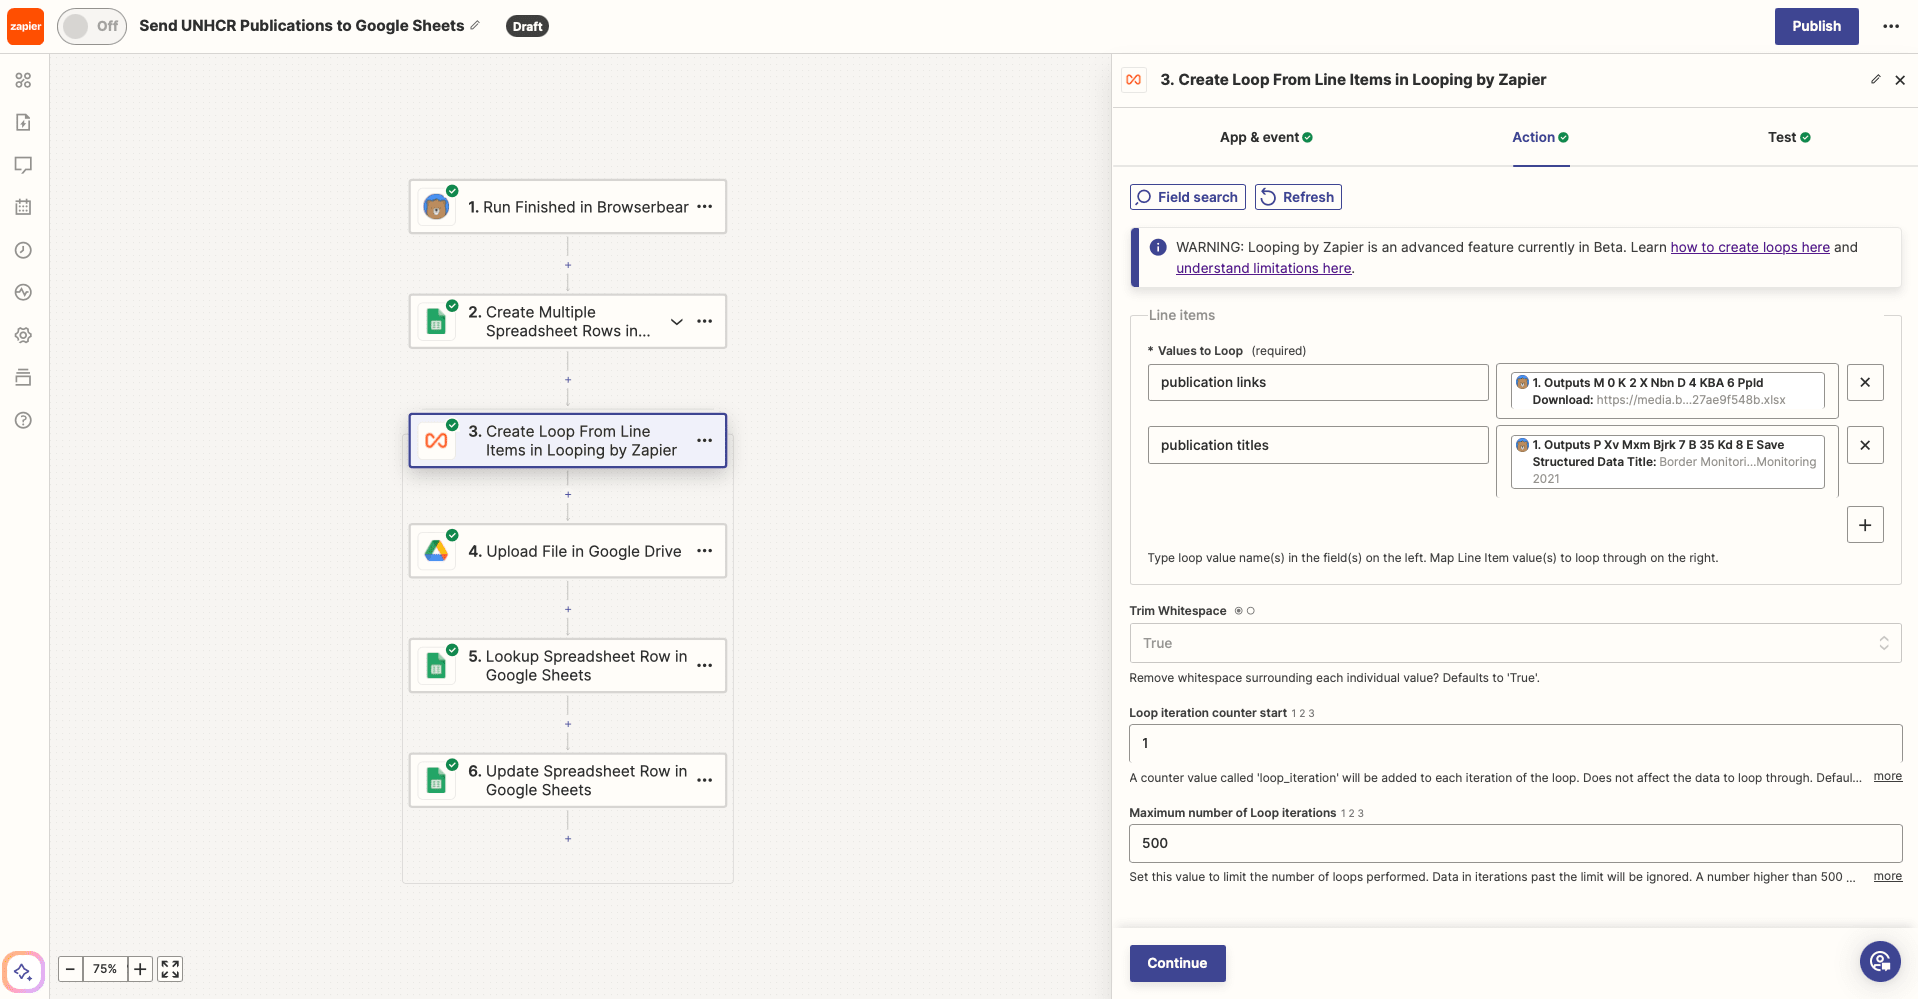
These two sets of data have the same number of items and will be matched up to loop.
Testing the action should yield loop iterations, each with paired publication links and titles.
Action: Upload File in Google Drive
Choose Google Drive as the app and Upload File as the action. If you haven’t connected your account, you will be prompted to do so.
Set up the action by selecting the folder you created and mapping publication links and titles to File and File Name, respectively.
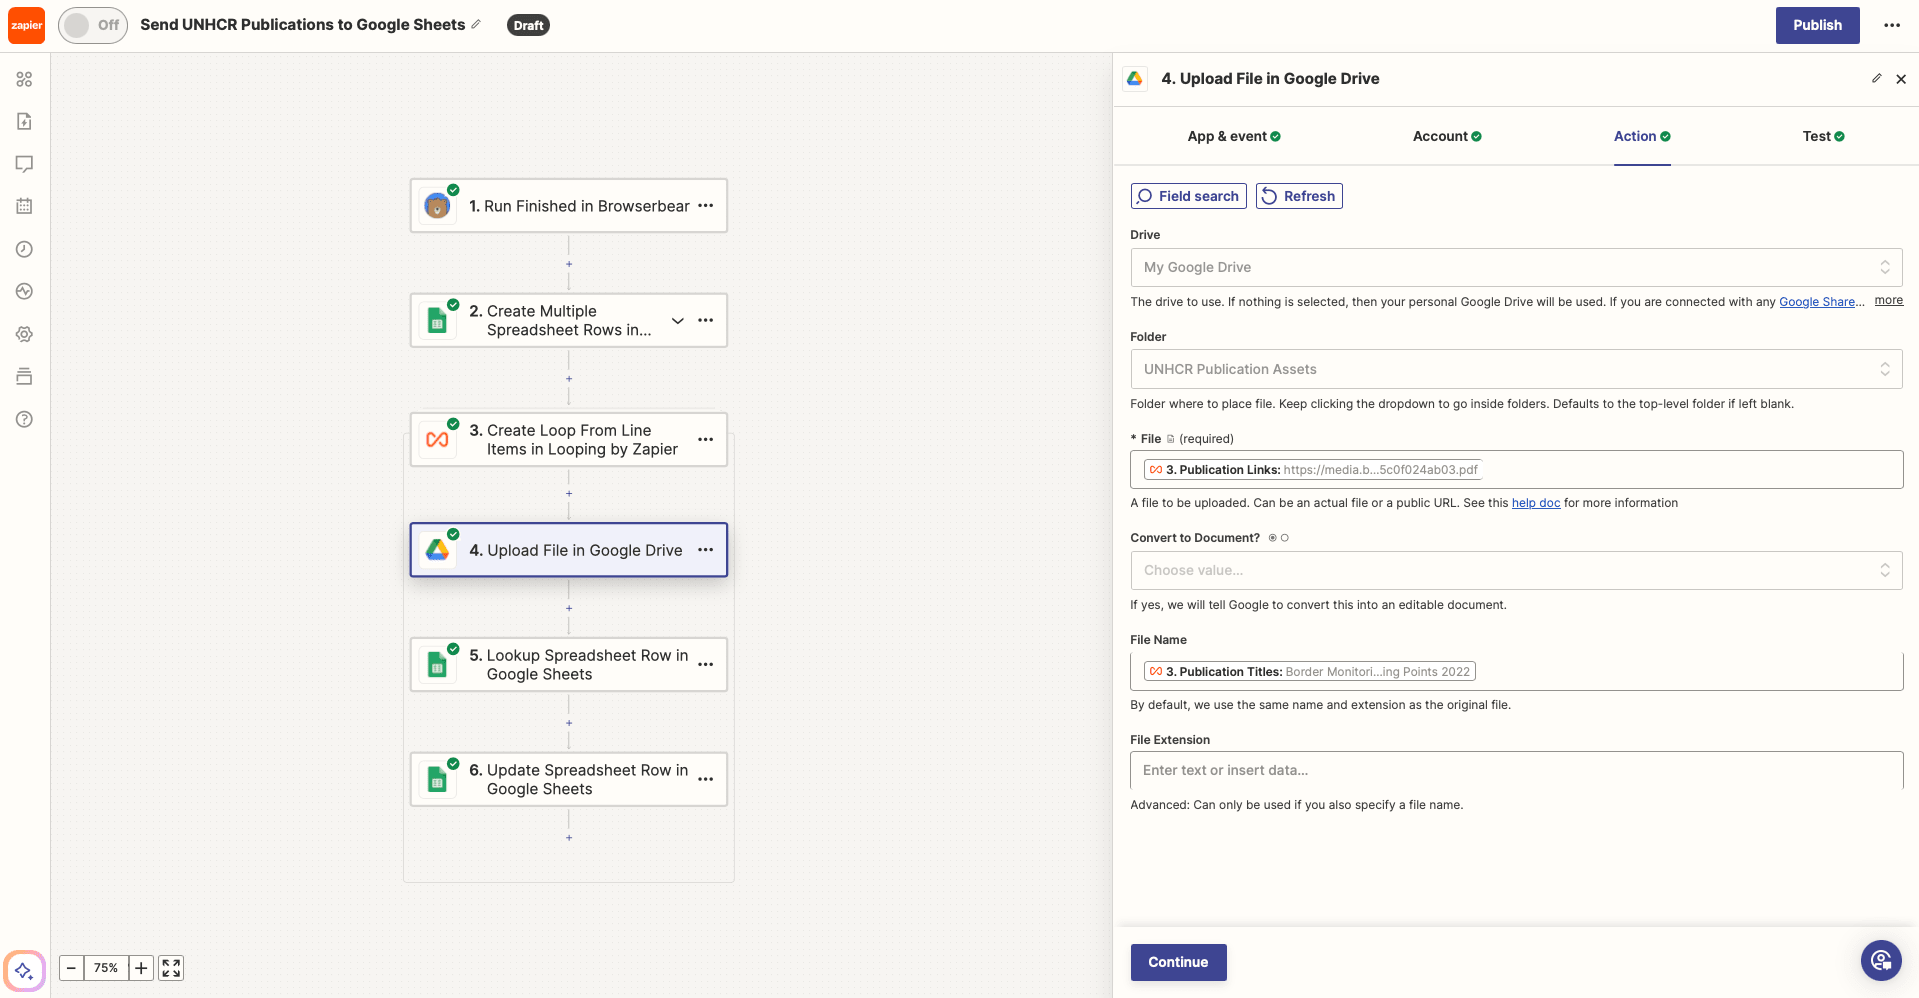
Test the action to ensure a file is uploaded to your Drive folder.
Action: Lookup Spreadsheet Row in Google Sheets
Choose Google Sheets as the app and Lookup Spreadsheet Row as the event.
After selecting the right spreadsheet and worksheet, choose Publication Title as the Lookup Column. Then, map the looping titles to the Lookup Value field.

Test the action. Zapier should be able to find the specified row.
Action: Update Spreadsheet Row in Google Sheets
Choose Google Sheets as the app and Update Spreadsheet Row as the action.
Select the correct spreadsheet and worksheet, then insert the dynamic output link from your lookup action to Row.
Map the dynamic link from your Google Drive upload step to its corresponding Sheets column.
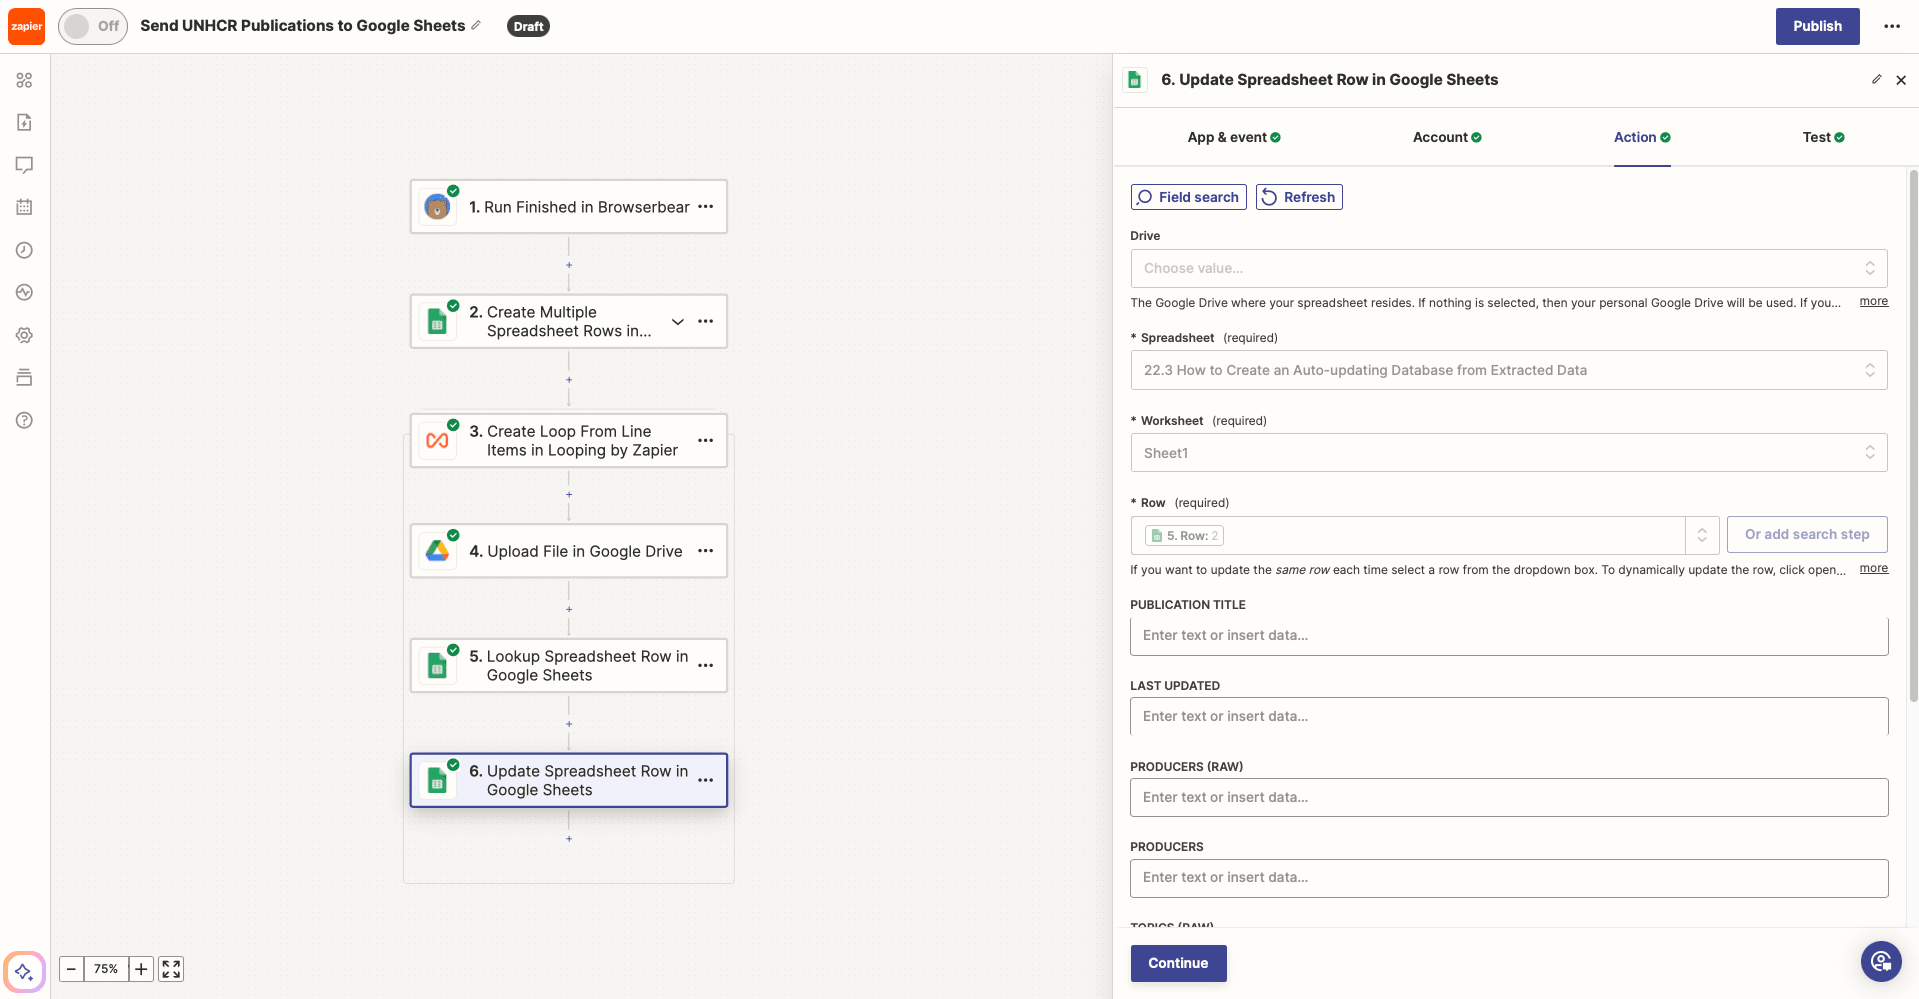
Test the action, then check to see that your Sheet is updated with the asset link.
And that’s it! Make any final adjustments to your zap, then hit Publish to take it live.
Access Updated Information Whenever You Need It
When you need to reference information from other websites on a regular basis, an auto-updating database can make your life much easier. There are so many other ways to upgrade the process too, such as:
- Using formulas, filters, and script to sort the extracted data automatically
- Adding a deduplication process to your spreadsheet
- Scraping multiple websites and consolidating it in a single database
- Sharing your resources with other team members
- Monitoring certain keywords and topics
- Sending automated notifications to Slack or Gmail
The best database is one that streamlines your work process, so the ultimate goal is to build something that works for you. Give our ideas a try and see how you do!
