
How to Automatically Scan for Missing Image Alt Text in Browserbear
Contents
Image alt text, also known as alternative text or alt tags, is descriptive text added to an image on a web page. It’s an addition website owners are encouraged to include because it improves the site’s accessibility, search engine optimization (SEO), and user experience.
Because alt text does so much for the functionality of a site, testing to ensure they’ve been included alongside any images uploaded is crucial. Some reasons you may want to automatically test for them are:
- Missing alt text has a negative effect on your site’s accessibility, SEO, and user experience.
- Manually testing each image for an alt tag is too time-consuming.
- Automatic testing saves time and resources, simply notifying you when an image has to be updated with alt text.
Fortunately, it’s easy to use a browser automation tool like Browserbear to create a quick test that scans new posts when they’re published on your site. And in this article, you’ll learn how to do just that.
What You Will Create
Knowing when an image is missing alt text makes it easy to go back and update them, ensuring your site is constantly optimized. We’ll be building an automation that scans articles when they’re published, saves image details to a database, then notifies you when alt text is missing.
The tools you will be using are:
- Browserbear : To create a browser automation that saves data from new posts
- Ghost : To publish new articles on your website
- Google Sheets : To save scraped data and tag those with missing alt text
- Slack : To send notifications when alt text is missing
- Zapier : To trigger actions in different programs based on pre-specified commands
By the end of the tutorial, you should be able to receive Slack notifications that remind you to insert alt text when missing from new posts.

Let’s prepare a Browserbear task, a spreadsheet, and a series of zaps to make it all happen.
How to Automate Testing for Image Alt Text
There are tools and scripts you can use to test for image alt text, but if you’re on a limited budget or simply would like to build a nocode automation for this task, it’s just a matter of setting up a Browserbear automation, Google Sheets spreadsheet, and some zaps.
Bear Tip 🐻: This tutorial assumes you already use Ghost and Slack in your workflows, but you can easily adapt it to suit other CMS and communication tools by switching them out in the Zapier steps.
Create a Browserbear Task to Scrape Image Details
With this task, Browserbear will extract the webpage’s title alongside alternative text and source URLs from images in the article body.
Log into your Browserbear account (or create a free trial account if you don’t have one—no credit card required! 🎉). Go to the Tasks tab, then click Create a Task.
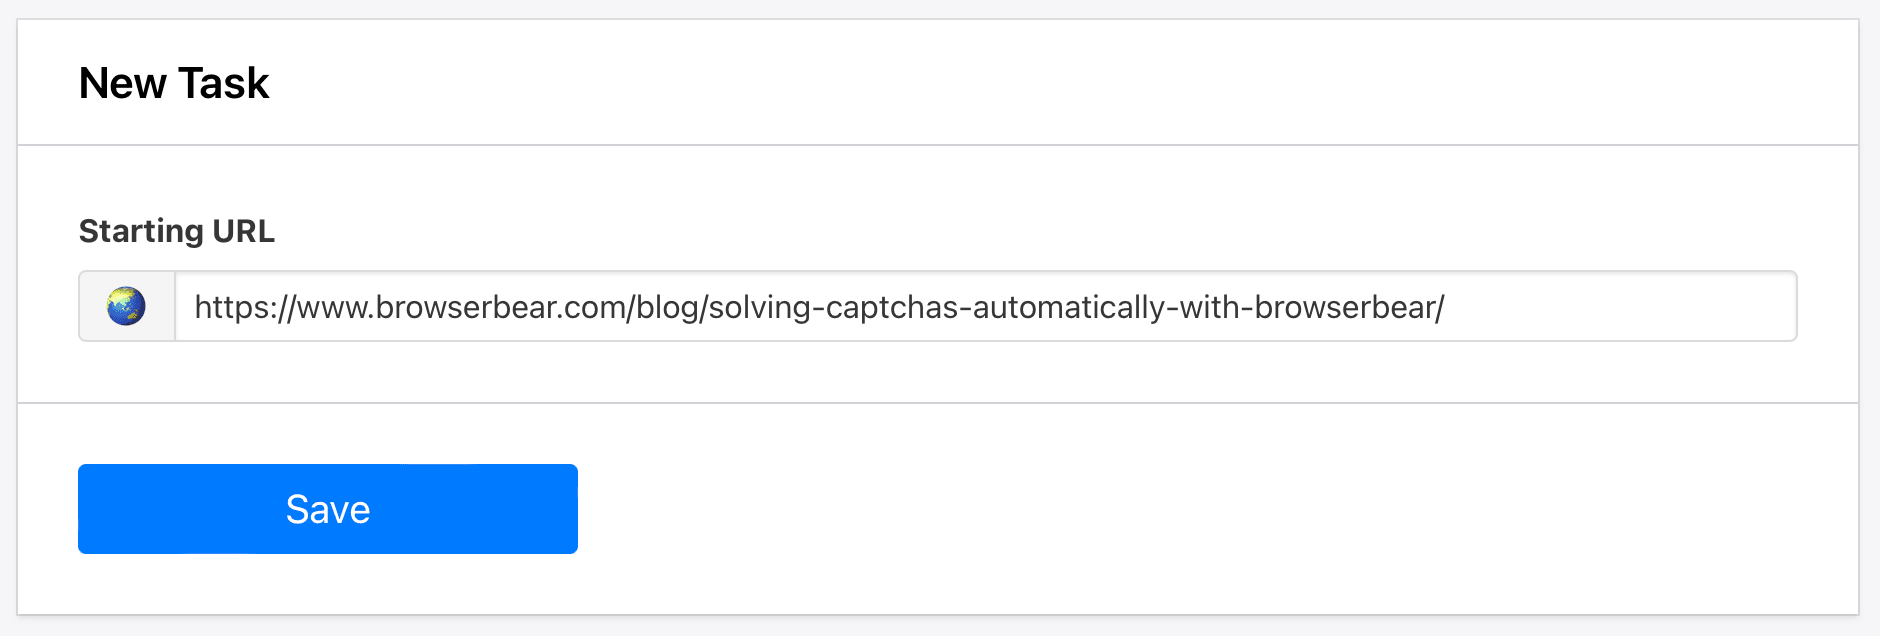
You will now be able to insert a starting URL, which will be the destination site your automation takes place on.
Add a link, then click Save.
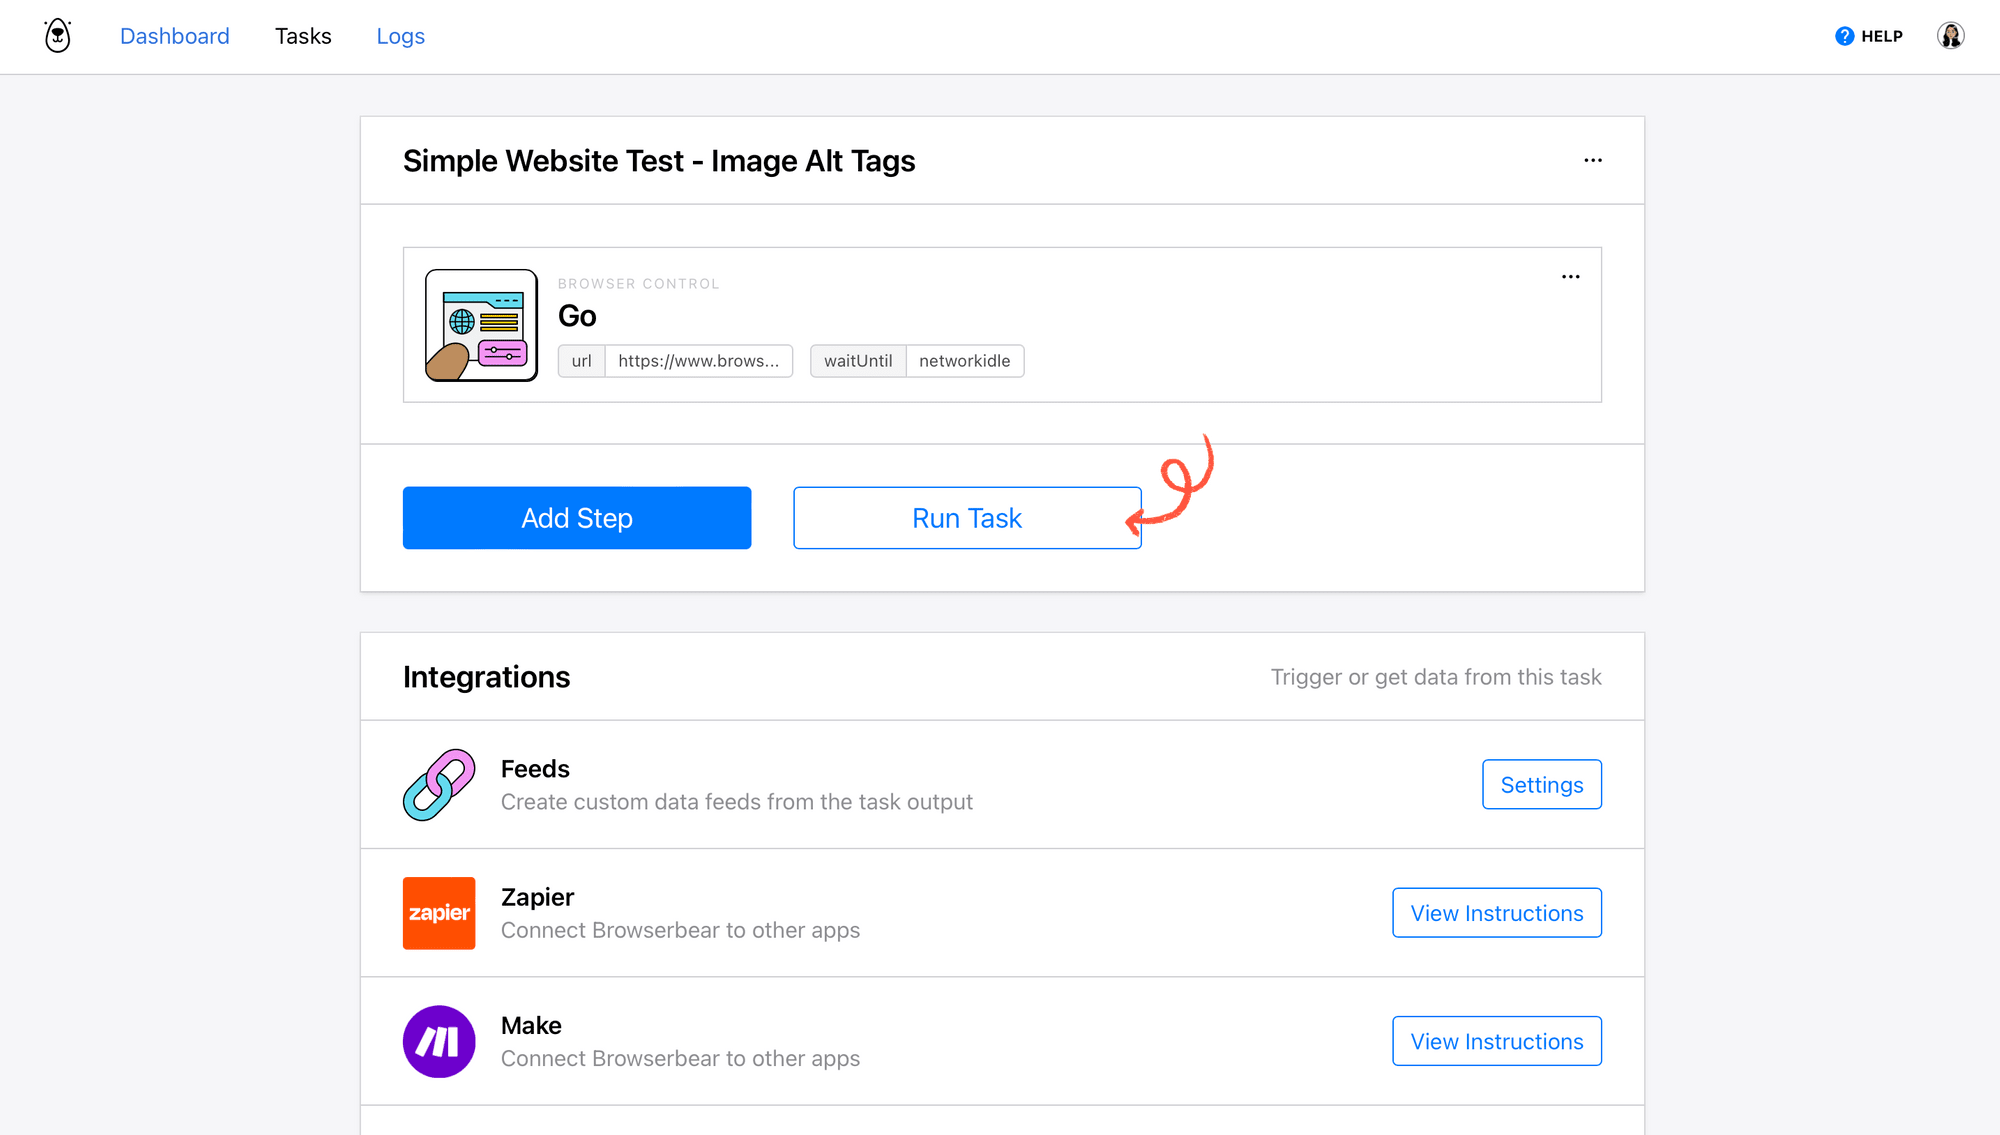
You’ll now be on a task page where you can add steps, run your automation, and view completed runs.
Step 1. Go
The starting URL you placed will already be added as the first step: go. This can be changed to a dynamic field in Zapier later on so new posts are the destination link.
Networkidle will automatically be set as the wait instructions, but you can edit the step to use load or domcontentloaded instead.
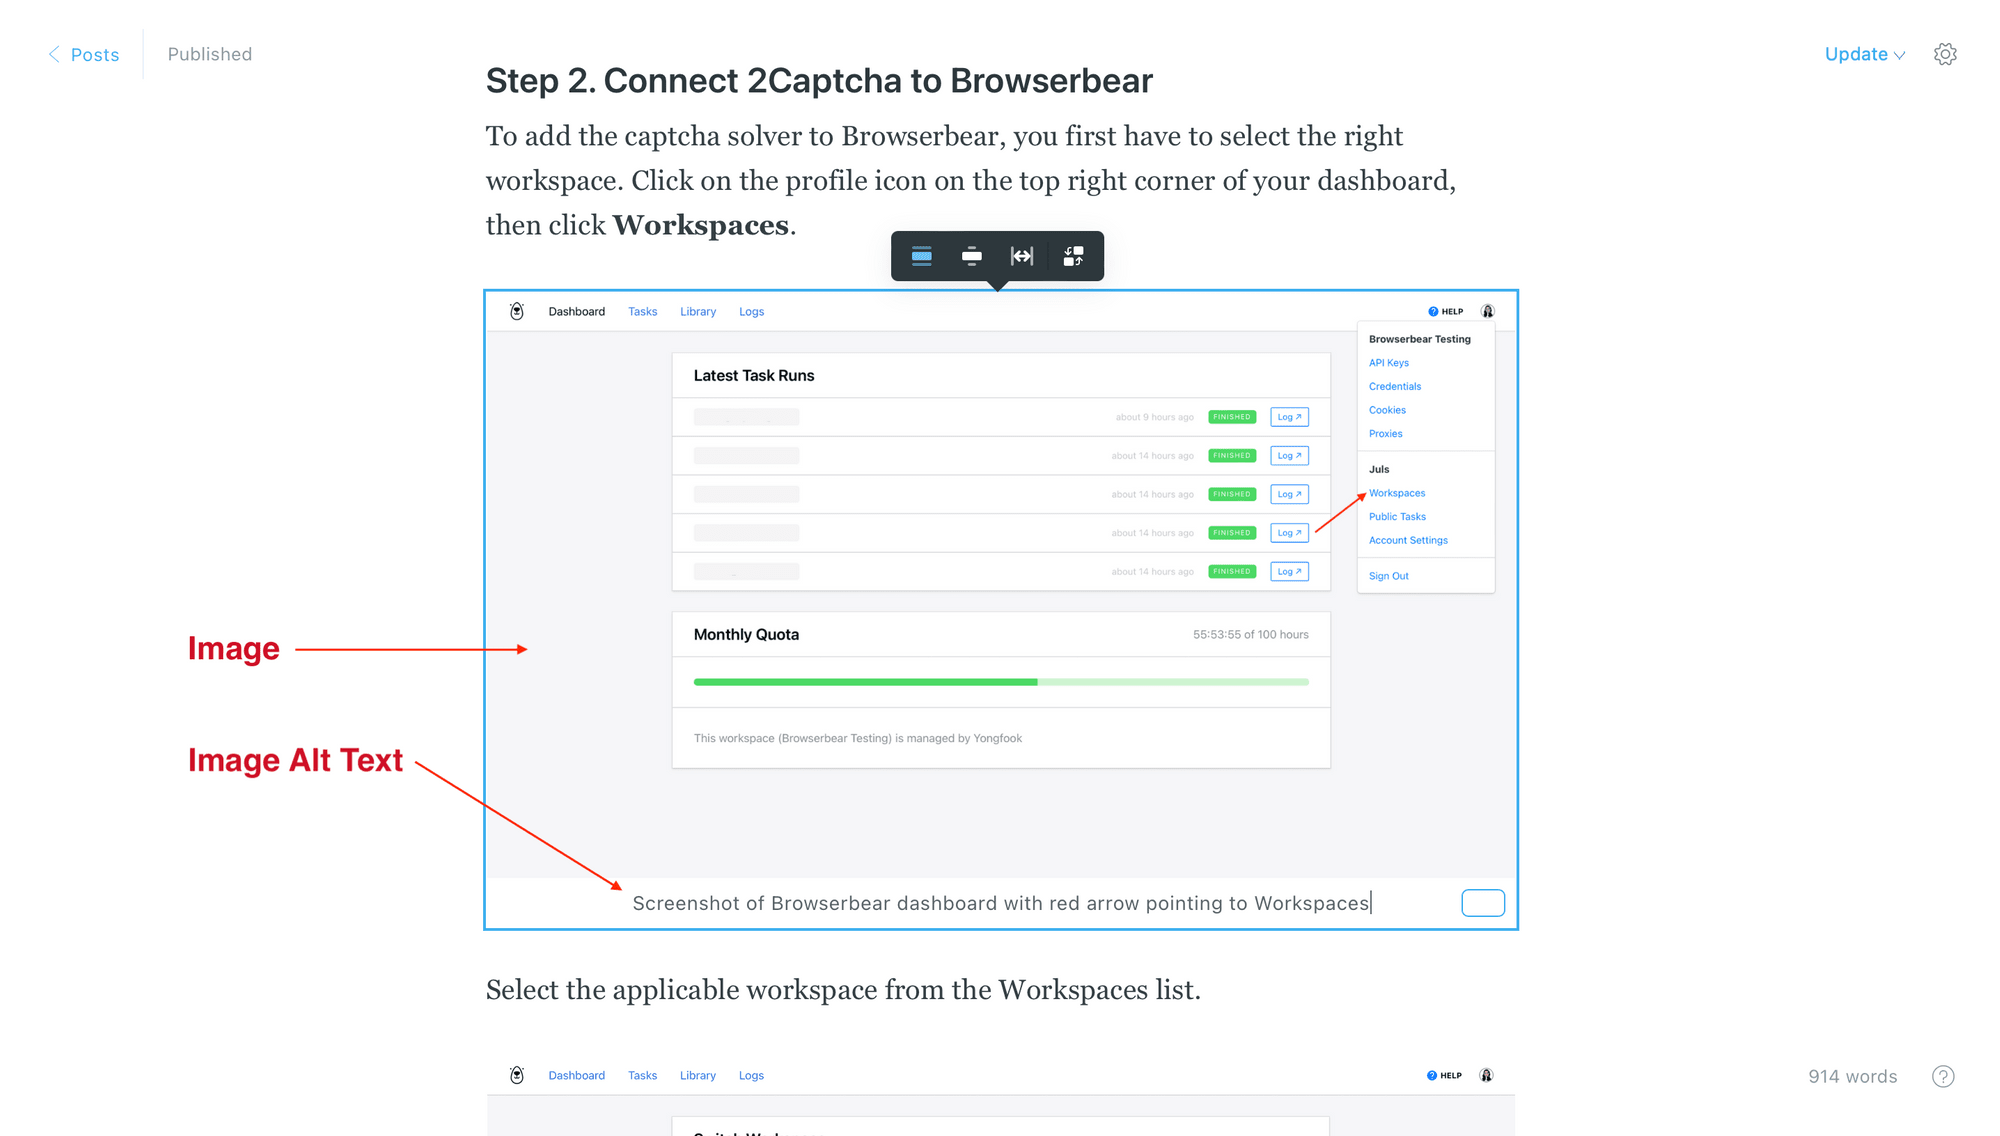
Step 2. Save Text
Click Add Step on your task page, then choose save_text as the action. In the Helper section, insert the config for the article title.
Click Save.
Bear Tip 🐻: Refer to our article A Nocoder’s Guide to the Browserbear Helper (Element Selection) for a more detailed guide on working with helper configs.
Step 3. Save Structured Data
Add a new step and choose save_structured_data as the action. In the Helper section, insert an adapted config that identifies only images in the selection.
You can produce this adapted config by first finding the full config with the Browserbear helper, isolating the XPath, then adding an axis for images.
Start with the full config, then remove the HTML snippet of the elements as well as the closing quotation mark. Add the following axis: //img/..”}.
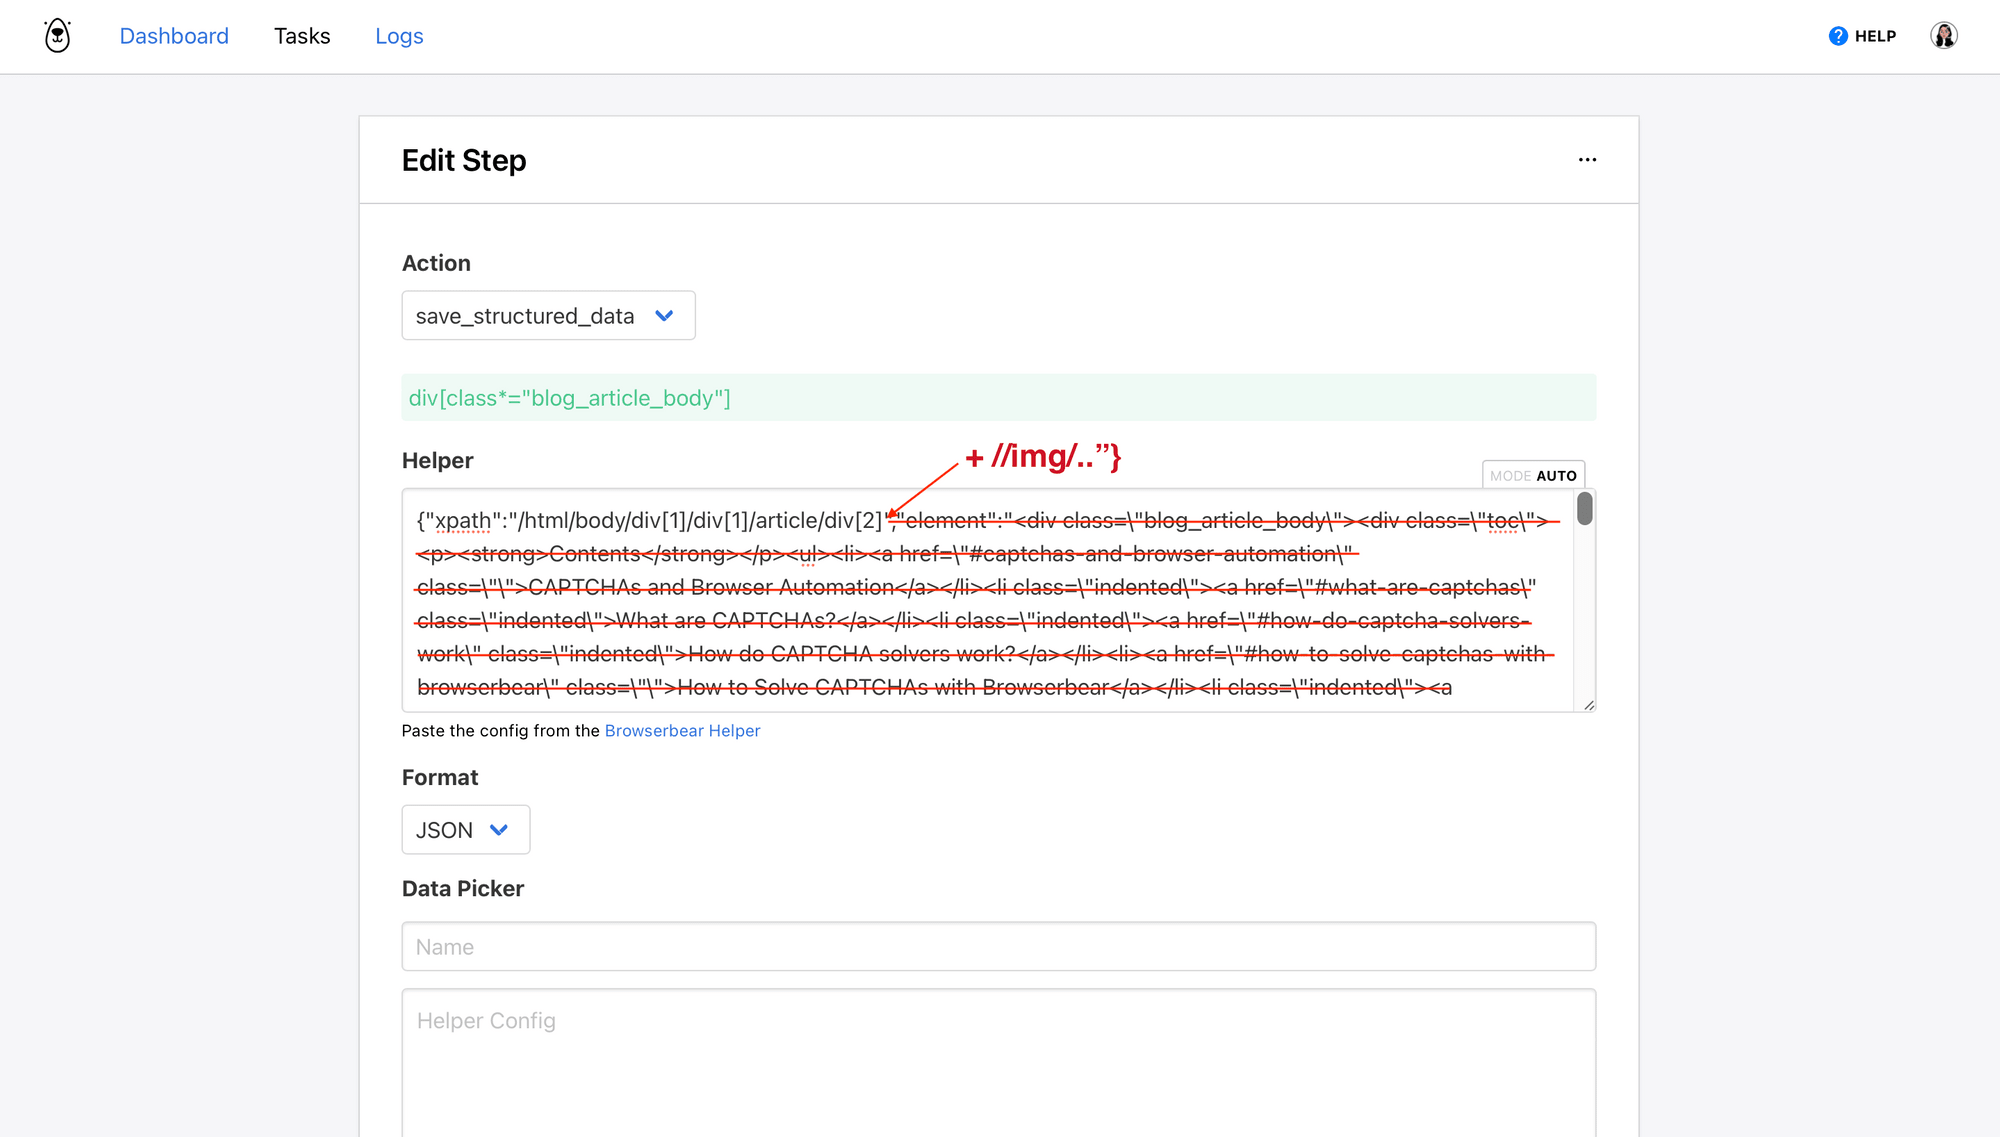
You should end up with an XPath that looks something like this:
{"xpath":"/html/body/div[1]/div[1]/article/div[2]//img/.."}
Once this is in the parent container Helper section, you can add define each individual HTML element and set it up using the Data Picker. You will have to set scraping up for two items: image alt (using alt data type) and image src (using src data type). Use the same adapted XPath config as above.
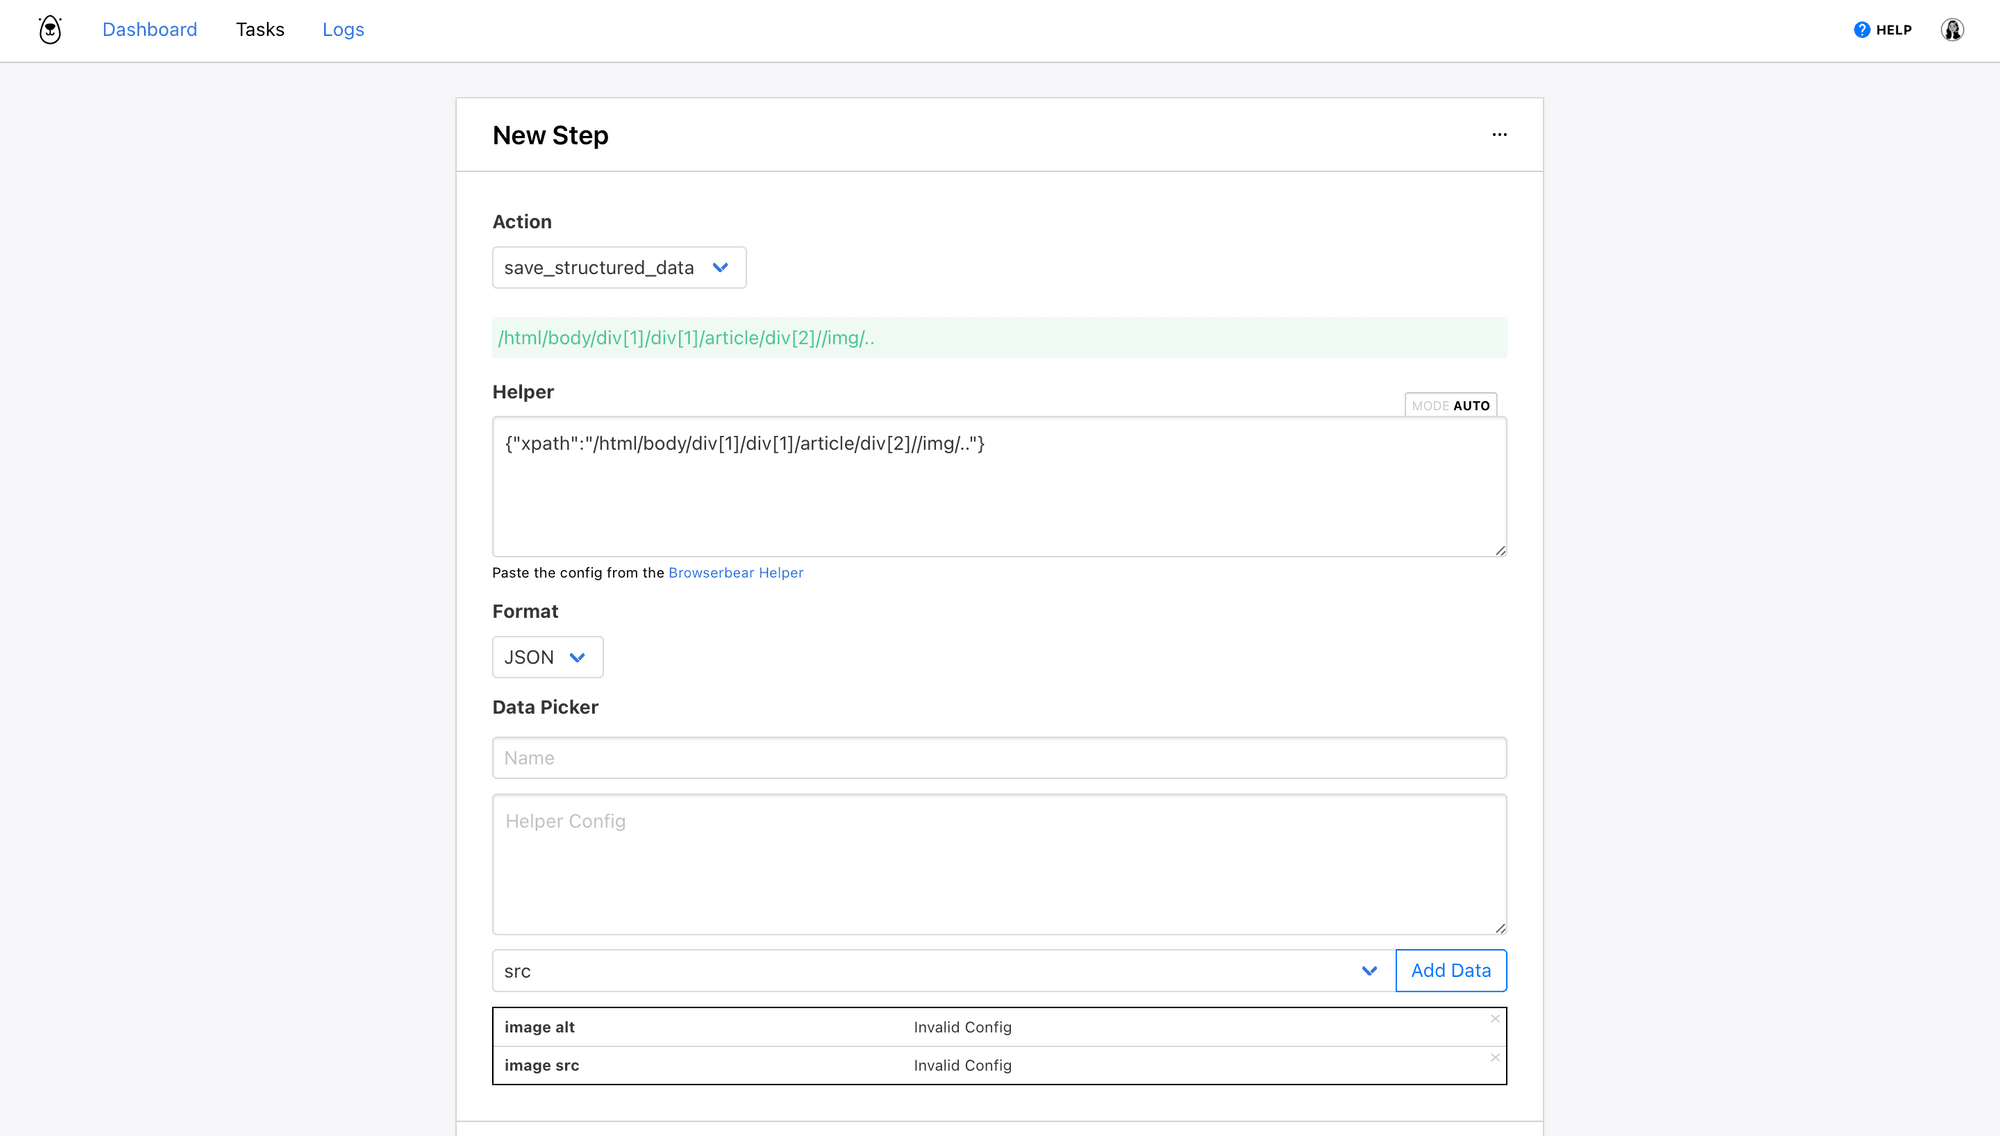
Click Save.
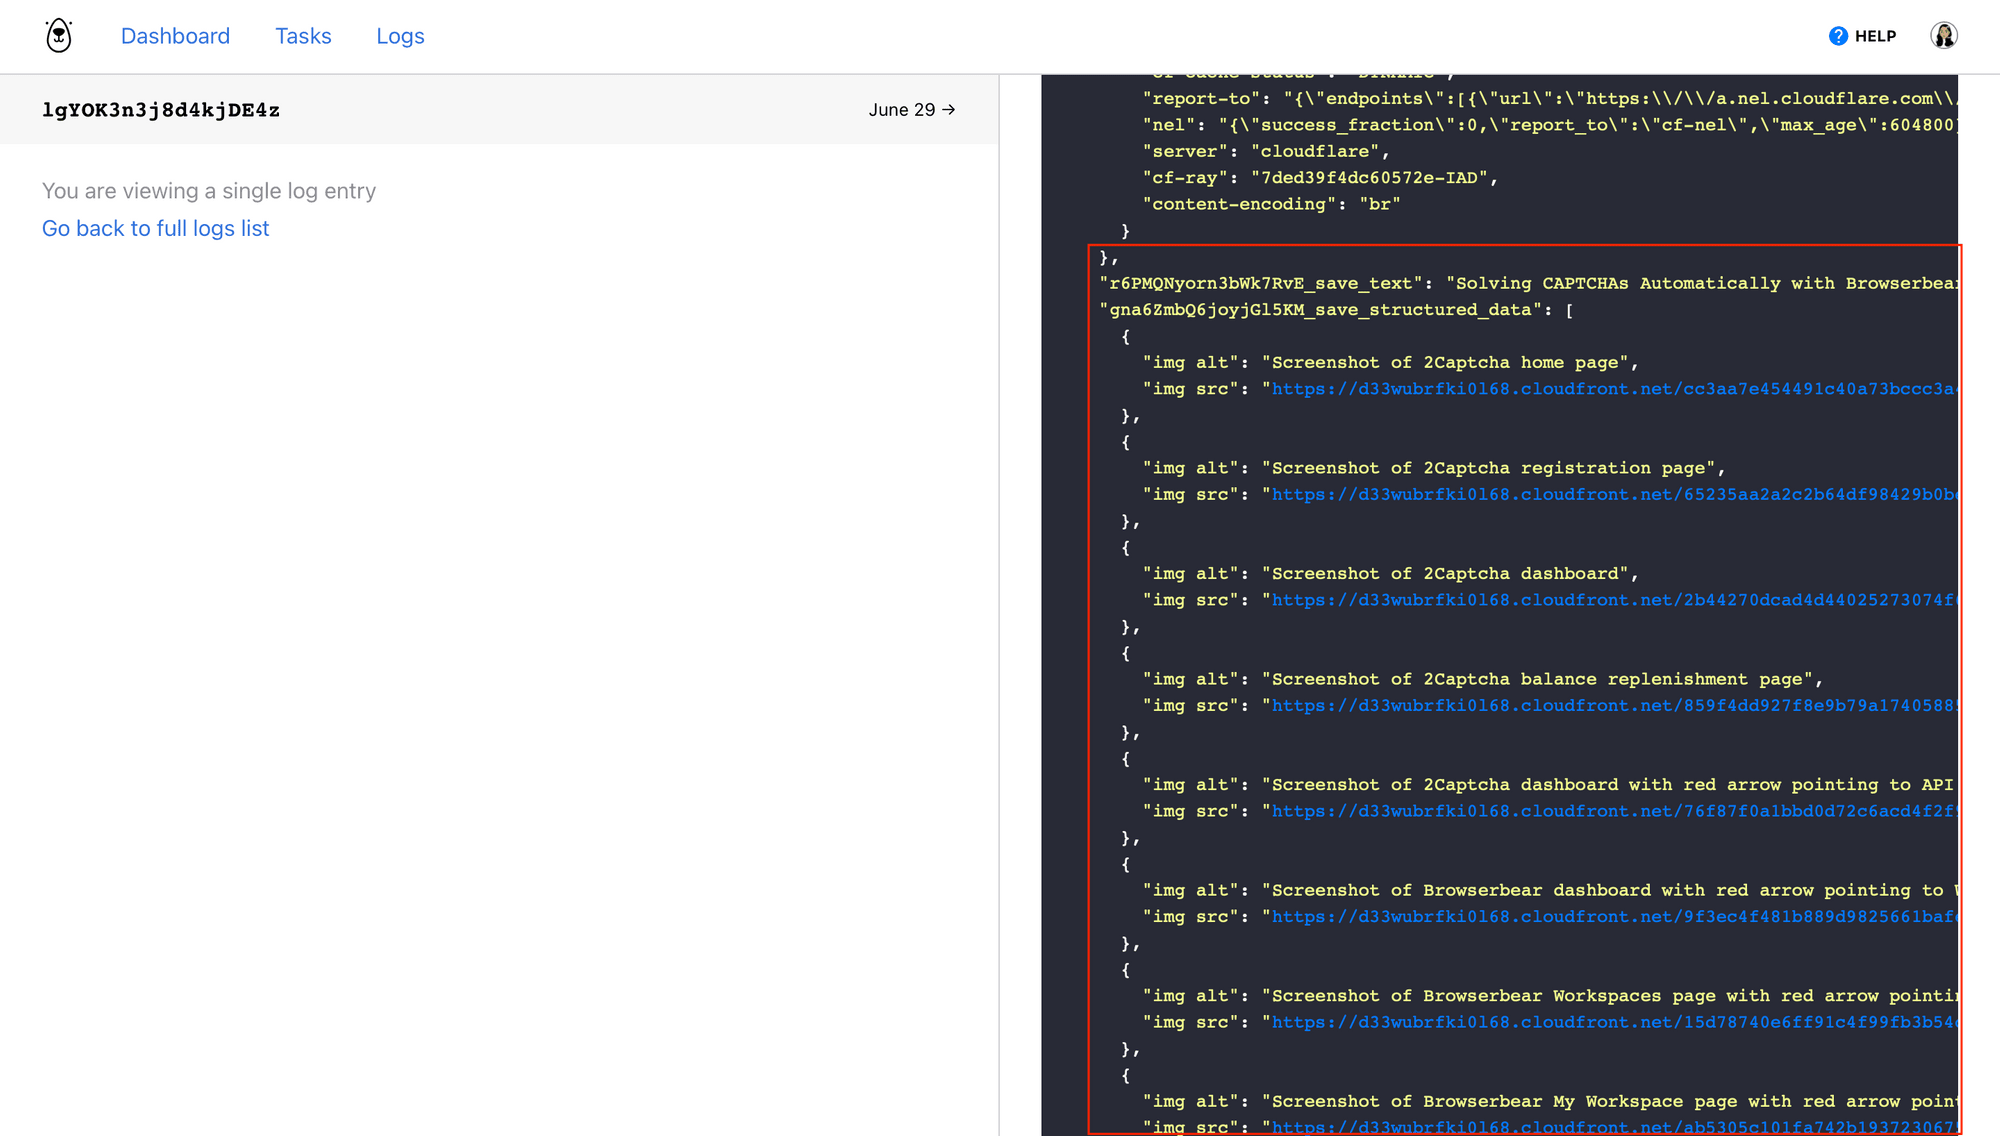
Running the task should yield output that includes the webpage title, then an array of image alt tags and their corresponding source URLs.
Bear Tip 🐻: The editor will show invalid config because the XPath configs are identical, but running the task should still yield the desired output.
Prepare a Google Sheets Spreadsheet to Store Image Details
Your Google Sheets spreadsheet will store image details and identify any missing alt tags.
Create a new Sheets file, then add headers for the following columns:
- Blog Title
- Blog URL
- Image Alt
- Image Src
- Alt Text Missing?
Format them however you’d like.
In cell E1, insert the following formula: ={"Alt Text Missing?";ARRAYFORMULA(IF(C2:C="null", "YES", ""))}. This will ensure the formula applies to all new rows created when new data is sent to the spreadsheet.
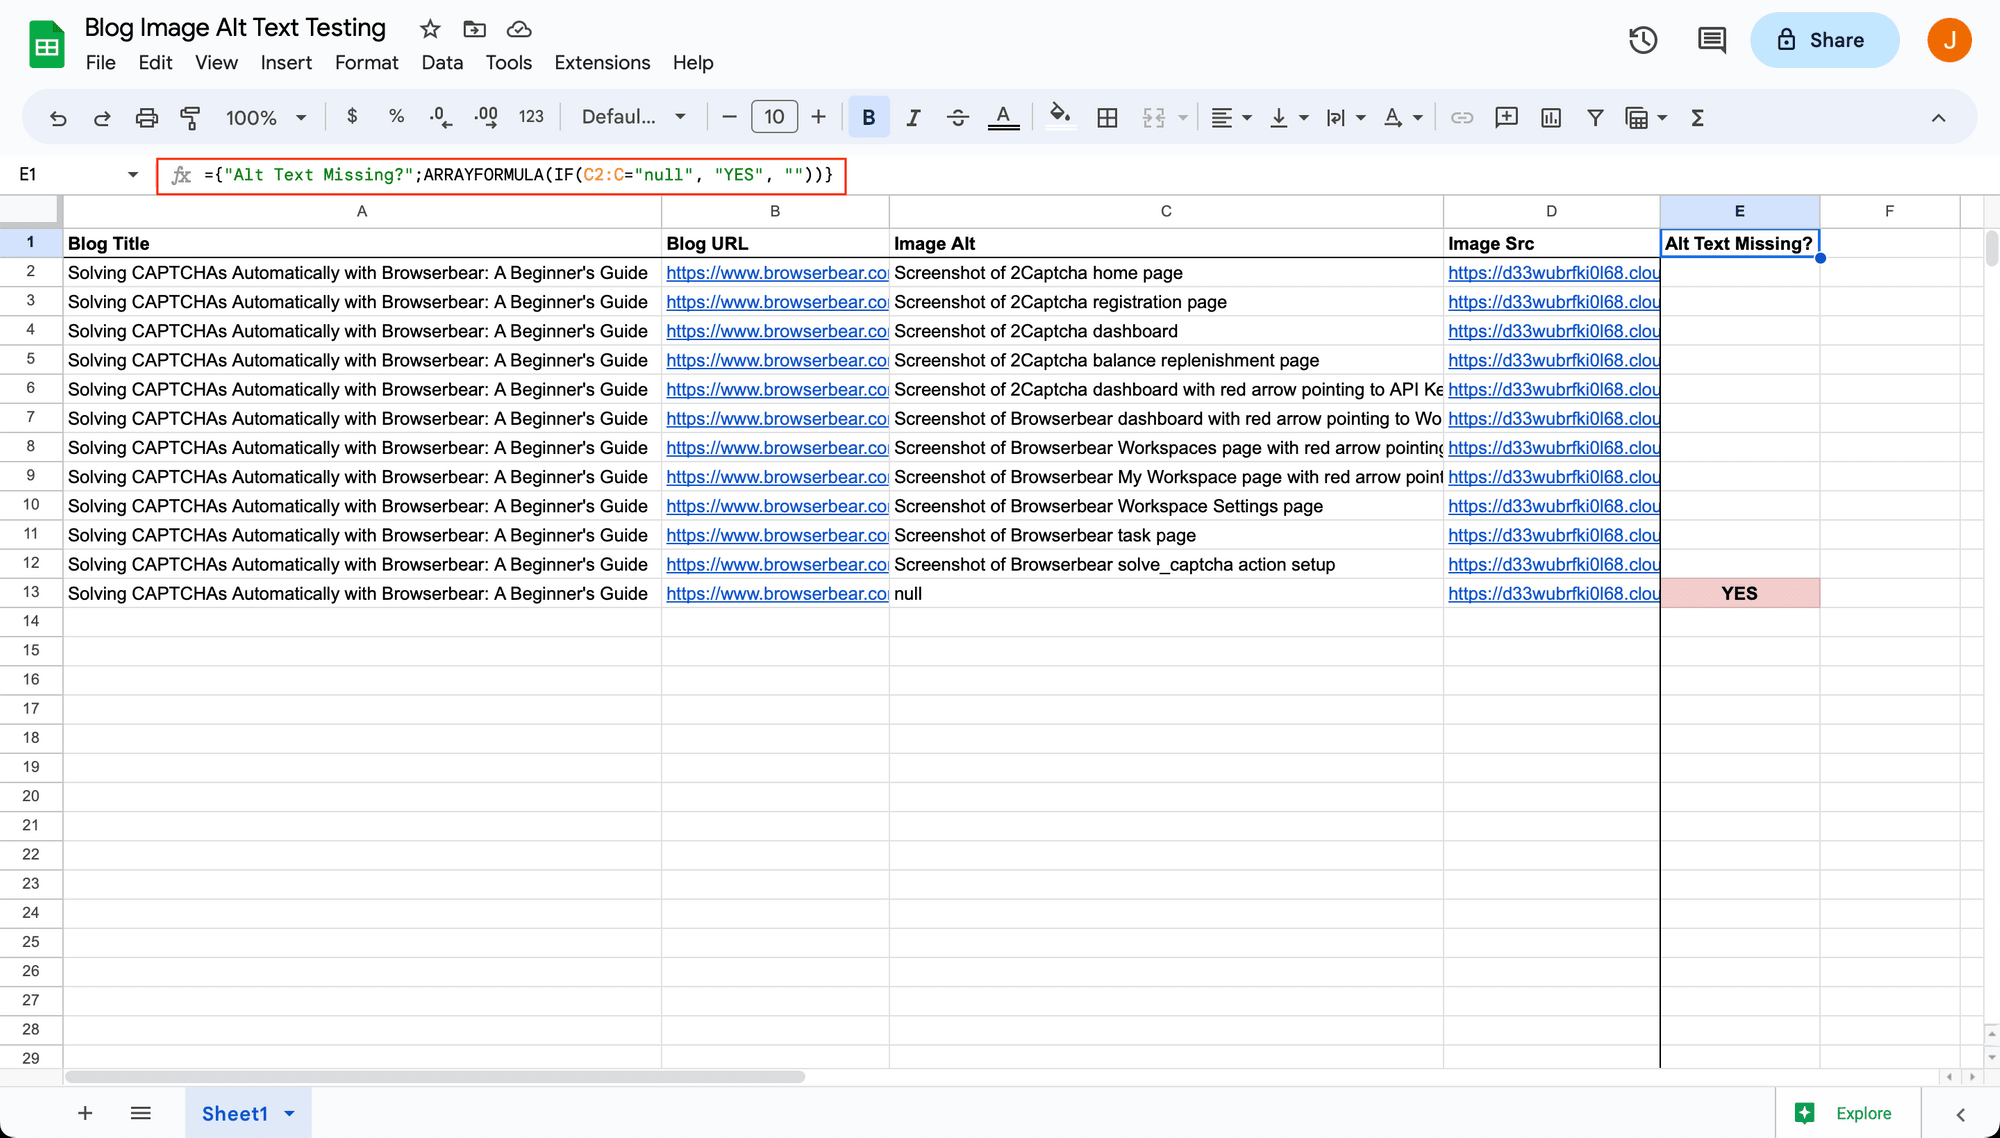
Your sheet is now ready to receive image details. As new lines are created, the Alt Text Missing? column will populate itself with text if any images are found to be missing alt text.
Bear Tip 🐻: Google Sheets has been selected as the database of choice for this tutorial because many rows can be created at once. Some databases, such as Notion and Airtable, have limitations on how many records can be created in a single API call, meaning they may not be appropriate for use cases that involve many data items.
Set up a Zap to Run Task When Post is Published
Your first zap will instruct Browserbear to scan new posts when they’re published on Ghost.
Log into your Zapier account, click + Create Zap , and set up the following events:
Trigger: Post Published in Ghost
Choose Ghost as the app and Post Published as the event. You will have to connect your account and select the site that will activate the trigger.
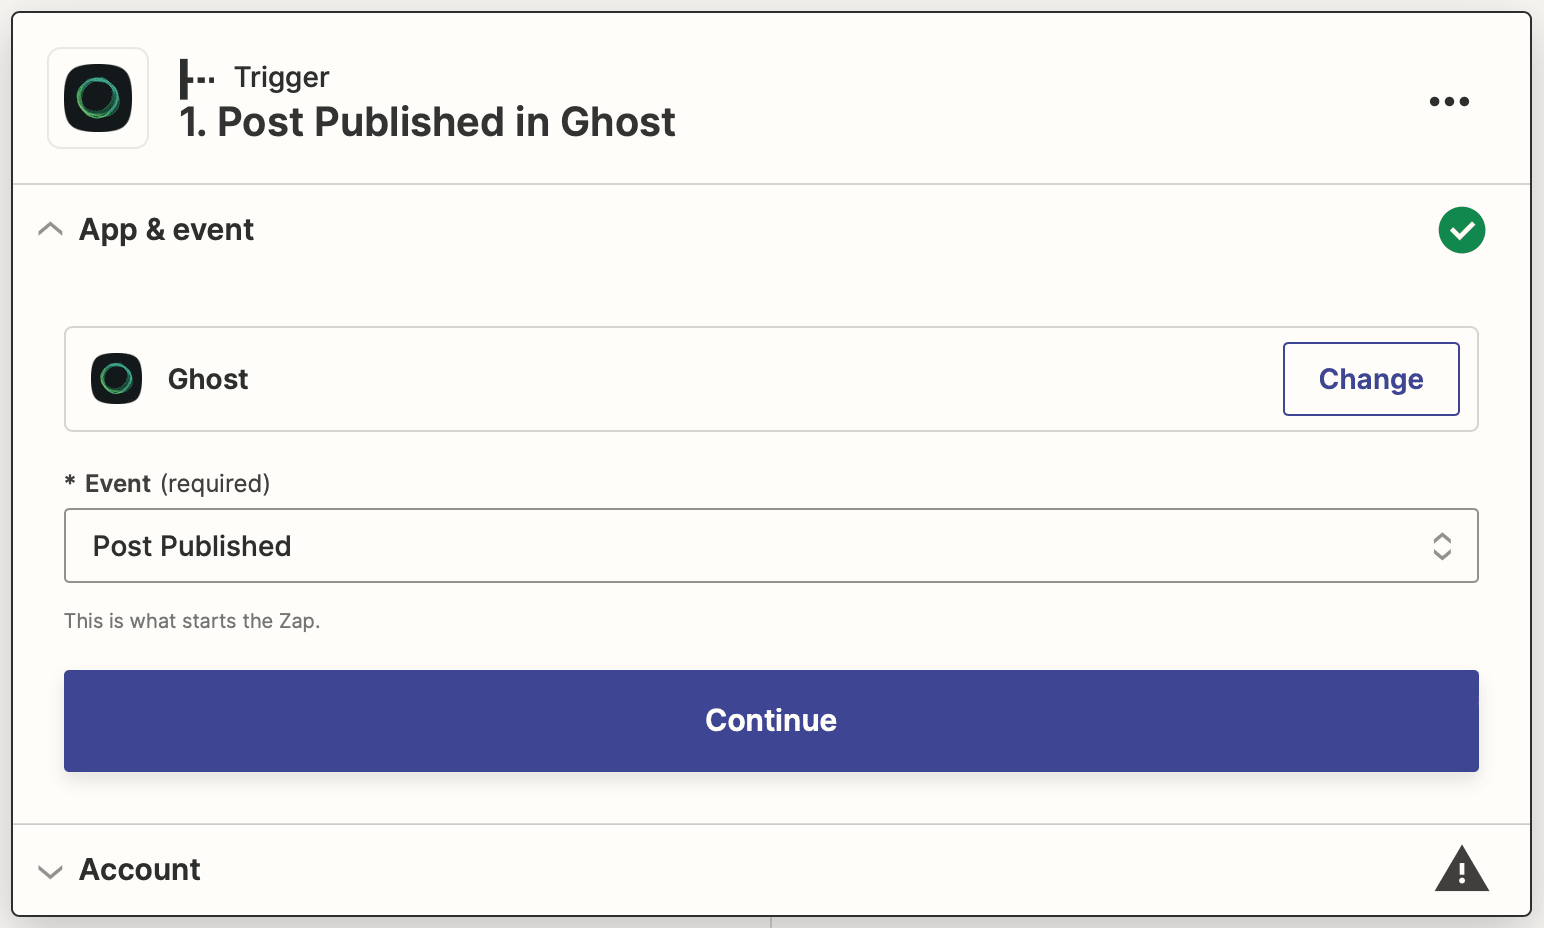
Test the trigger to ensure Zapier is able to find a recently published post, then continue.
Action: Create Run in Browserbear
Choose Browserbear as the app and Create Run as the event. You’ll have to connect your Browserbear account using your API key.
Select the task created earlier and insert the dynamic link for new Ghost posts into the Step 1 / Go field.
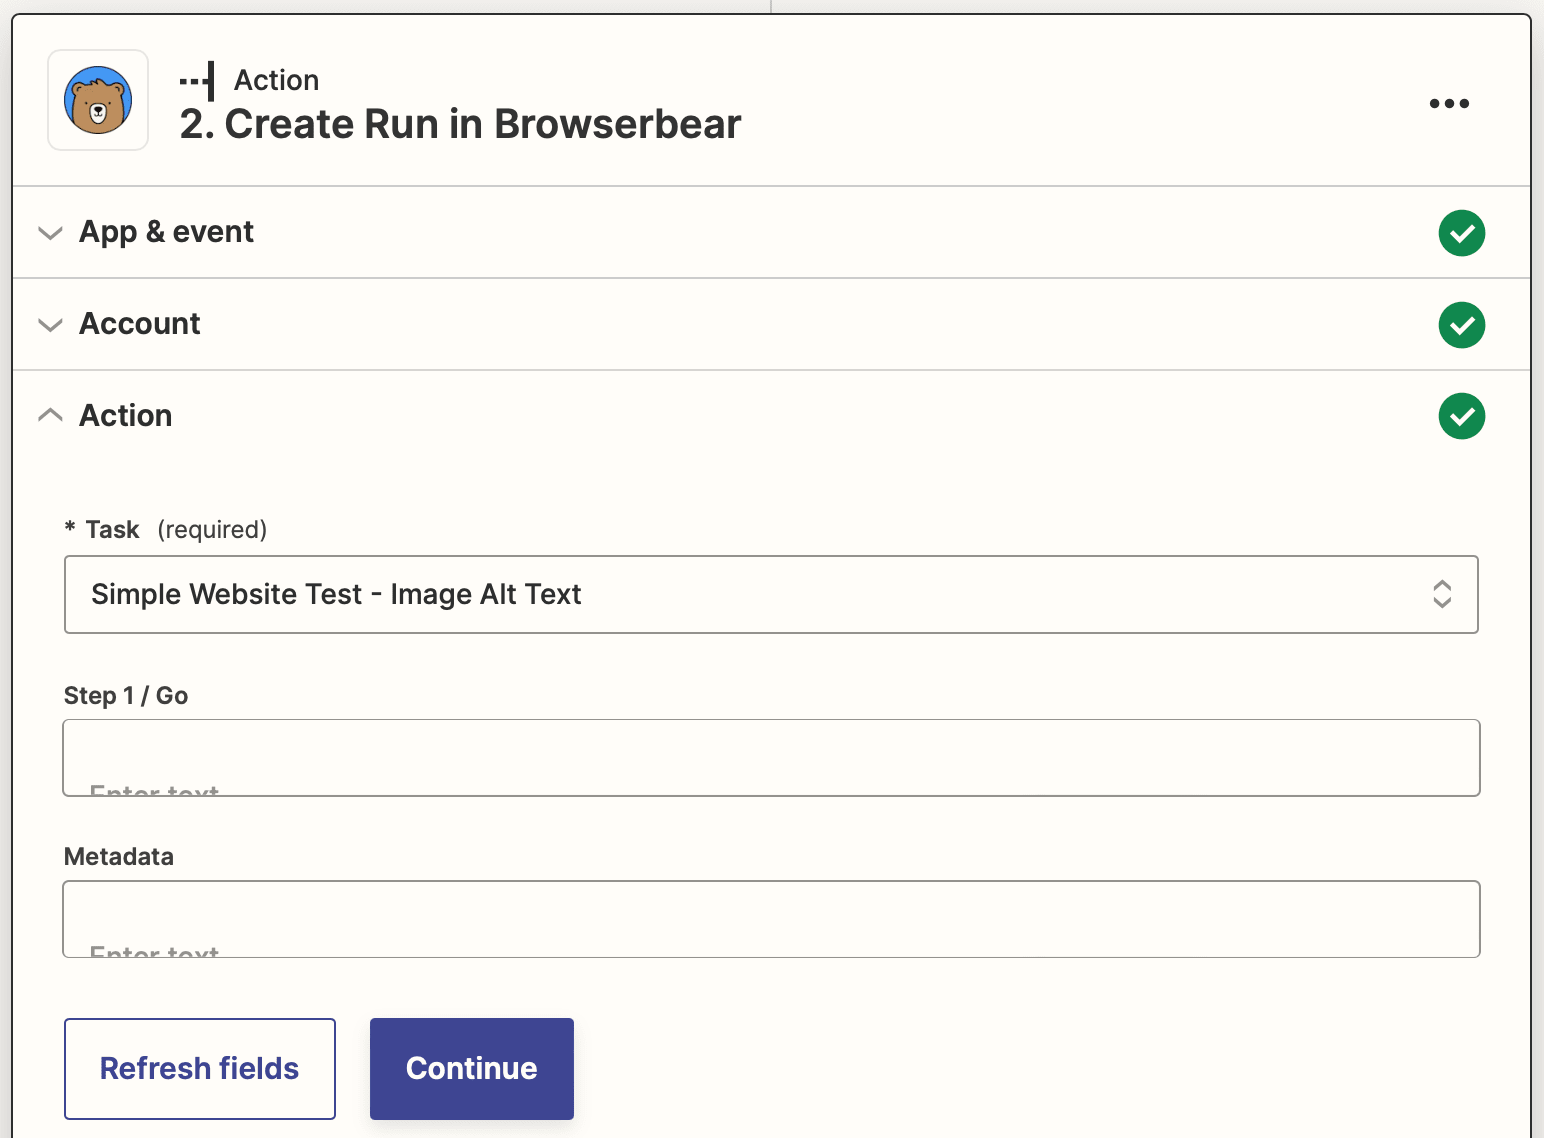
Test the action. You should see a run completed and recorded in your Browserbear logs.
Set up a Zap to Send Data to Google Sheets
Your second zap will retrieve the data scraped from task runs and deposit them in your spreadsheet.
Click + Create Zap , and set up the following events:
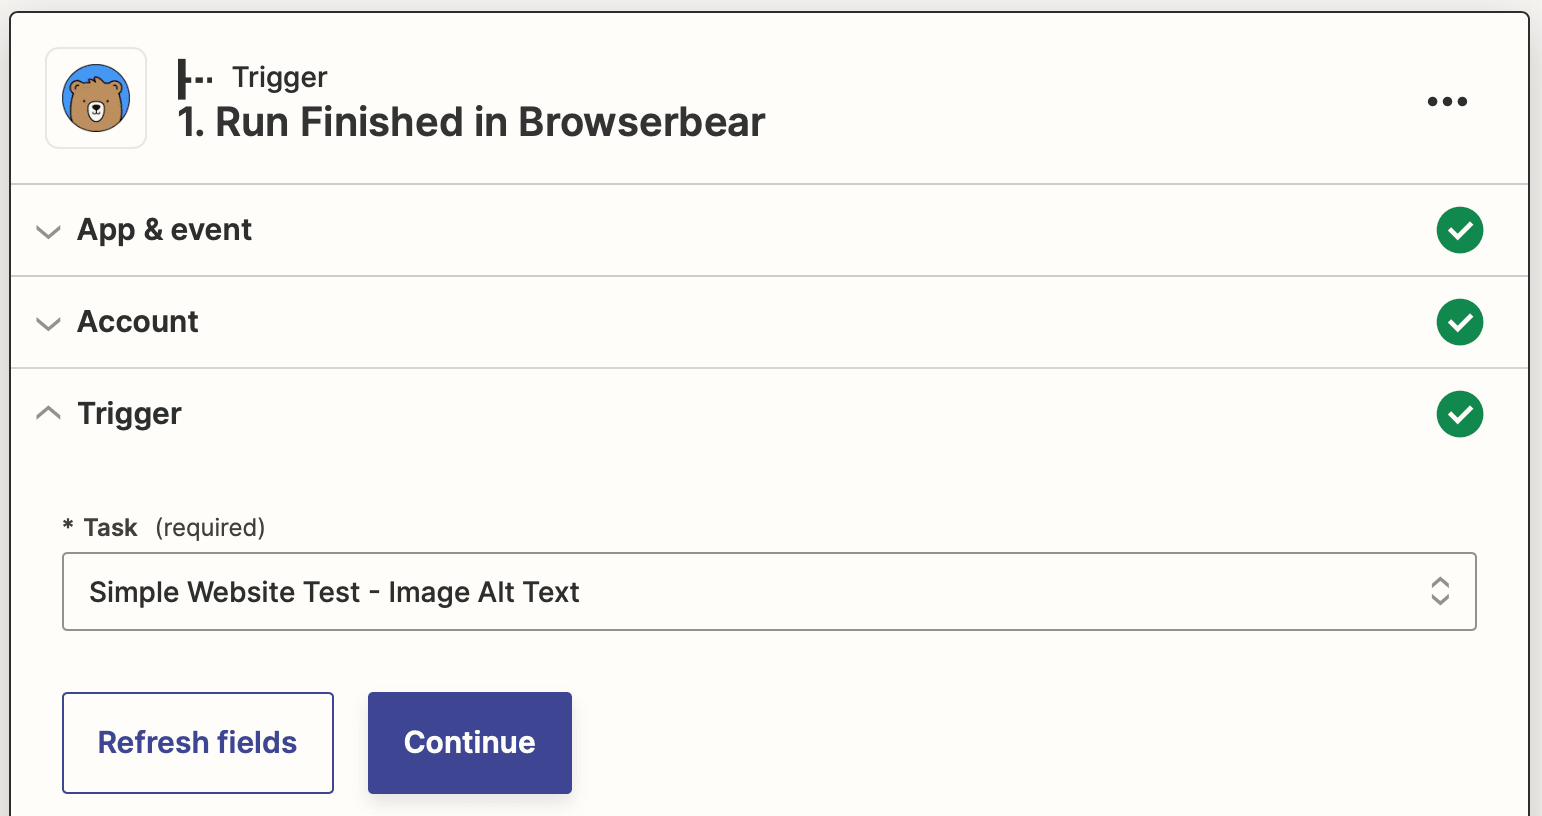
Trigger: Run Finished in Browserbear
Choose Browserbear as the app and Run Finished as the event. Select the task you created.
 Screenshot of Zapier Browserbear run finished trigger
Test the trigger to ensure you are able to retrieve the details of a task run, then continue.
Action: Create Multiple Spreadsheet Rows in Google Sheets
Choose Google Sheets as the app and Create Multiple Spreadsheet Rows as the event. If you haven’t connected your Google Sheets account to Zapier, you will be prompted to log in.
Set up the action by choosing the right drive, spreadsheet, and worksheet. Map the blog title, URL, image alt text, and image source URLs to their corresponding columns.
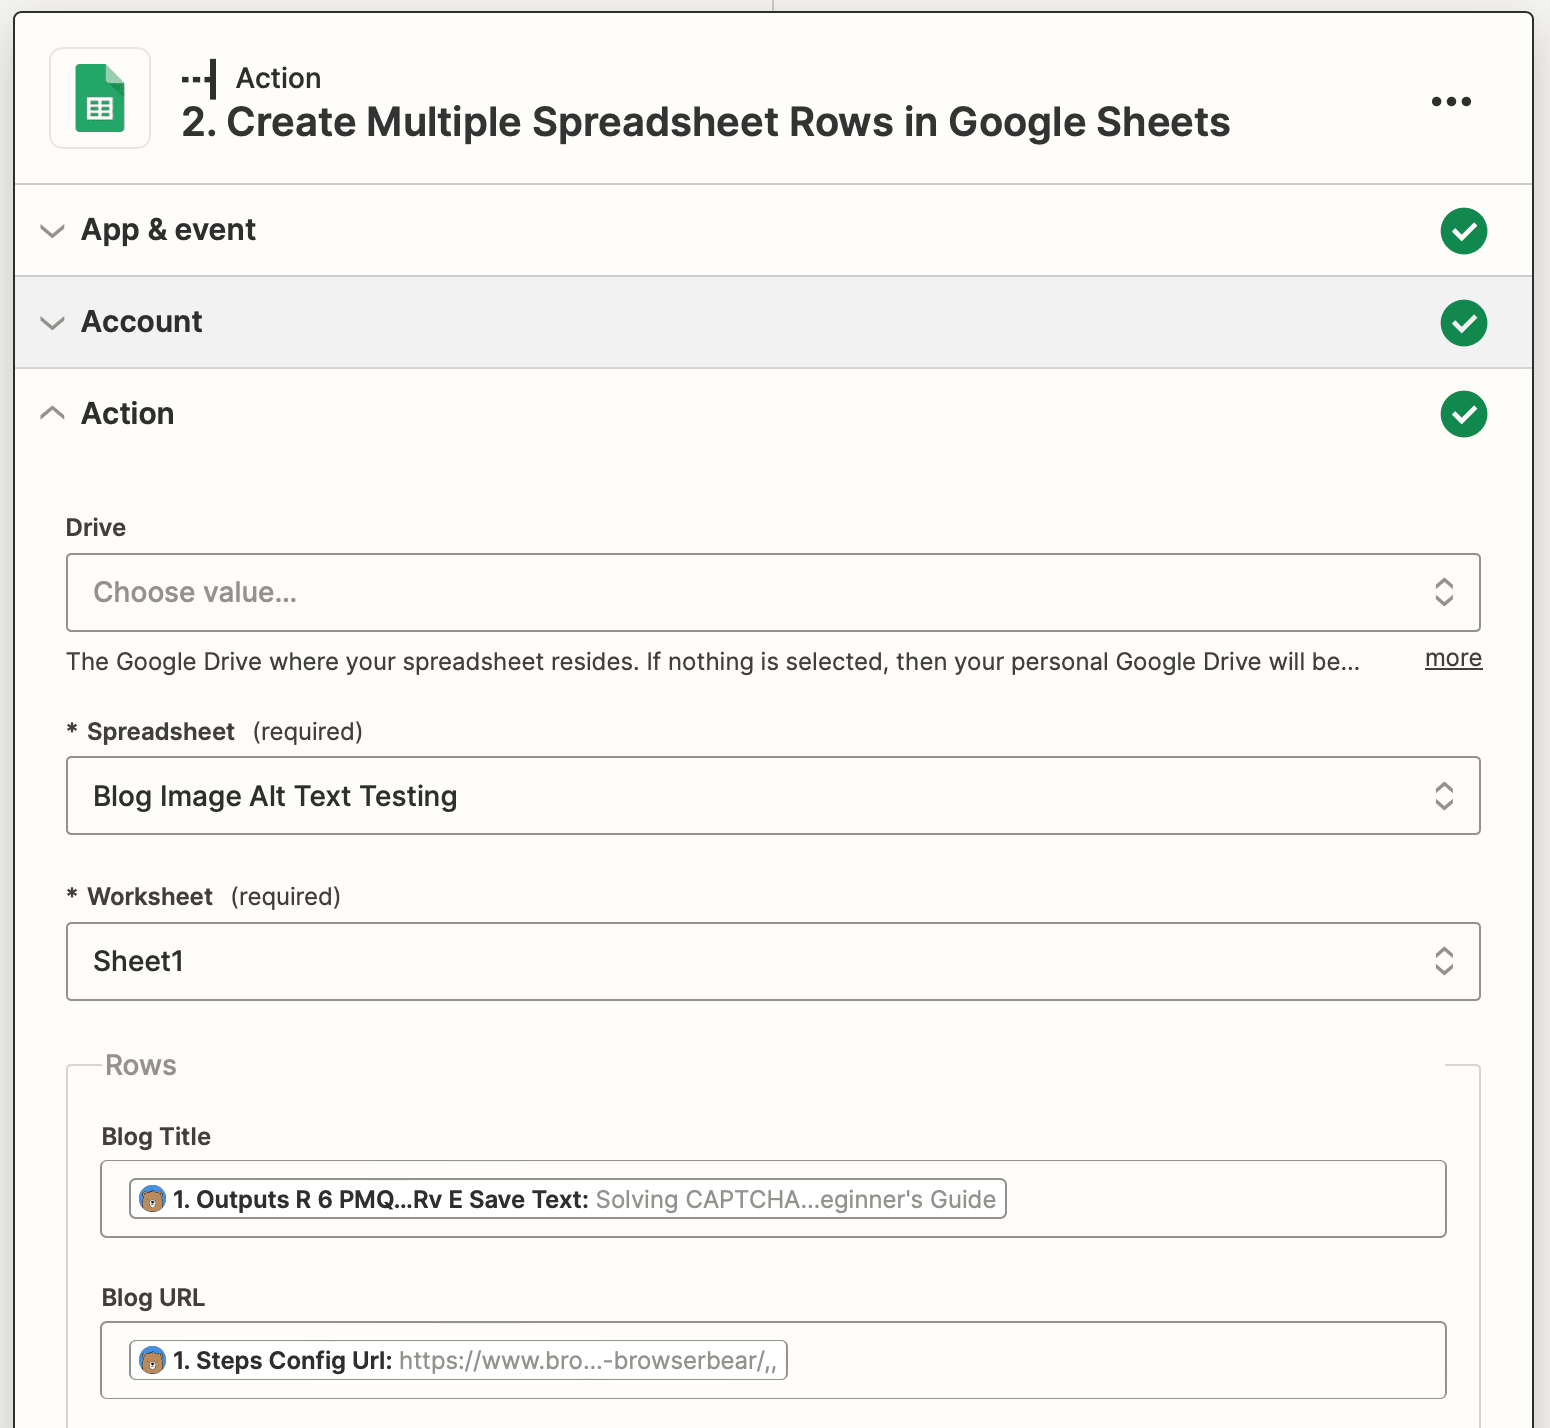
Test the action. You should see your spreadsheet populate itself with the output of the task run.
Set up a Zap to Send Slack Message
The last step notifies you when alt text is found to be missing by sending you a Slack message.
Click + Create Zap , and set up the following events:
Trigger: New or Updated Spreadsheet Row in Google Sheets
Choose Google Sheets as the app and New or Updated Spreadsheet Row as the event.
Set up the trigger by selecting the corresponding drive, spreadsheet, and worksheet. You’ll also have to select a trigger column, which will be Alt Text Missing?.
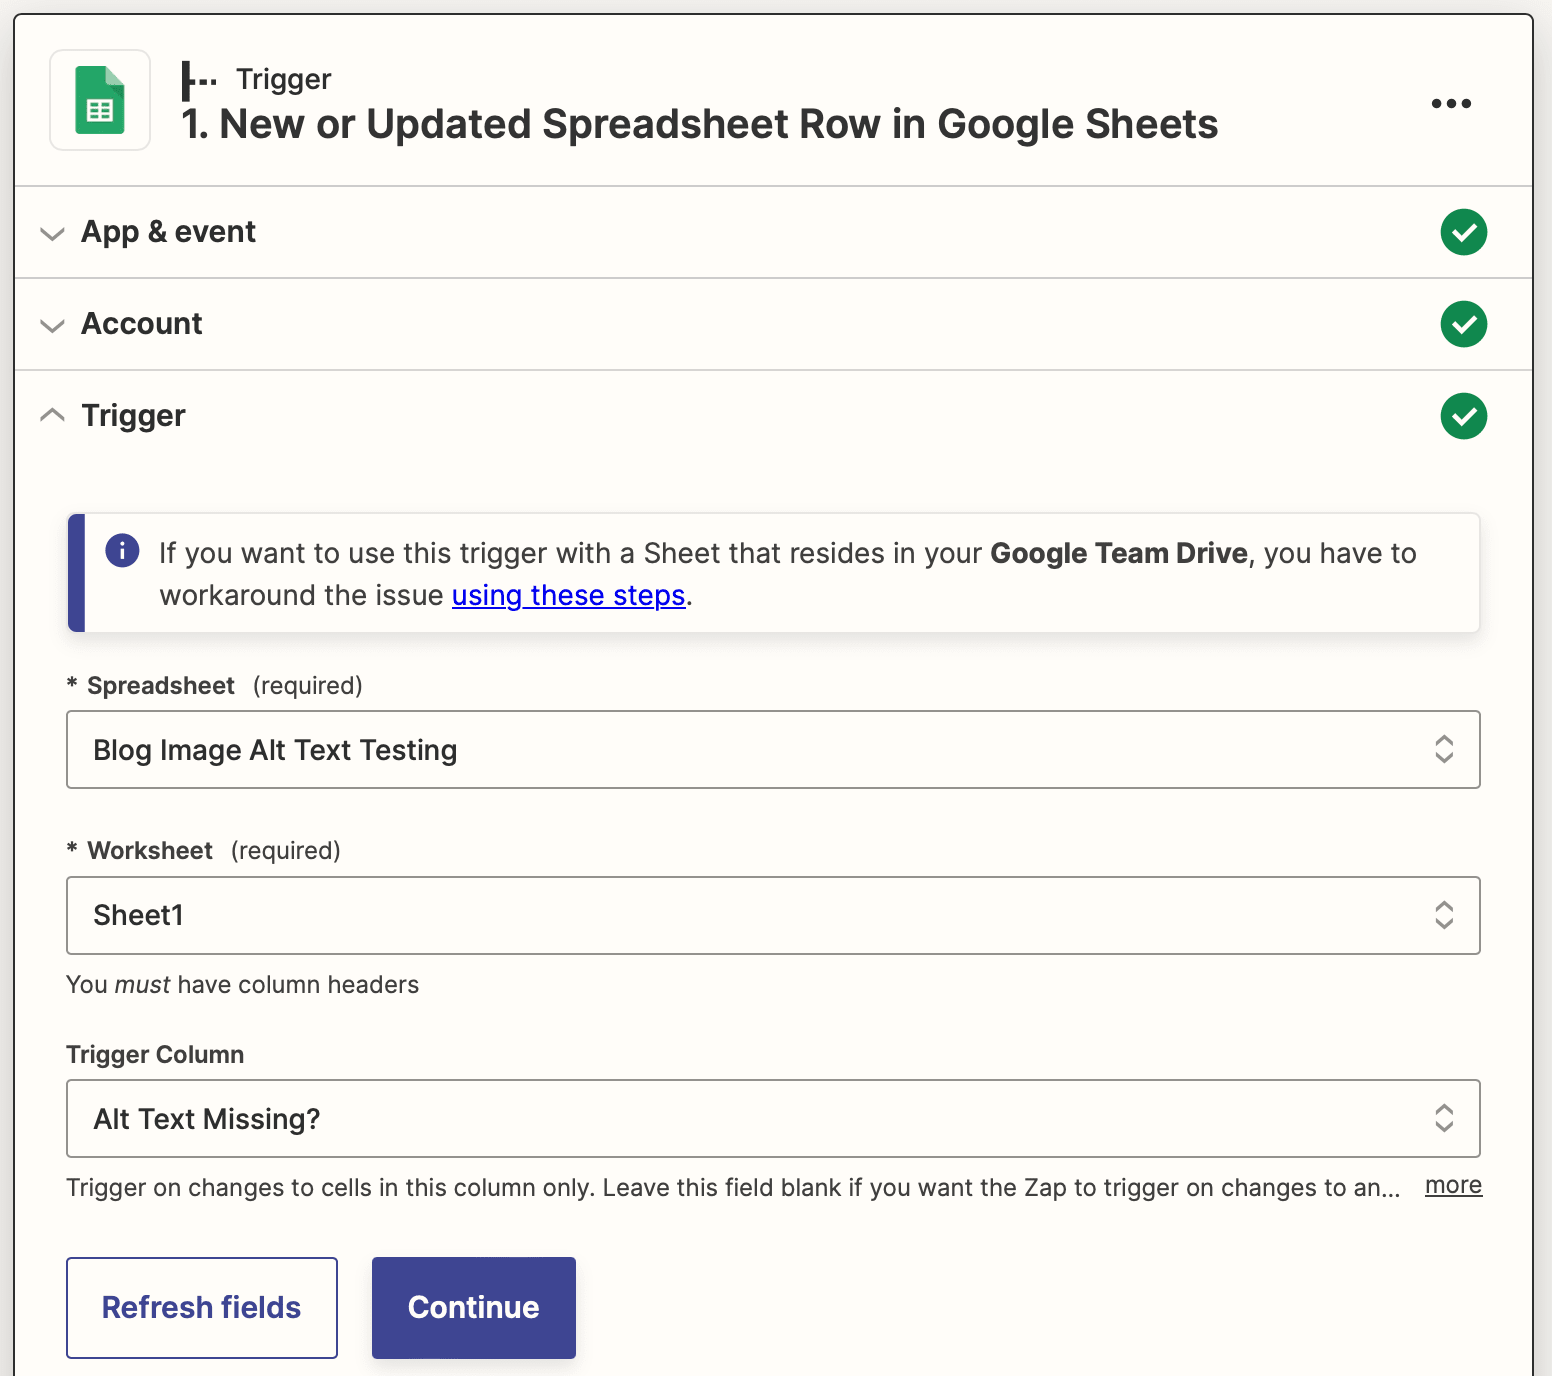
Test the trigger to ensure Zapier is able to find a row.
Bear Tip 🐻 : Zapier needs test data to work with, and your task run may not yield null results. You can manually replace an Image Alt cell with “null” on your spreadsheet for testing purposes.
Action: Send Direct Message in Slack
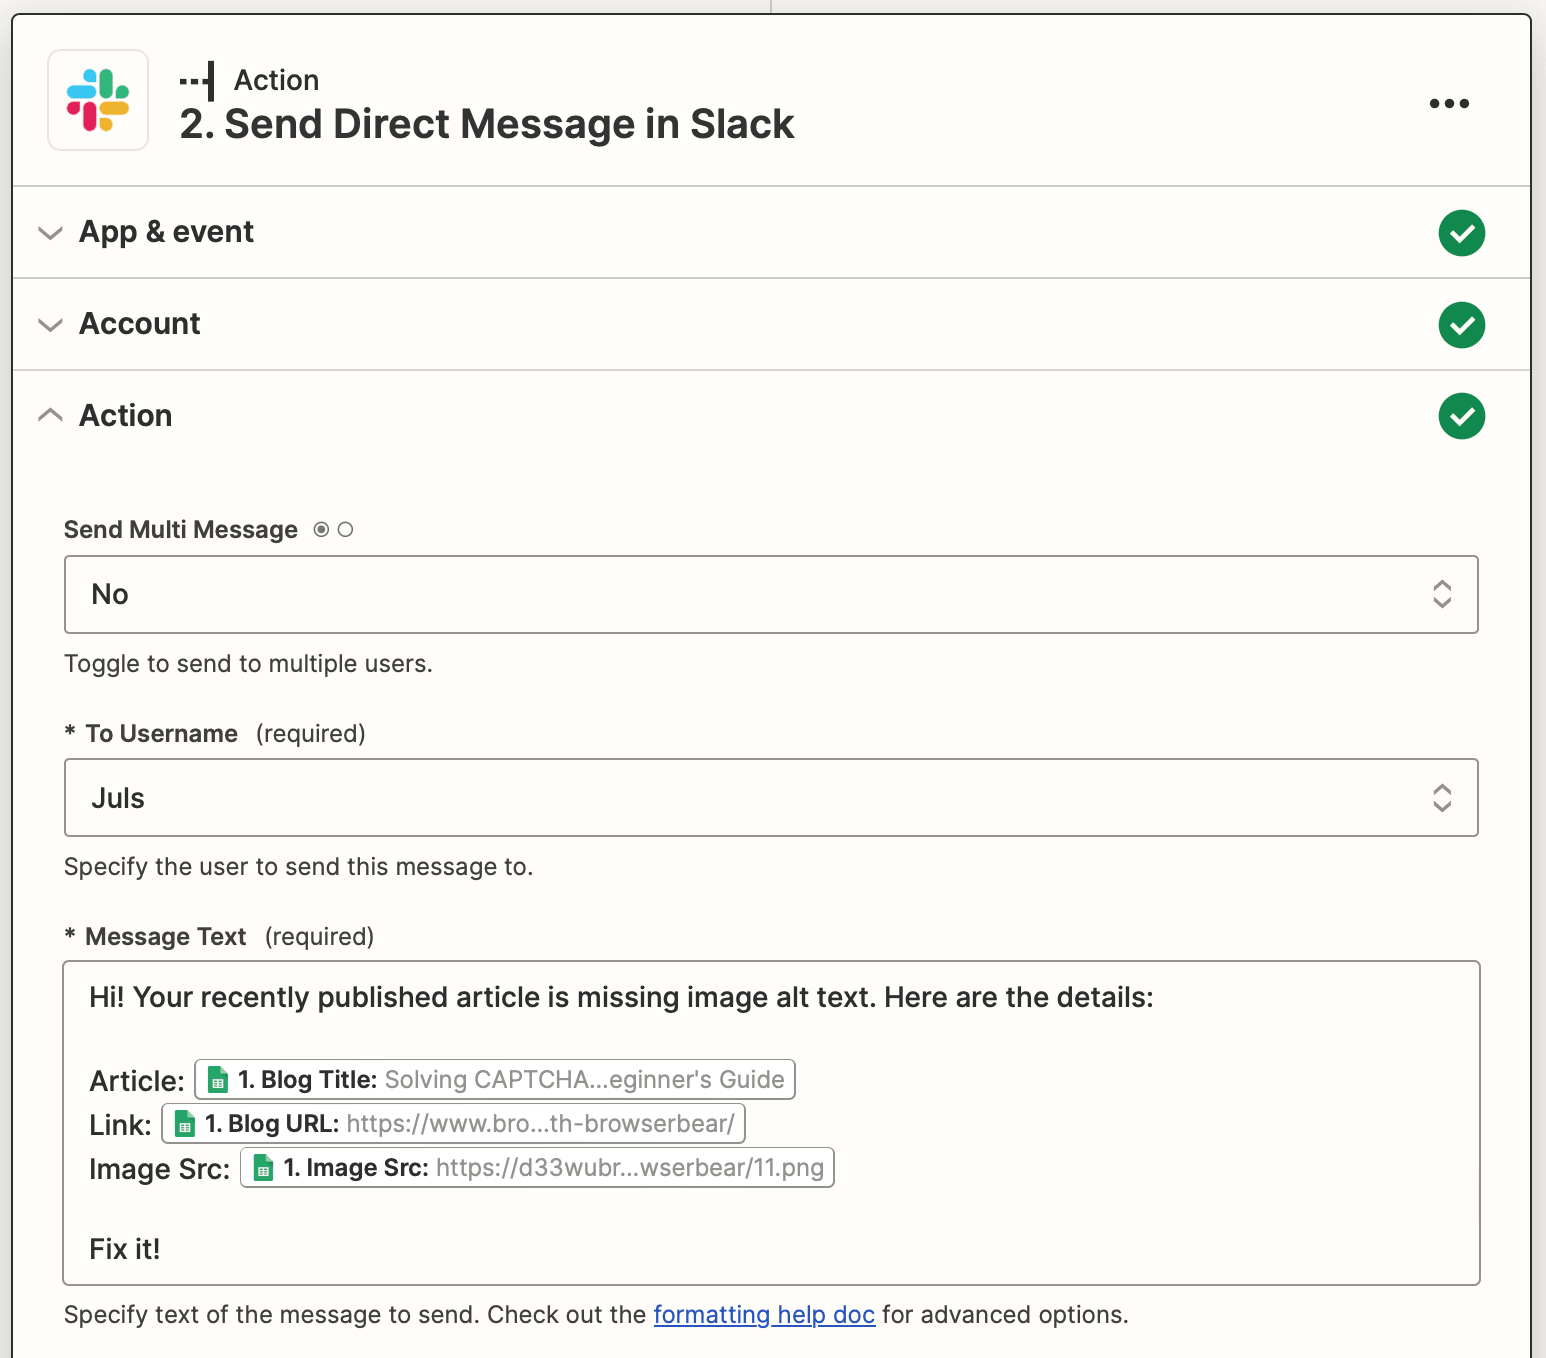
Choose Slack as the app and Send Direct Message as the event. If your Slack account is not yet connected to Zapier, you’ll be prompted to login and give permissions.
Set up the action by customizing the message options available. This can be done according to your needs, so you can choose whether to send a message to yourself, a channel, or even multiple users. There are also options for sending the message as a bot with a custom icon.

After you’ve customized the message, test the action. Zapier will deliver the message to the specified Slack user or channel:
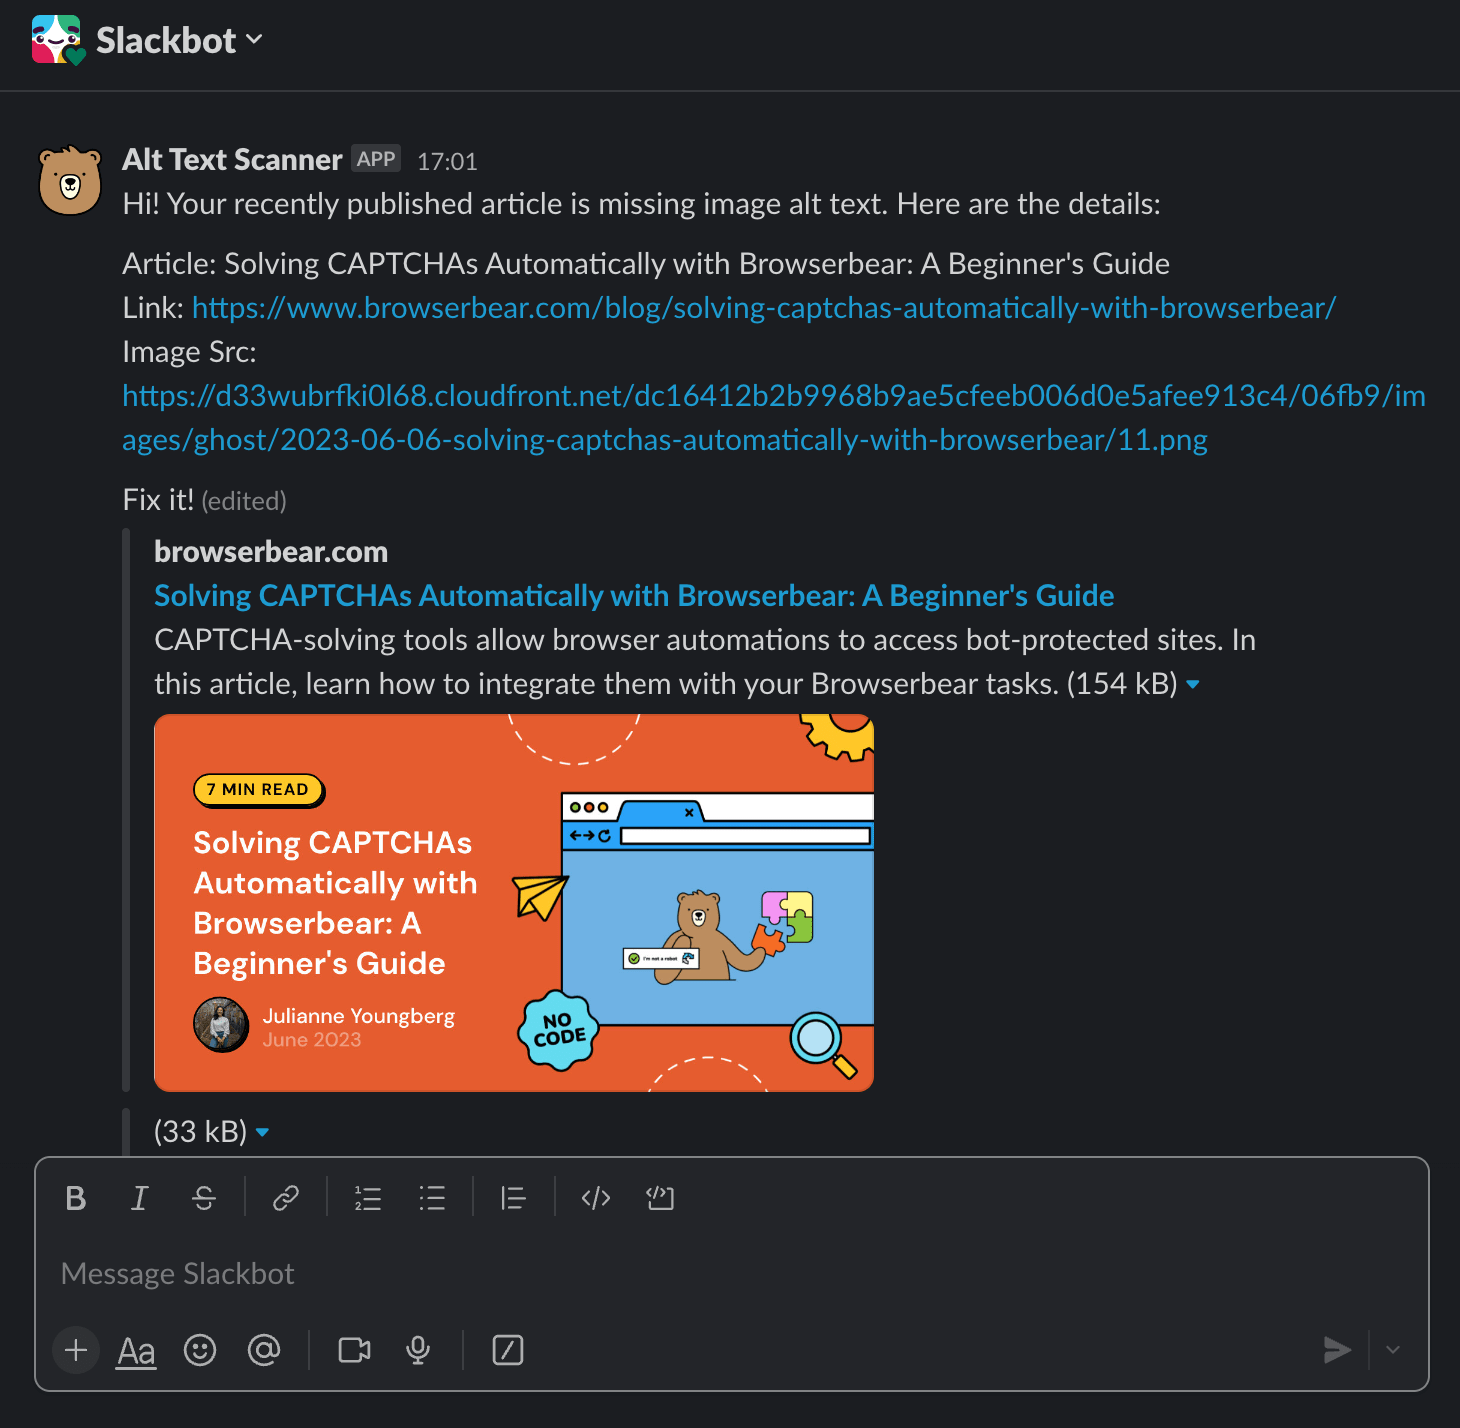
And that’s it! When you’re happy with your workflow, click Publish and take all the zaps live.
Improve Website Experiences with Image Alt Text
Image alt text does a lot to improve the overall user experience you offer. It contributes to accessibility and SEO, and neglecting it could result in a negative impression of your site.
It’s inevitable to miss alt text here and there, especially if you frequently update your site with new posts. That’s why setting up an automation that scans new posts and prompts you to take action can be so helpful. With it, you can always be sure new posts are optimized for humans and search engines alike.
