How to Automate Login with Browserbear
Contents
Whether you are a developer who uses automation to test web applications, scrape websites for data, or automate other tedious administrative tasks, I believe you have come across scenarios where you need to log in to the website to perform your task.
User authentication is commonly implemented on web applications to protect their systems and prevent unauthorized users from accessing sensitive information. However, this could be a challenge when you need to automate tasks that require logging in.
In this article, we’ll guide you step-by-step on how to create automation that helps you log in to a website using Browserbear. We will demonstrate how to log in to a Browserbear account but you can follow this tutorial to log in to other websites too.
What is Browserbear
Browserbear is a scalable, cloud-based browser automation tool that helps you to automate any browser task. From automated website testing, scraping data, taking scheduled screenshots for archiving, to automating other repetitive browser tasks, you can do it with Browserbear without writing a single line of code.
One of the best things about Browserbear is its simplicity. Unlike other web automation tools, Browserbear is easy to set up and use. To get started, you must create a task in your Browserbear account (start your free trial) and add the steps needed to carry out the task. After that, you can start automating tasks on any web page.
Similar to Bannerbear, the flagship automated image and video generation tool from the same company, you can easily integrate it into your existing applications or code using its API. Therefore, you can use it for projects in any programming language including Python, JavaScript, R, etc. as long as you can make an HTTP request in that language.
Pre-requisites
To follow this tutorial, you will need:
- A Browserbear account - to create automation tasks (sign up here!)
- Browserbear Helper - a Chrome extension that helps Browserbear to locate the target HTML element from a web page
After creating a Browserbear account and installing the Chrome extension, we’re all set! There are three ways we can log in to a website using Browserbear and we will cover each of them in detail.
Method 1: Fill in the Login Form
This method uses basic browser actions like “go”, “enter text”, and “click” to enter the email and password like how you would log in to a website manually.
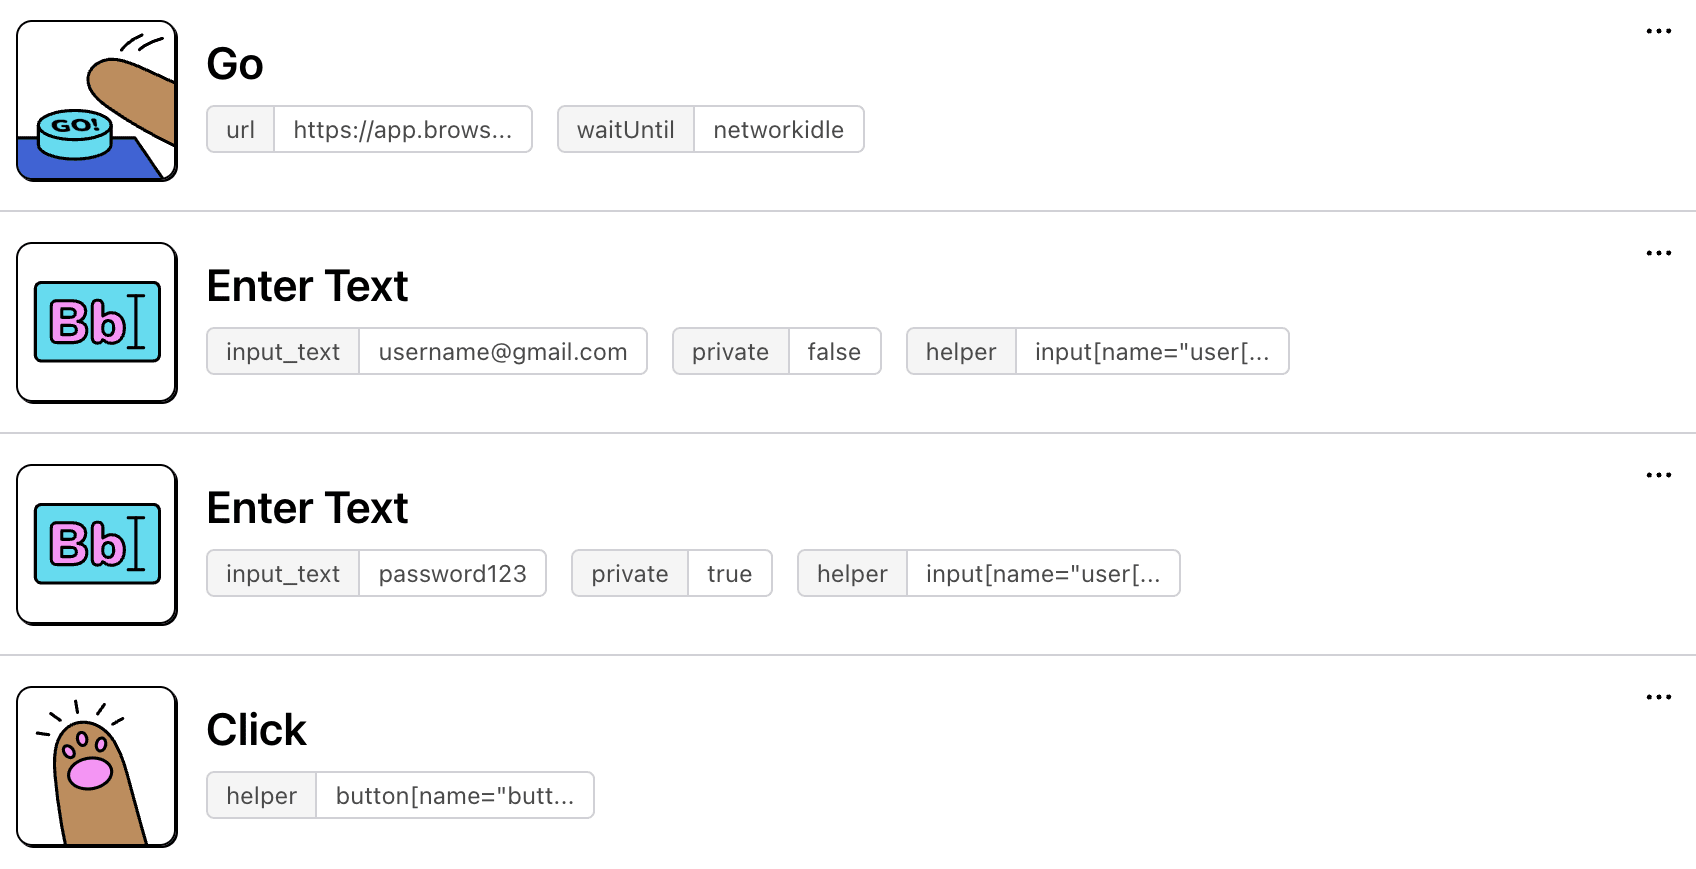
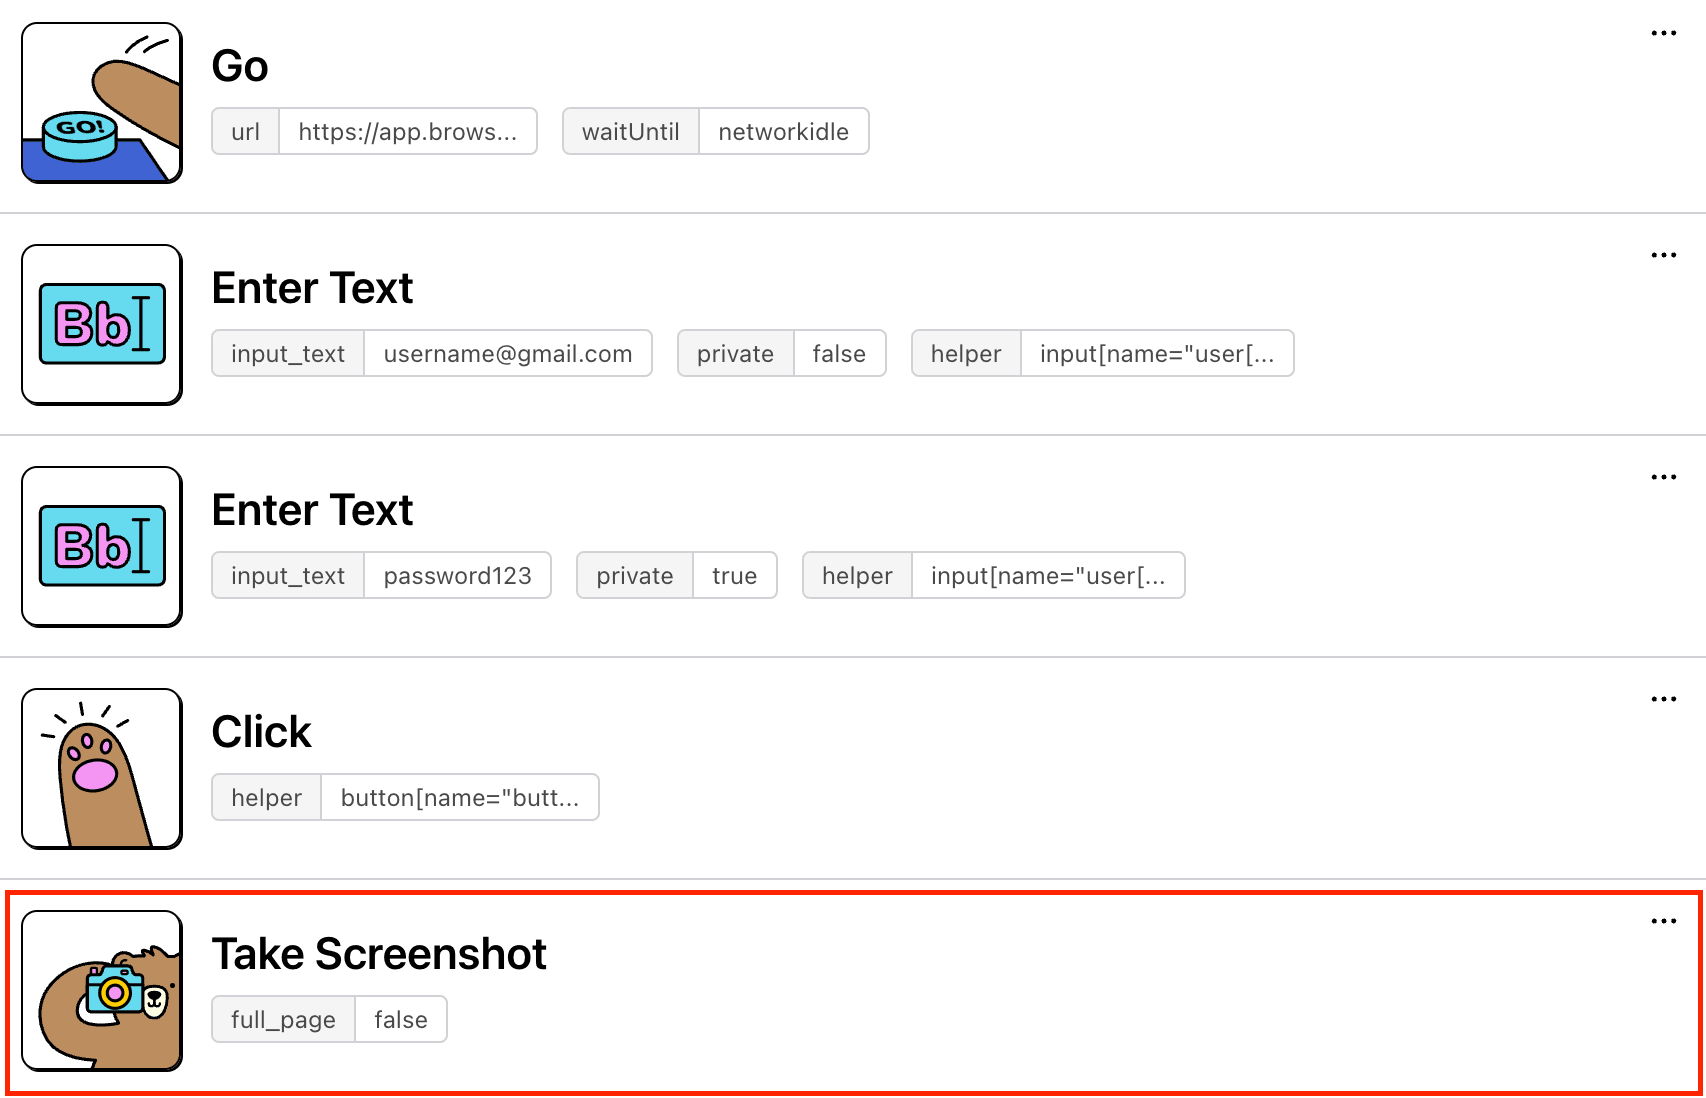
Create a new task from your Browserbear dashboard. Then, add these steps to your task:
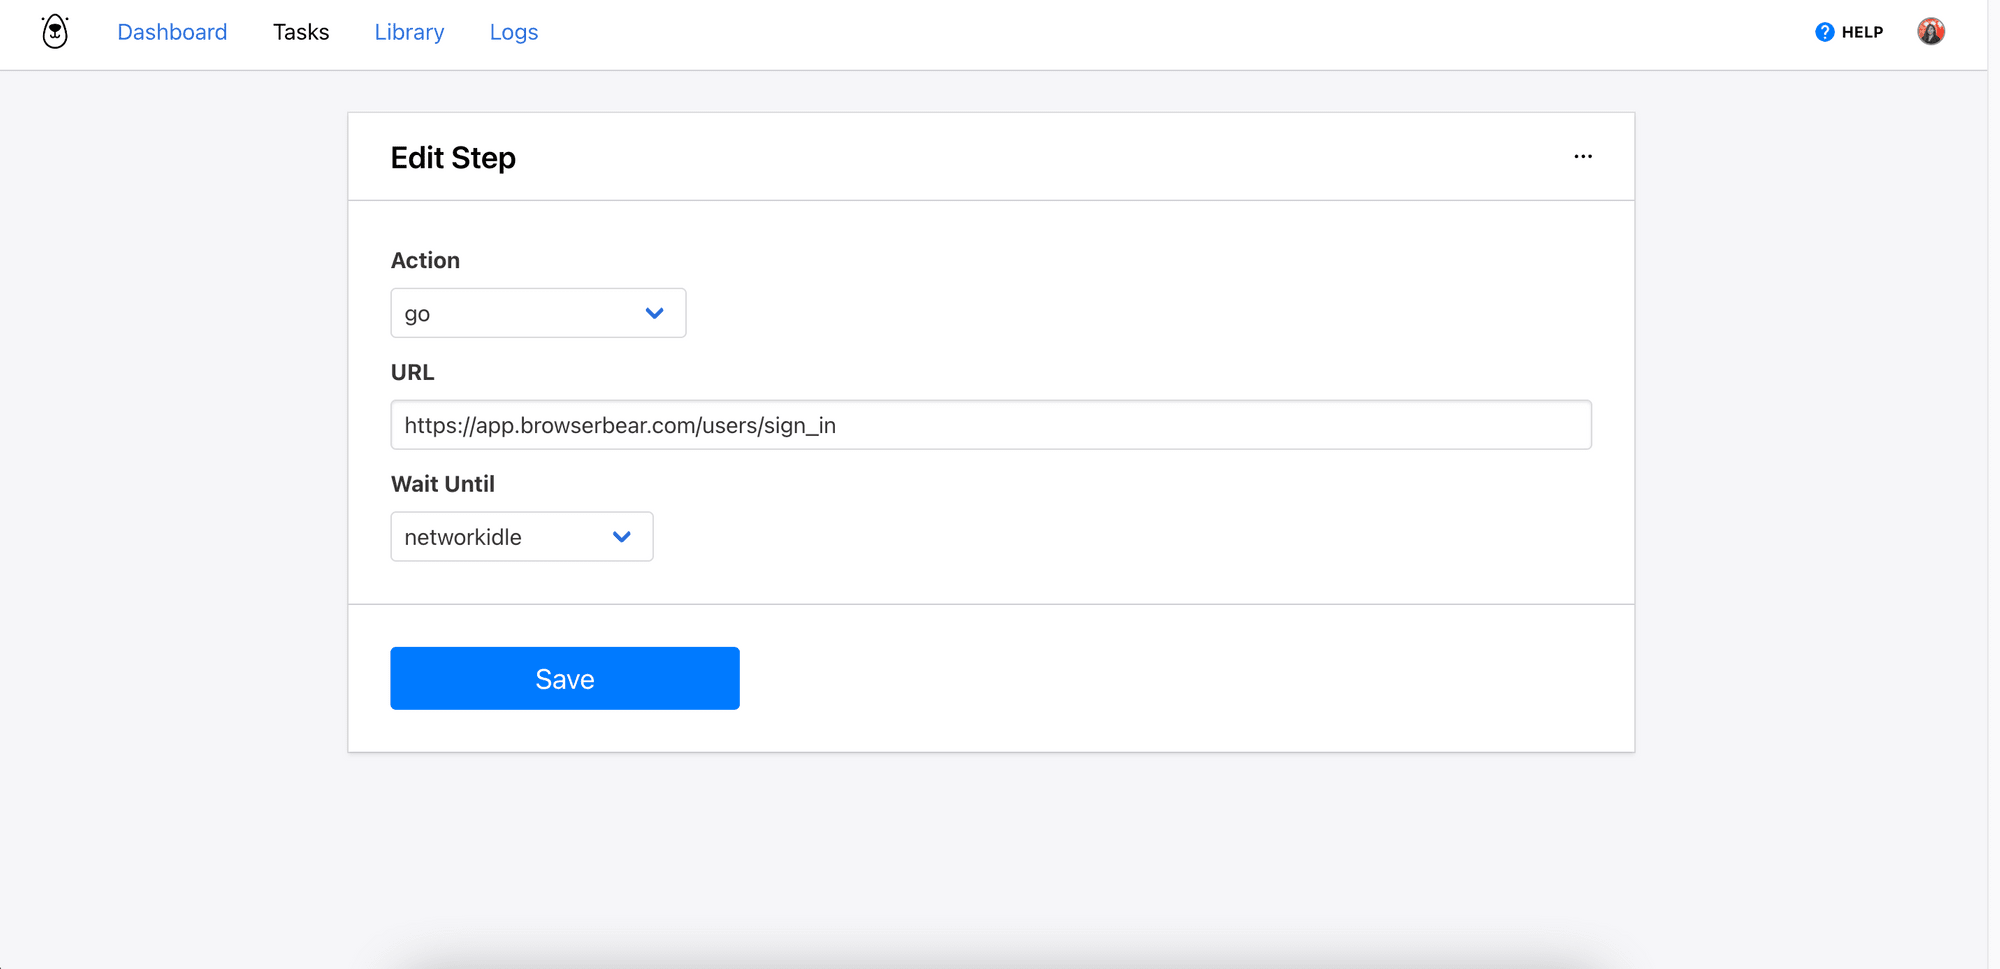
Step 1. Go
Select “go” from the Action dropdown and enter the URL of the website that you want to log in to. The Wait Until option will decide when to execute the next step after the browser navigates to the URL. Select “networkidle” to wait until no new network requests are made for 500ms so that the next step will be executed when this condition is met.

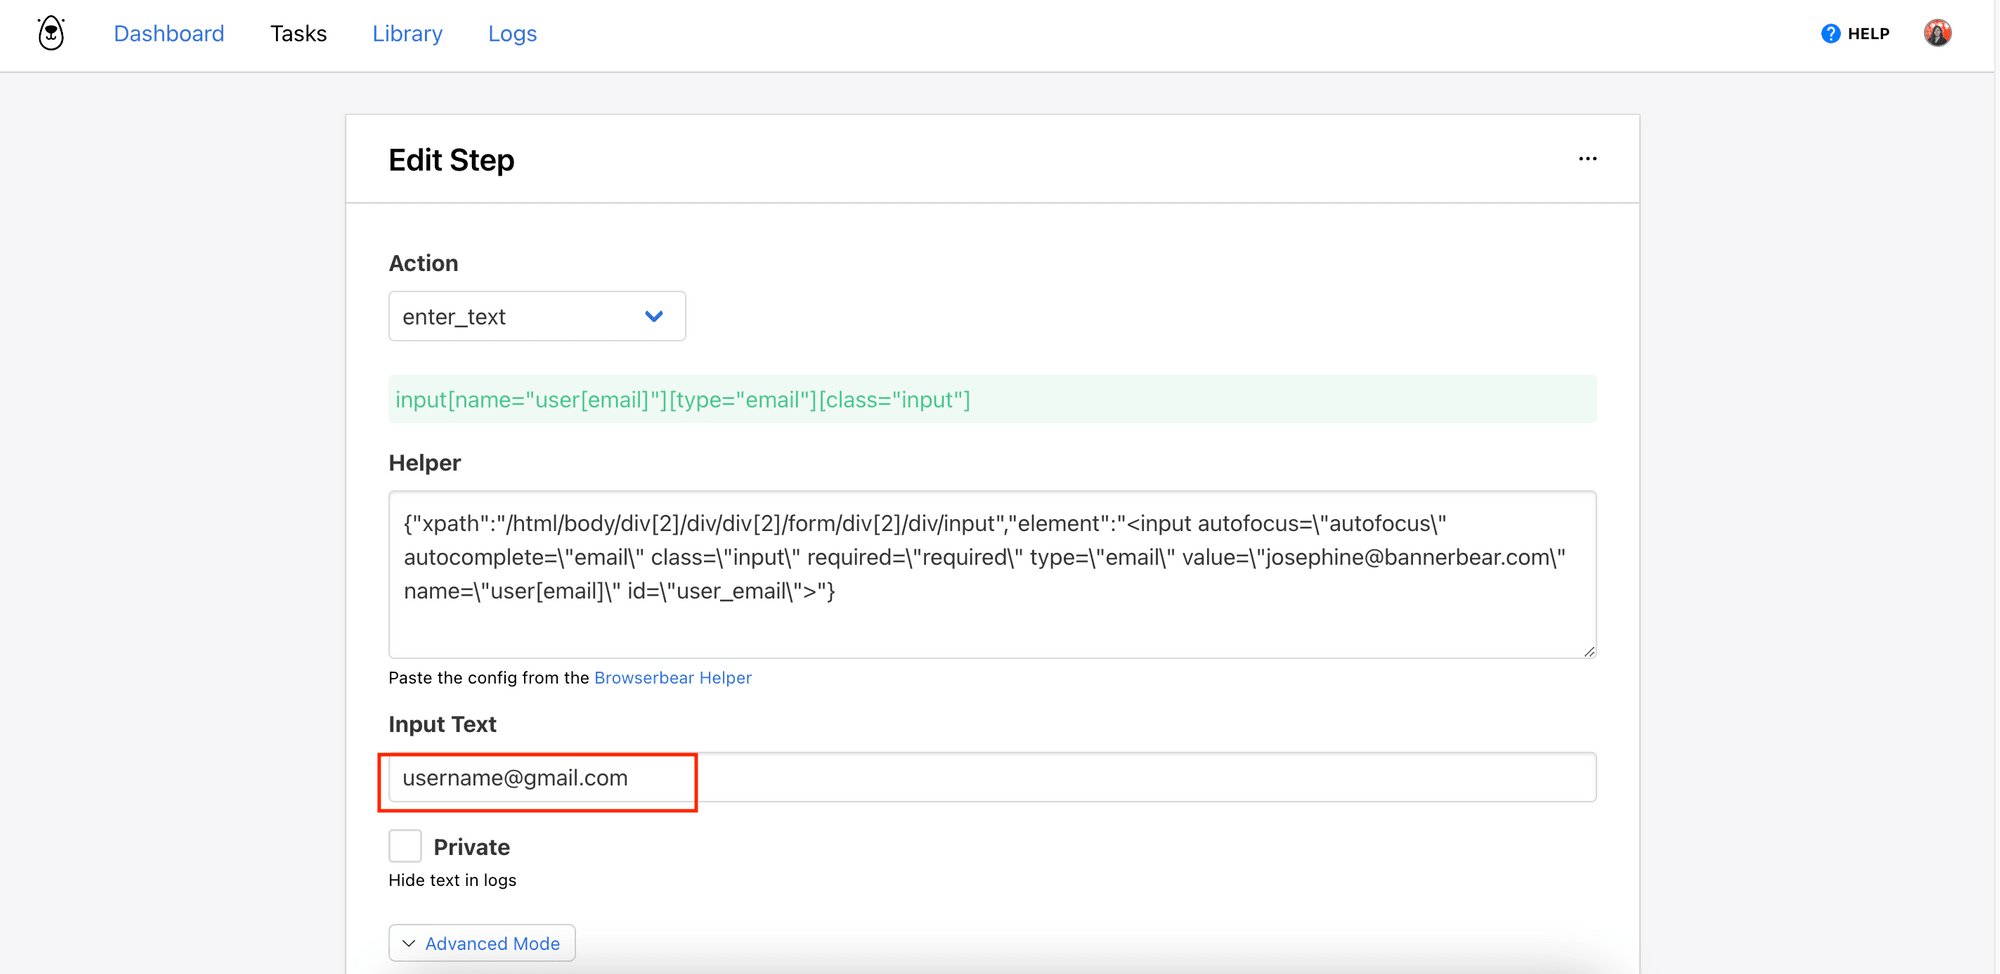
Step 2. Enter Text (Email)
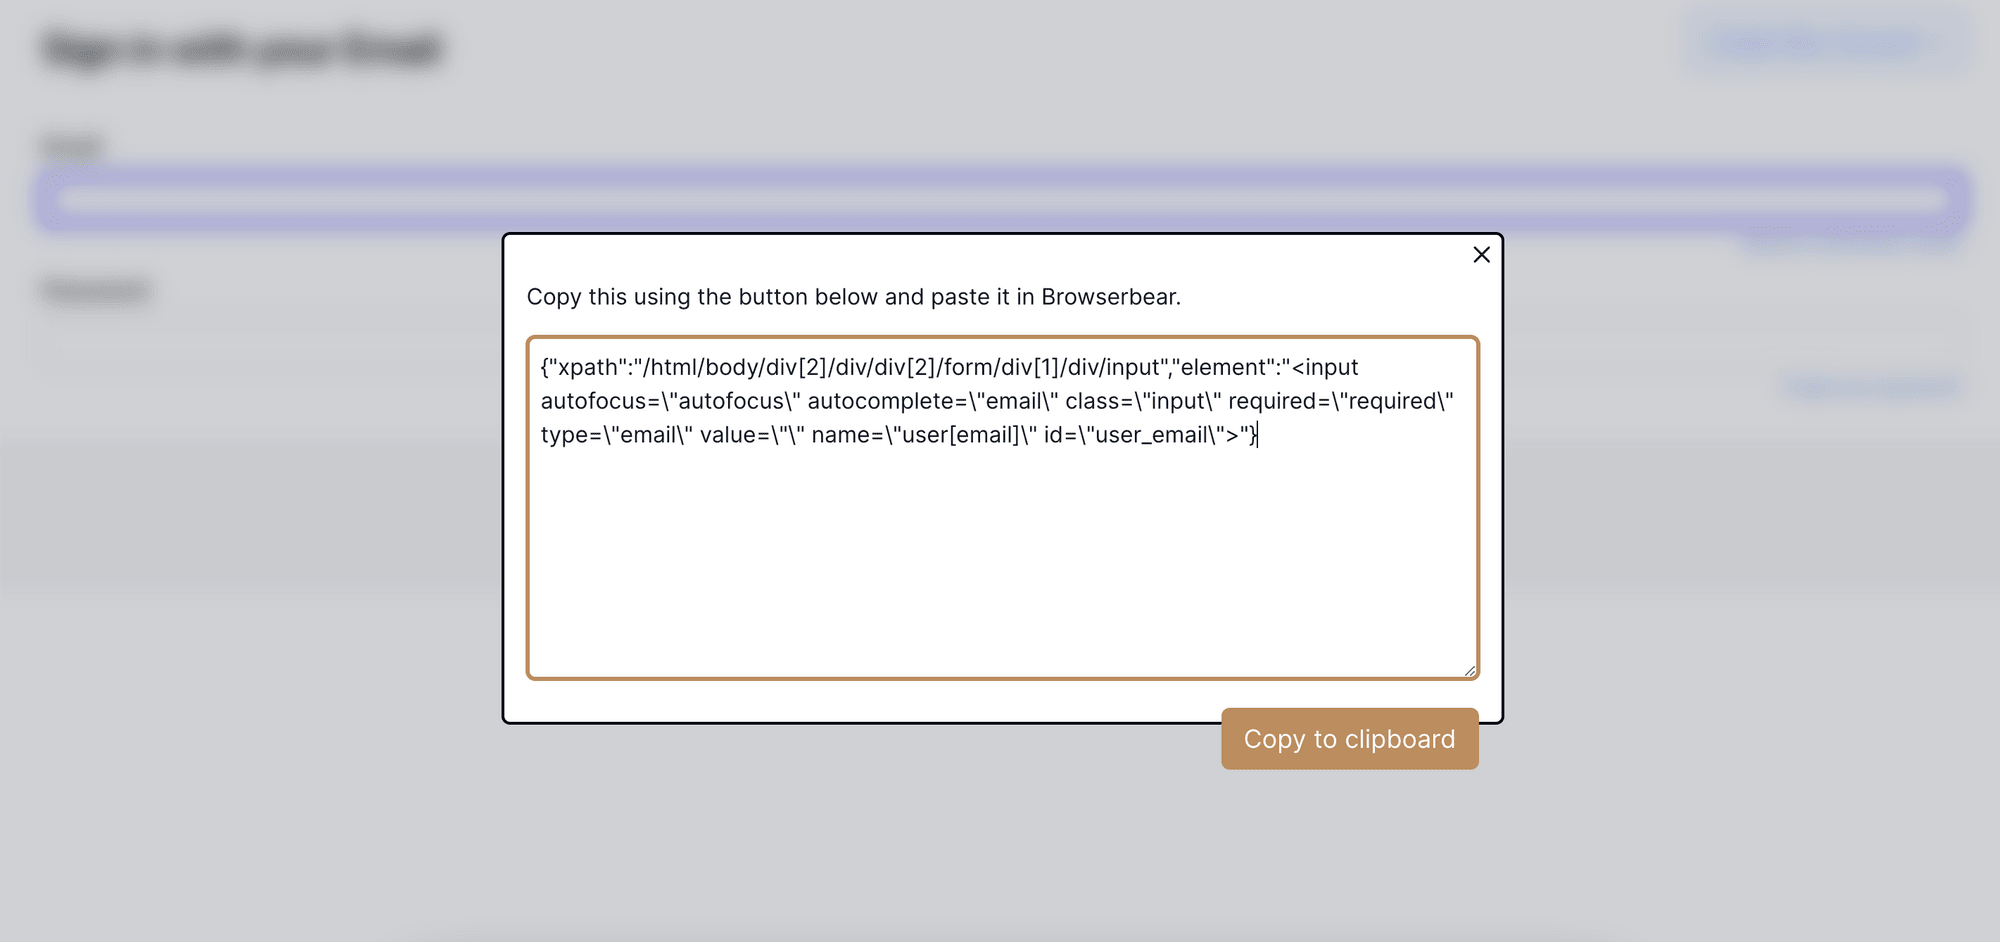
Select “enter_text” from the Action dropdown. Then, we need to enter a config that helps Browserbear to locate the target HTML element from the web page into the Helper text area. The config will be a JSON object that contains the XPath and the HTML snippet of the target element and we will use the Browserbear Helper to help us.
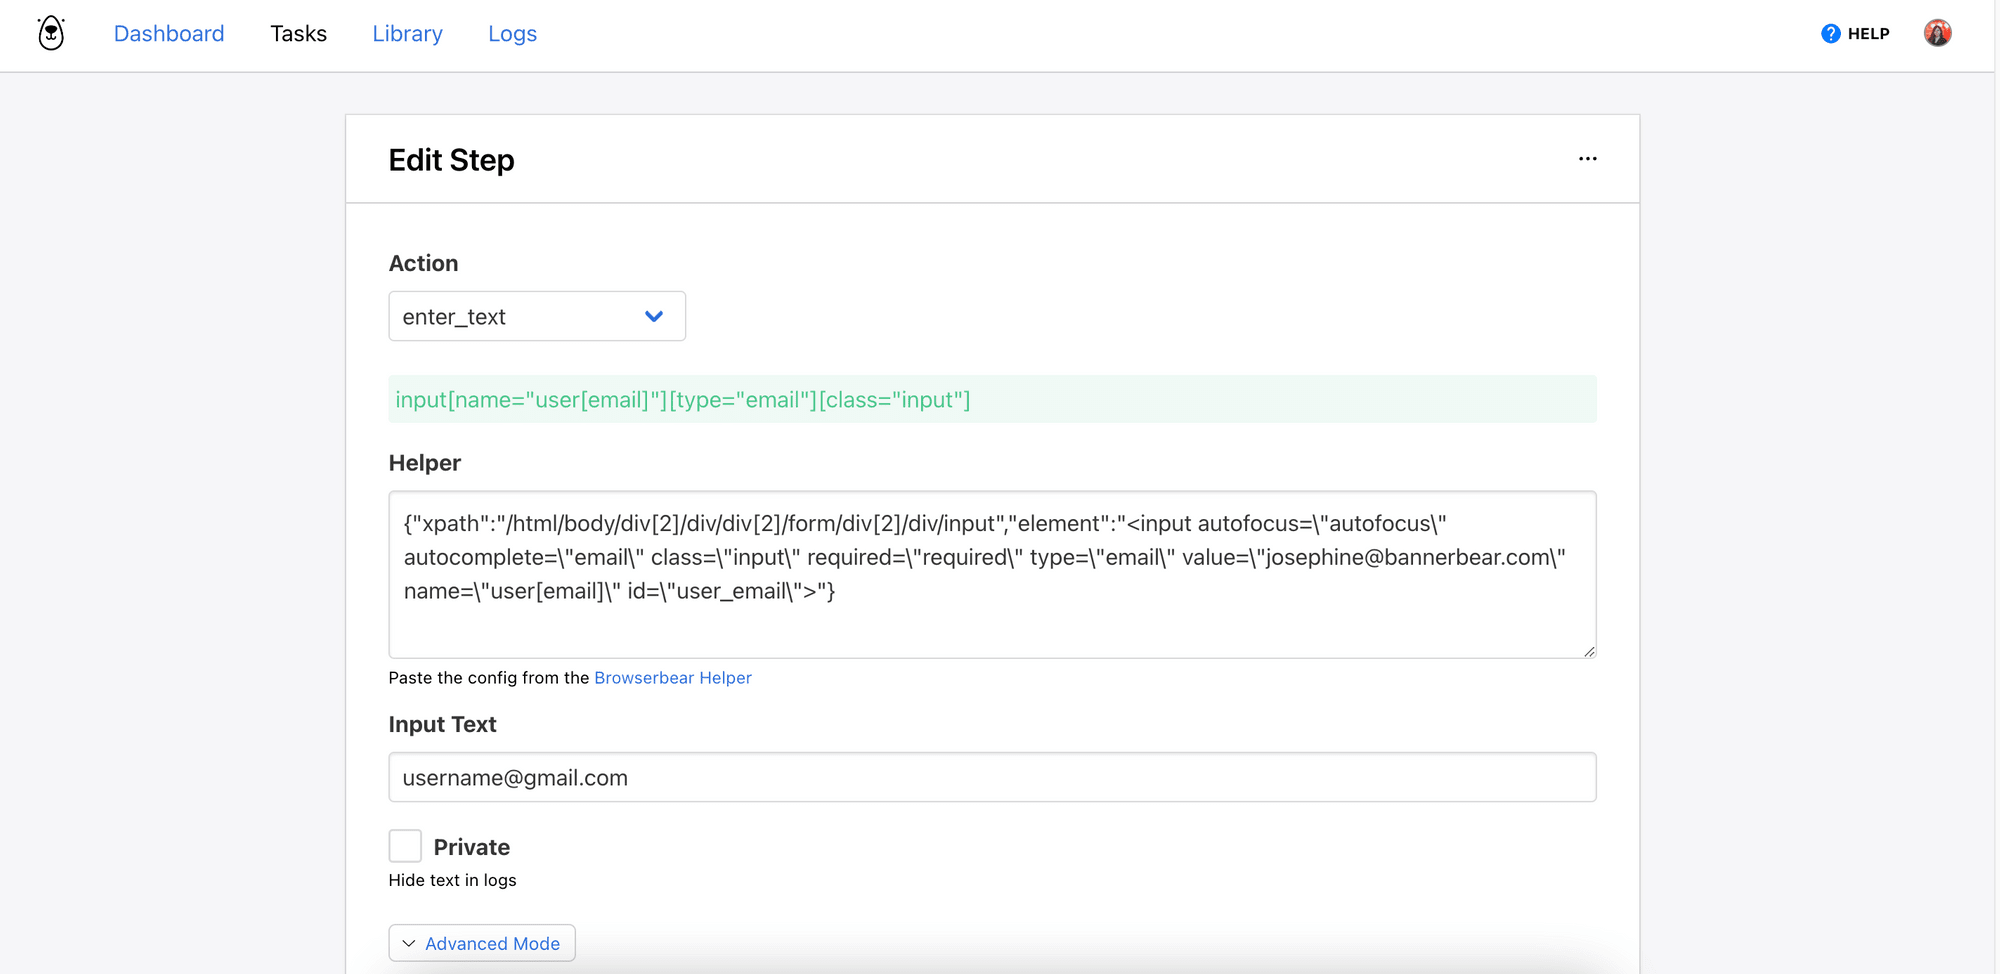
On the login page, click on the Browserbear Helper icon and hover your mouse over the email input field. There should be a blue frame around the input field.
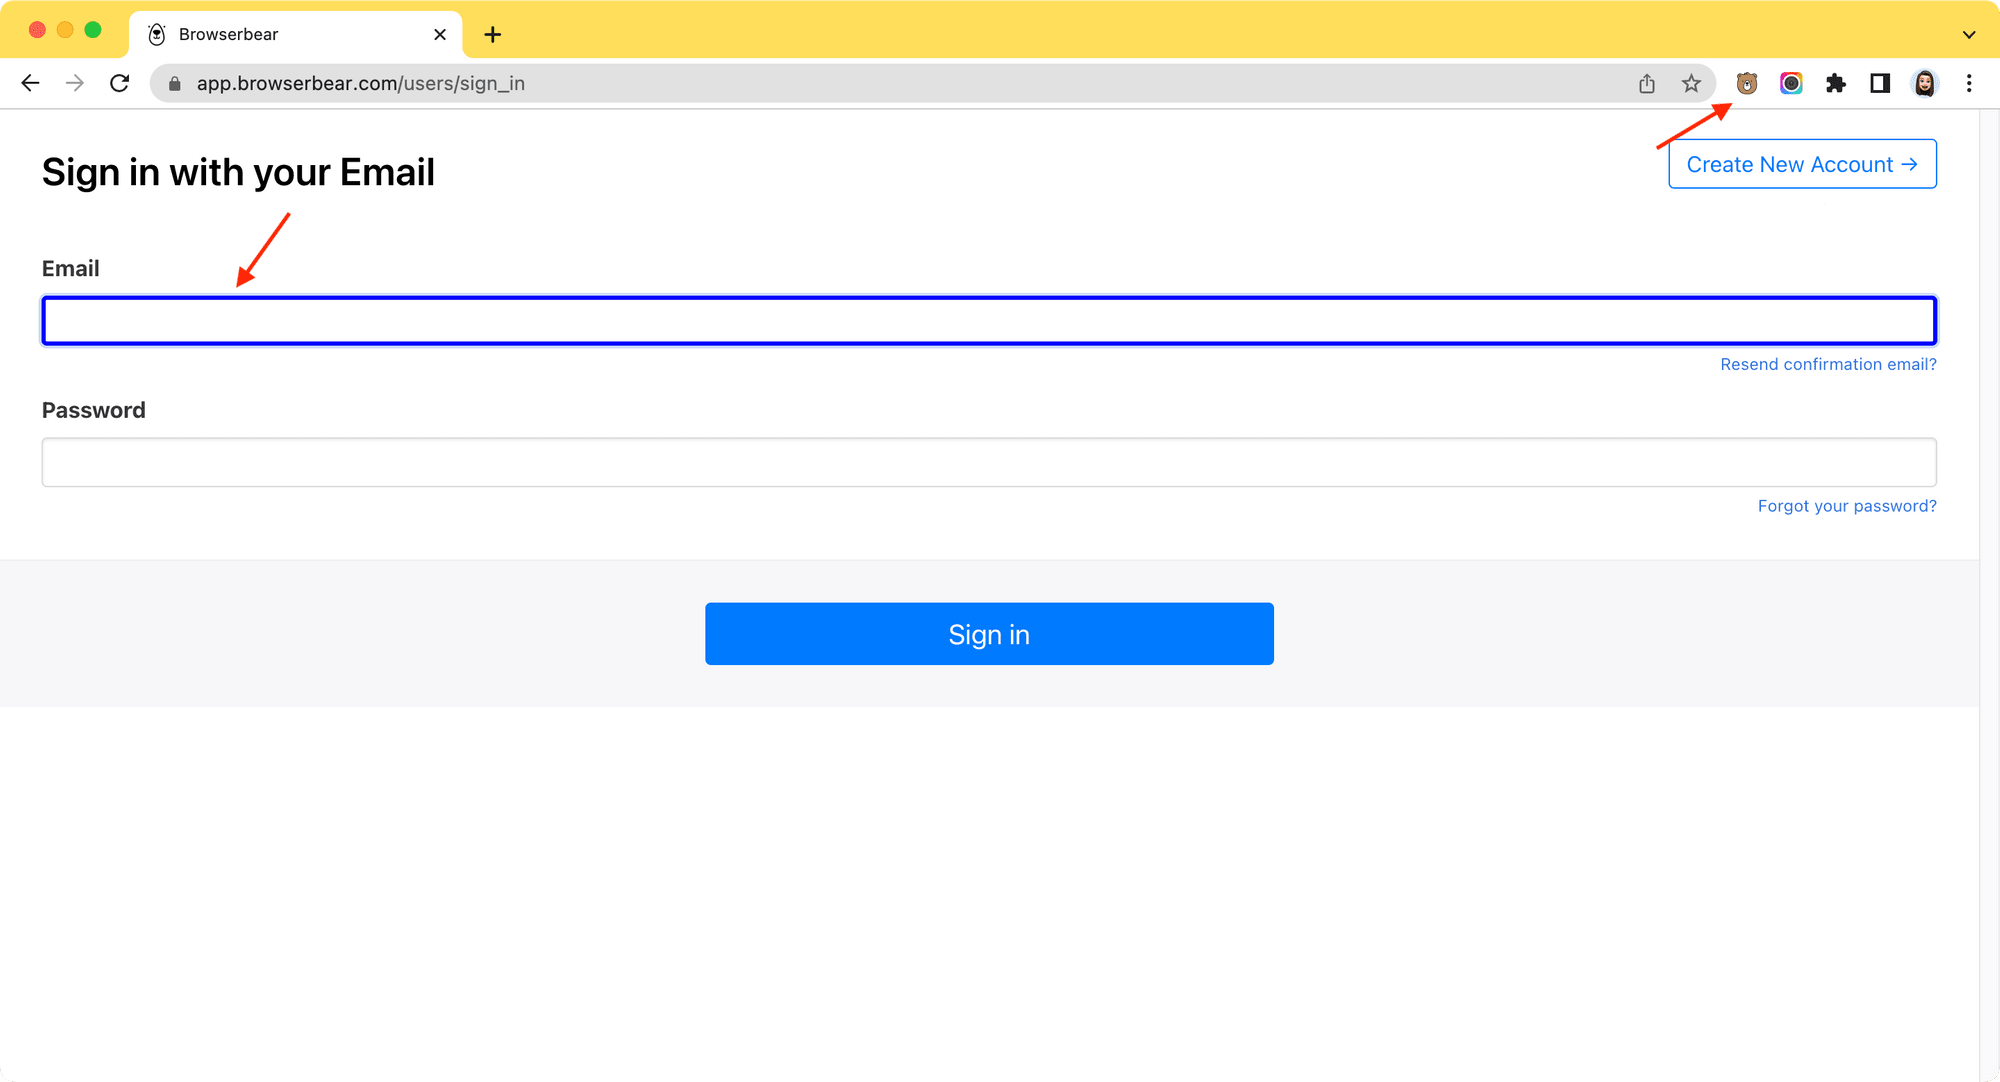
Click on it and a pop-up window containing the config/JSON object will appear. Copy the config and paste it into the Helper field in your Browserbear task.
For the Input Text field, enter the email that will be used for login.
Step 3. Enter Text (Password)
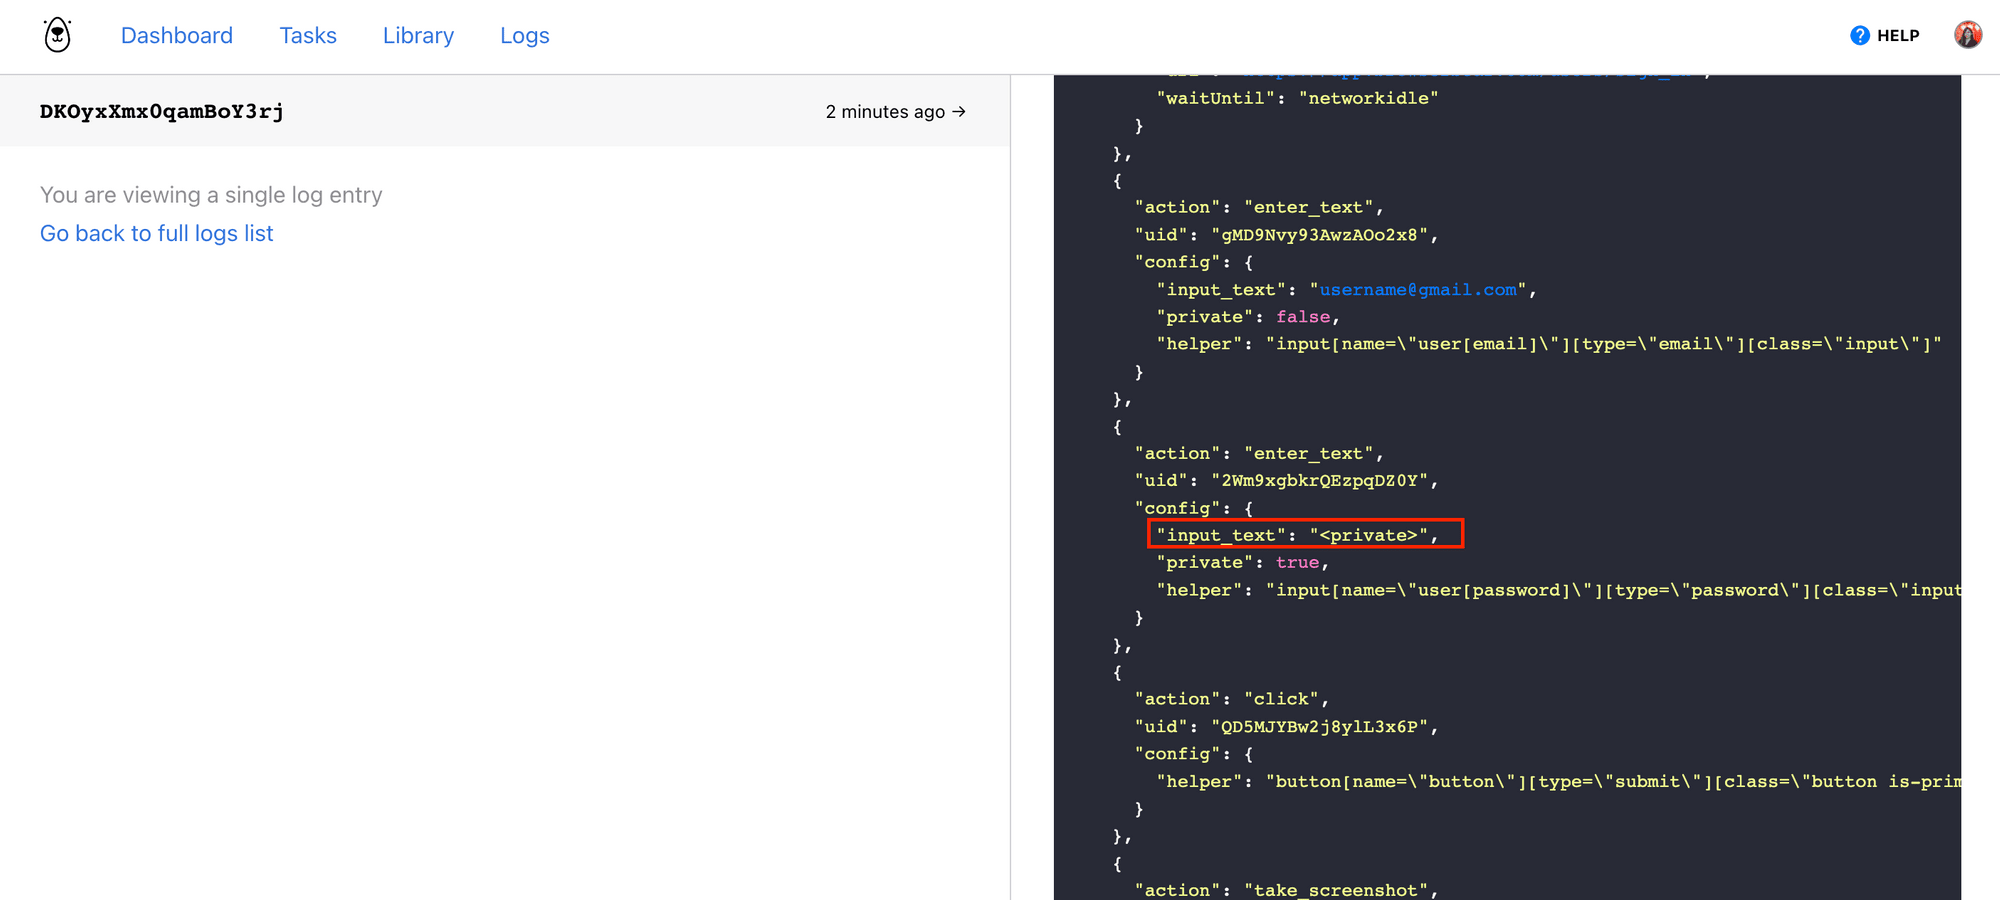
Repeat the same steps for the password input field. To protect your password, you can tick the Private checkbox so that the password entered into the input field will be hidden in the log.
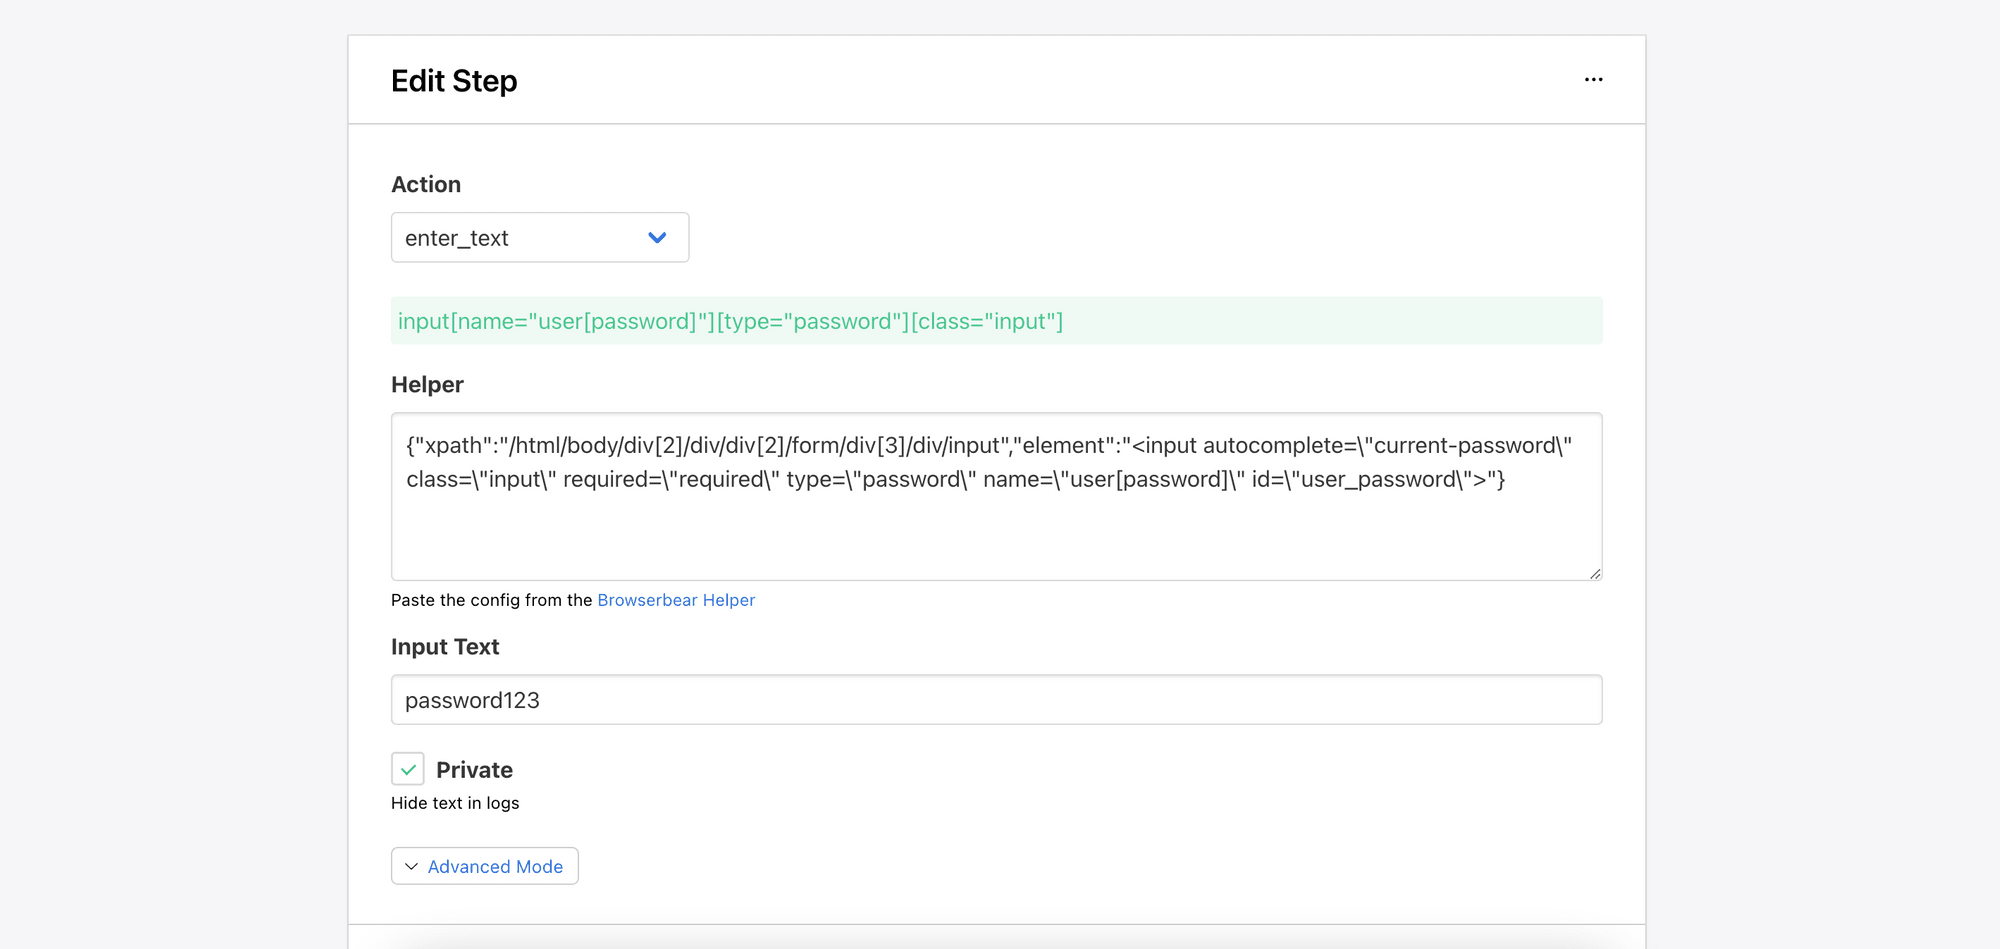
When the Private checkbox is ticked, the input text will be shown as <private> in the log:
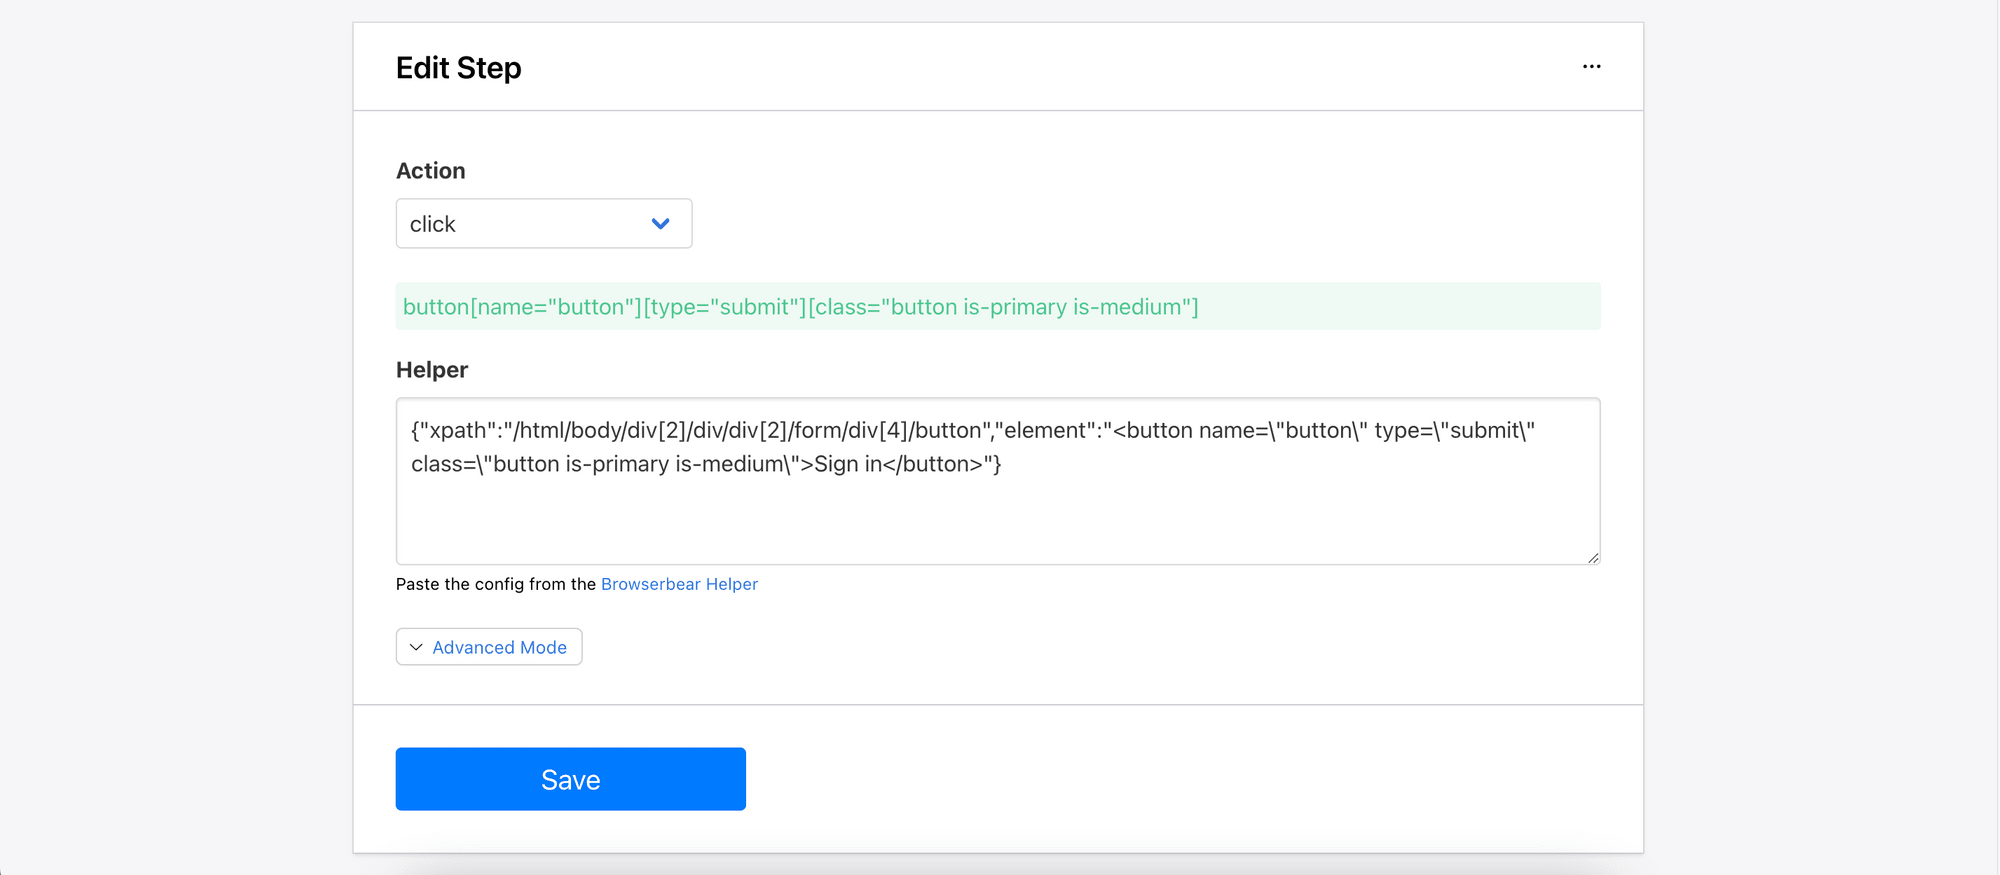
Step 4. Click (Submit)
After filling in the email and password, it’s time to submit the form. Like before, use the Browserbear Helper to get the config for the submit button and paste it into the Helper field.
Save the step and return to the task overview page. After running the task, you can check whether the login is successful from the video recorded in the log.

You can also add an extra step to the task to take a screenshot of the website after logging in and check the screenshot from the log.
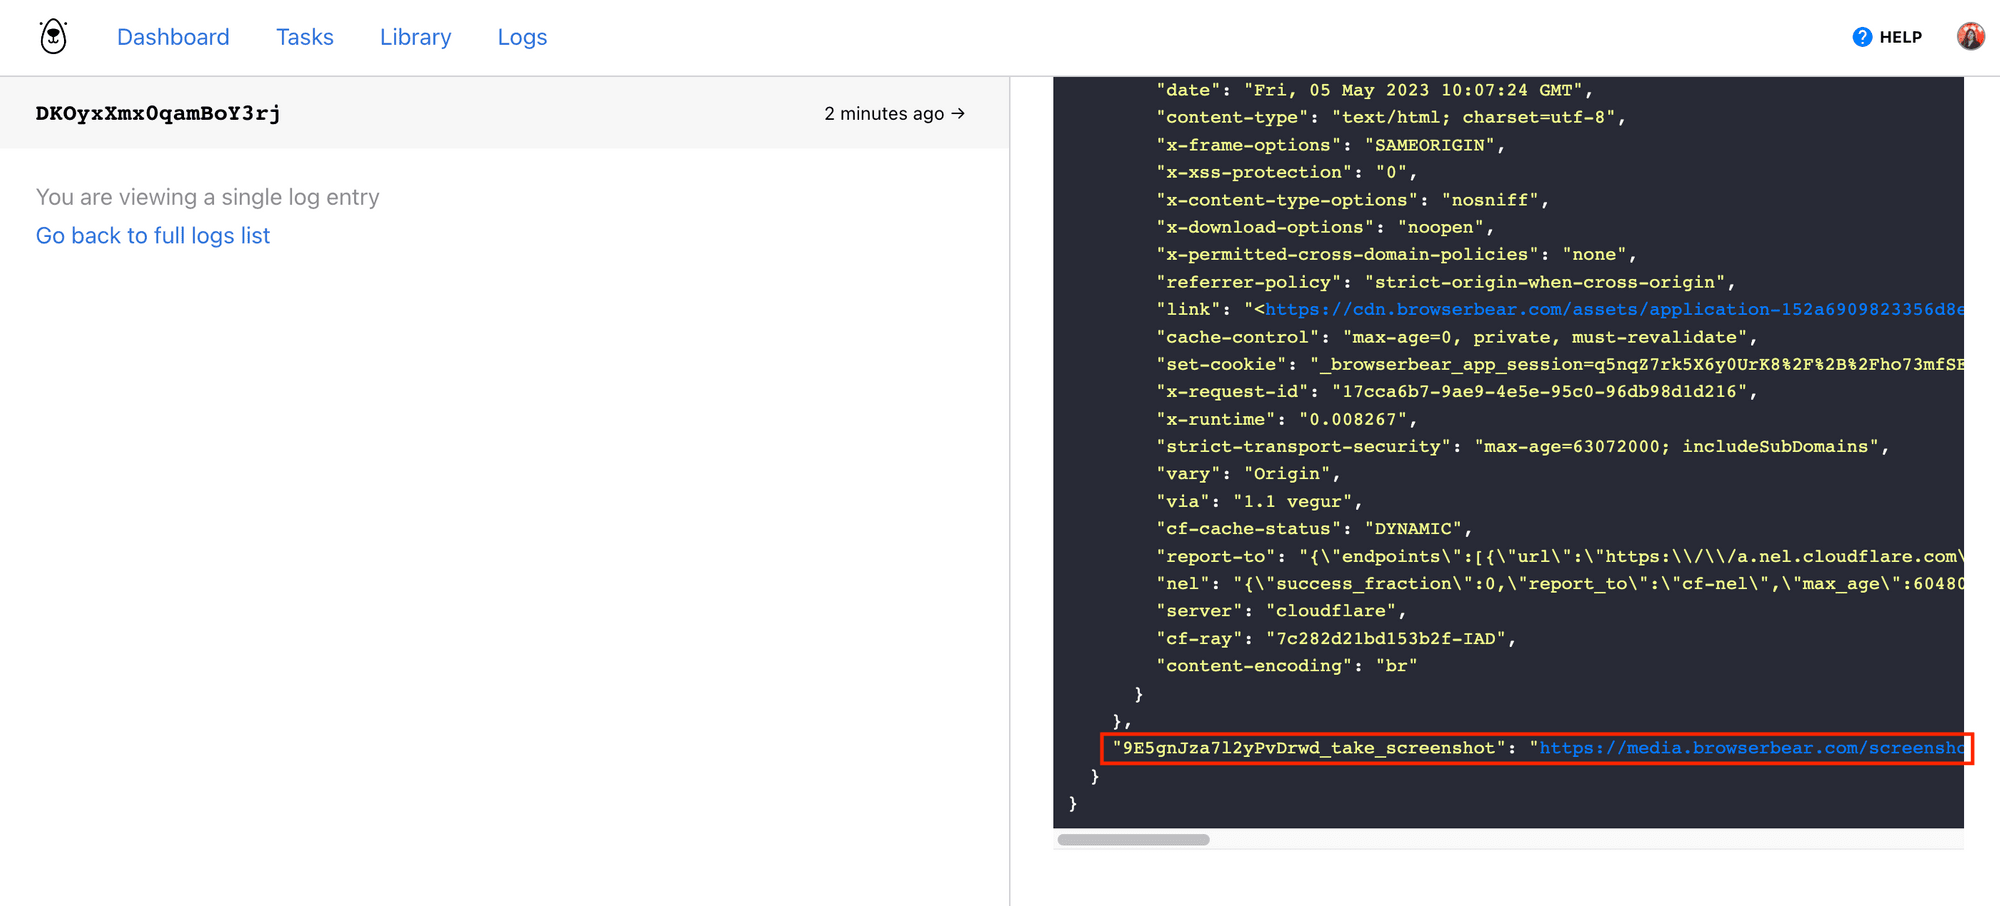
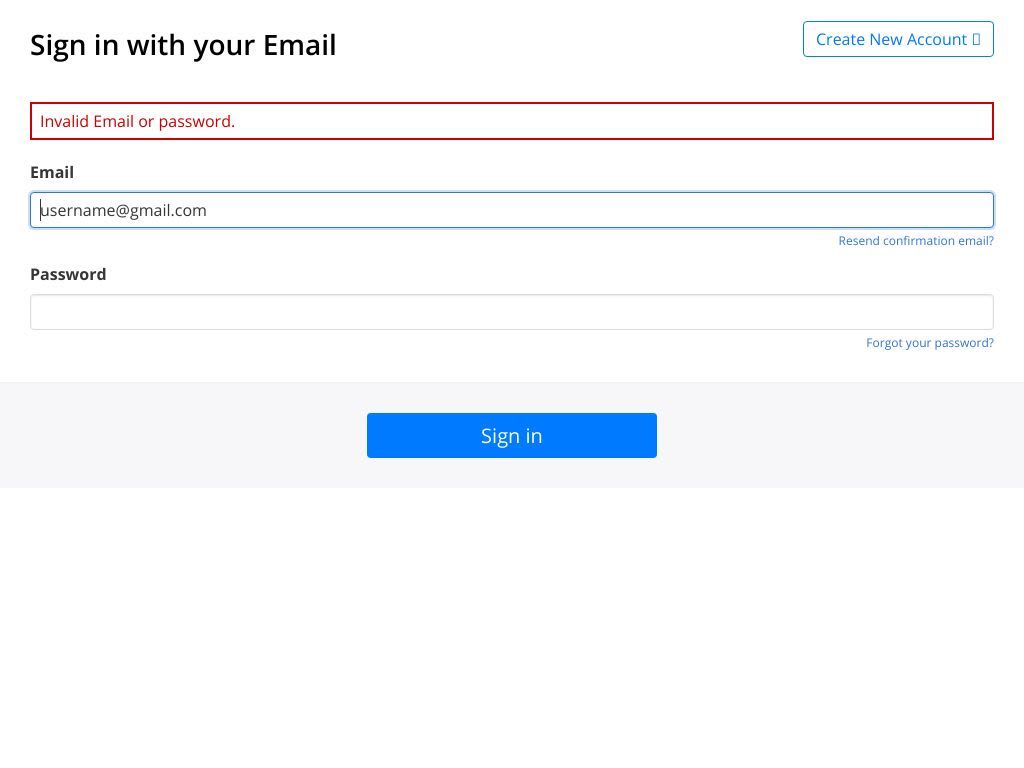
If you’re logged in successfully, a screenshot of your Browserbear dashboard should be captured.
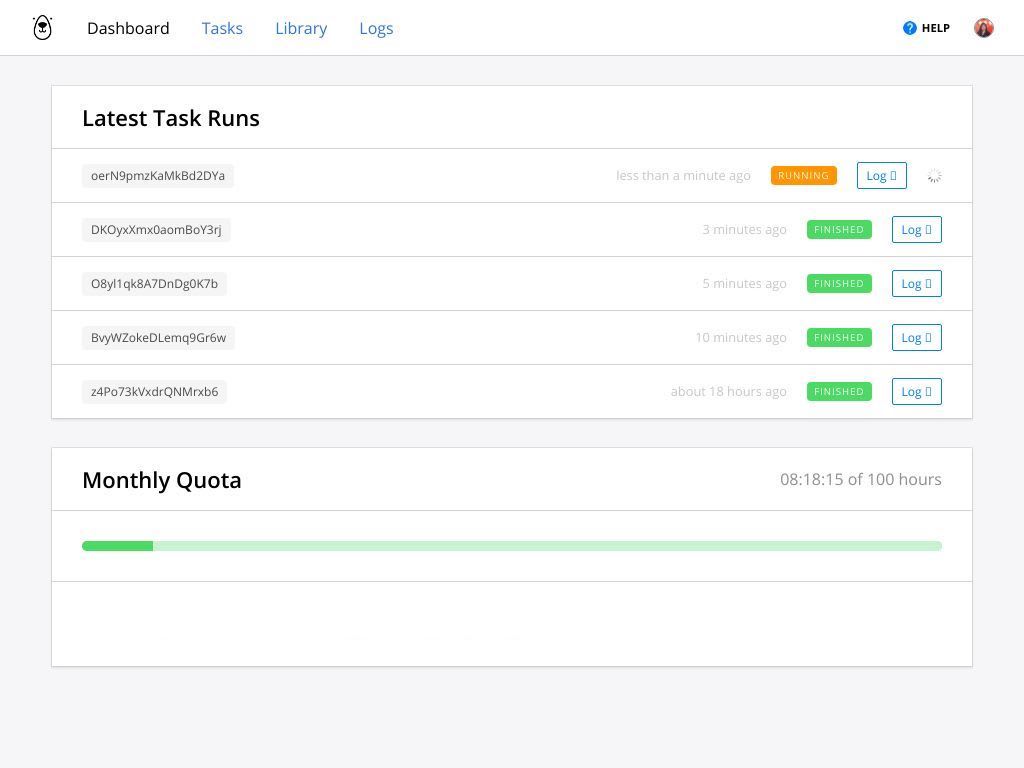
Otherwise, the screenshot will show a login error.
Method 2: Use Saved Login Credential
Browserbear has a “login” action that helps you log in to a website without having to create steps to fill in the login form. This simplifies the login task to two steps instead of four and allows you to log in to different accounts easily by switching to different login credentials.
This could be useful for cases that require logging in to different accounts, like:
- Testing multi-role applications where there are various roles, permissions, and access levels for different users
- Testing in different environments like development, staging, and production
- Security testing for login where you need to test different login combinations
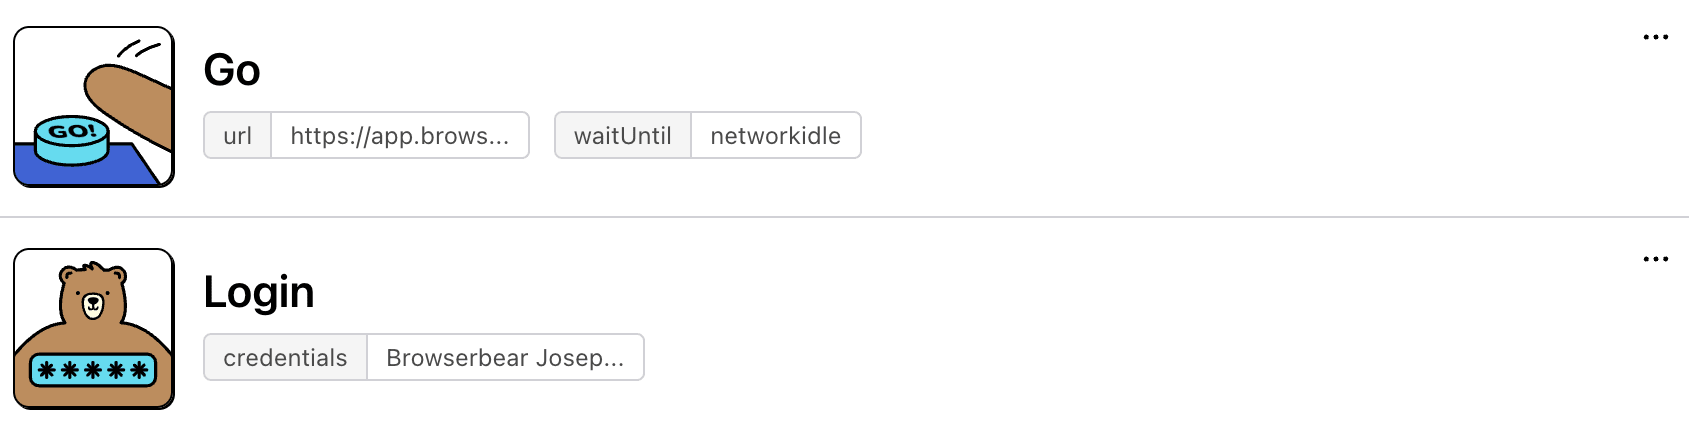
Step 1. Go
Like the first task, select “go” from the Action dropdown and enter the URL of the website that you want to log in to.

Step 2. Login
Add a new step and select the “login” action. Then, click on Manage secure credentials to add a new login credential.
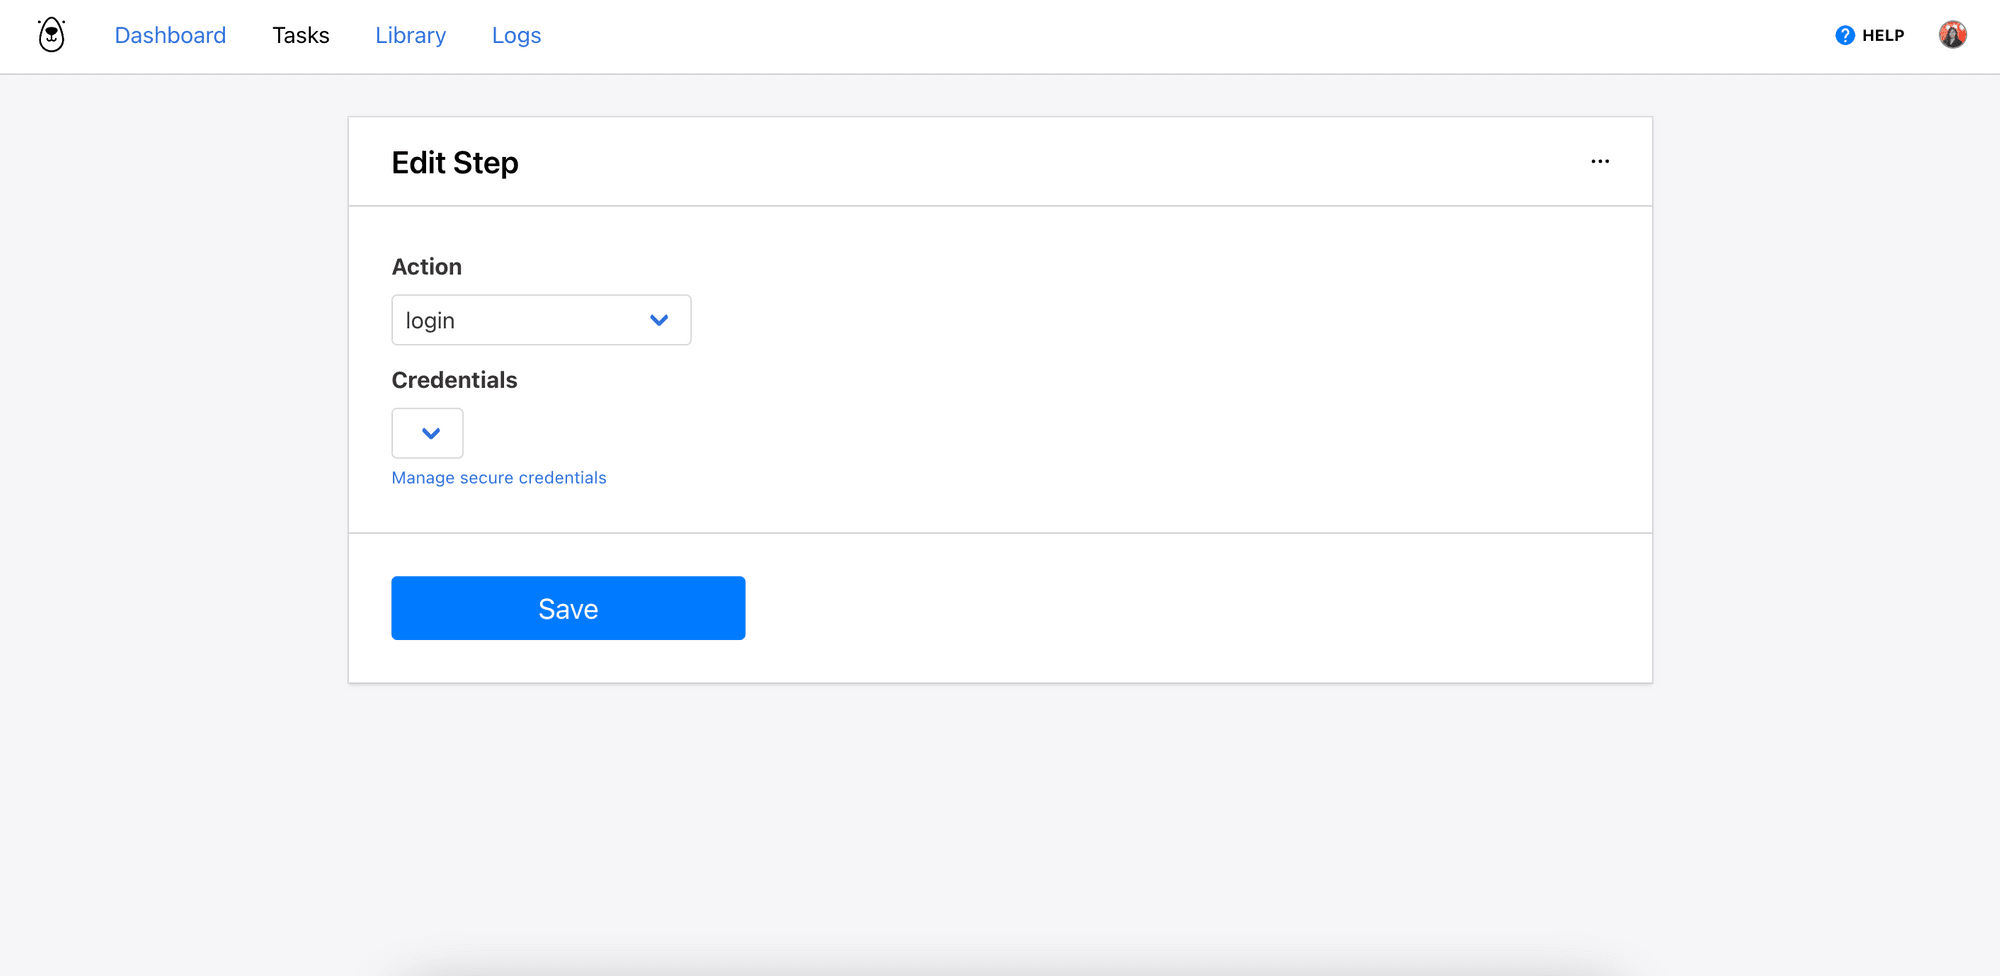
If you have other team members in your Browserbear workspace, you can see other credentials that are added by your team members. However, the details of the credential could be hidden depending on the visibility setting. Click on Create Credential to add your new login credential.
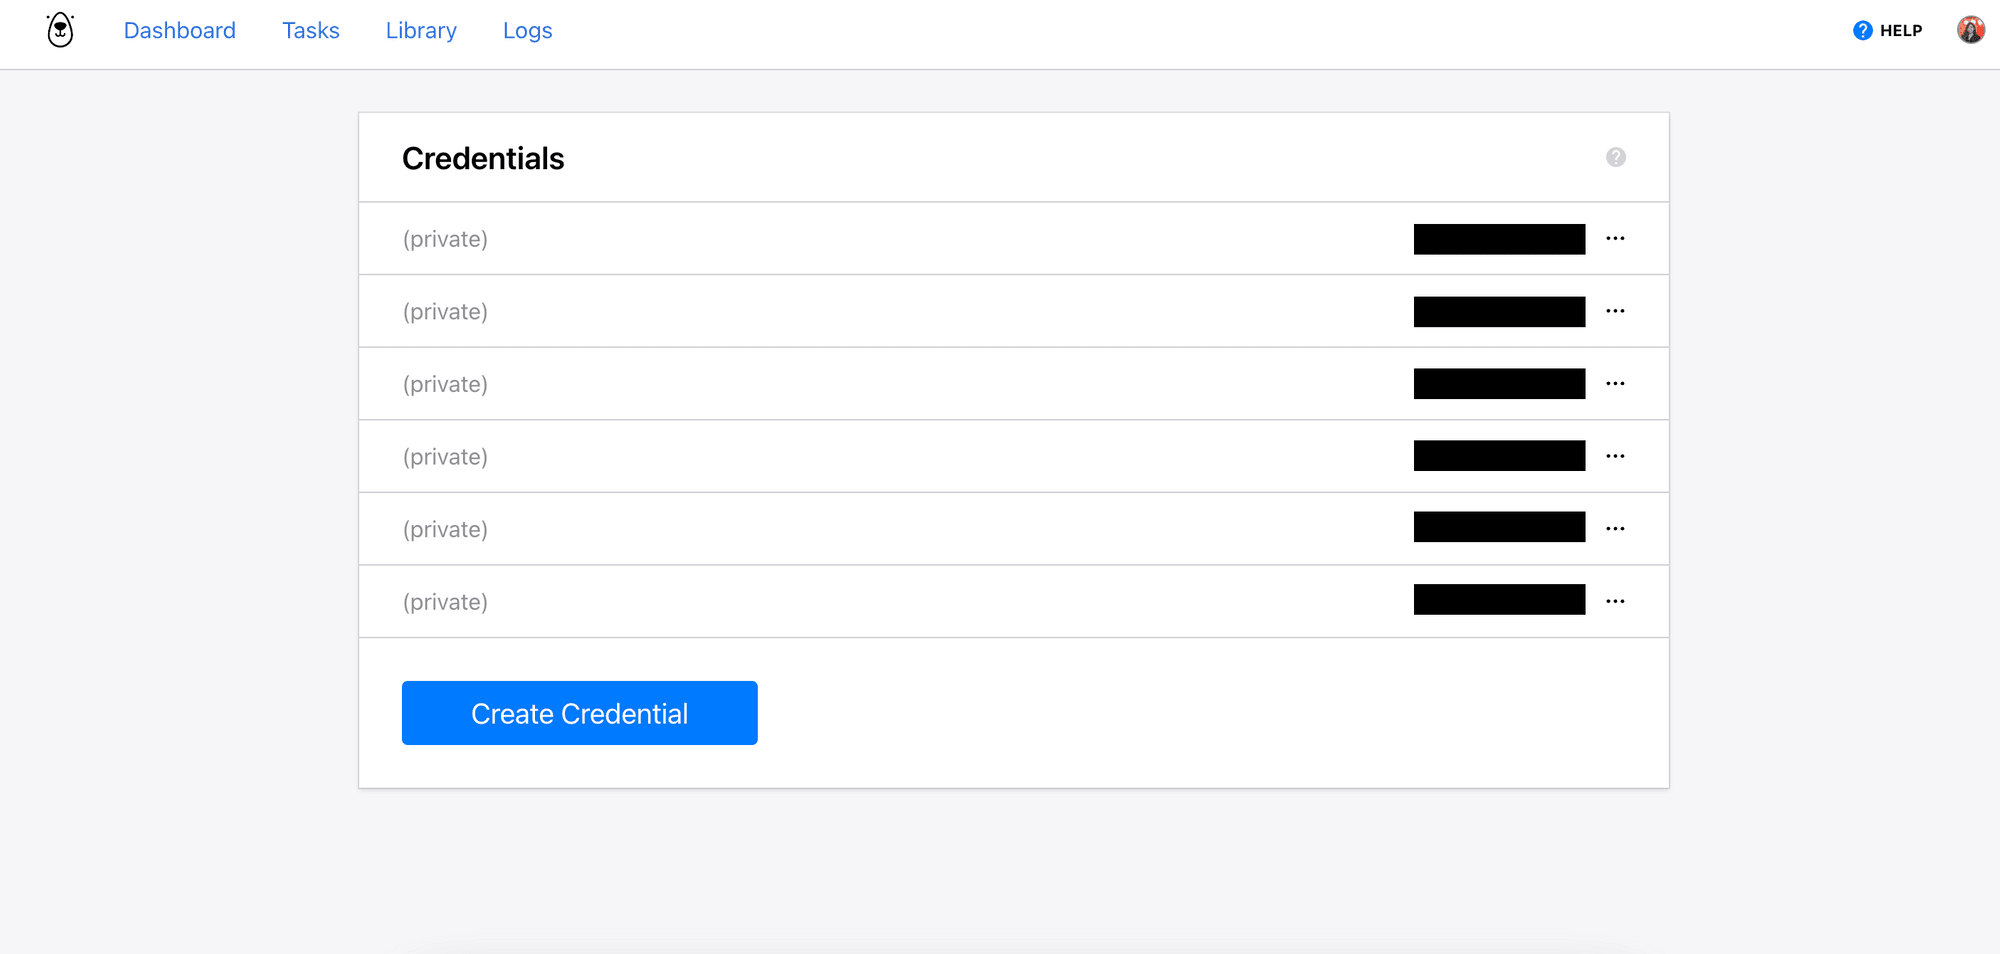
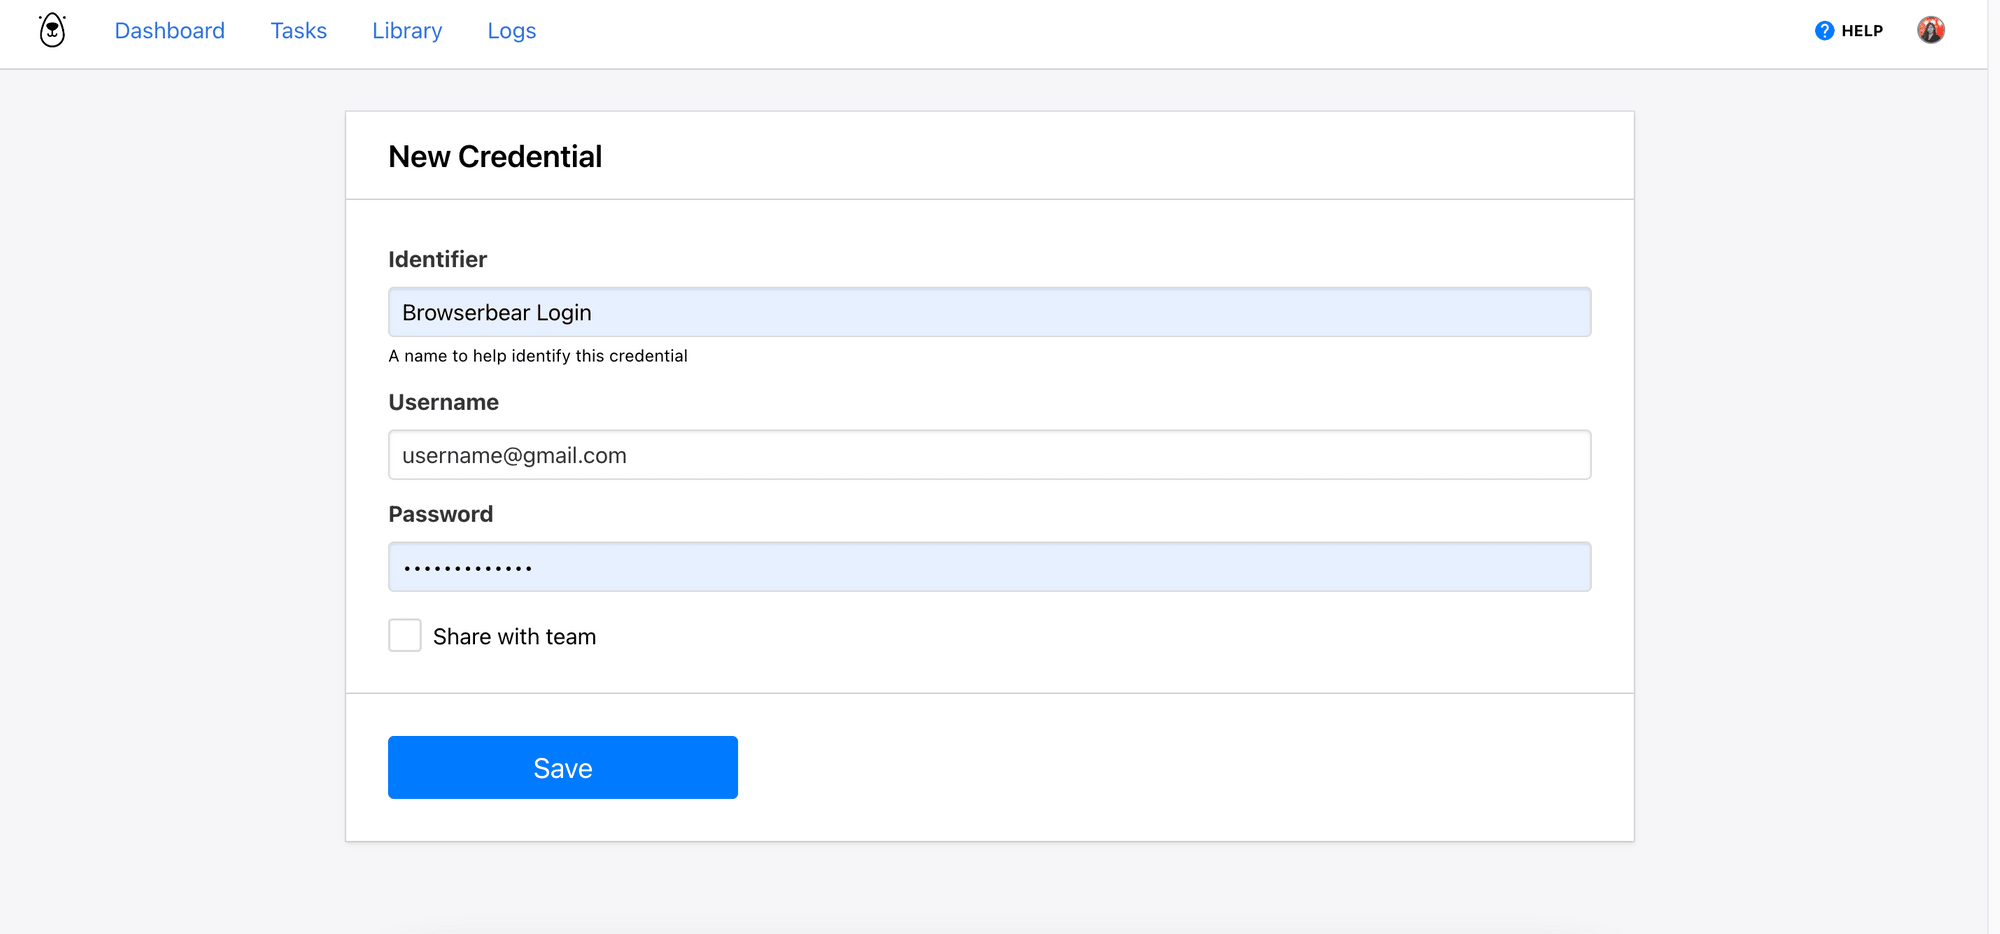
Fill in the credential needed to log in to the website. If you want to share it with your team members, you can tick the Share with team checkbox. Otherwise, save the credential and go back to the previous page.
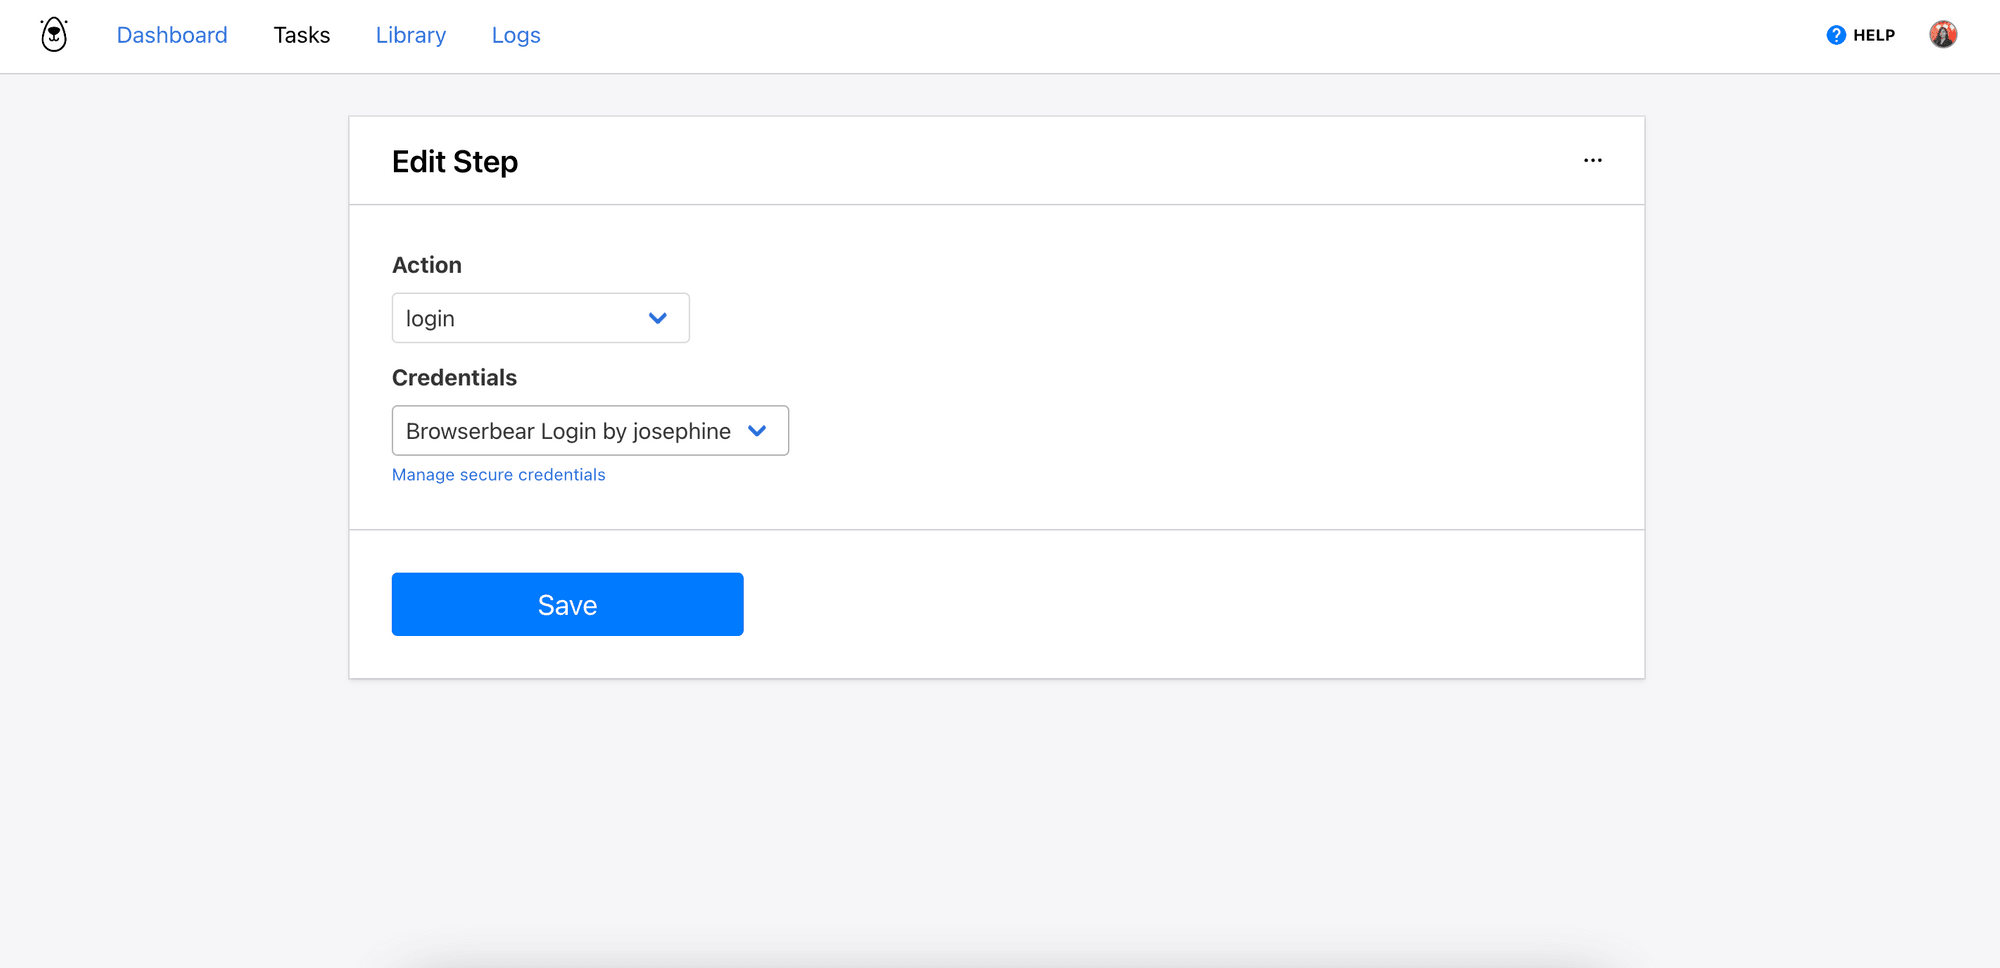
On the Edit Step page, select the newly created login credential from the Credentials dropdown.
Note: You might need to refresh your page to find the login credential from the dropdown.
After saving the current step, you can run the task and check whether the login is successful from the video or screenshot.
Method 3: Set Browser Cookies
If the website uses cookies to save logged-in sessions, you can use this method. However, you will need to log in to the website manually to get the session cookie first.
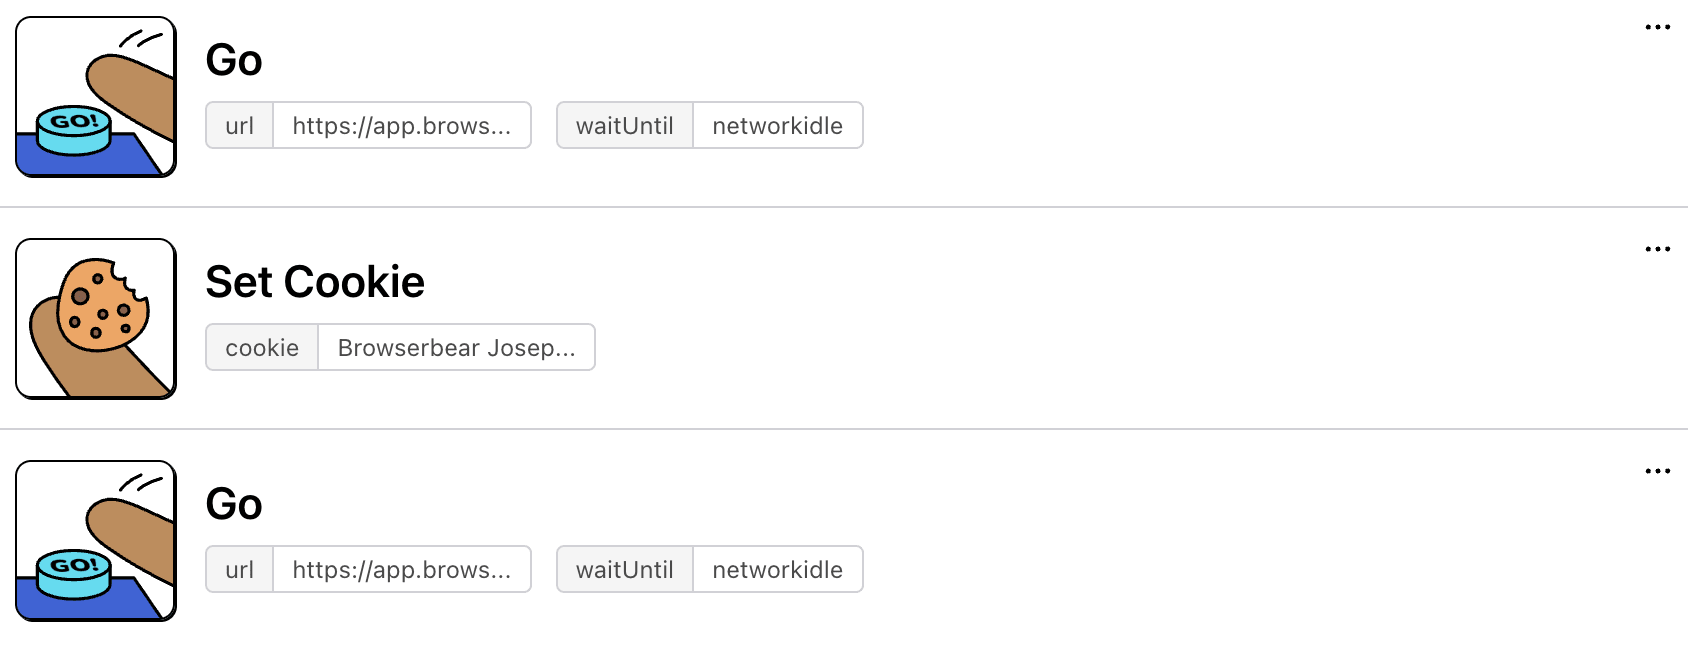
Step 1. Go
Like the previous tasks, select “go” from the Action dropdown and enter the URL of the website that you want to log in to.

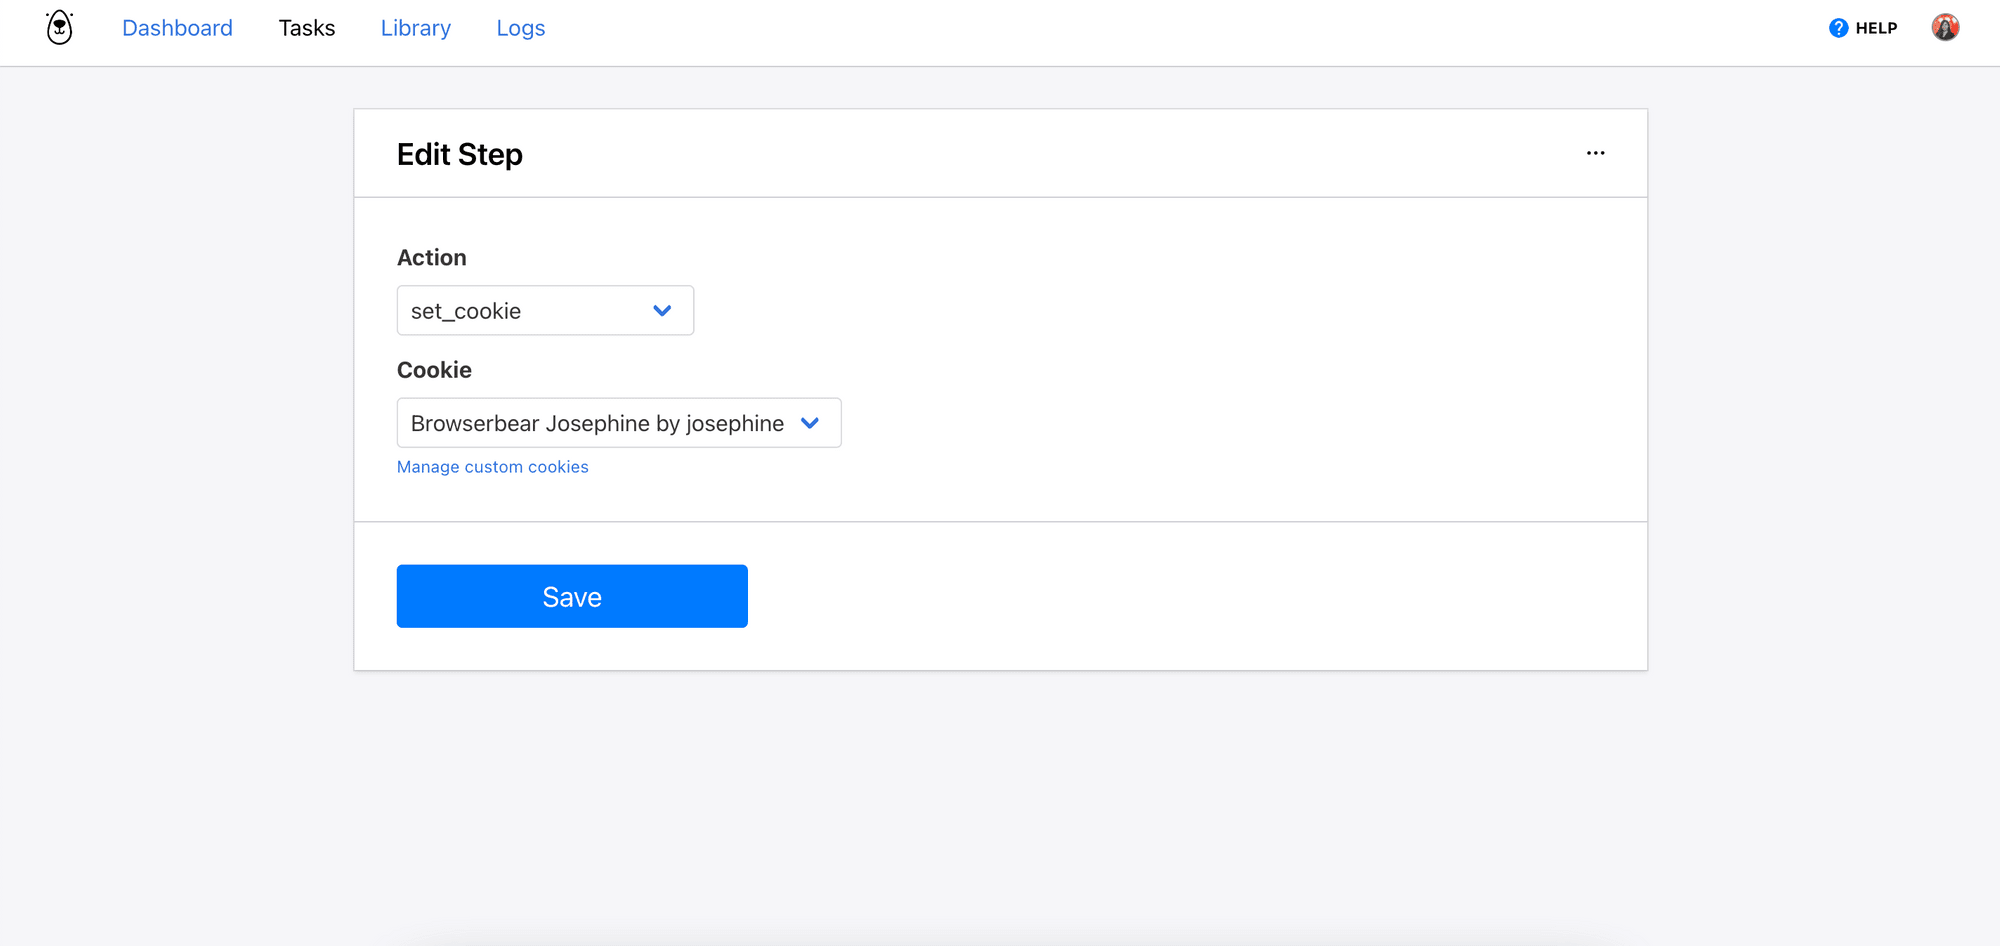
Step 2. Set Cookie
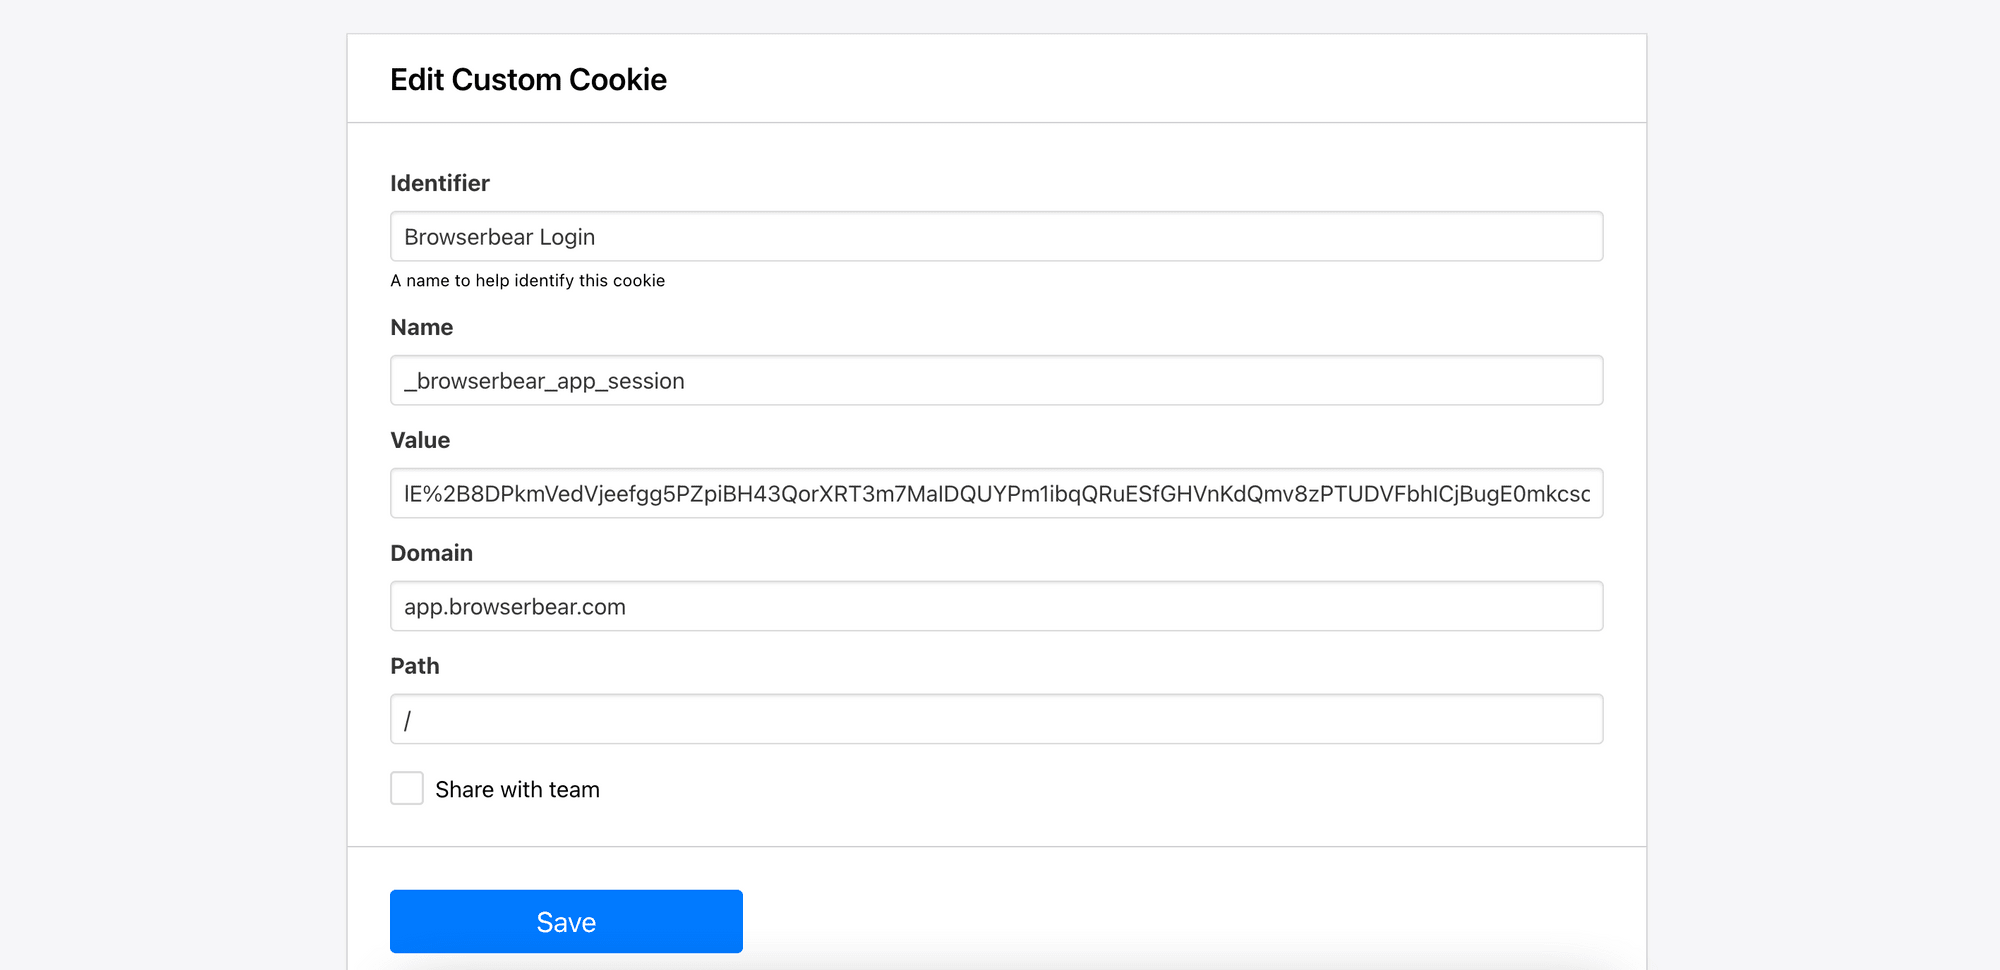
Select “set_cookie” from the Action dropdown. Then, click on Manage custom cookies > Create Cookie to add a new cookie.
In a new tab, log in to the website manually. After logging in, open up the browser inspector and go to Application.
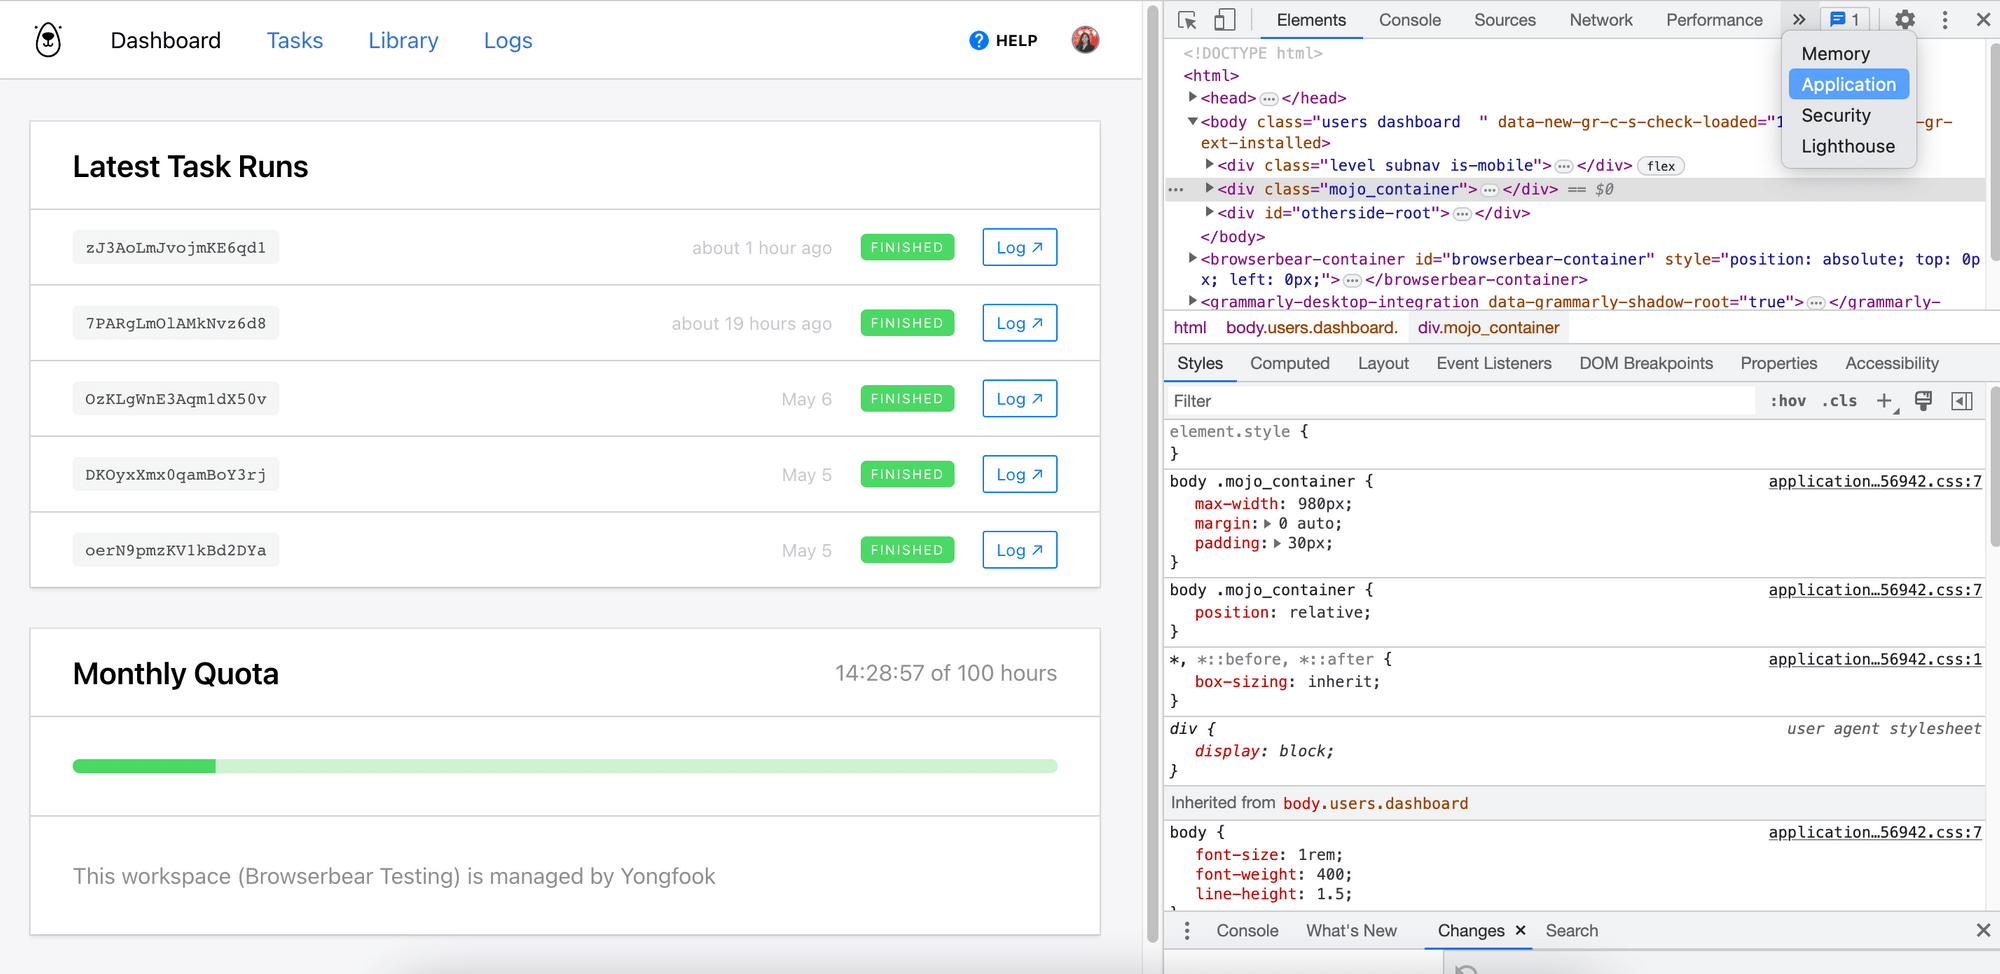
Under Storage > Cookies , you’ll be able to find the cookie for your current logged-in session.
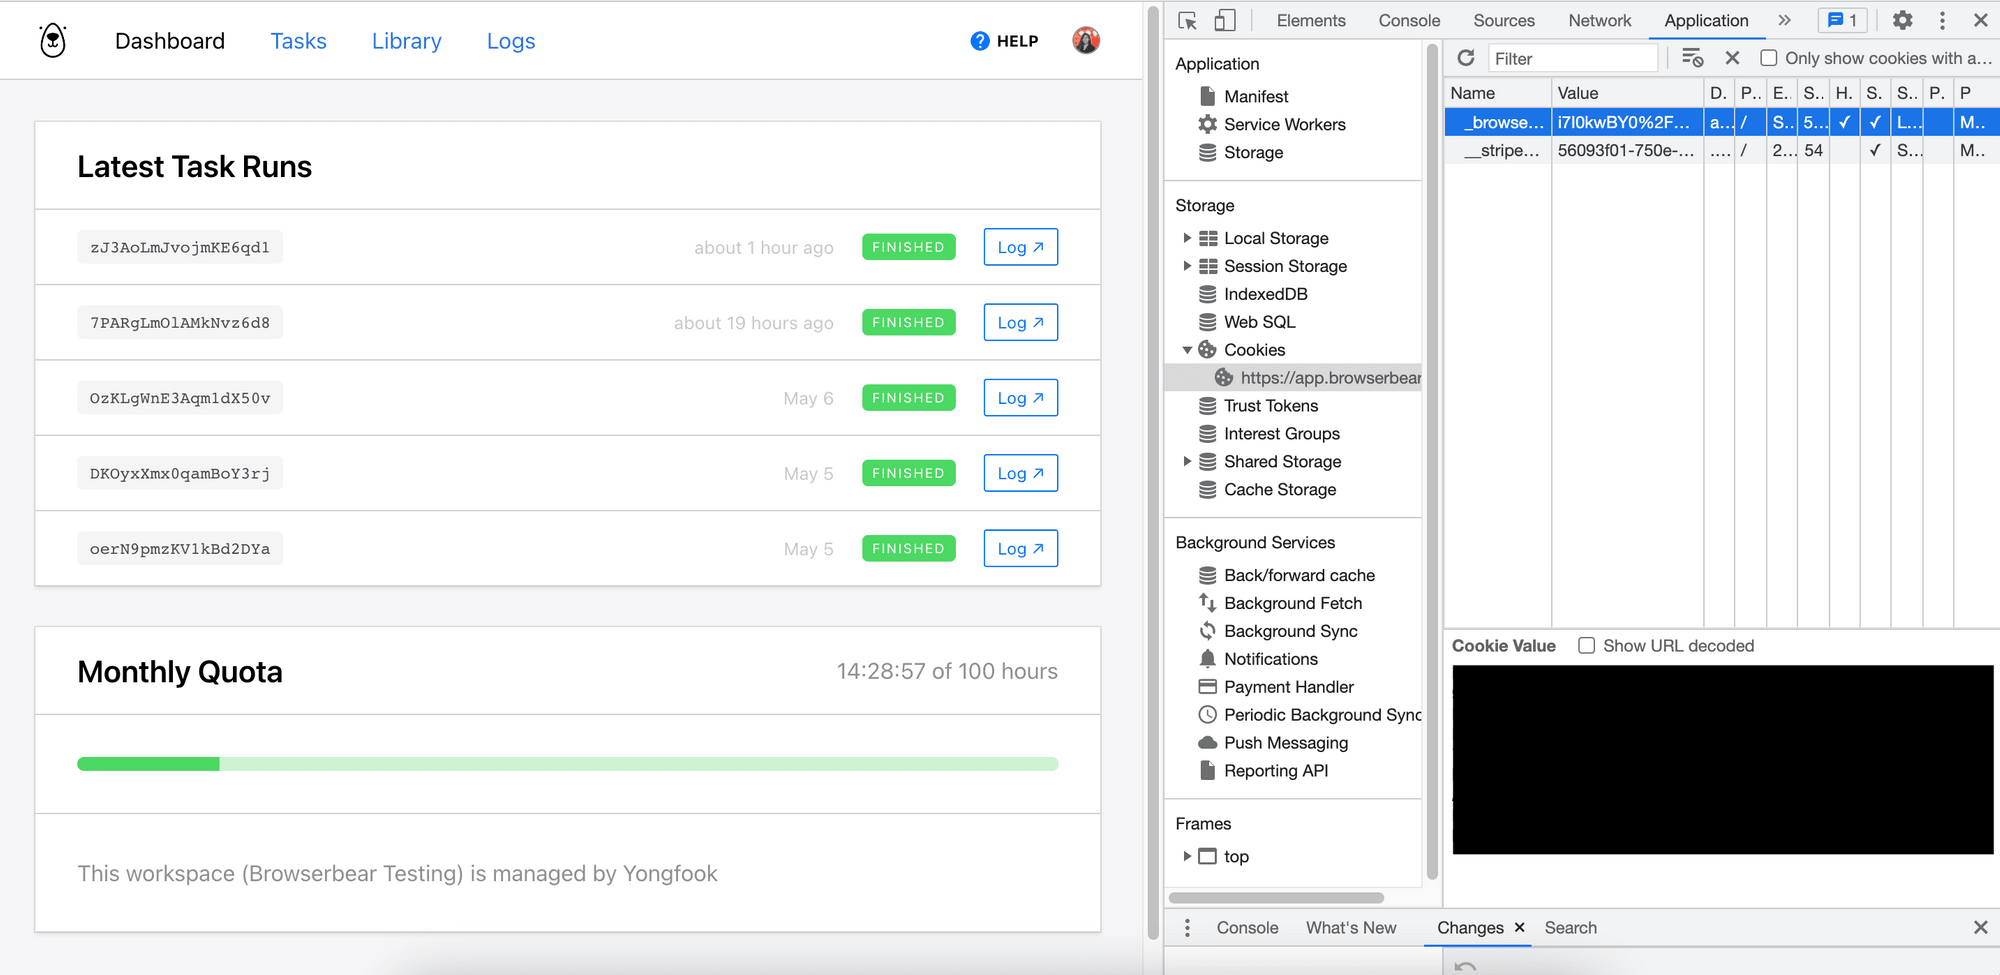
Copy the details from the browser inspector to Browserbear and save it.
Step 3. Go
Add another step with the “go” action to your task. This will revisit the URL and acts as a browser refresh. This time, it should bypass the login page and bring you to the dashboard directly since the session cookie is used.
Save the step and return to the task overview page to run the task. Like before, you can check the result from the video or screenshot.
Conclusion
Whether you’re testing your application, scraping data, or filling out forms, using automation to perform these tasks makes your work more efficient. If these tasks require user authentication but it’s not handled, it could cause your automation to fail. In this article, we have demonstrated how to handle login easily with Browserbear. If you would like to explore more, you can extend the current Browserbear login task with these tasks: