How to Auto-Fill Forms with Data from a CSV File in Python Using Browserbear
Contents
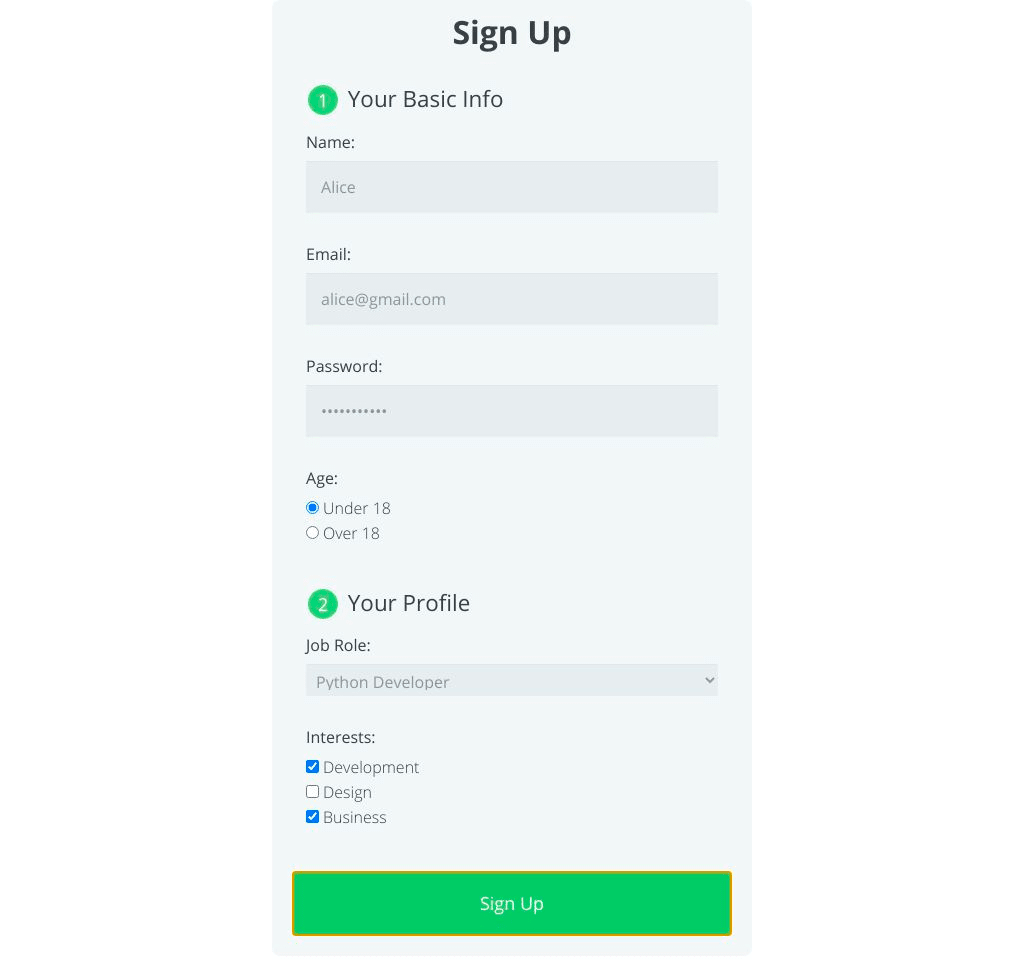
HTML forms are a fundamental component of web applications, playing a crucial role in gathering user input and enabling user interactions. They are used in various sections of a web application, serving diverse purposes like registration, data collection, feedback submission, cart checkout, search filter, etc.
In situations where you need to submit an HTML form numerous times, whether it’s for testing your web application or carrying out administrative tasks, importing data from a CSV file and automating the form submission process can save a significant amount of time and effort. Besides that, it can also significantly reduce human errors.
When it comes to automating the web browser, many developers will go for popular automation libraries like Selenium, Playwright, and Puppeteer. However, using these libraries requires a certain level of familiarity with their functions in order to automate browser tasks. In this article, we will introduce you to an alternative that requires minimal coding but still enables you to harness the data-handling capabilities of Python. Let's delve into the details and learn how!
Pre-requisites
To follow this tutorial, you will need:
- Python
- An HTML form (you can use this sample form)
- A CSV file that contains the data to be entered into the form (you can use this template)
- Browserbear Helper - a Chrome extension that helps Browserbear in locating HTML elements on a web page
What is Browserbear
Browserbear is a scalable, cloud-based browser automation tool that helps you to automate any browser task. From automated website testing, scraping data, taking scheduled screenshots for archiving, to automating other repetitive browser tasks, you can do it with Browserbear without writing a single line of code.
One of the standout features of Browserbear is its user-friendly interface and ease of use. Unlike other web automation tools, Browserbear is incredibly simple to set up and navigate. To get started, all you need to do is create a task within your Browserbear account (you can start your free trial by visiting this link) and define the necessary steps to accomplish your automation task. Once configured, you can automate tasks on any web page effortlessly.
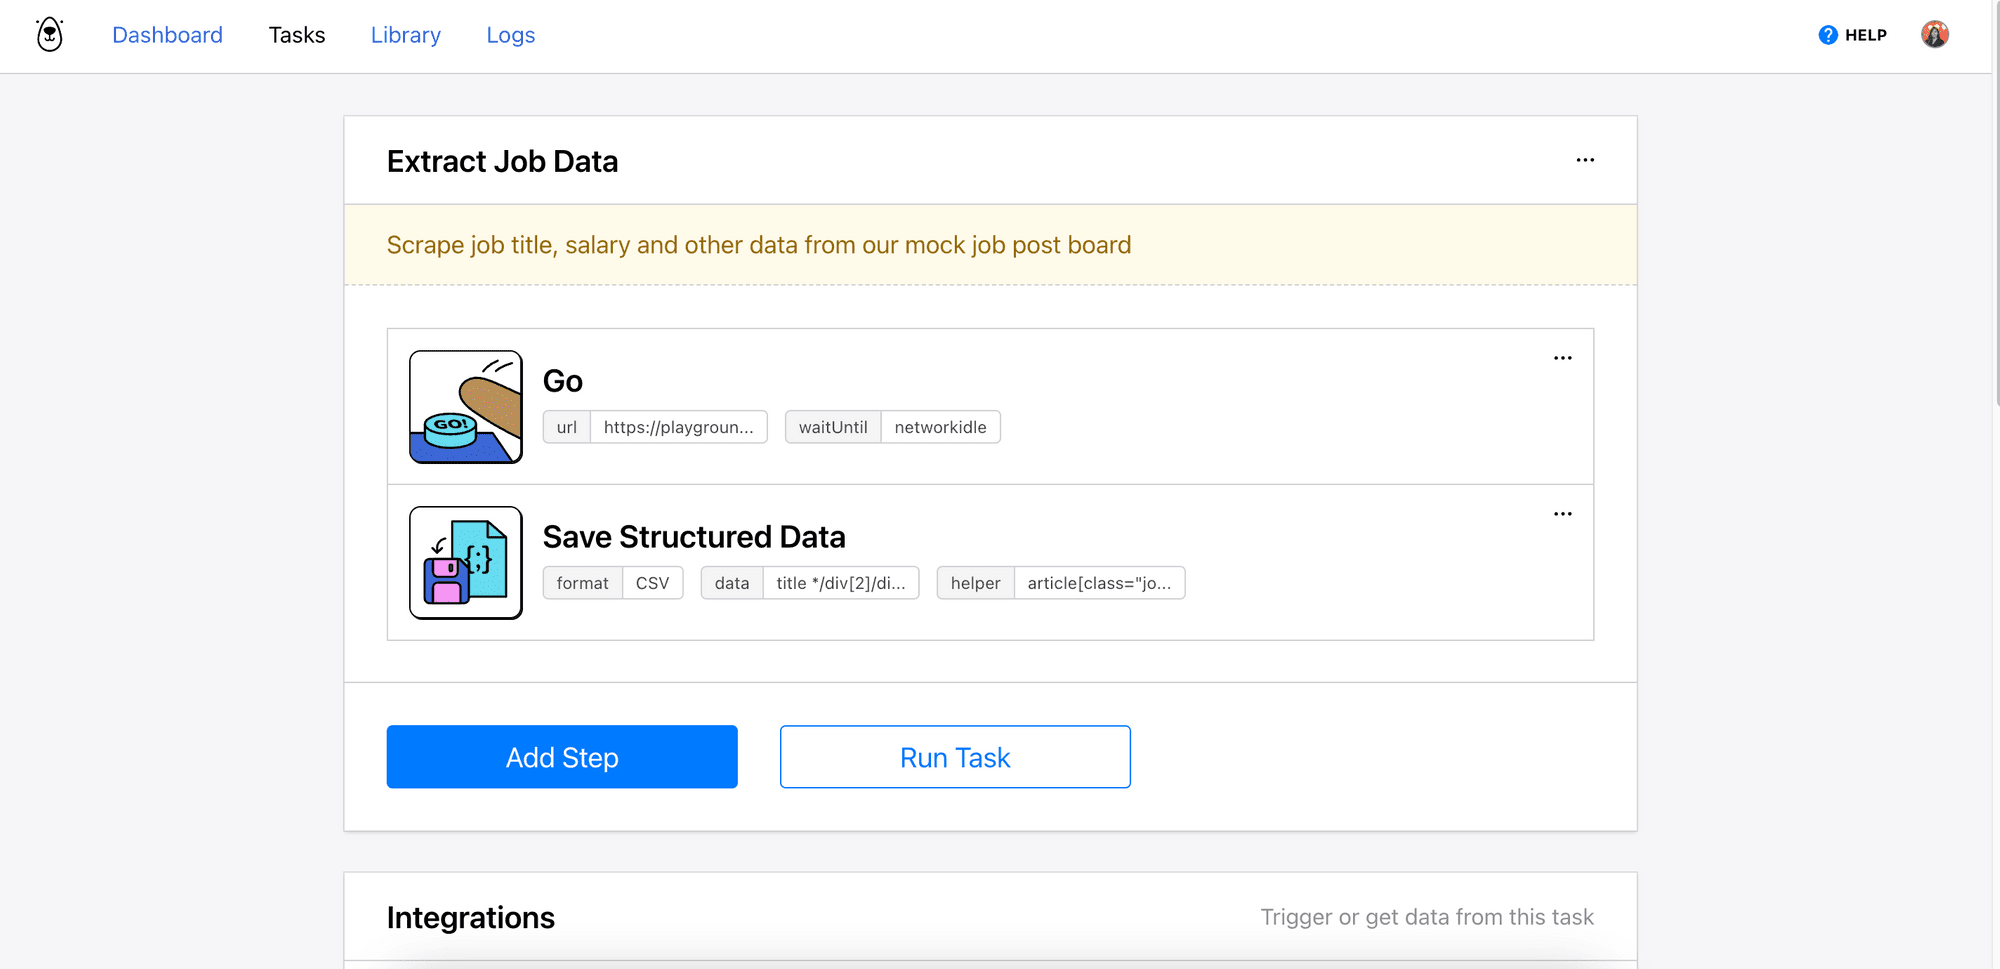
Here’s an example:
Similar to its sister product, Bannerbear, which is an automated image and video generation tool, Browserbear can be easily integrated into your existing applications or code using its API. This means you can utilize Browserbear for projects in any programming language, such as Python, JavaScript, R, and more, as long as you can make an HTTP request in that language.
Creating a Browserbear Task
Start by logging in to your Browserbear account and creating a new task. Then, add the following steps to the task:
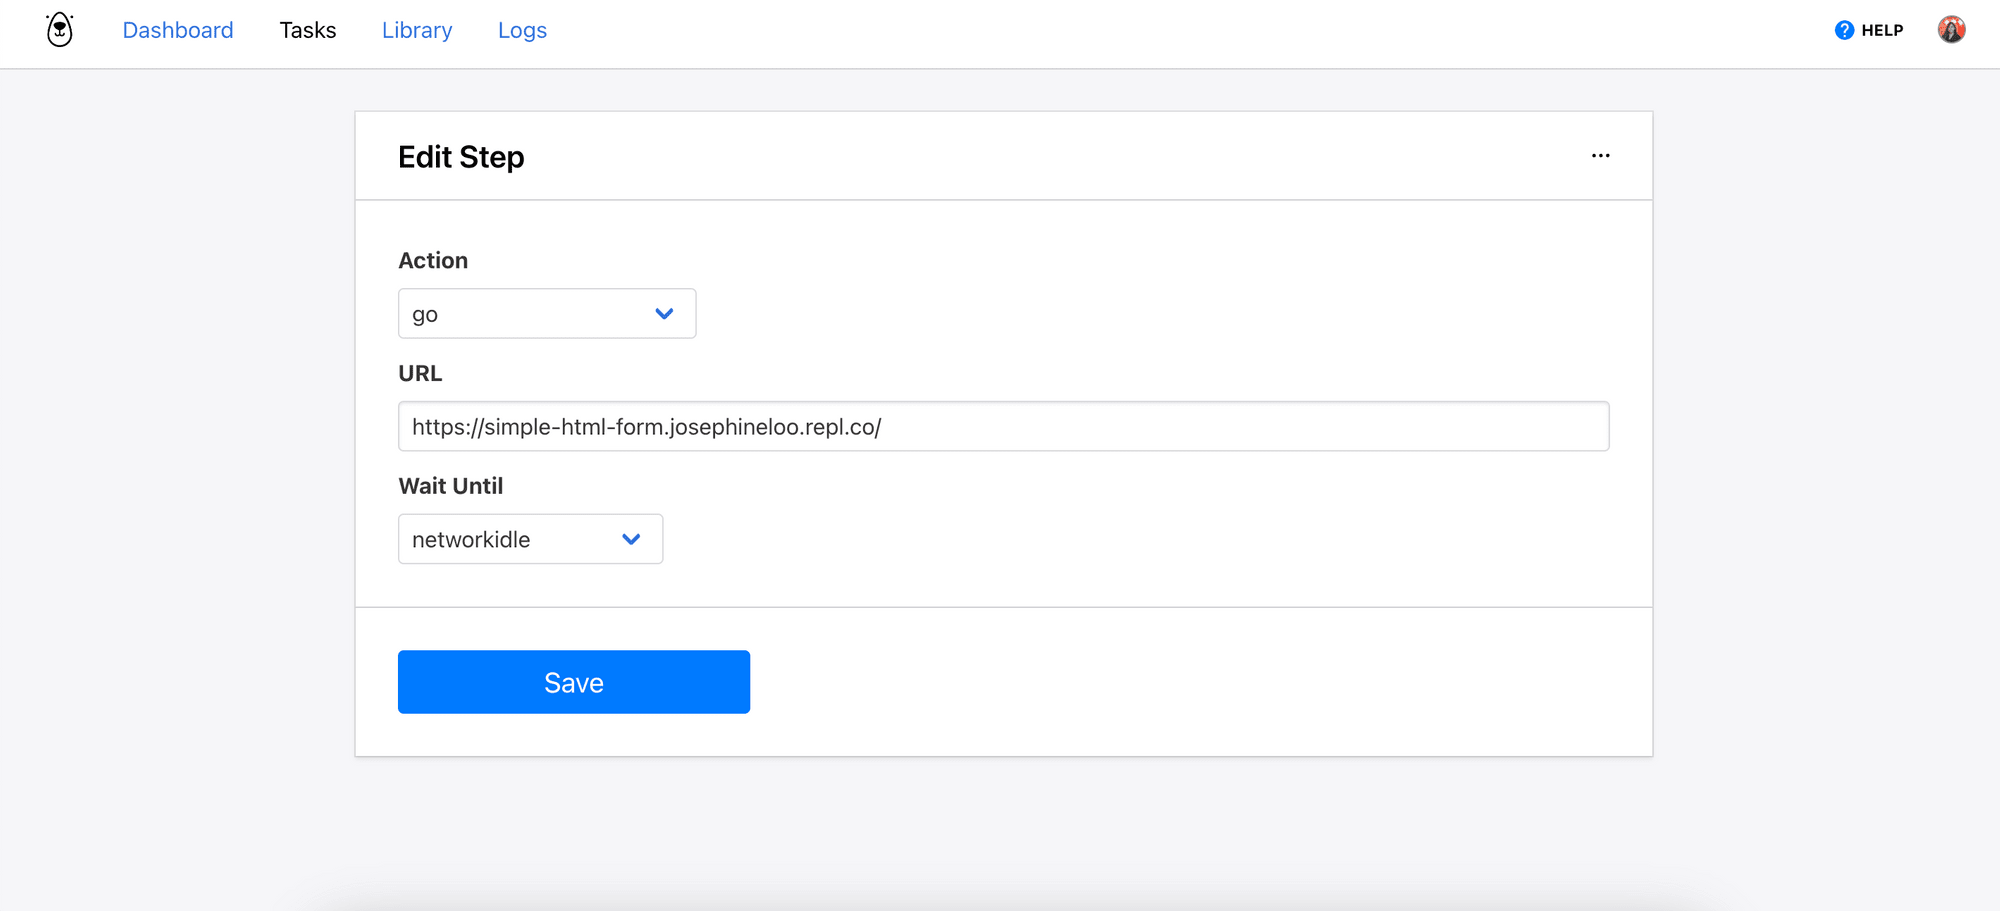
Step 1. Go
The first step is to navigate to the HTML form. Open the HTML form in your browser and copy the URL from the address bar.
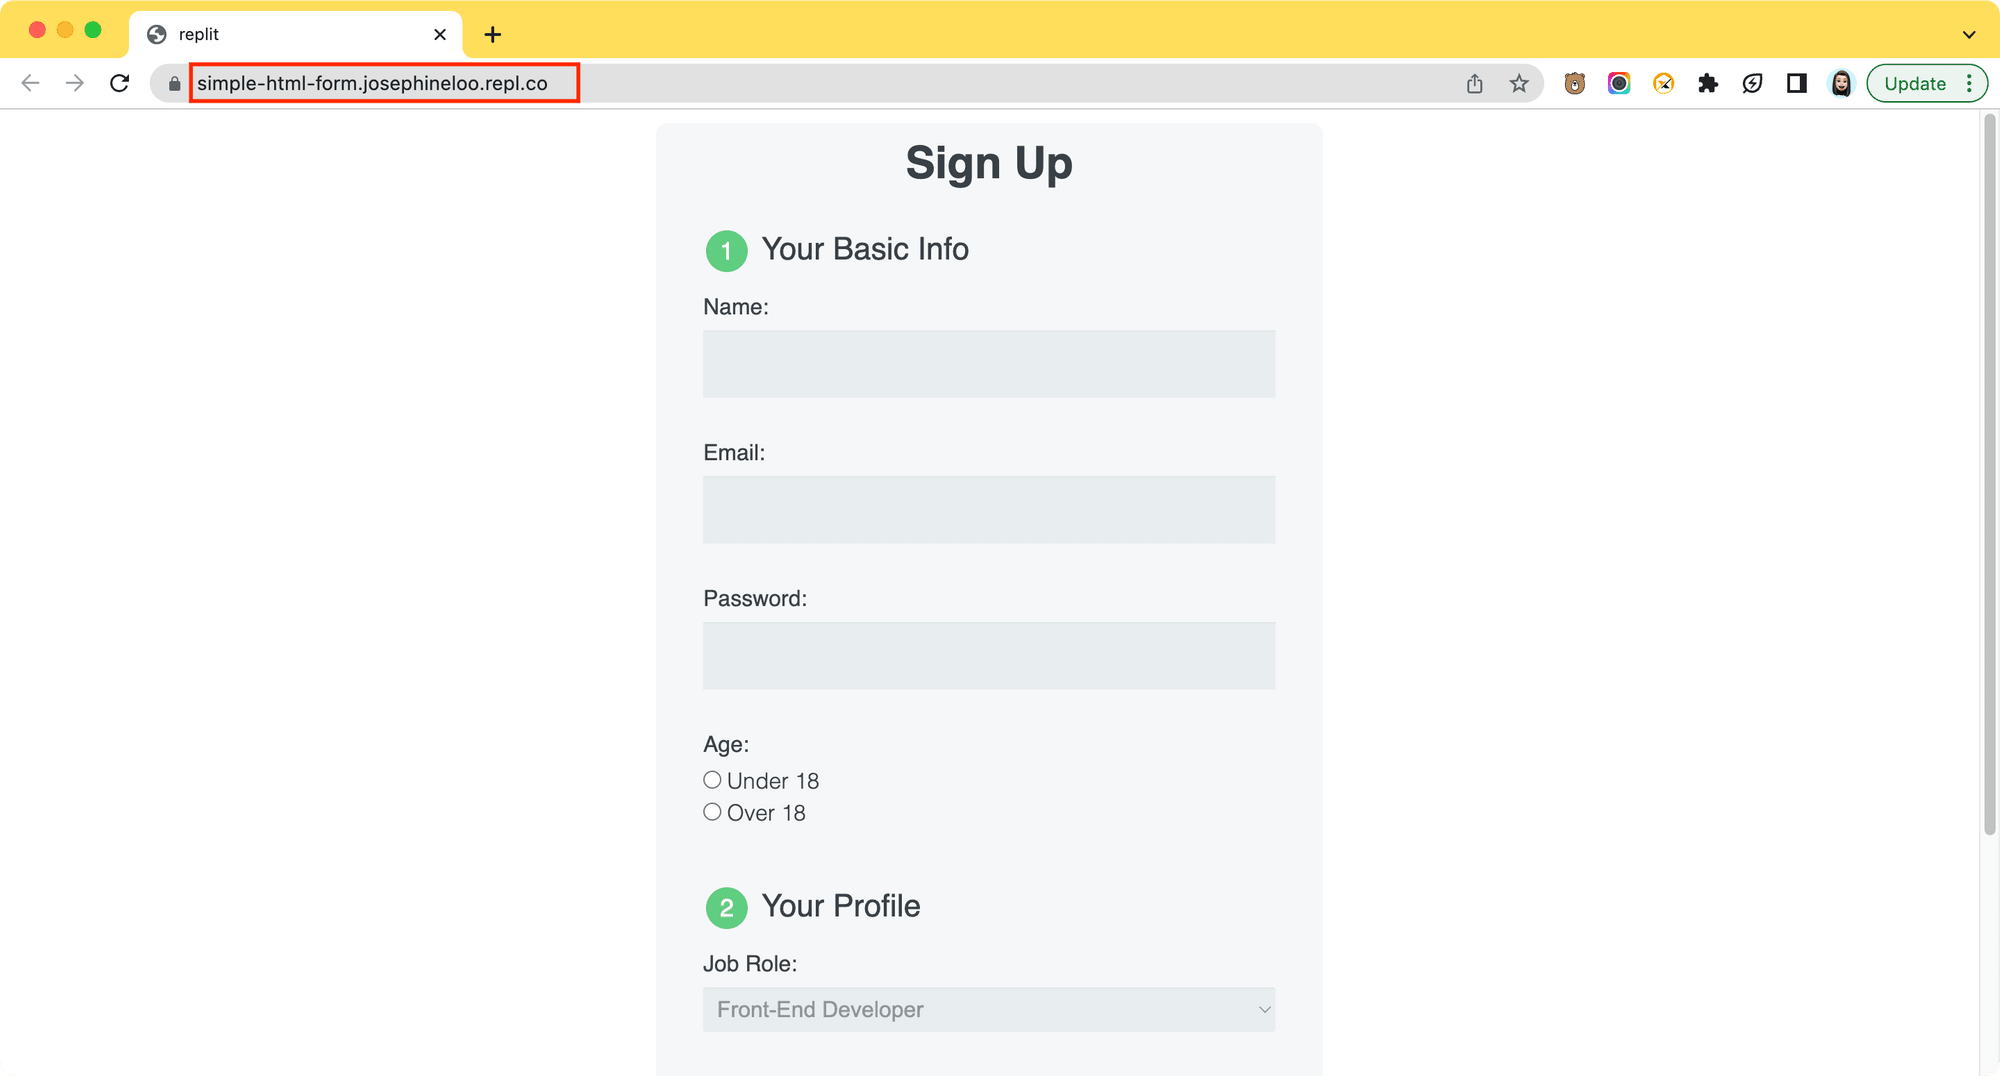
In your Browserbear task, select "go" from the Action dropdown and paste the URL into the URL field. For the Wait Until option, choose "networkidle" to wait until no new network requests are made for 500ms before executing the next step.
Steps 2-4. Enter Text
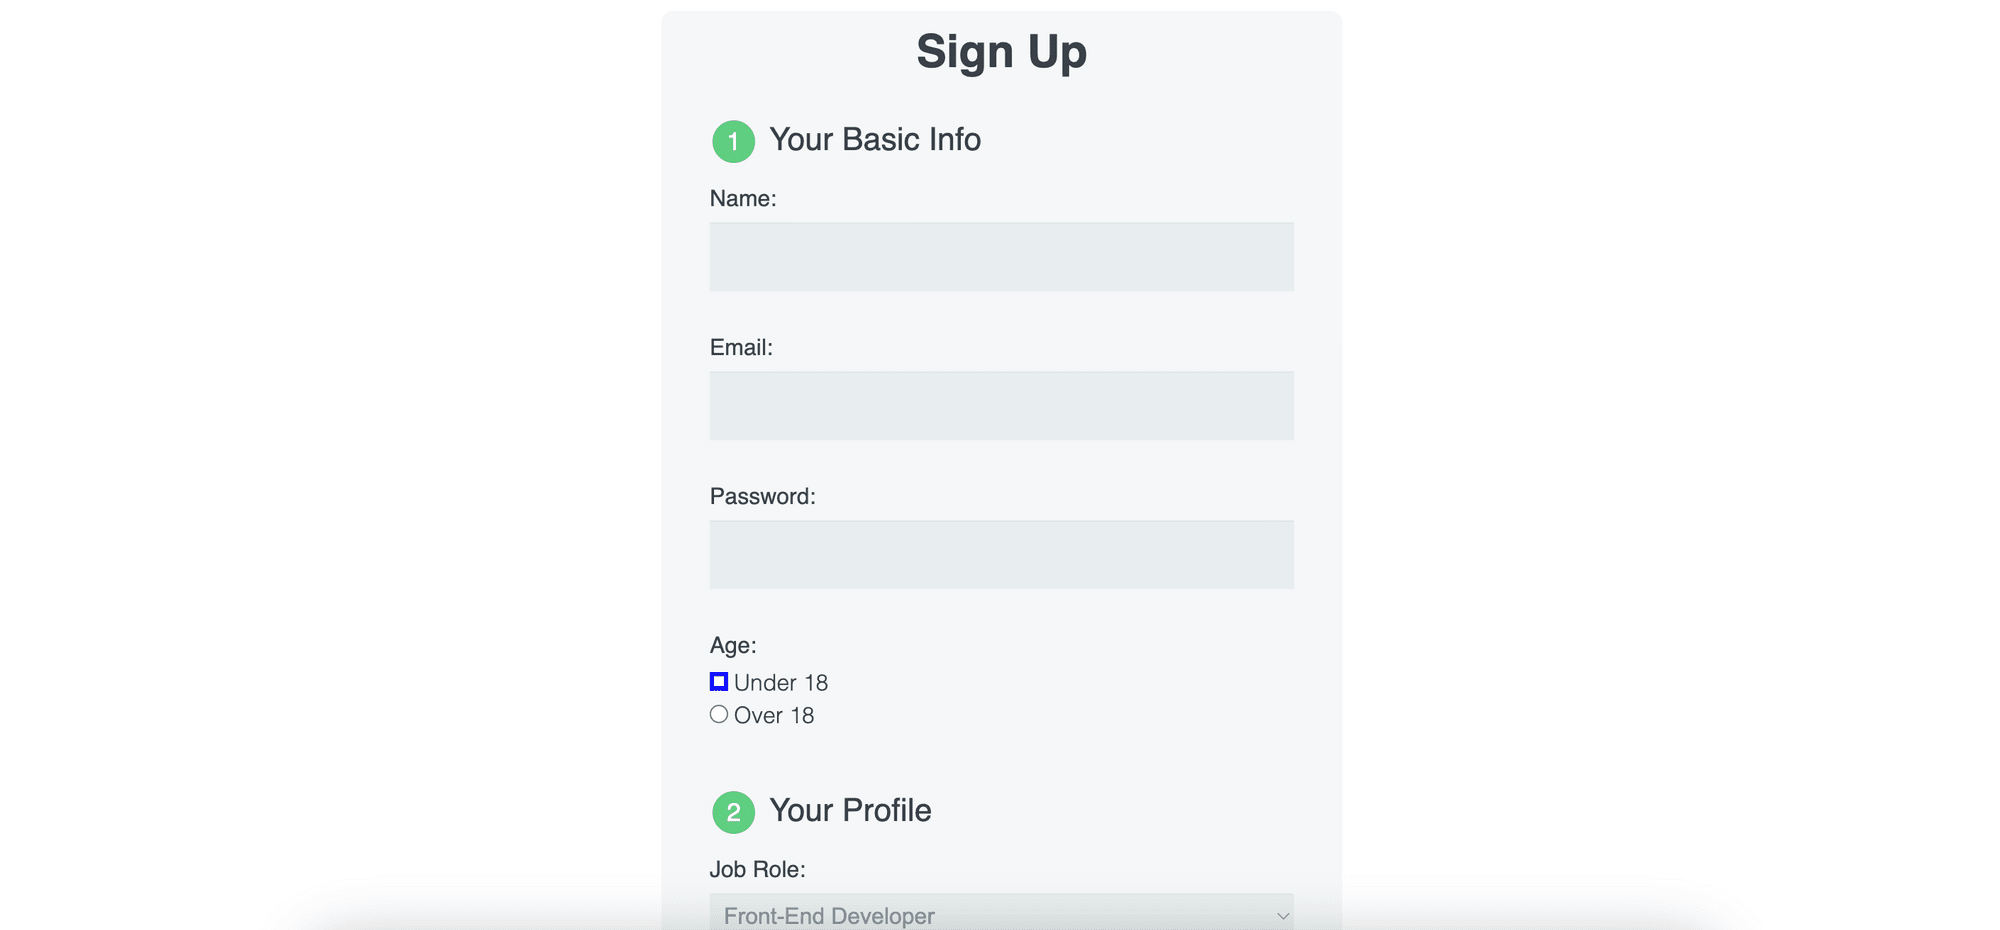
Next, we need to enter text into the text fields (name, email, and password) of the form.
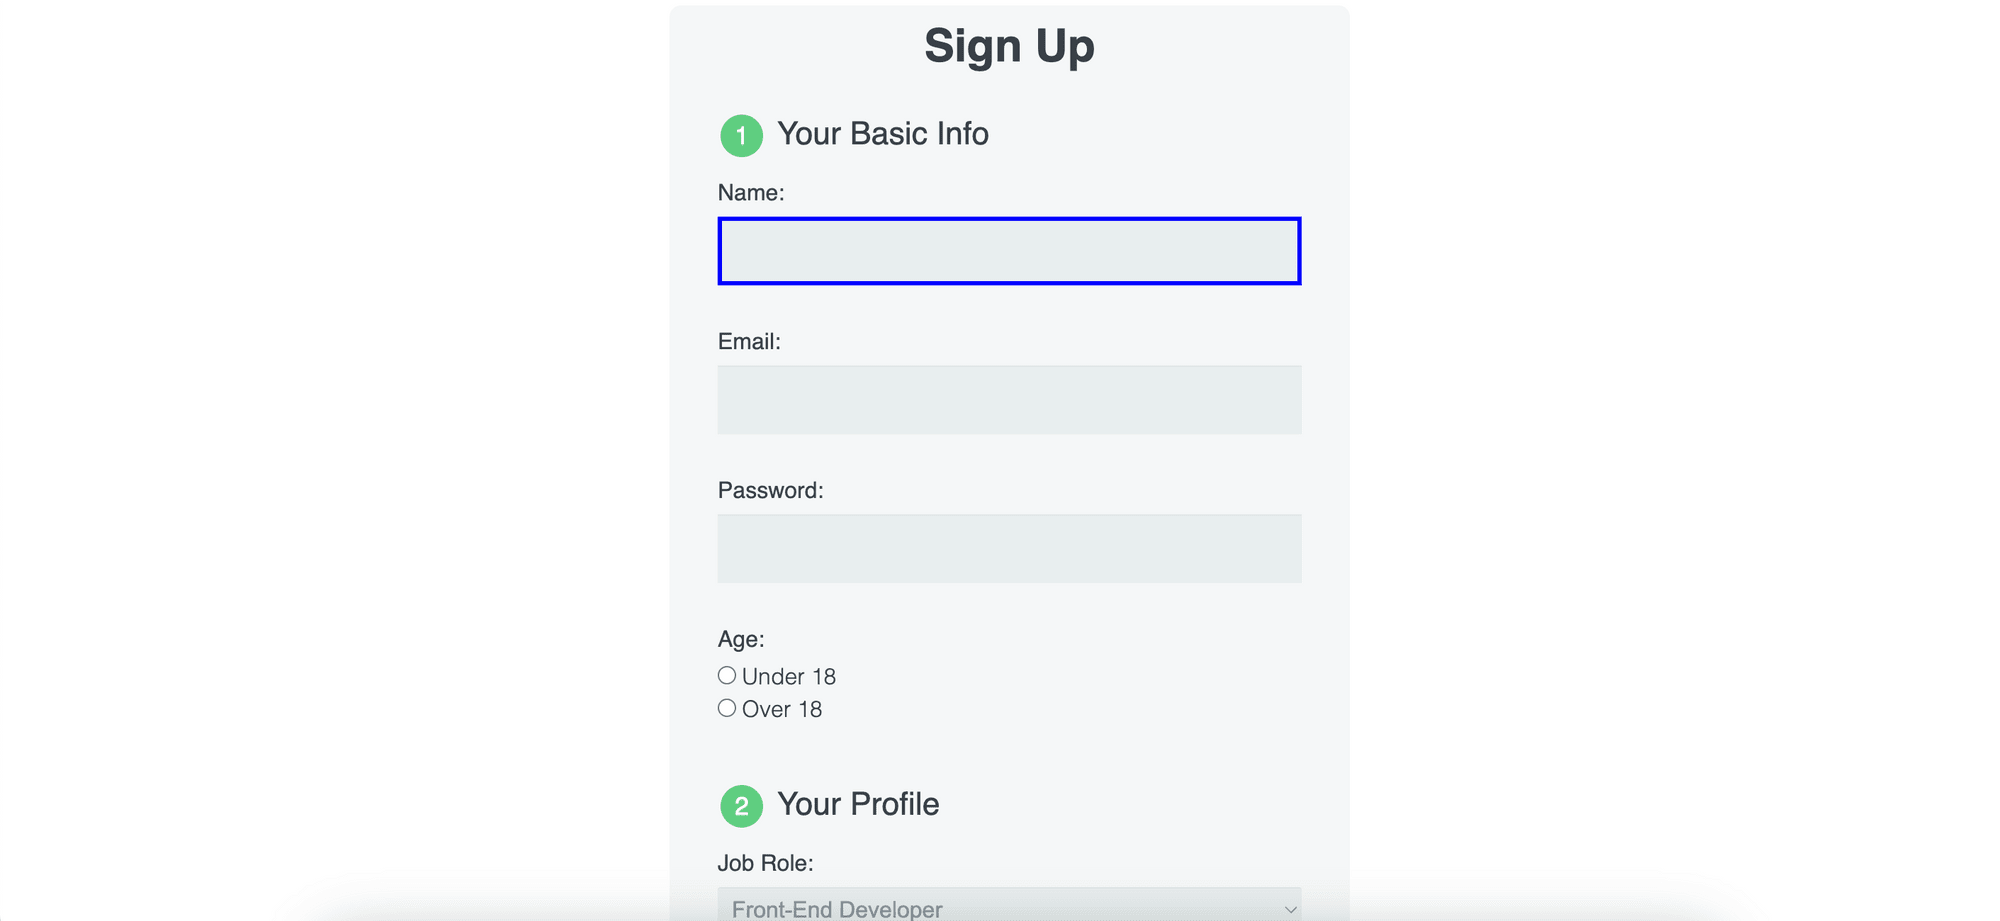
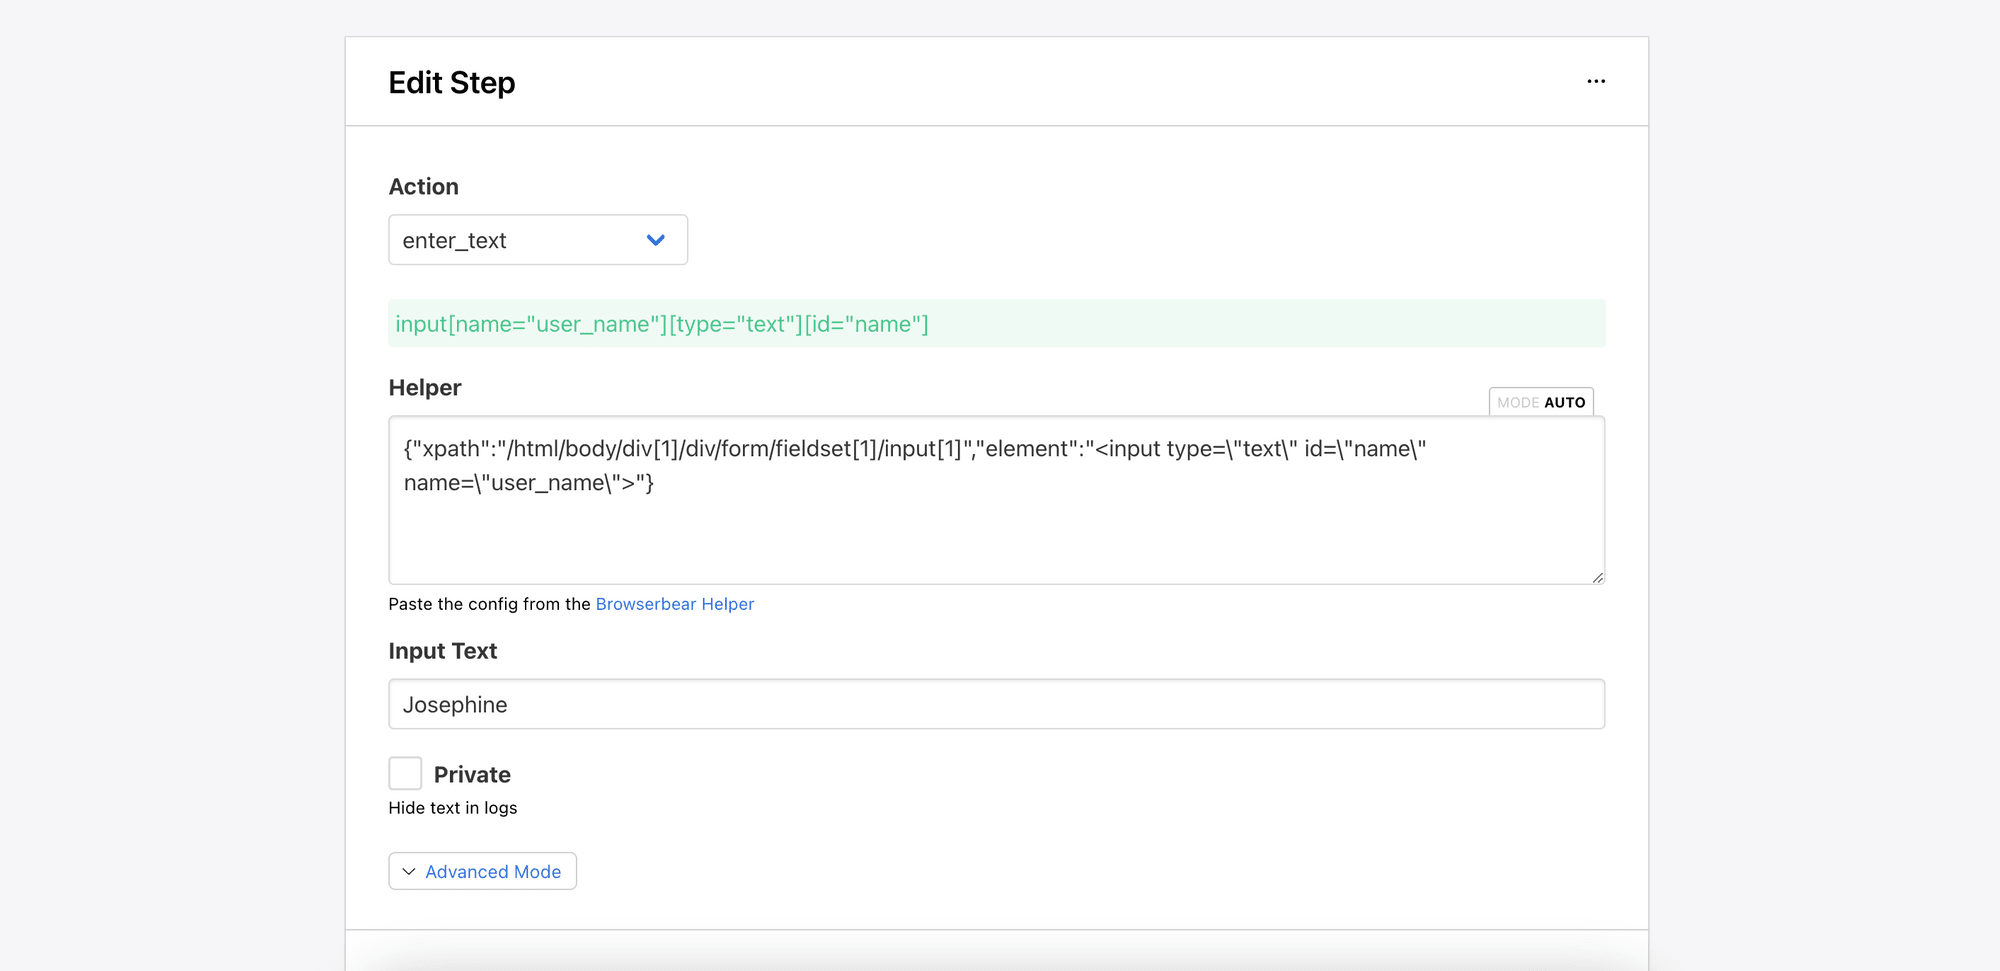
Add a new step to the Browserbear task and select “enter_text” as the action. The value of the Helper field is a JSON object containing the XPath and code snippet of the text input. We will use the Browserbear Helper extension to retrieve it.
 form - step 2
Go to the HTML form and click on the Browserbear Helper icon. When you hover your mouse over the text input, a blue frame should appear around it, like what is shown in the previous screenshot. Click on it and the JSON object (config) should be shown in a pop-up window.
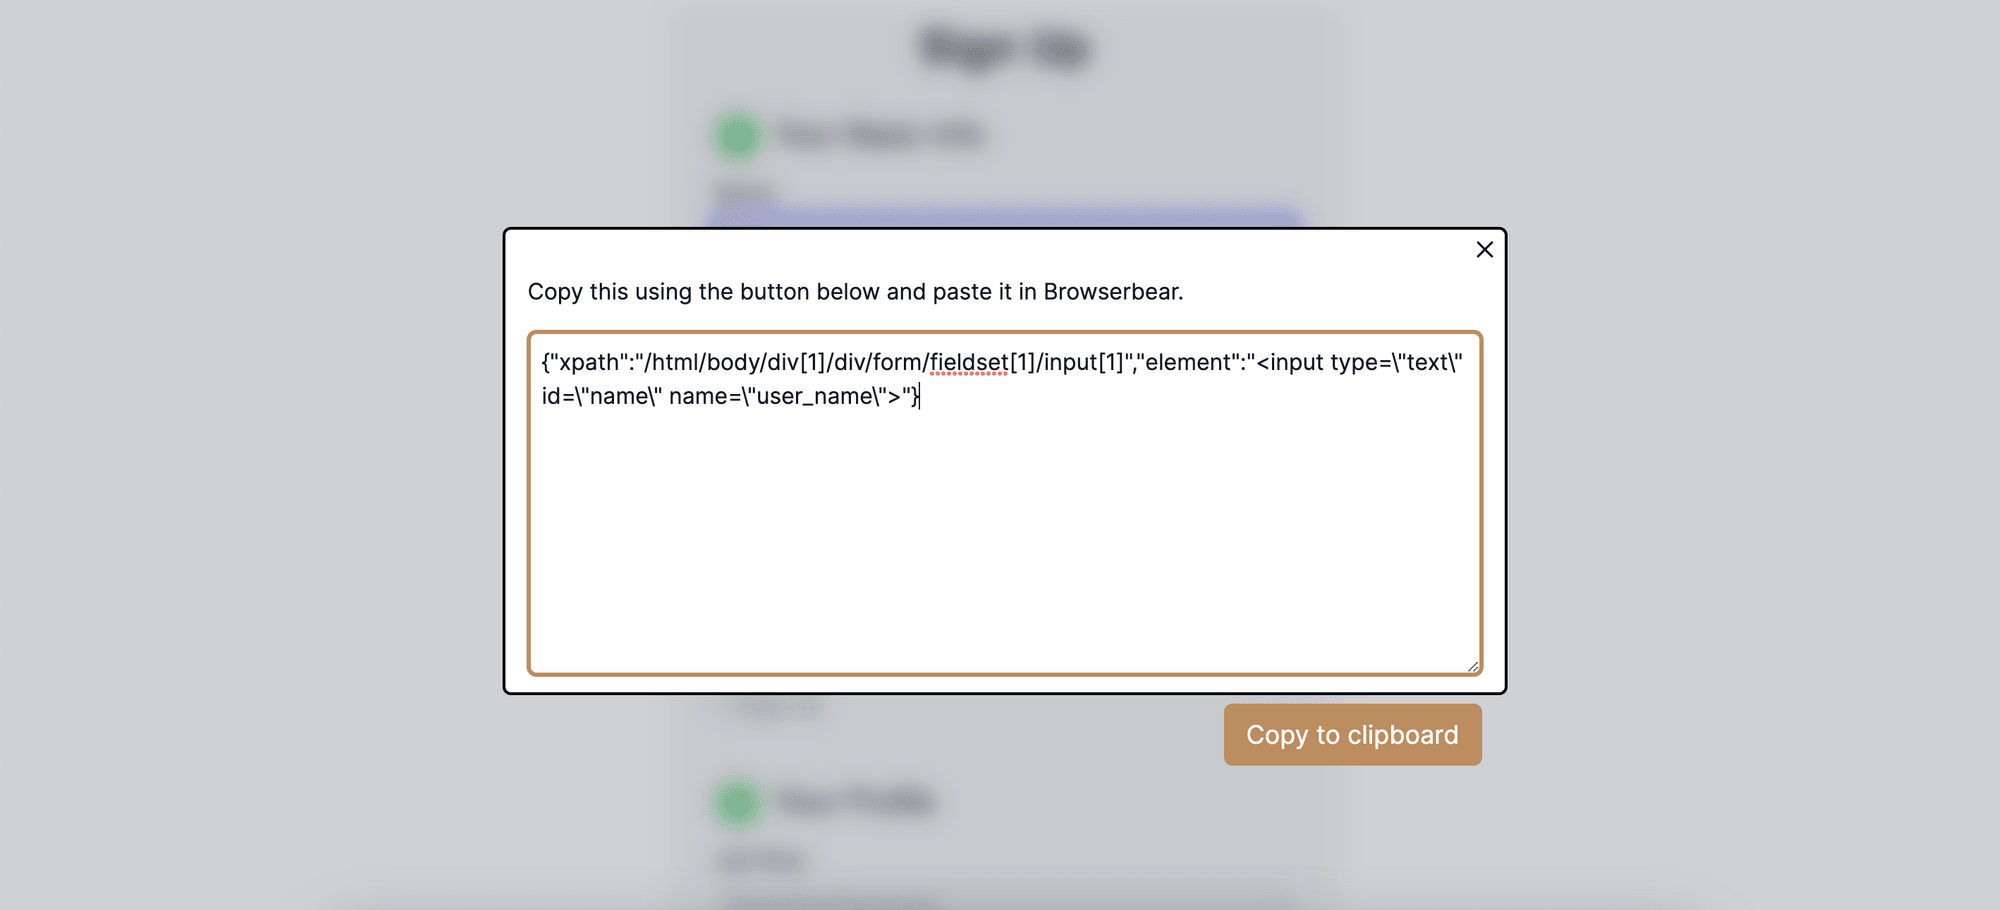
Paste the value into the Helper field and enter a value for the Input Text field.
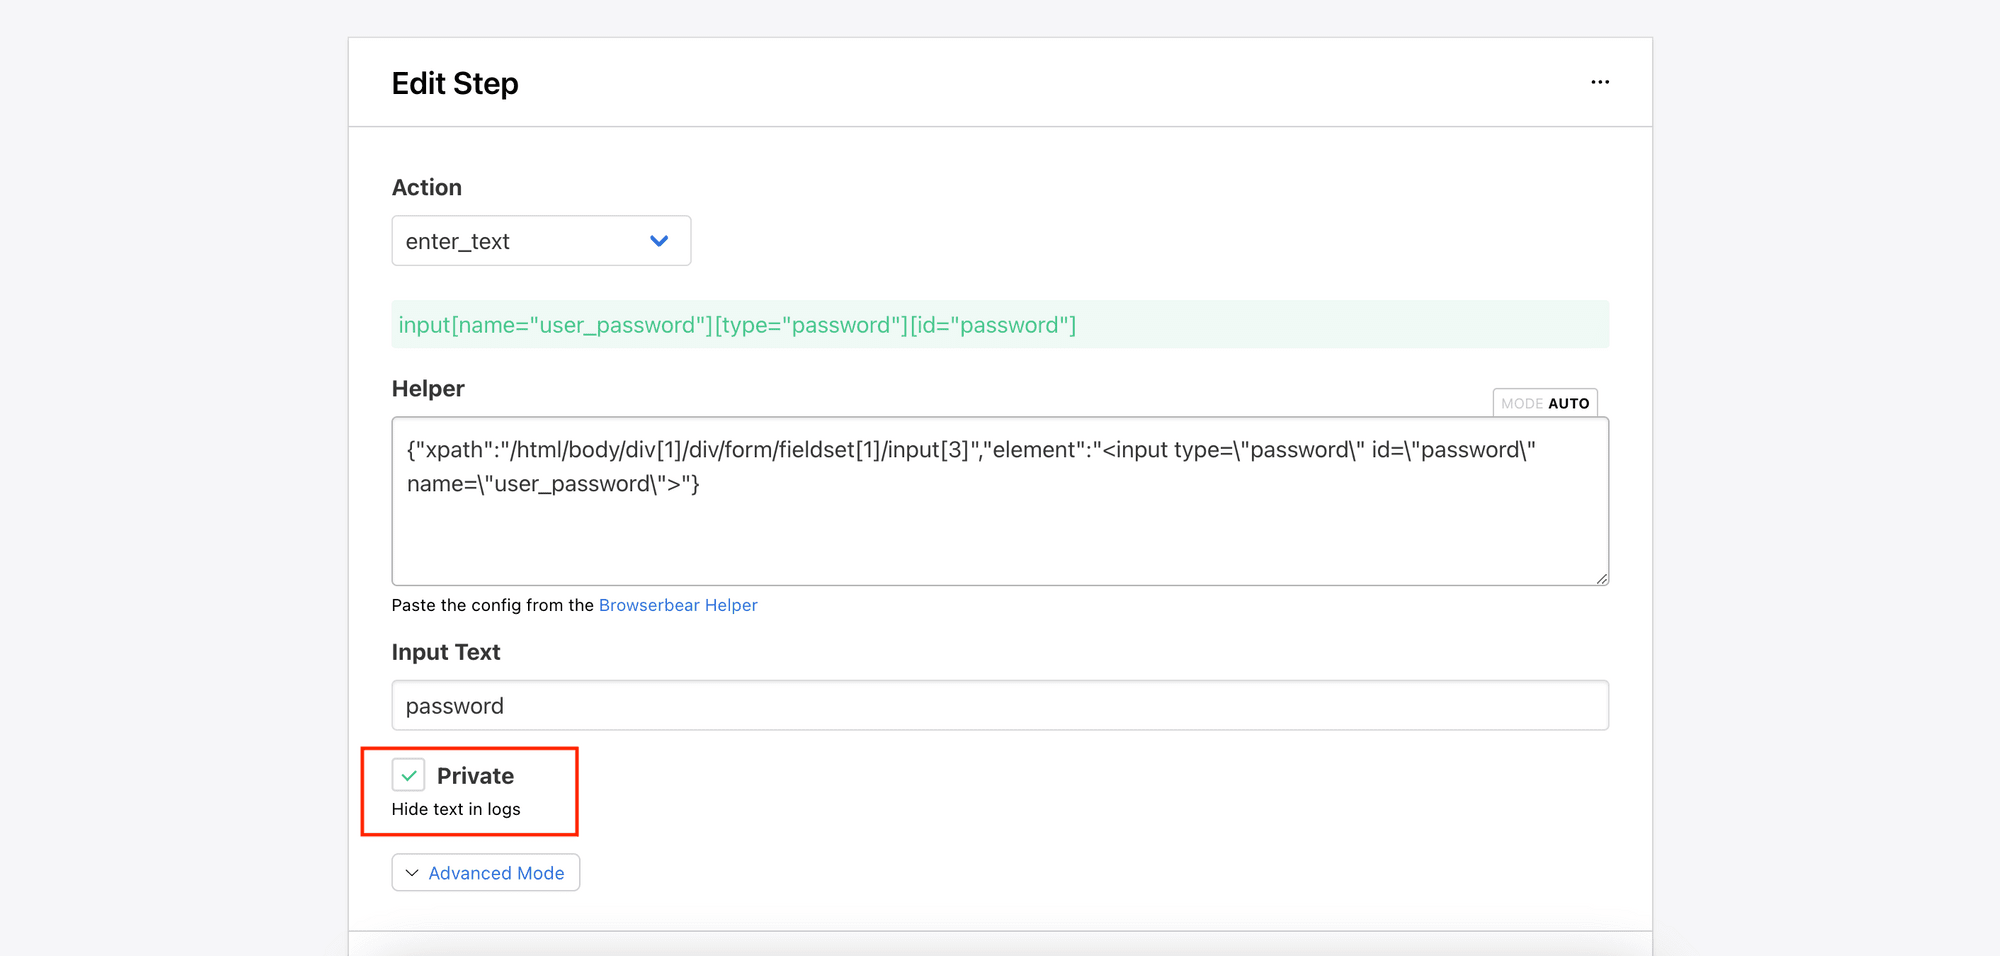
Repeat the same process for email and password.
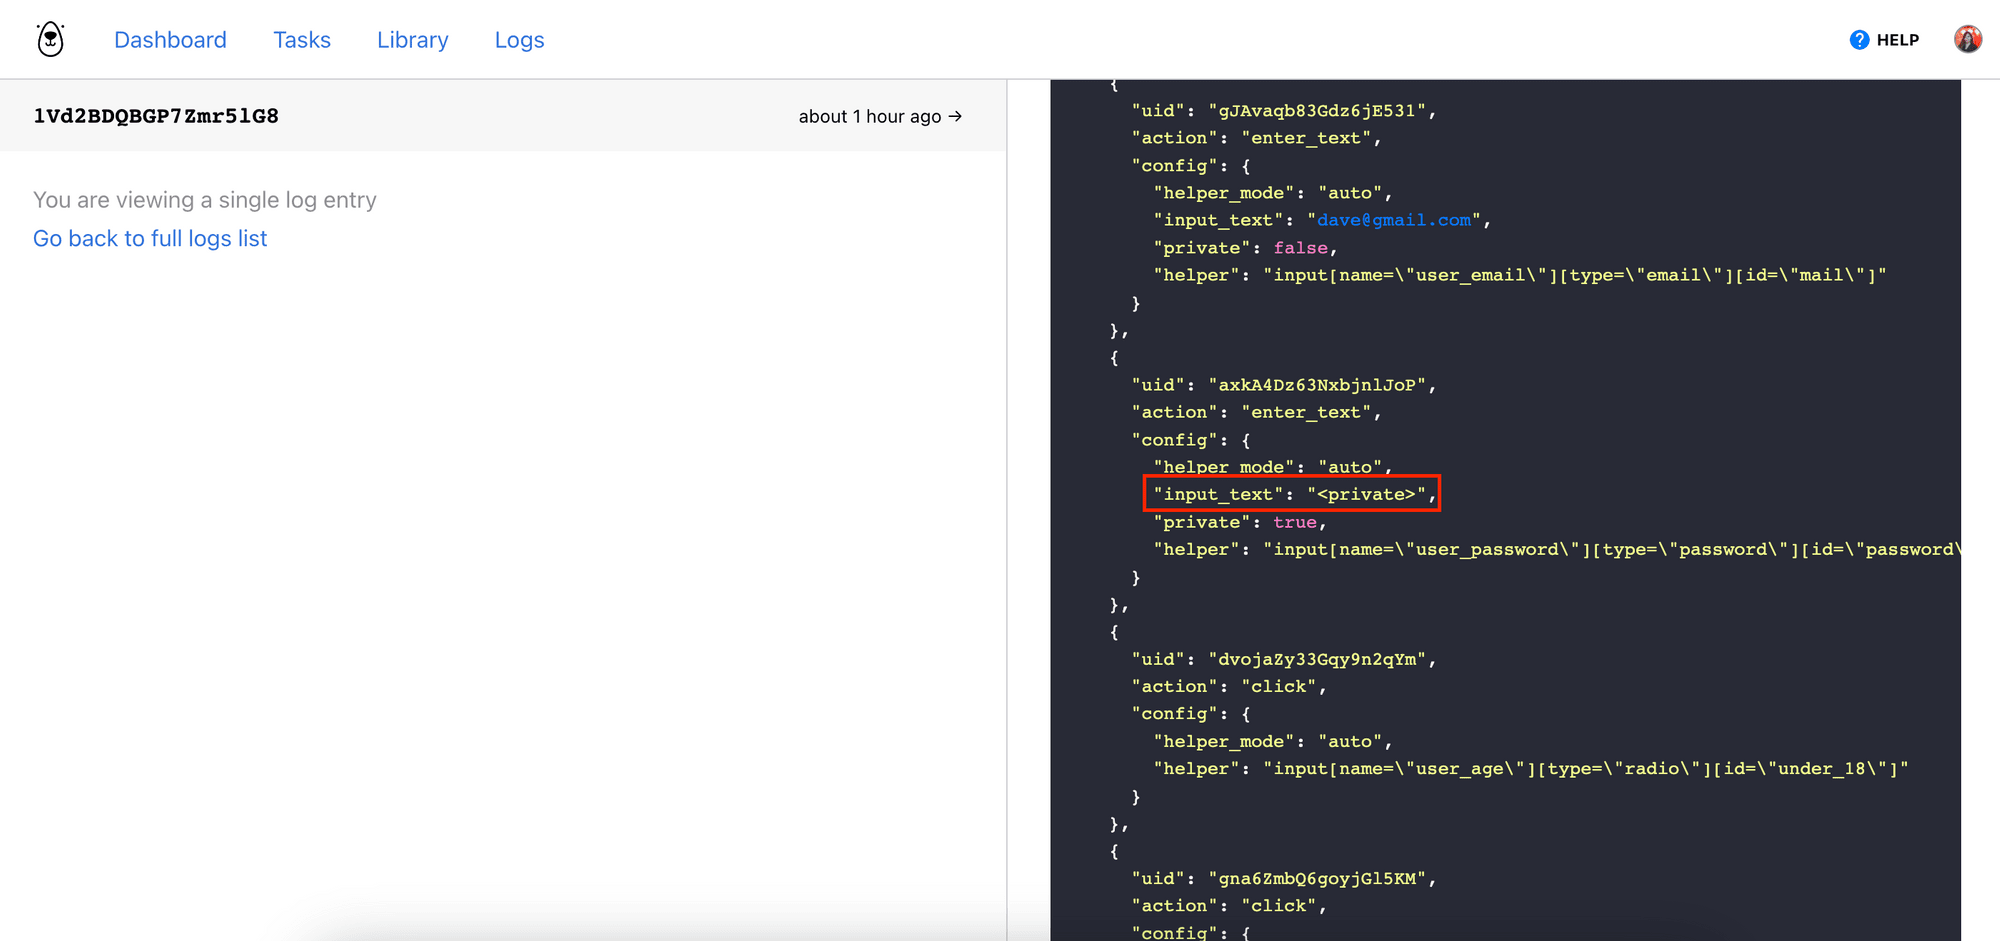
To ensure the security of sensitive information such as passwords, you can mark the Private checkbox. This will mask the password in the log when the task is executed.
Steps 5-6. Click (Radio Button)
For fields that use radio buttons, you can use the "click" action in Browserbear to select the desired options.
Add a "click" step for each radio button option. Similar to the previous steps, use the Browserbear Helper extension to obtain the config for each option and paste it into the Helper field.
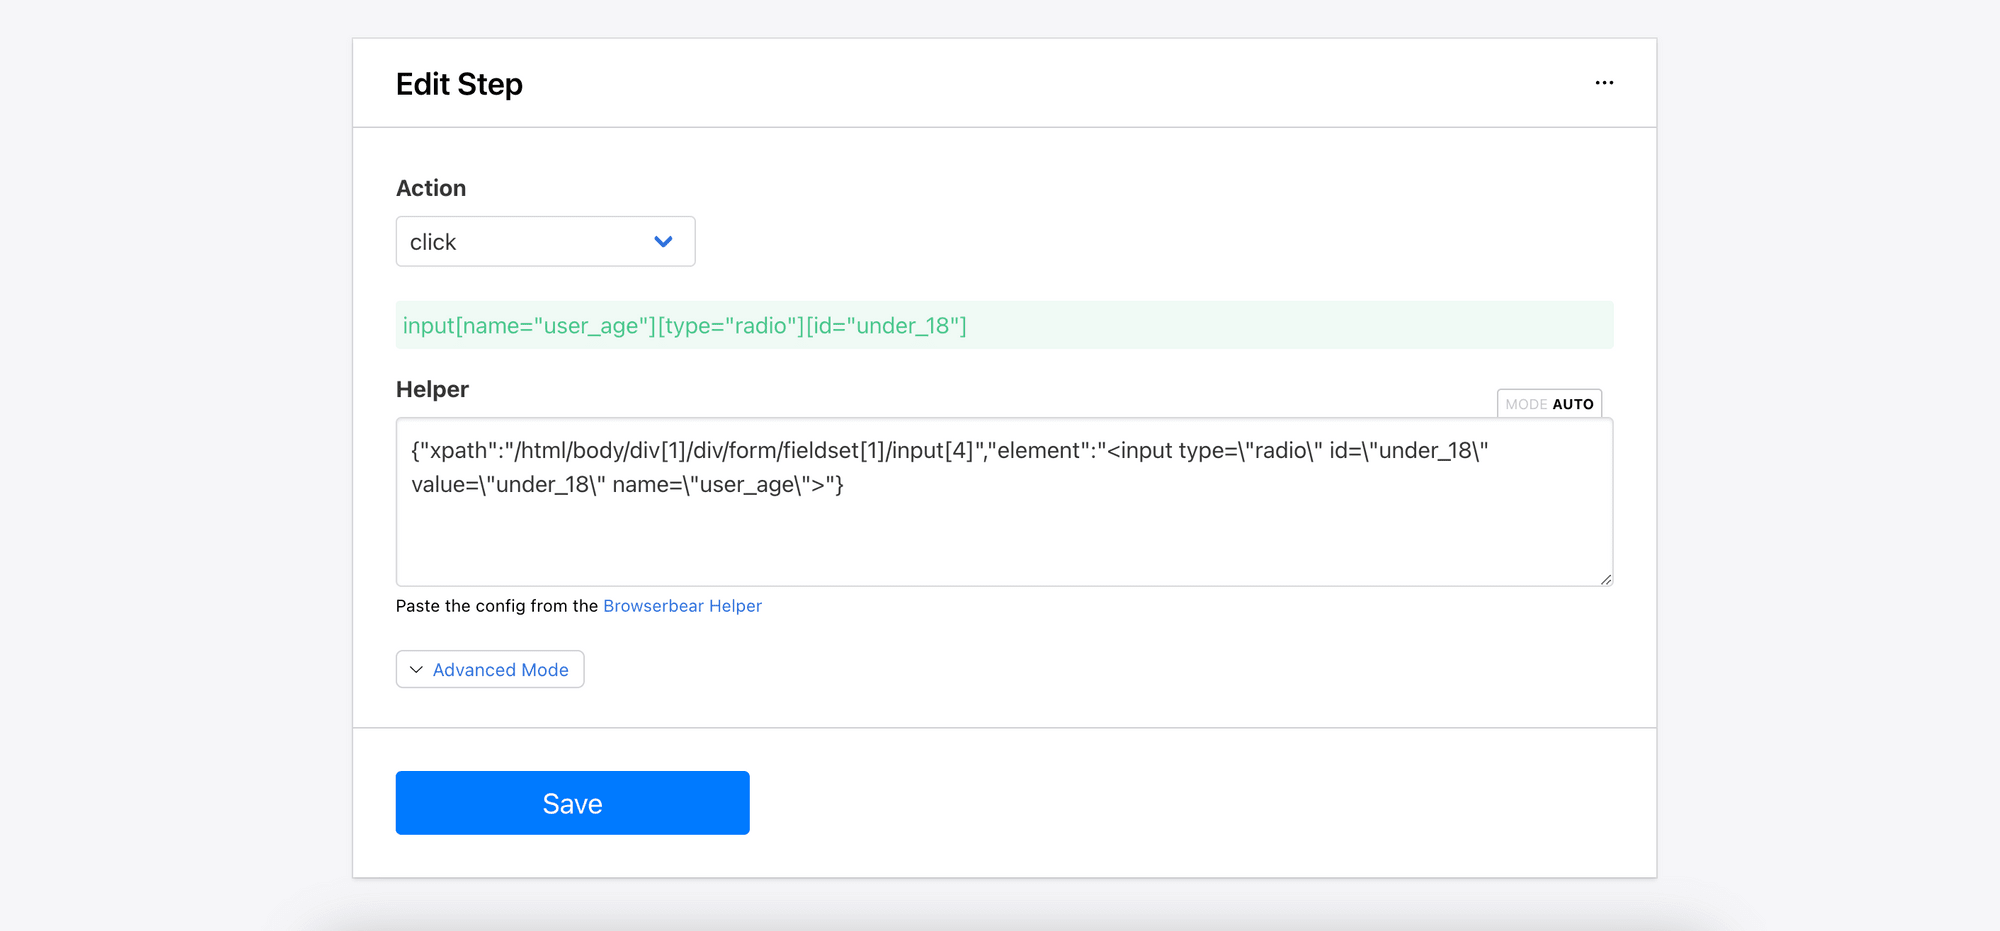
Note: When using the Browserbear Helper extension to select the radio button, you should click on the radio button element instead of the option’s text.
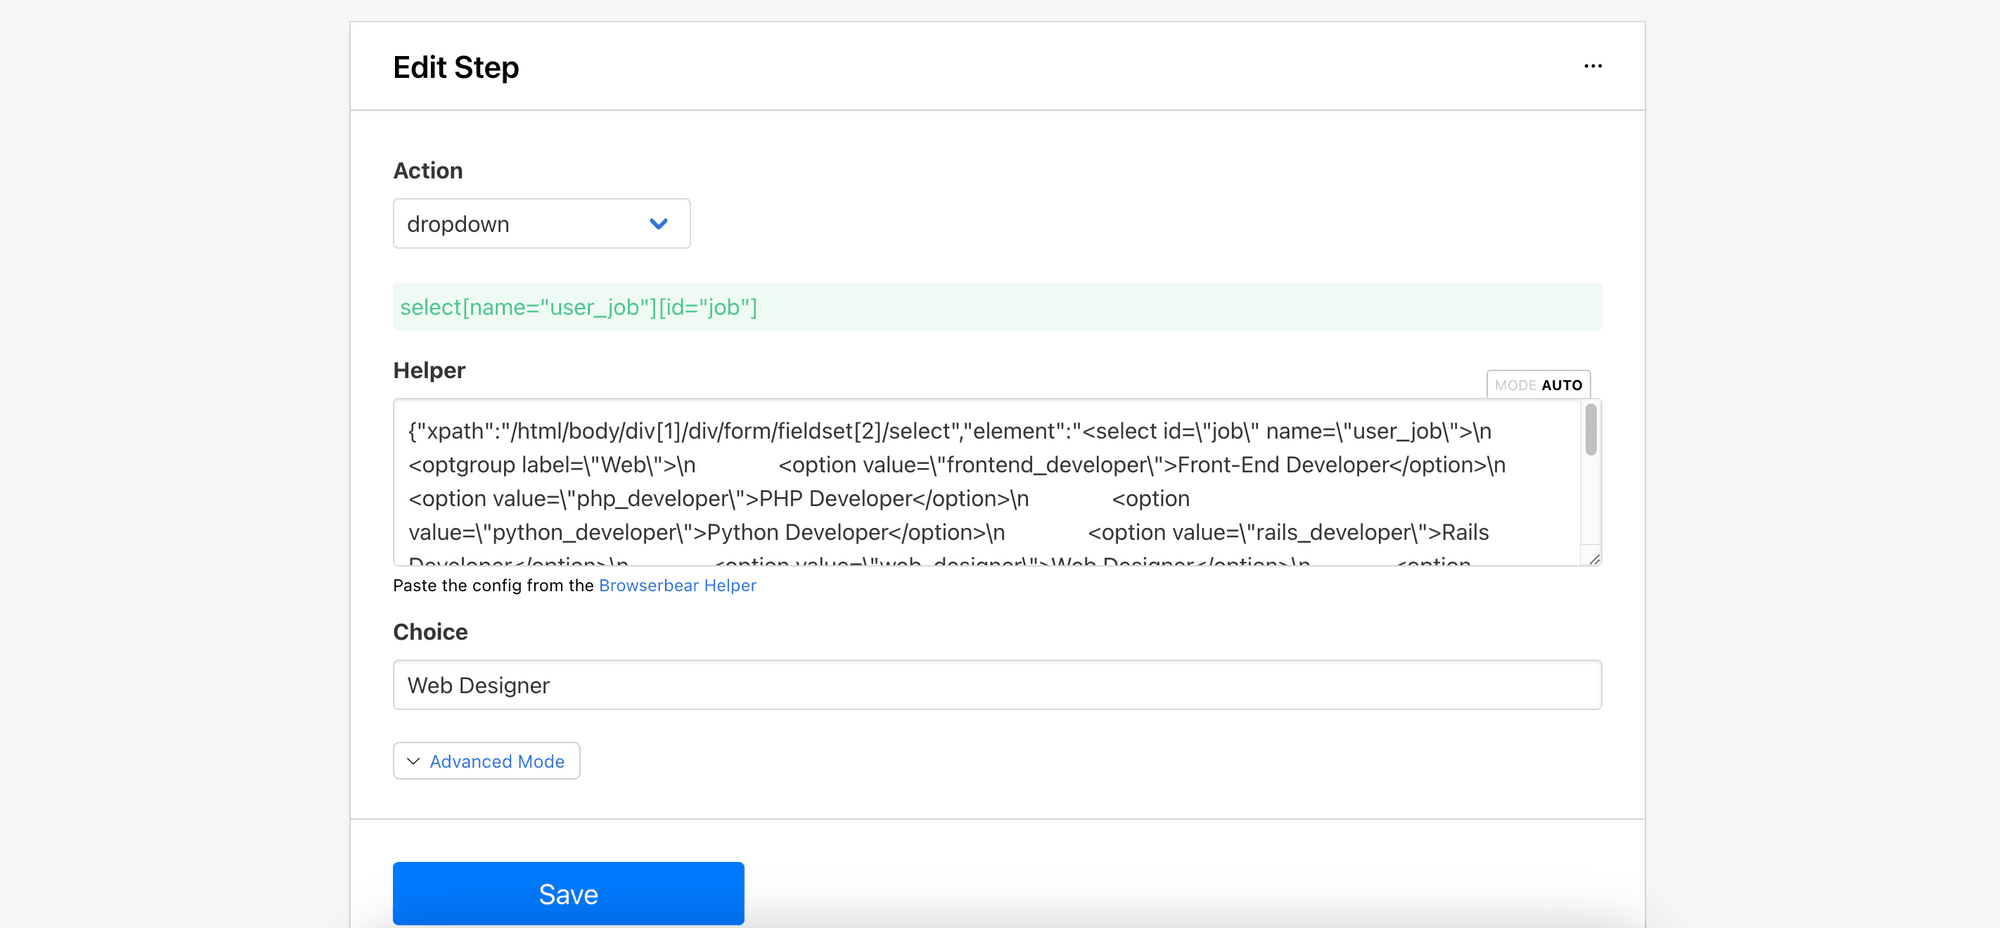
Step 7. Dropdown
The “Job Role" field uses the <select> element to provide multiple options in the dropdown menu. Unlike the radio buttons, there is a dedicated action for this HTML element.
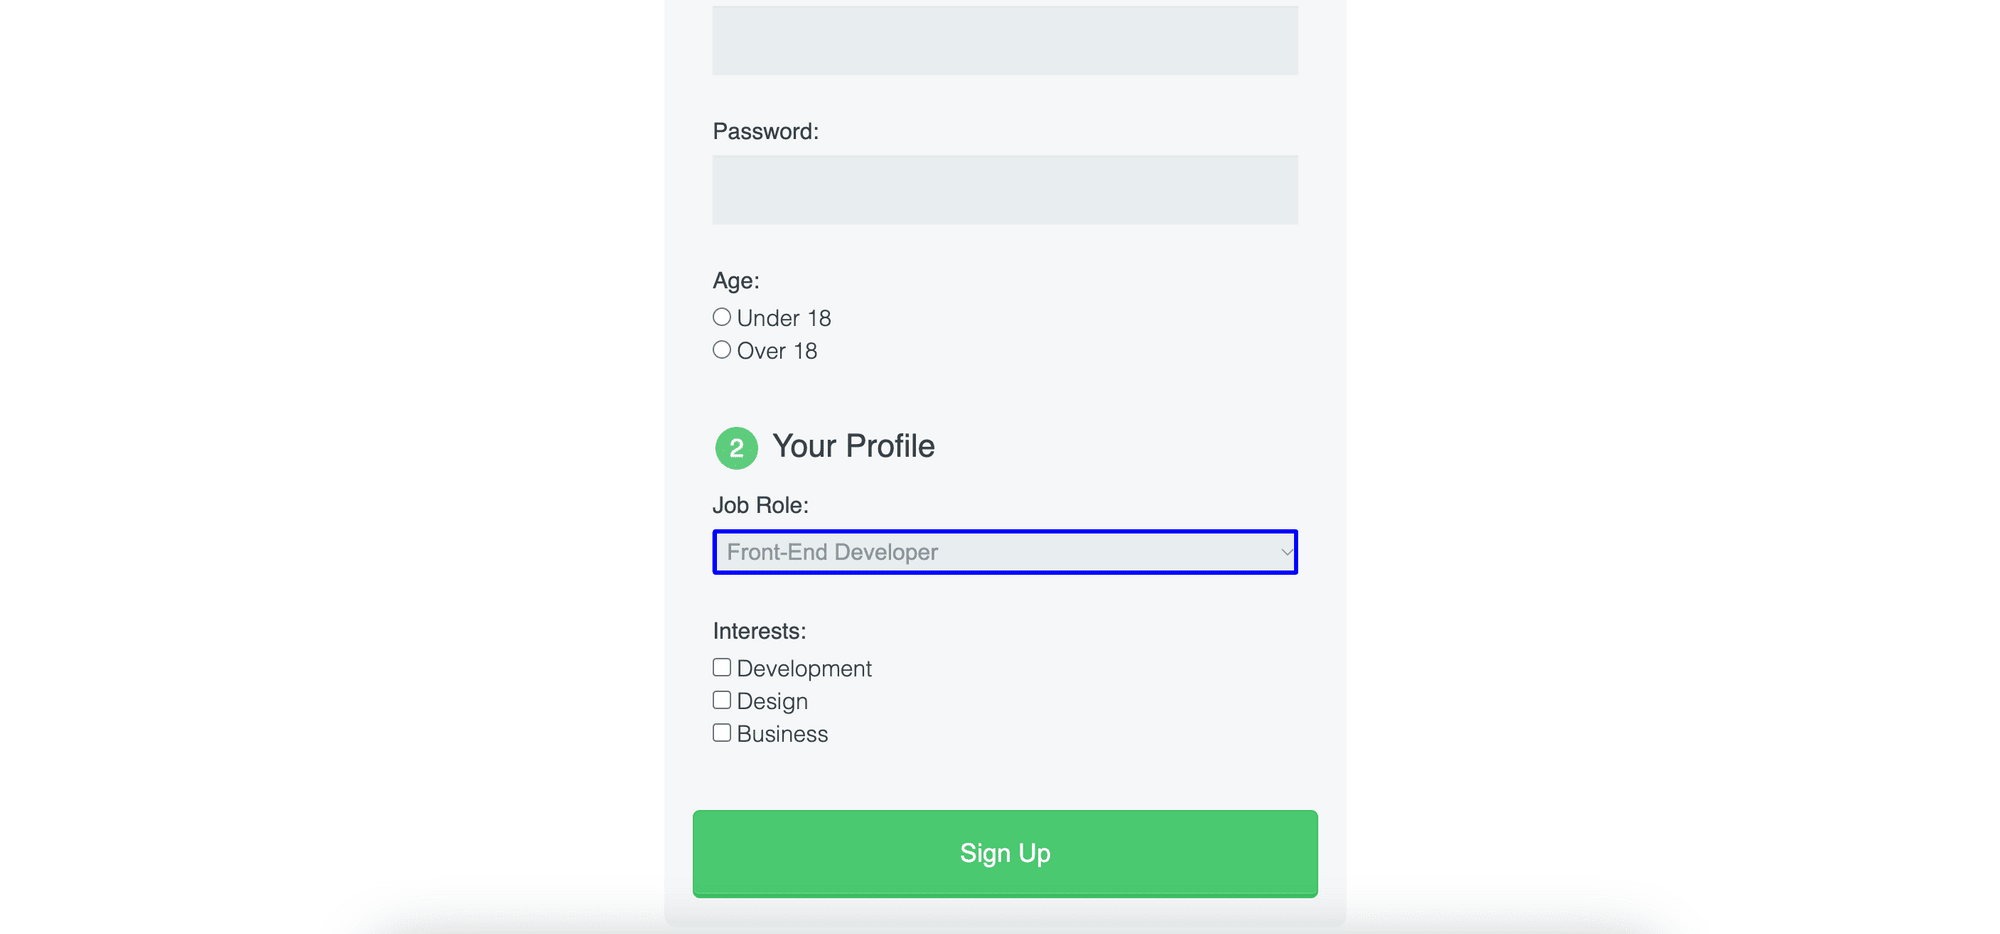
Add a new step and select “dropdown” as the action. Then, paste the element’s config to the Helper field and specify one of the available values from the dropdown menu in the Choice field (eg. “Web Developer”).
Steps 8-10. Click (Checkboxes)
For fields that use checkboxes, you can use the "click" action in Browserbear to select the desired options too, similar to clicking the radio buttons. Follow the same steps to add a "click" step for each checkbox option.
Step 11. Click (Button)
To submit the form, it is necessary to click on the "Sign Up" button. Add a "click" step in your Browserbear task to perform this action.
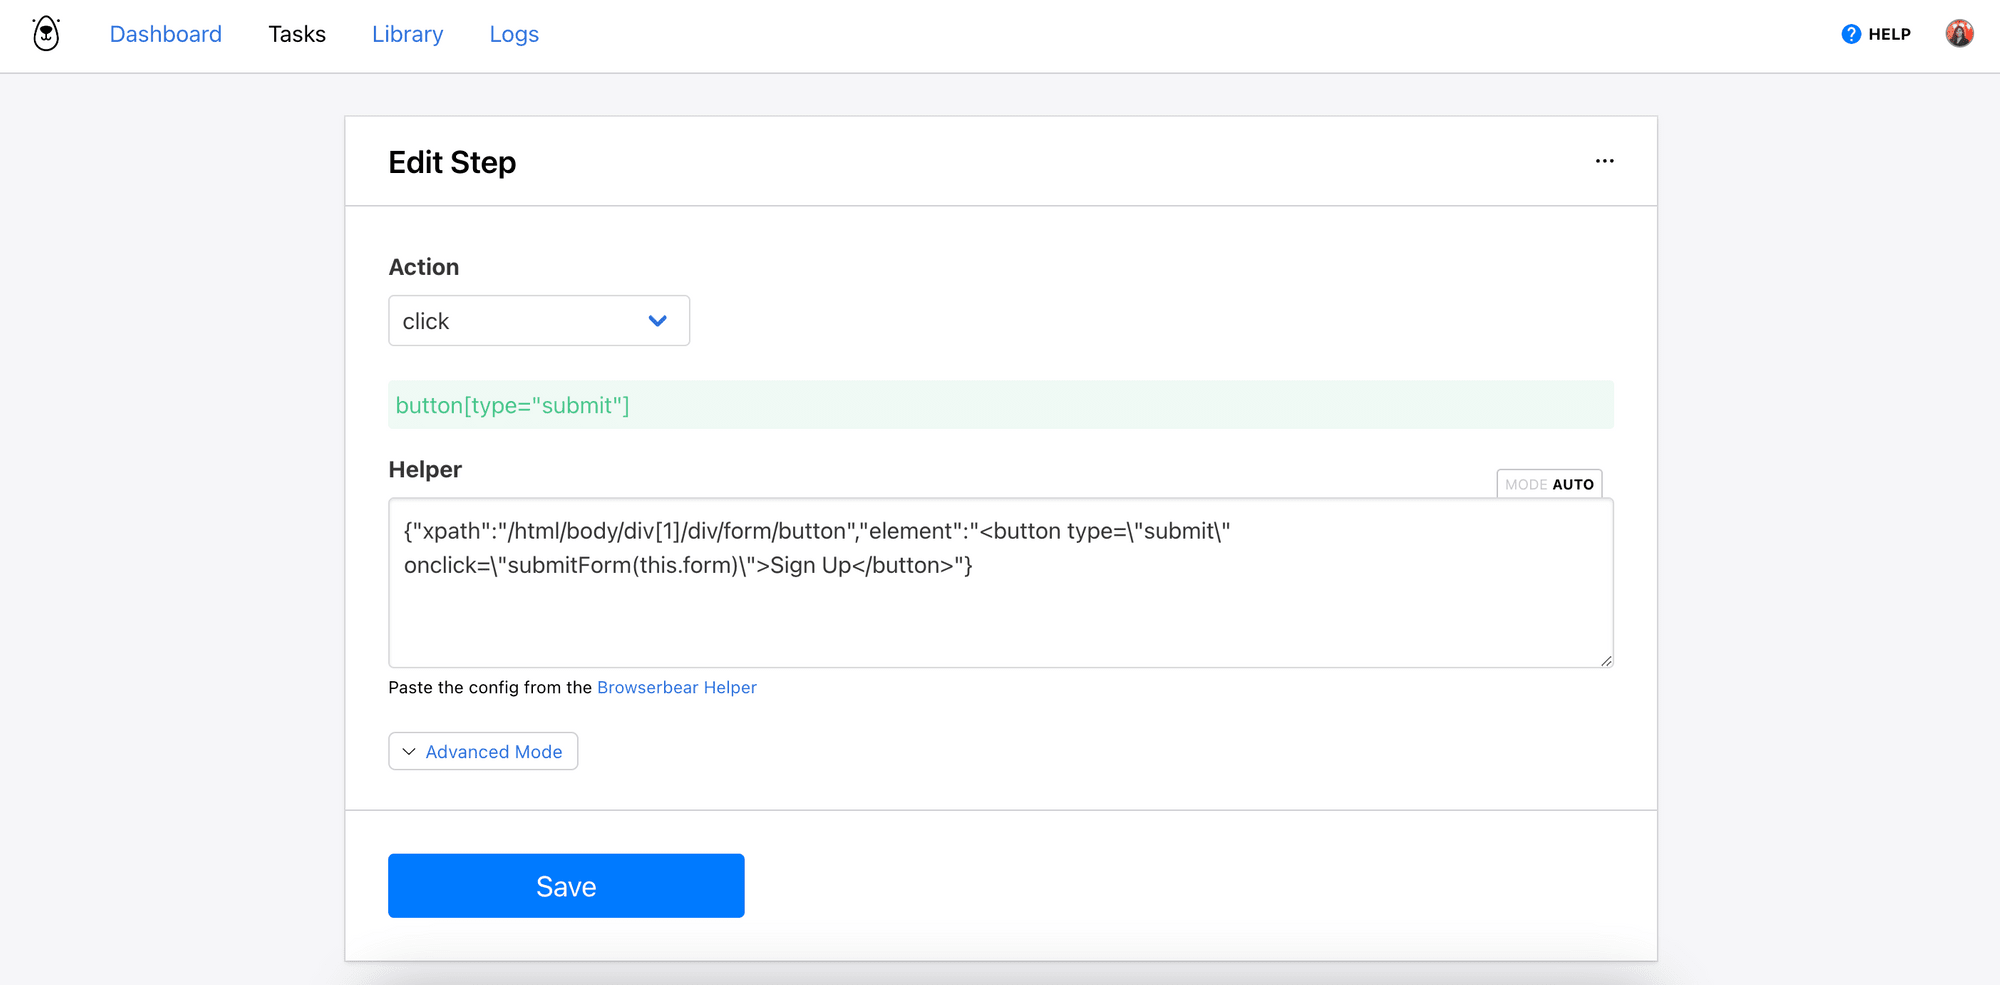
🐻 Bear Tips: Alternatively, you can use the "submit_form" action to submit the form.
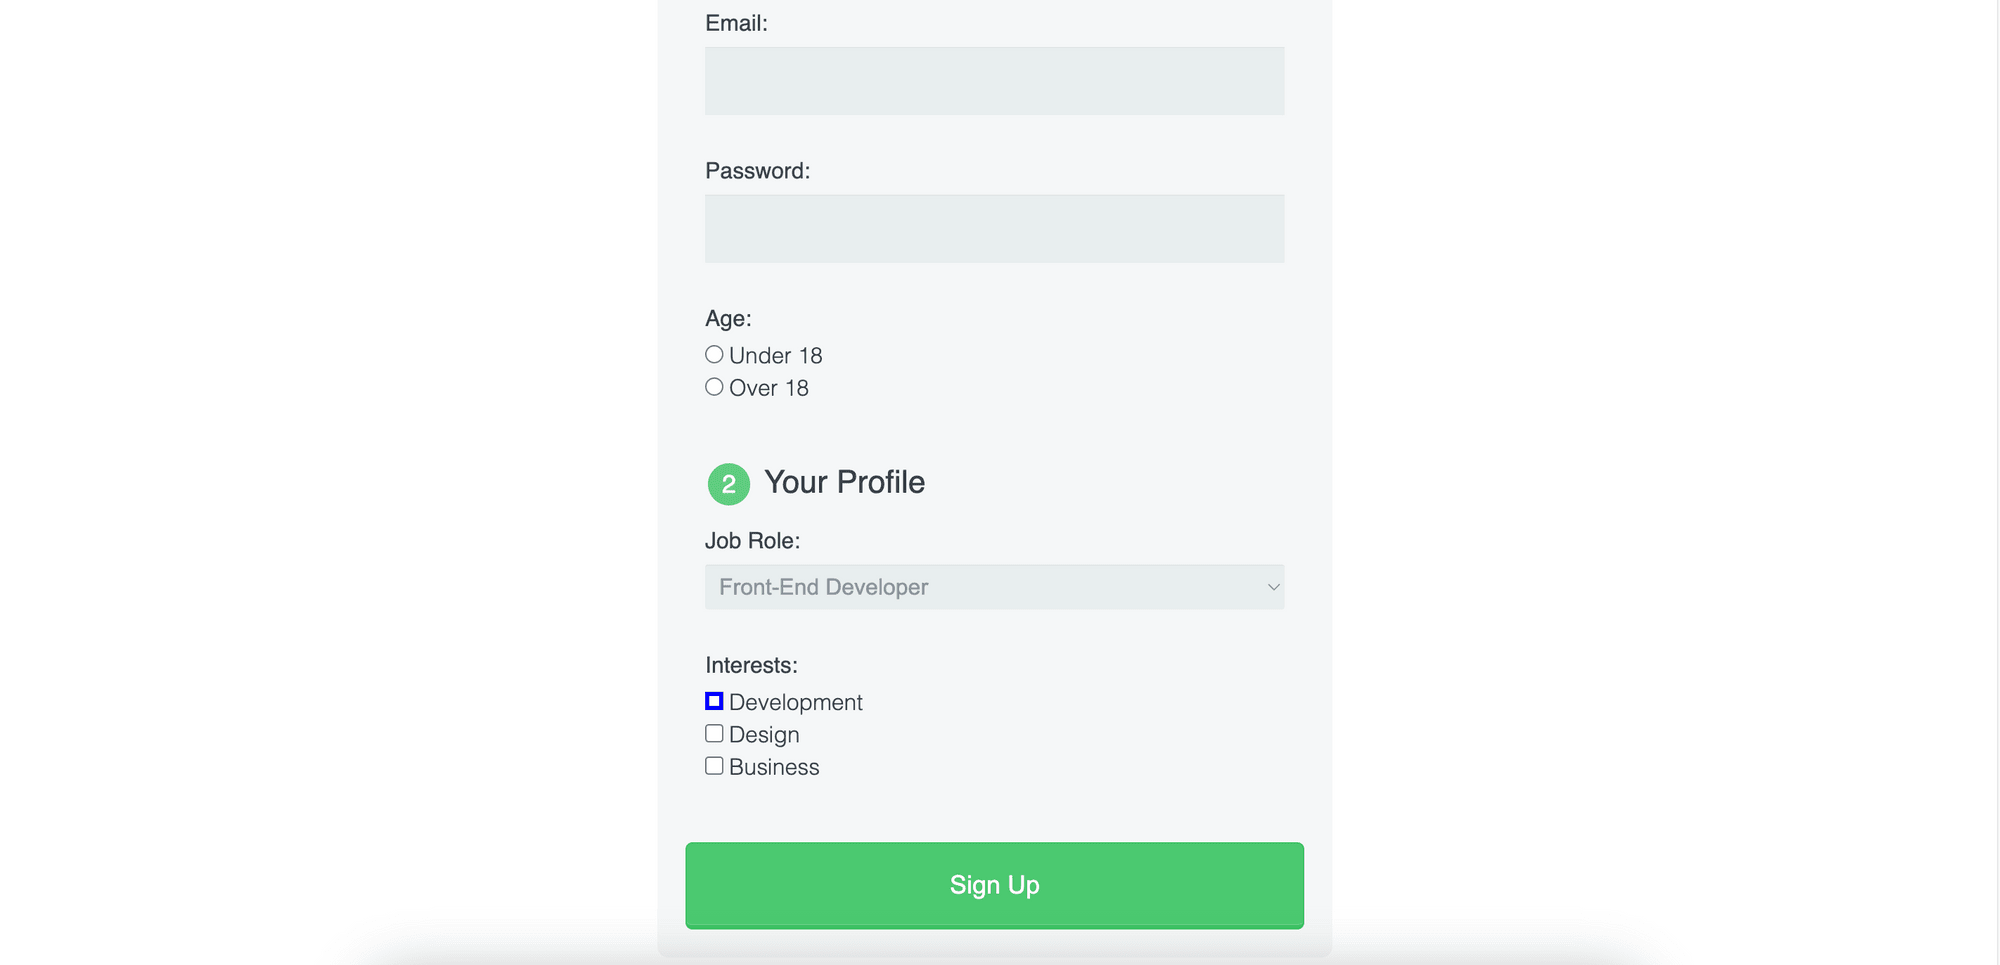
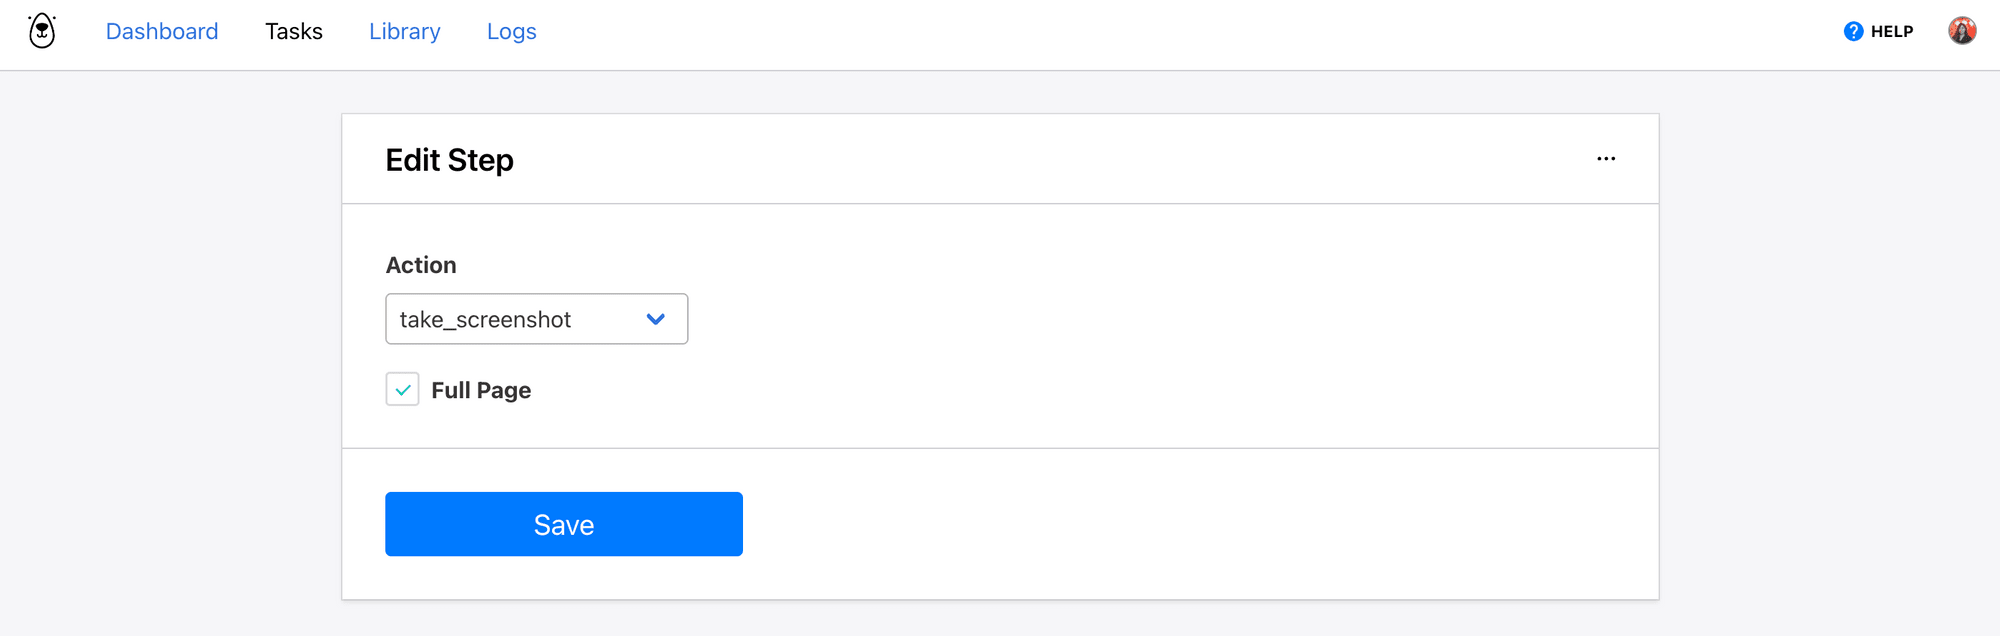
Step 12. Take Screenshot
This step is optional. As the HTML form in this tutorial does not have a backend to handle the form submission, you can take a screenshot of the resulting web page to verify if the form is correctly filled.
Based on the fields in your form, you can add more steps to interact with different elements on the web page. Browserbear supports other actions like "scroll", "paste”, “submit_form”, and more. You can refer to this page for a complete list of available actions.
Once you have added all the necessary steps to your Browserbear task, you can click the "Run Task" button on your dashboard to test it!
Writing the Python Code
Other than clicking the “Run Task” button, you can also trigger it through your choice of programming language, like Python and fill it with data from a CSV file.
Create a new Python file. At the beginning of your file, import all the required libraries.
import requests
import json
import csv
Then, declare the variables below:
api_key = "your_api_key" #eg. bb_ak_7192f60ed28434c230a726b6907ec11ffc1b009e
headers = {"Authorization": f"Bearer {api_key}"}
task_uid = "your_task_uid" #eg. YA80jrMnA62nQ6Zxz7
post_url = f"https://api.browserbear.com/v1/tasks/{task_uid}/runs"
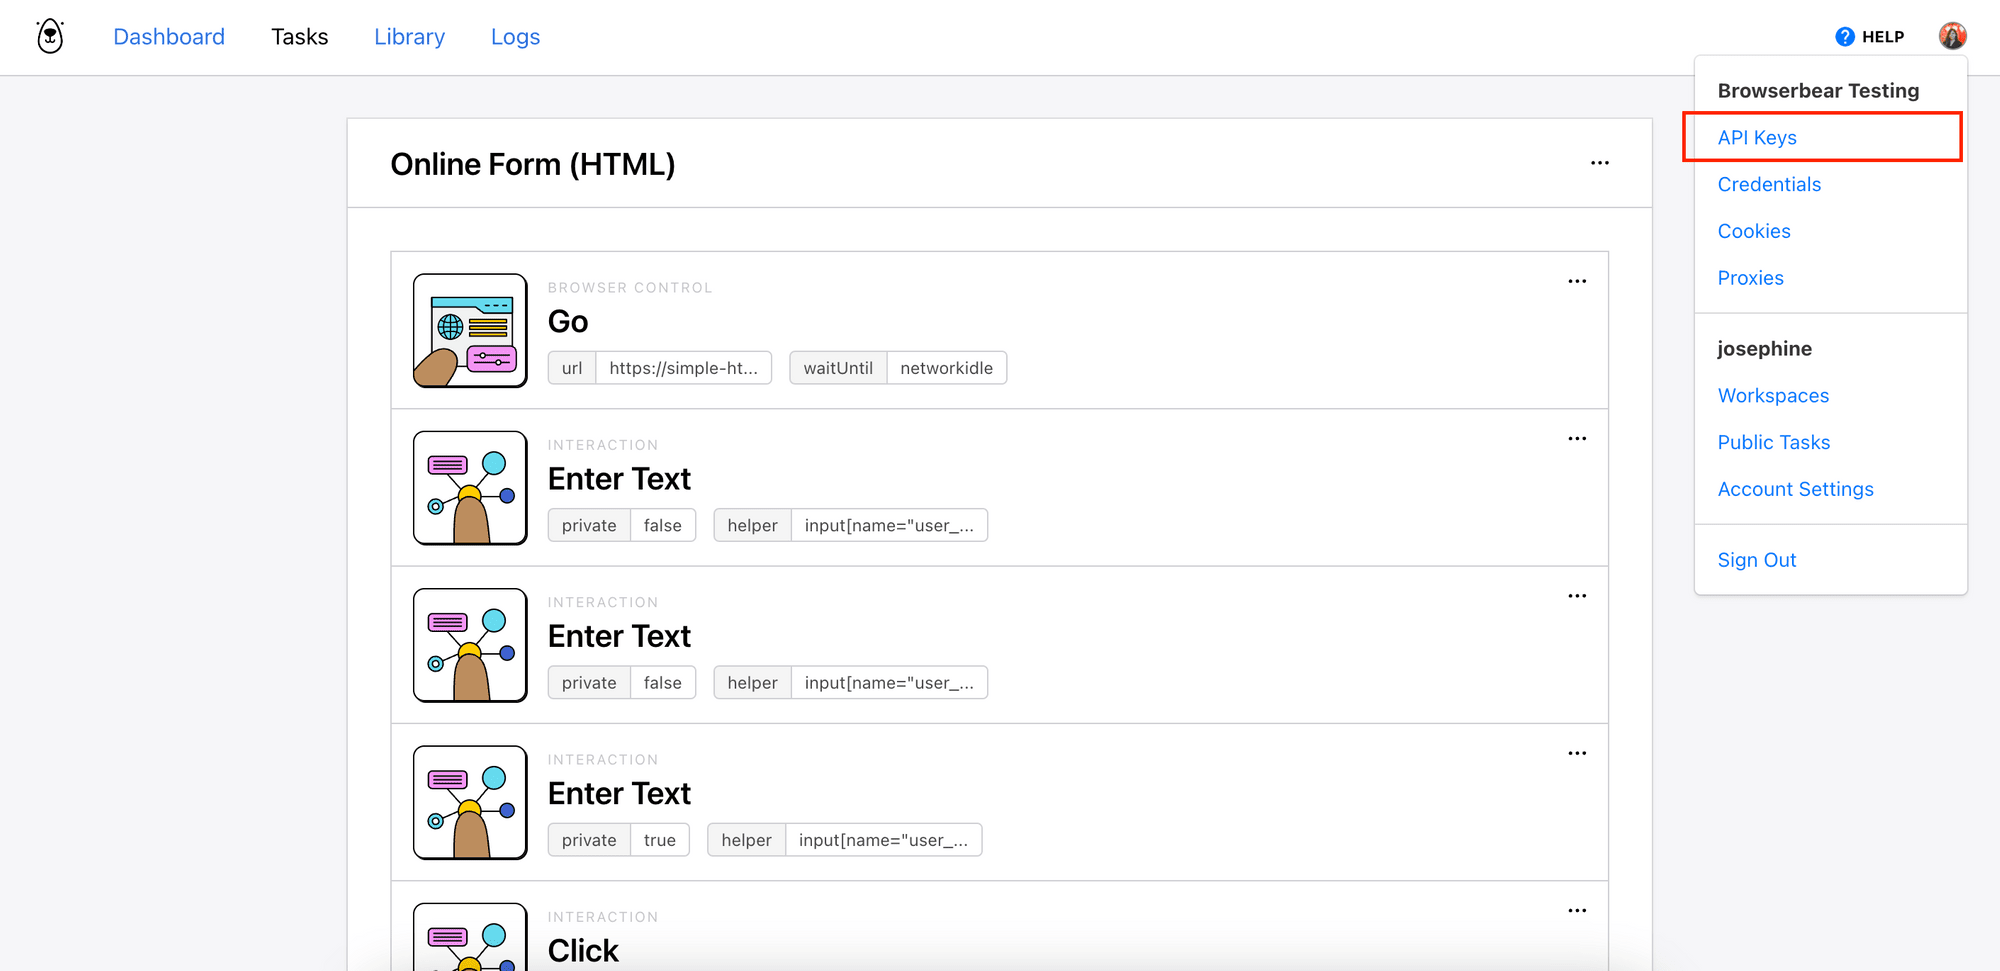
The API Key and task ID can be retrieved from your Browserbear dashboard.

Next, open the CSV file and read the data from the file.
# Read data from CSV file and insert into data object
with open("htmlData.csv") as csvFile:
  csv_reader=csv.DictReader(csvFile,delimiter=',')
Then, loop through each row of the CSV file and extract data from each row:
# Read data from CSV file and insert into data object
with open("htmlData.csv") as csvFile:
  ...
  for row in csv_reader: #loop through each row
    name = row['Name']
    email = row['Email'
    password = row['Password']
    age = row['Age']
    job = row['Job']
    interests = row['Interests']
To send the data to the API, create a data object that contains an array of step overrides and populate it with the variables above. You must include the uid, action, and config for each step you want to modify. Other steps that are not included in the array will use their original configs.
# Read data from CSV file and insert into data object
with open("htmlData.csv") as csvFile:
  ...
  for row in csv_reader: #loop through each row
    ...
    data = {
      "steps": [
        {
	        "action": "enter_text",
	        "uid": "qlKAMVbAaJ6bNRGra9",
	        "config": {
	            "input_text": name
        }
        },
        {
	        "action": "enter_text",
	        "uid": "gJAvaqb83Gdz6jE531",
	        "config": {
	            "input_text": email
        }
        },
        {
	        "action": "enter_text",
	        "uid": "axkA4Dz63NxbjnlJoP",
	        "config": {
	            "input_text": password
        }
        },
        {
	        "action": "click",
	        "uid": "dvojaZy33Gqy9n2qYm",
	        "config": {},
	        "skip": False if age == "under_18" else True
        },
        {
	        "action": "click",
	        "uid": "gna6ZmbQ6goyjGl5KM",
	        "config": {},
	        "skip": False if age == "over_18" else True
        },
        {
	        "action": "dropdown",
	        "uid": "QkEpRmyeX1pbX1AGnO",
	        "config": {
	            "choice": job
        }
        },
        {
	        "action": "click",
	        "uid": "pXvMxmBjXRkb35kd8e",
	        "config": {},
	        "skip": False if "development" in interests else True
        },
        {
	        "action": "click",
	        "uid": "DLqol1zxr2ayKadVrR",
	        "config": {},
	        "skip": False if "design" in interests else True
        },
        {
	        "action": "click",
	        "uid": "NqV2ngBm1LnB7O9dPR",
	        "config": {},
	        "skip": False if "business" in interests else True
        }
      ]
🐻 Bear Tips: If you're not sure about the uid, action, and config values that need to be added to the steps array, you can run the task manually from your Browserbear dashboard and copy the them from the log.
Note: For config, you only need to specify values for properties that need to be modified. Other unchanged properties like "helper", "helper_mode", etc. can be omitted.
For steps like clicking the radio buttons and checkboxes, we want to execute only the steps that contain the desired values and skip the rest. Therefore, we need to add the skip property to them.
{
	"action": "click",
	"uid": "gna6ZmbQ6goyjGl5KM",
	"config": {},
	"skip": False if age == "over_18" else True
}
After that, we can send a request to the Browserbear API. This will execute the task and fill in the HTML form with data from the CSV file.
# Read data from CSV file and insert into data object
with open("htmlData.csv") as csvFile:
  ...
  for row in csv_reader: #loop through each row
    ...
    # Send the request to Browserbear API
    response = requests.post(post_url, headers=headers, json=data)
    result = json.loads(response.text)
    print(result)
Last but not least, close the CSV file.
# Read data from CSV file and insert into data object
with open("htmlData.csv") as csvFile:
  ...
  for row in csv_reader: #loop through each row
    ...

csvFile.close()
Execute the Python file and there you go—all the data from the CSV file will be automatically filled into the HTML form and submitted!
You can check the screenshots from the logs:
 screenshot of the log

Conclusion
By combining the simplicity of Browserbear and the flexibility of Python, you can fill in web forms using data from a CSV file efficiently and effortlessly. This approach reduces your learning curve in automating the web browser and improves overall productivity compared to using a conventional browser automation library.
As a developer, using the right tool not only saves time but also empowers you to focus on higher-value aspects of web development. If you are not doing so, sign up for a Browserbear account for free and start automating the boring stuff!