
How to Create Automated Web App Login Tests with No Code
Contents
Testing is an essential part of app maintenance that ensures users have a seamless and effective experience. Most apps are extensively tested before release, but the process of verifying functionality must be ongoing.
While there’s no way to fully automate QA testing, software can take the repetitive, mundane tasks off your plate. This leaves you free to develop and improve your app rather than continuously search for bugs as they crop up.
You can use nocode tools to set up automated tests that detect when logins on web apps are malfunctioning. In this tutorial, you’ll learn how to do this using Browserbear, Zapier, and Airtable.
What You Will Create
Users must be assured that the apps they use prioritize their safety with secure login systems. Issues with password requirements, alternative access methods, and more can negatively impact the user experience and cause people to abandon your app.
We will be using an automated browser tool to enter different sets of login credentials when a trigger is activated, checking to ensure an app responds correctly.
The tools you will be using are:
- Airtable : To store test login credentials and show which respond correctly
- Browserbear : To automatically browse and enter login credentials
- Zapier : To trigger actions in different programs based on pre-specified commands
By the end of this tutorial, you should be able to take screenshots of where a set of login credentials leads and identify which ones are successful.

Automated screenshot sample and updated login test status
Let’s start with an Airtable base.
Create an Airtable Base to Store Login Credentials
We will use Airtable to store test login credentials, activate the sets to be tested, and indicate which ones are responding correctly.
Log into your Airtable account and create a new base. On the first table, set up the following fields:
- Username
- Password
- Notes
- Test
- Login Successful
Create a few records with test login credentials.
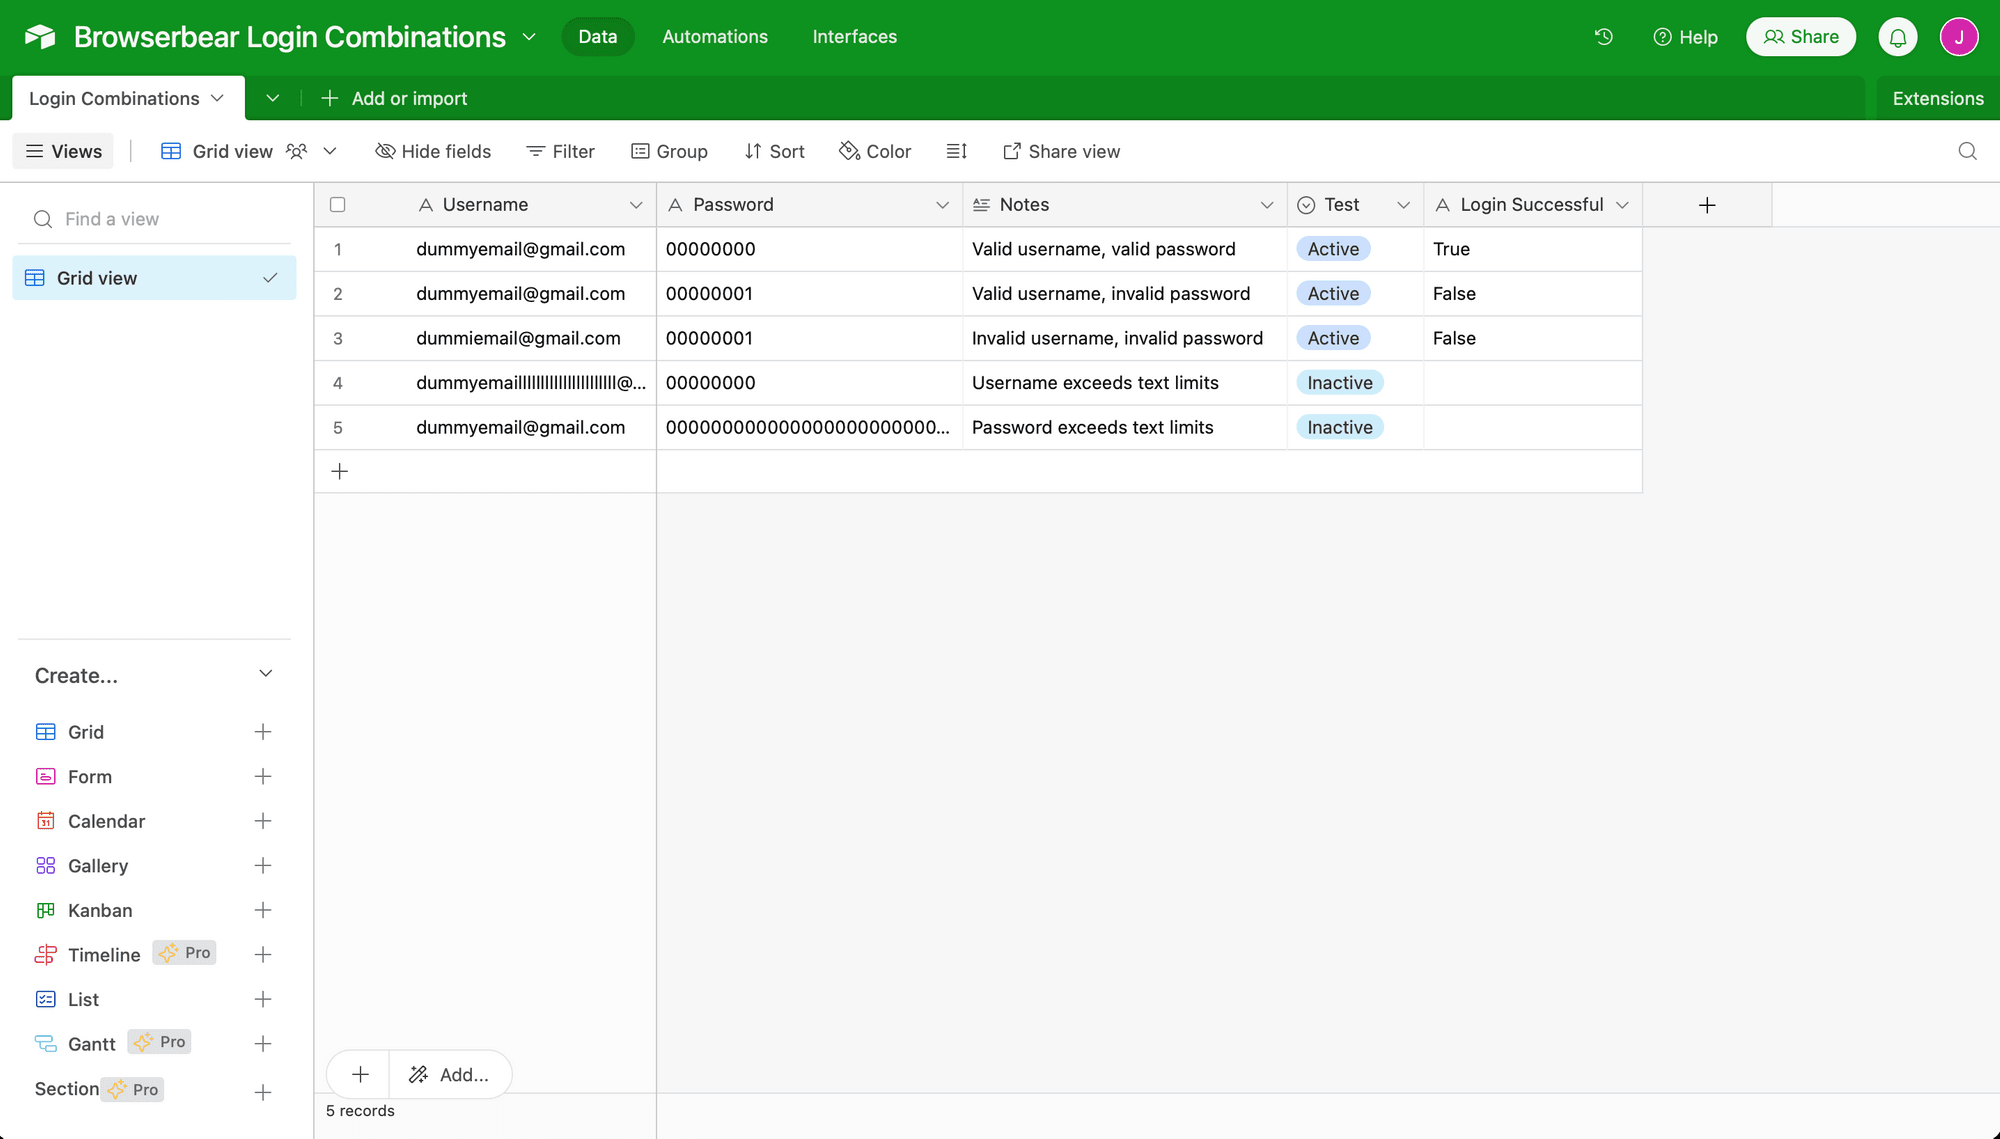
You will have to manually input data for all fields except the Login Successful field, which will auto-update according to the results of each task run.
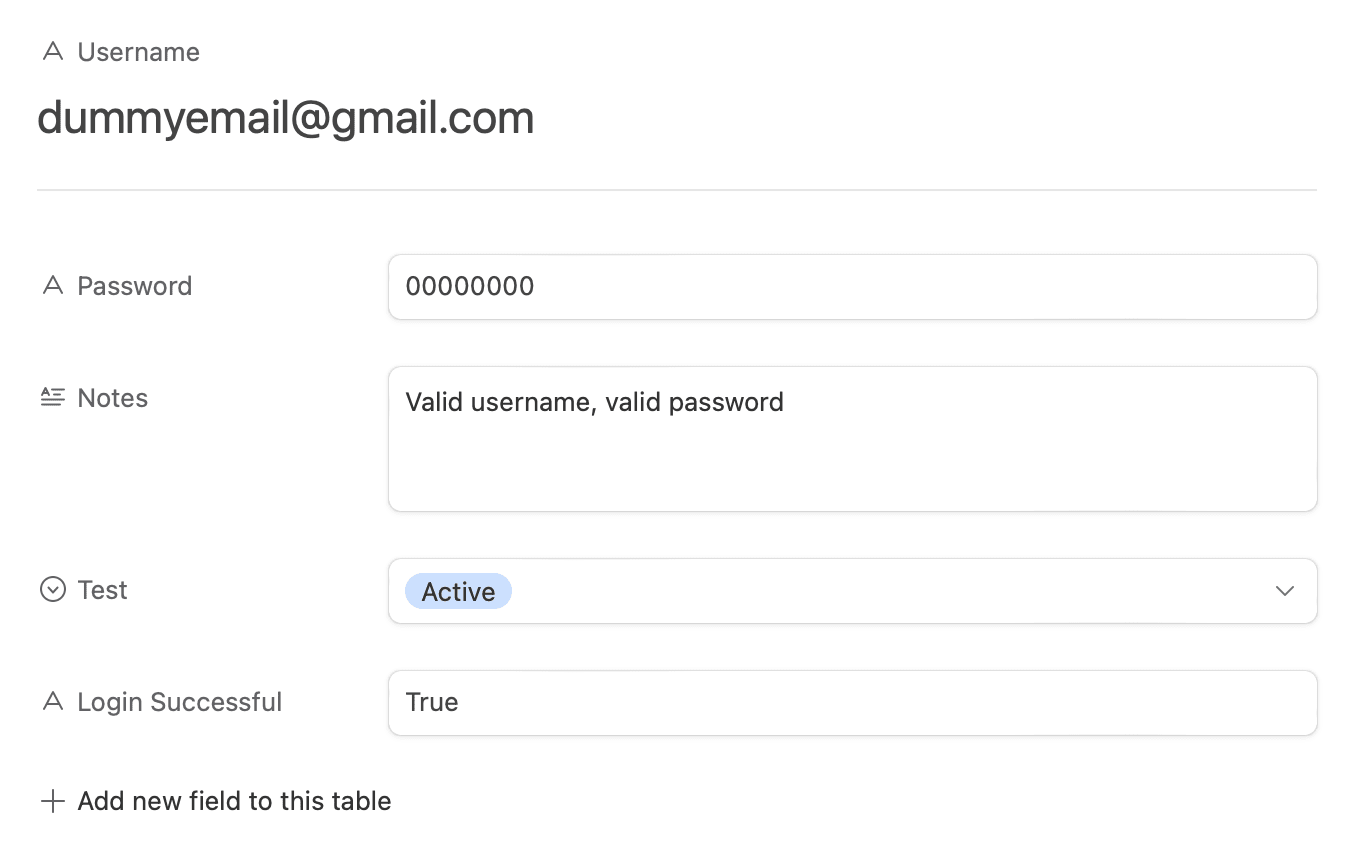
The Test field will indicate whether or not a set of credentials is active, and you can change this as needed.
Build a Task on Bannerbear
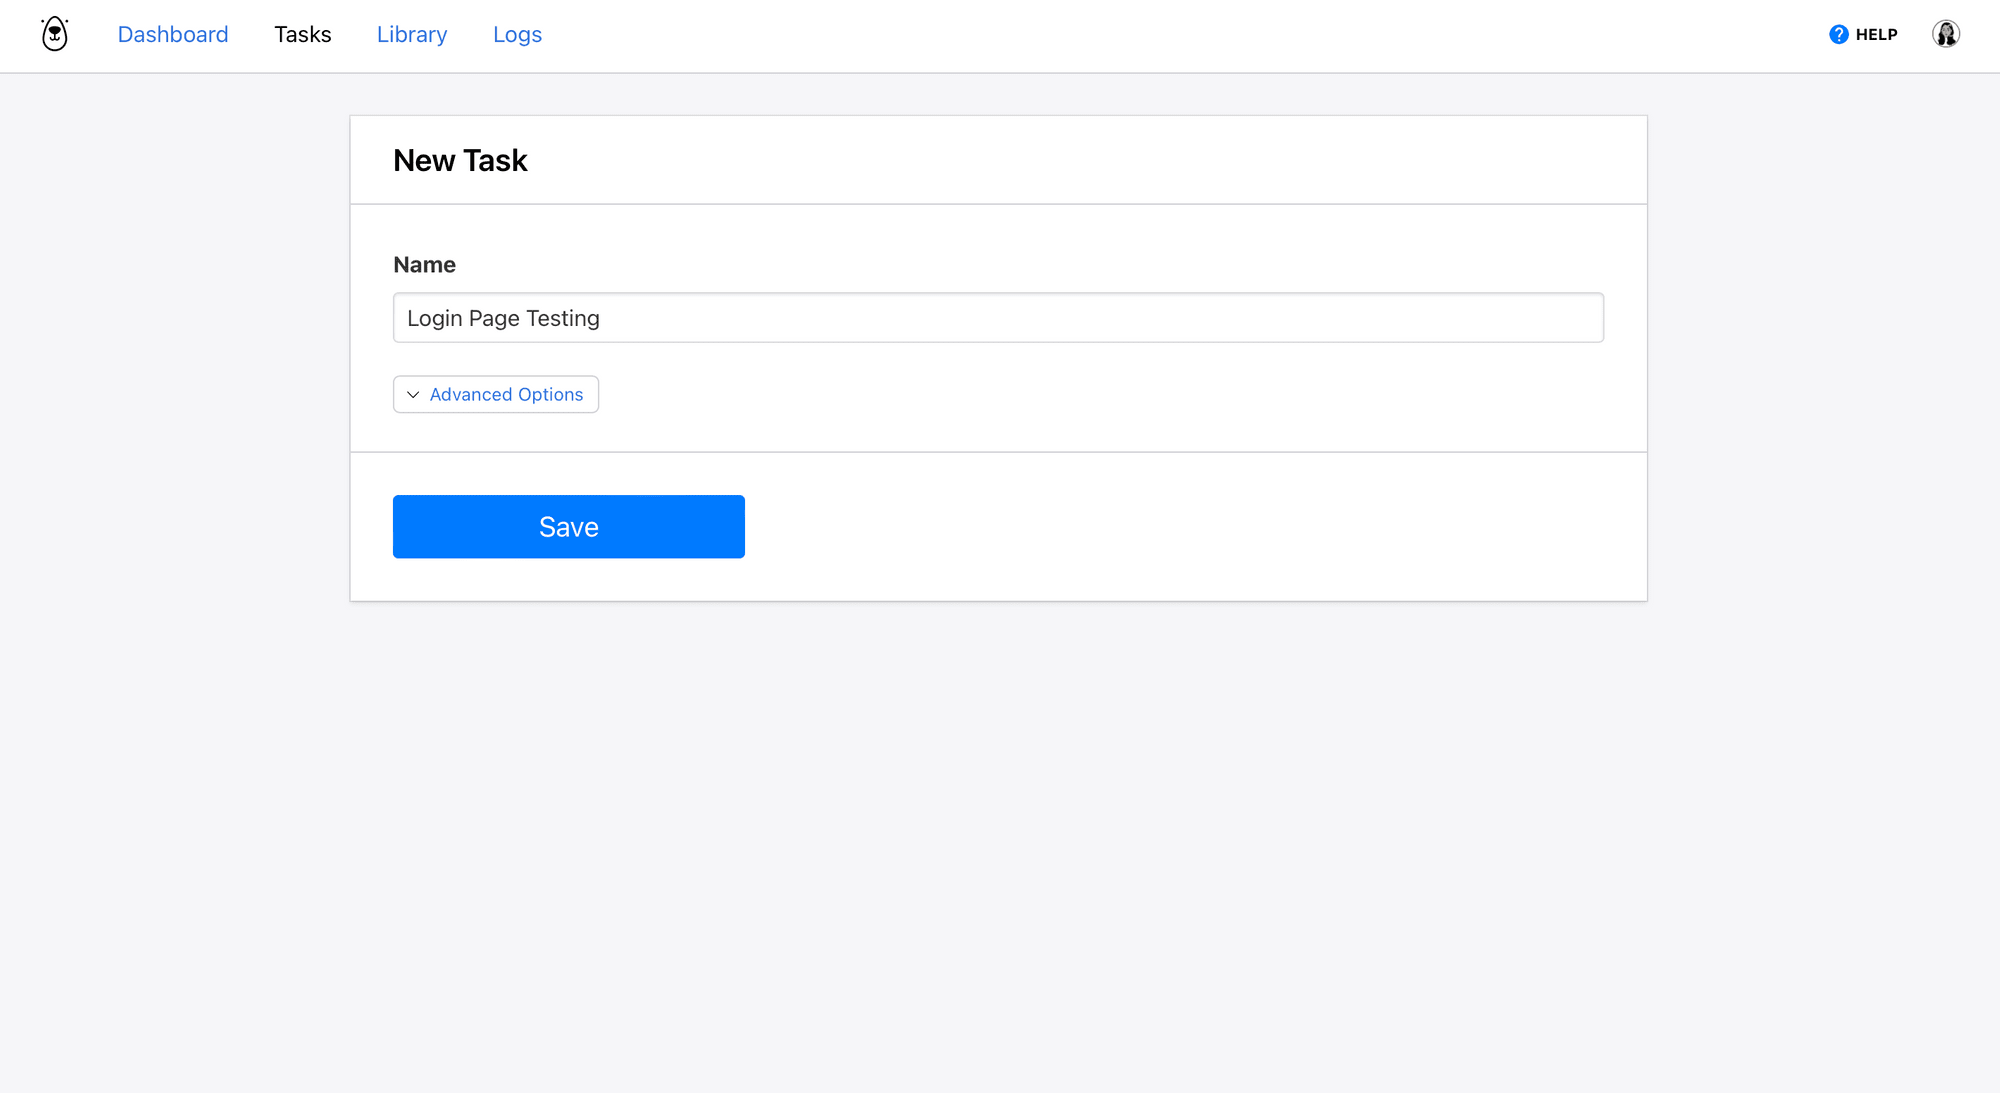
Log into your Browserbear account (or create a free trial account if you don’t have one — no credit card required! 🎉). Go to the Tasks tab, then click Create a Task.
After naming it, click Save.
Now, you should be on a task page where you can add steps, view integrations, run the automation, and review completed runs.
❗_ Note : Keep in mind that every website works differently, so this exact task (especially steps like Click and Enter Text ) might need to be modified based on the login sequence of your app._
Let’s build a task that tests login credentials on the Browserbear app. Click Add Step and set up the following actions:
Step 1. Go
Select go as the Action, insert your destination website URL, and choose networkidle as the wait instructions.
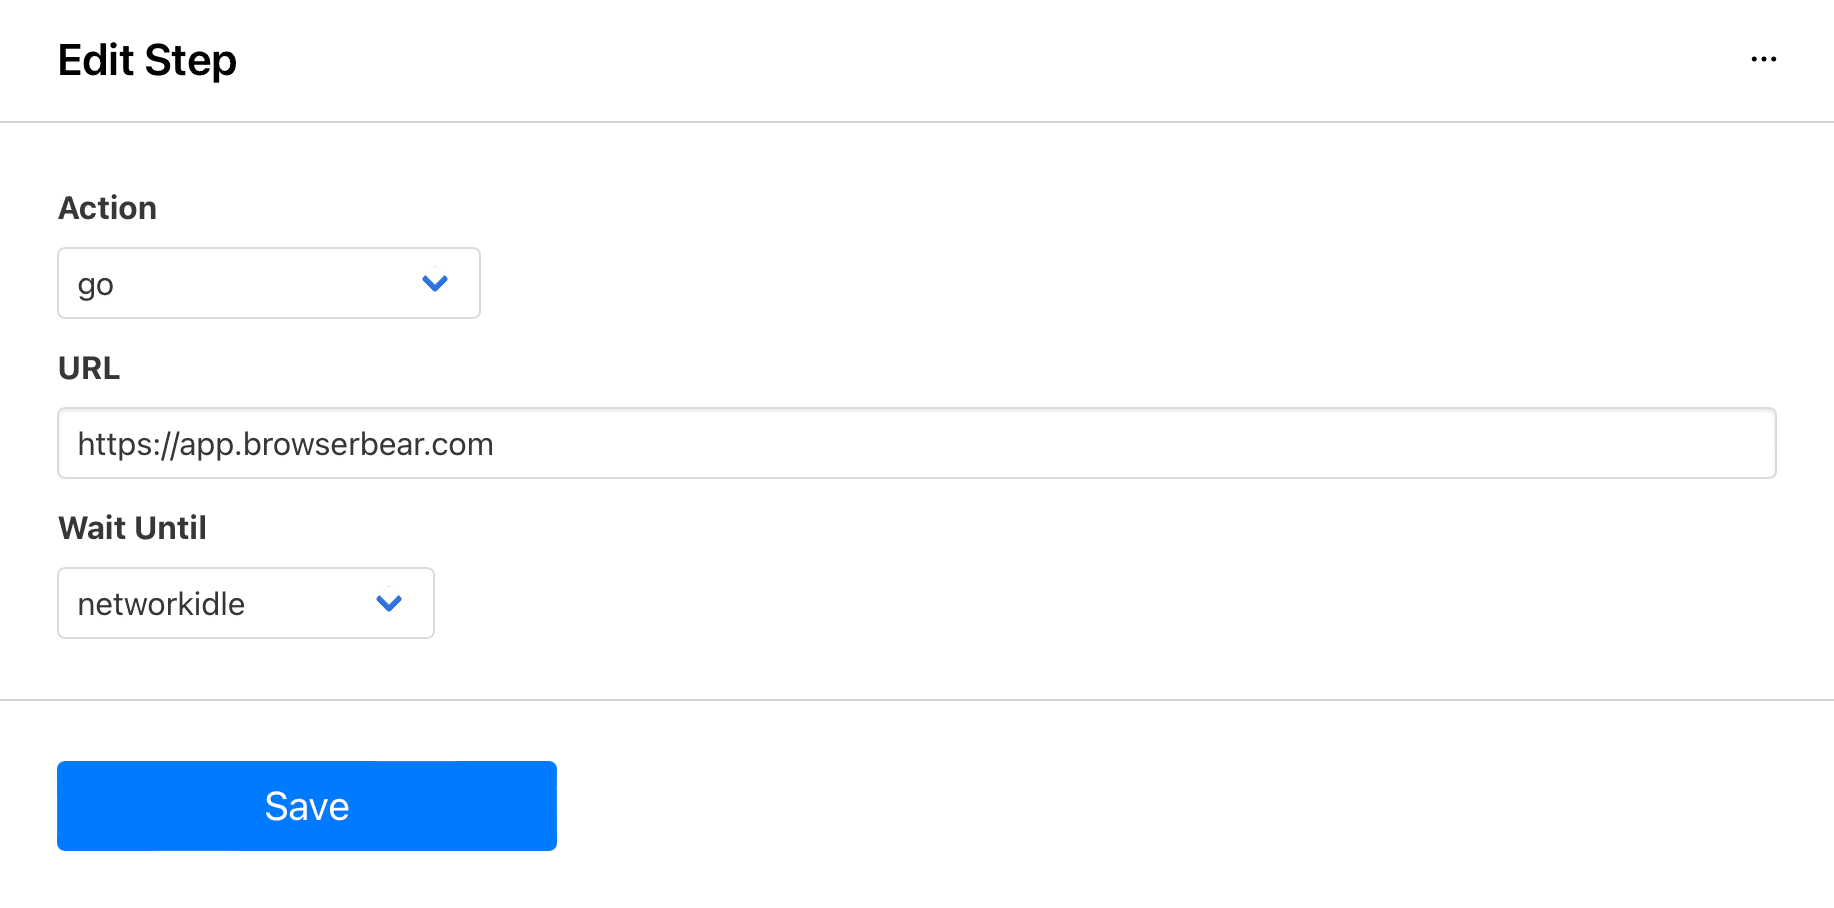
Click Save.
Bear Tip 🐻: Networkidle waits until no new network requests have been made for 500 ms, making it the safest load instructions for the majority of situations. Other options include domcontentloaded and load.
Step 2. Click
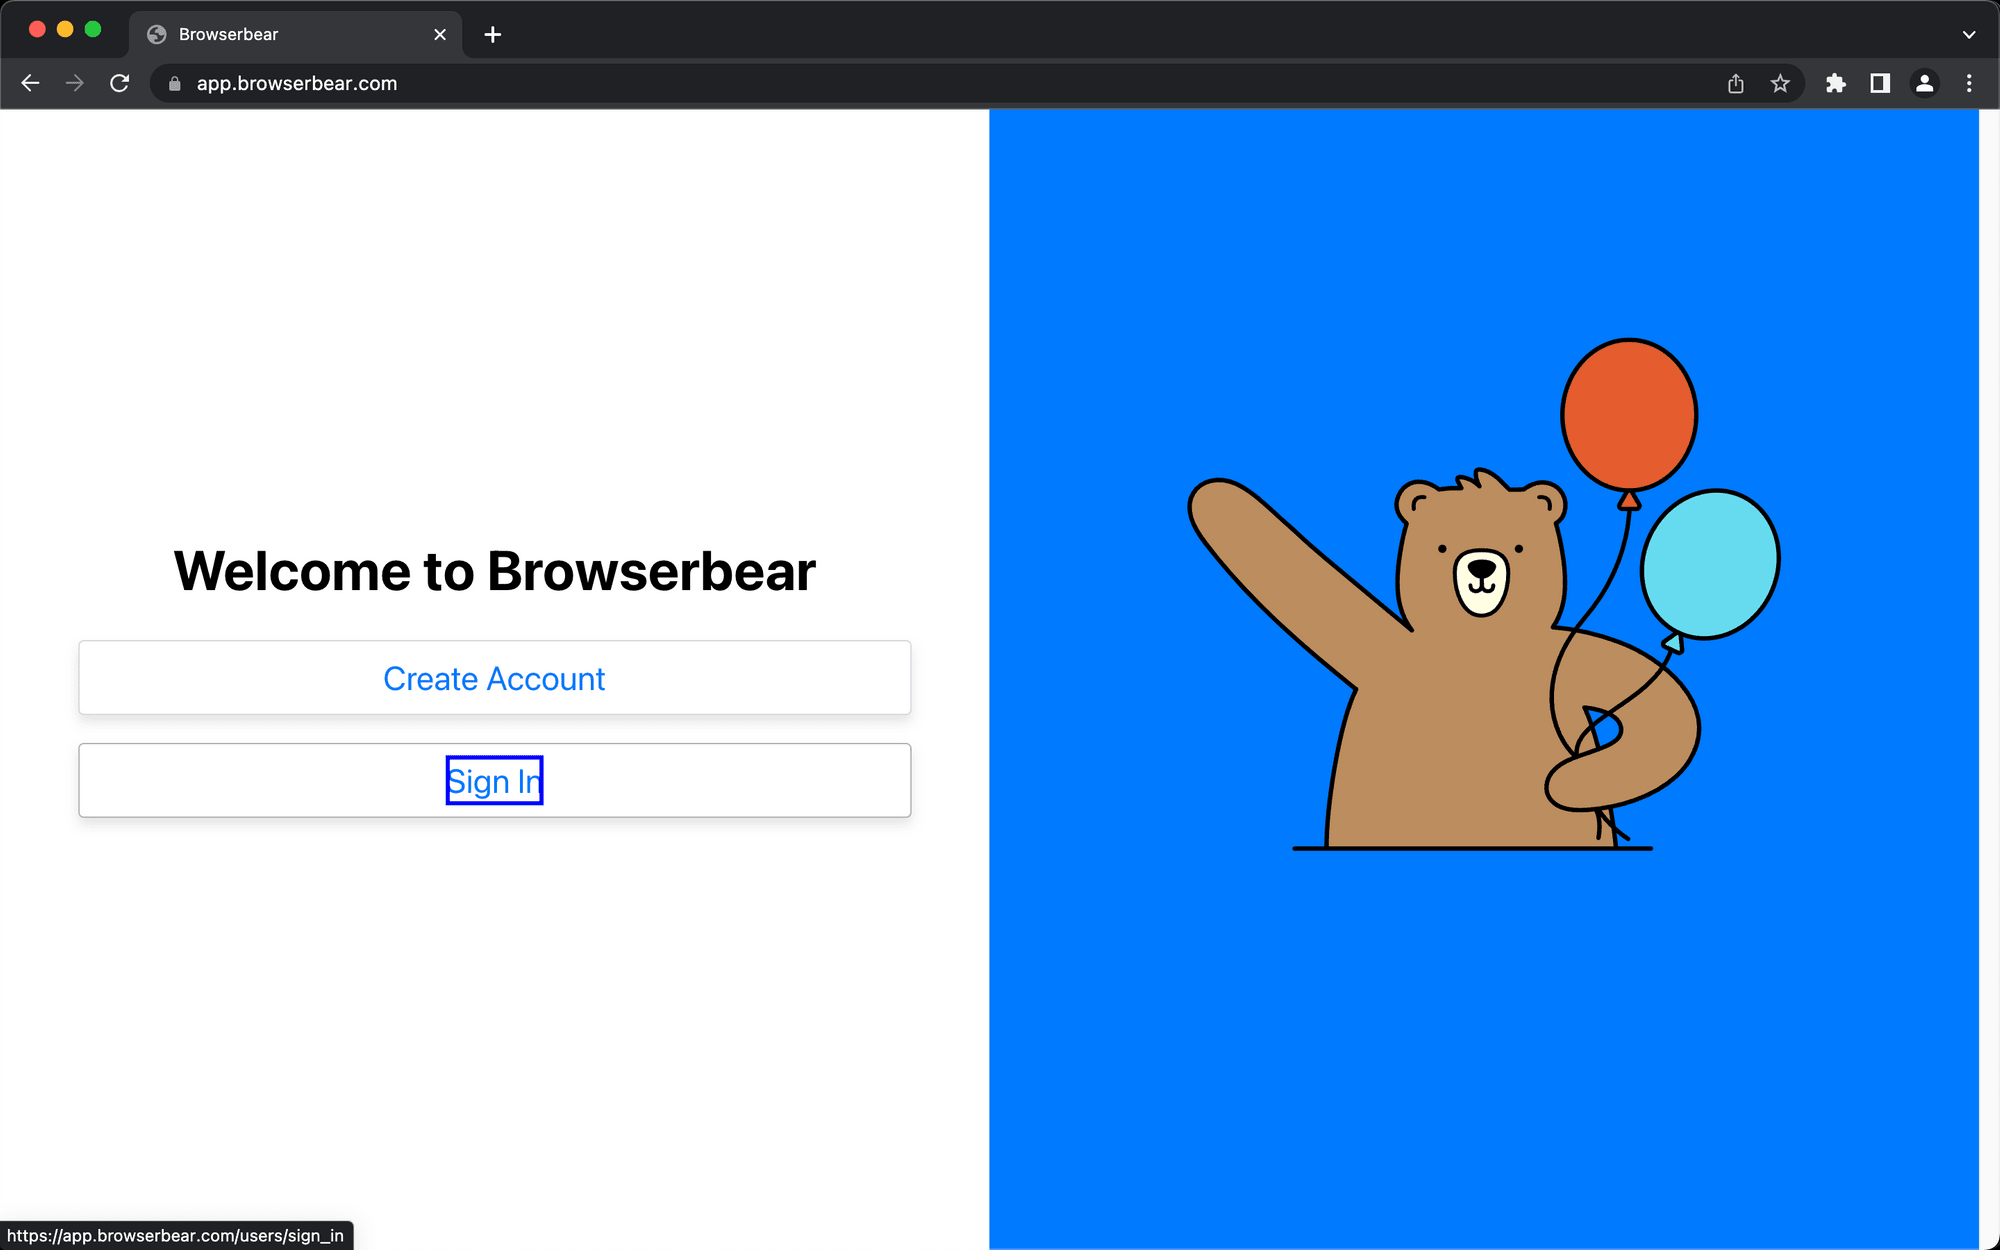
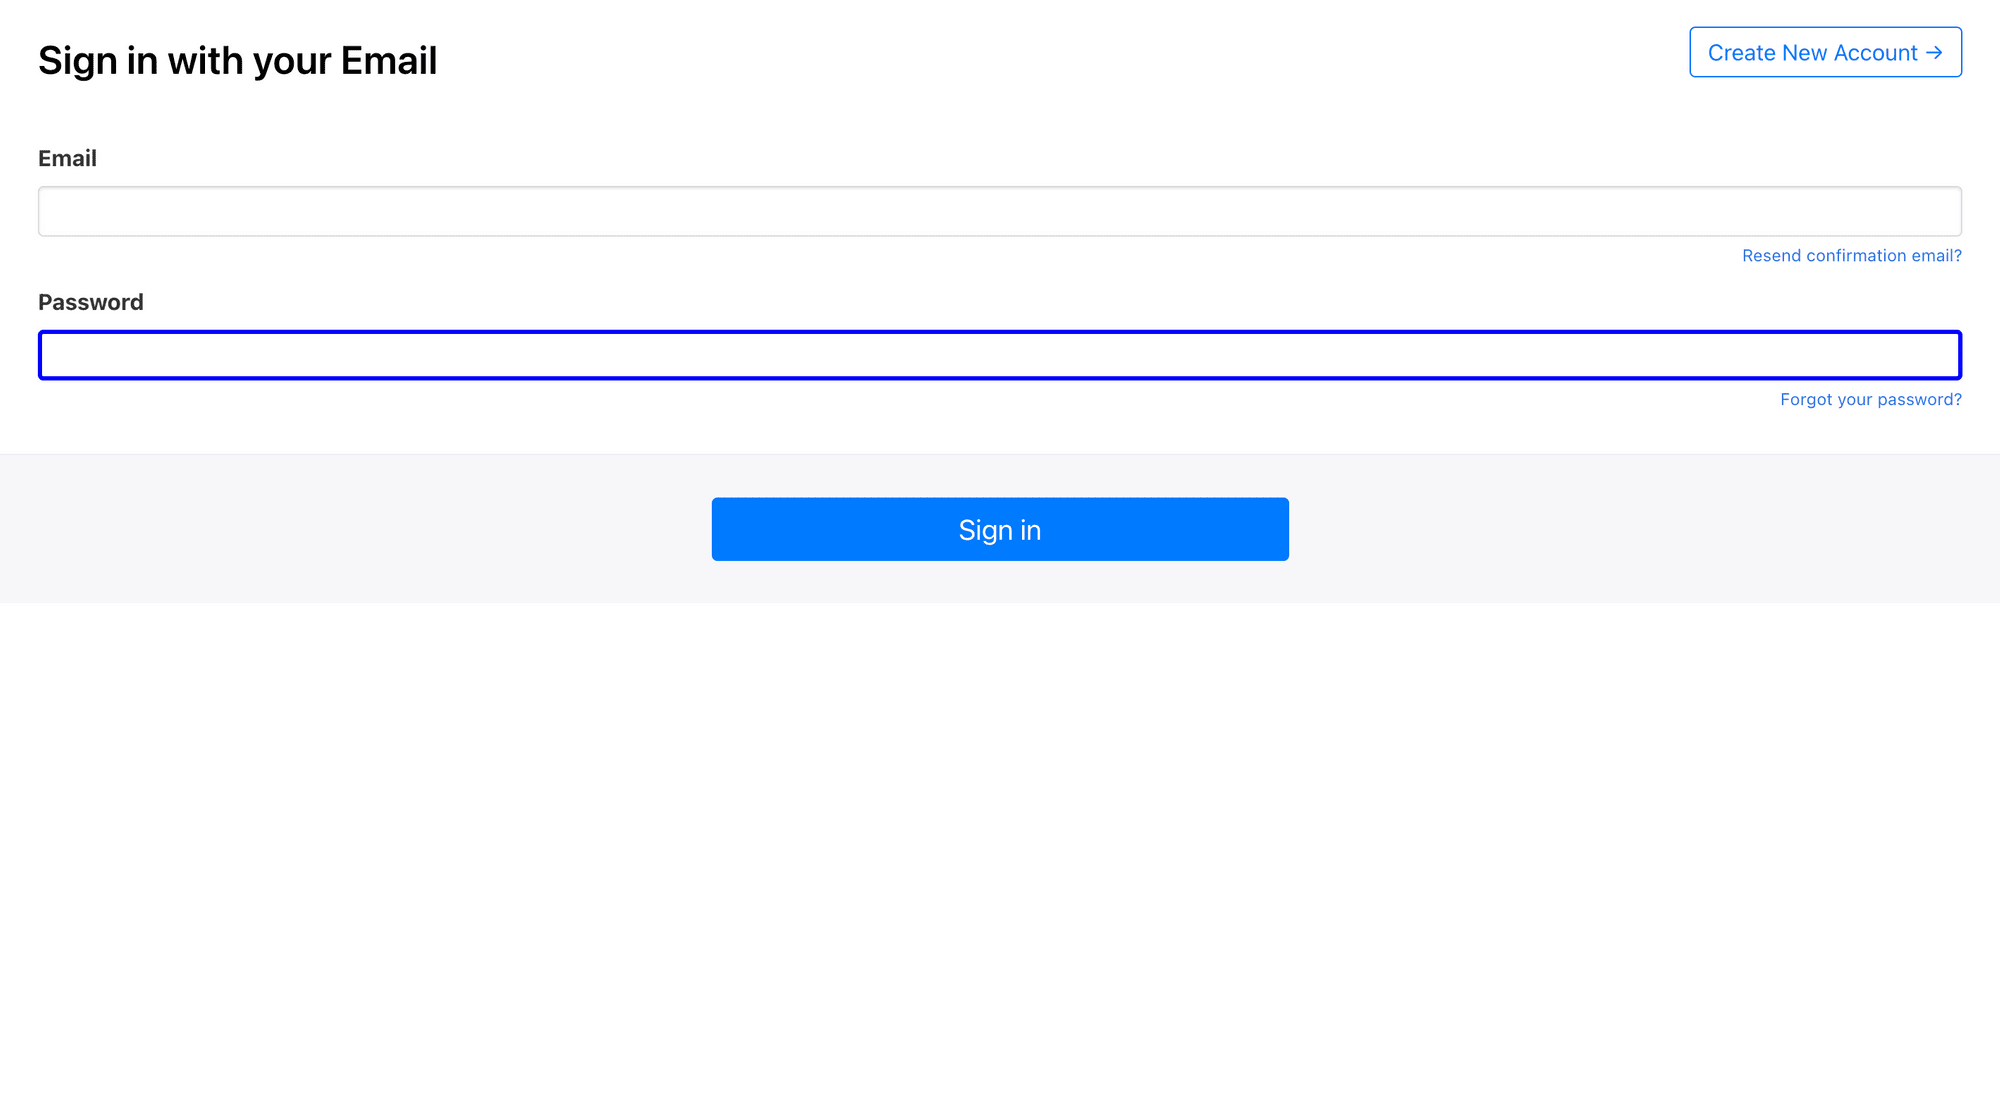
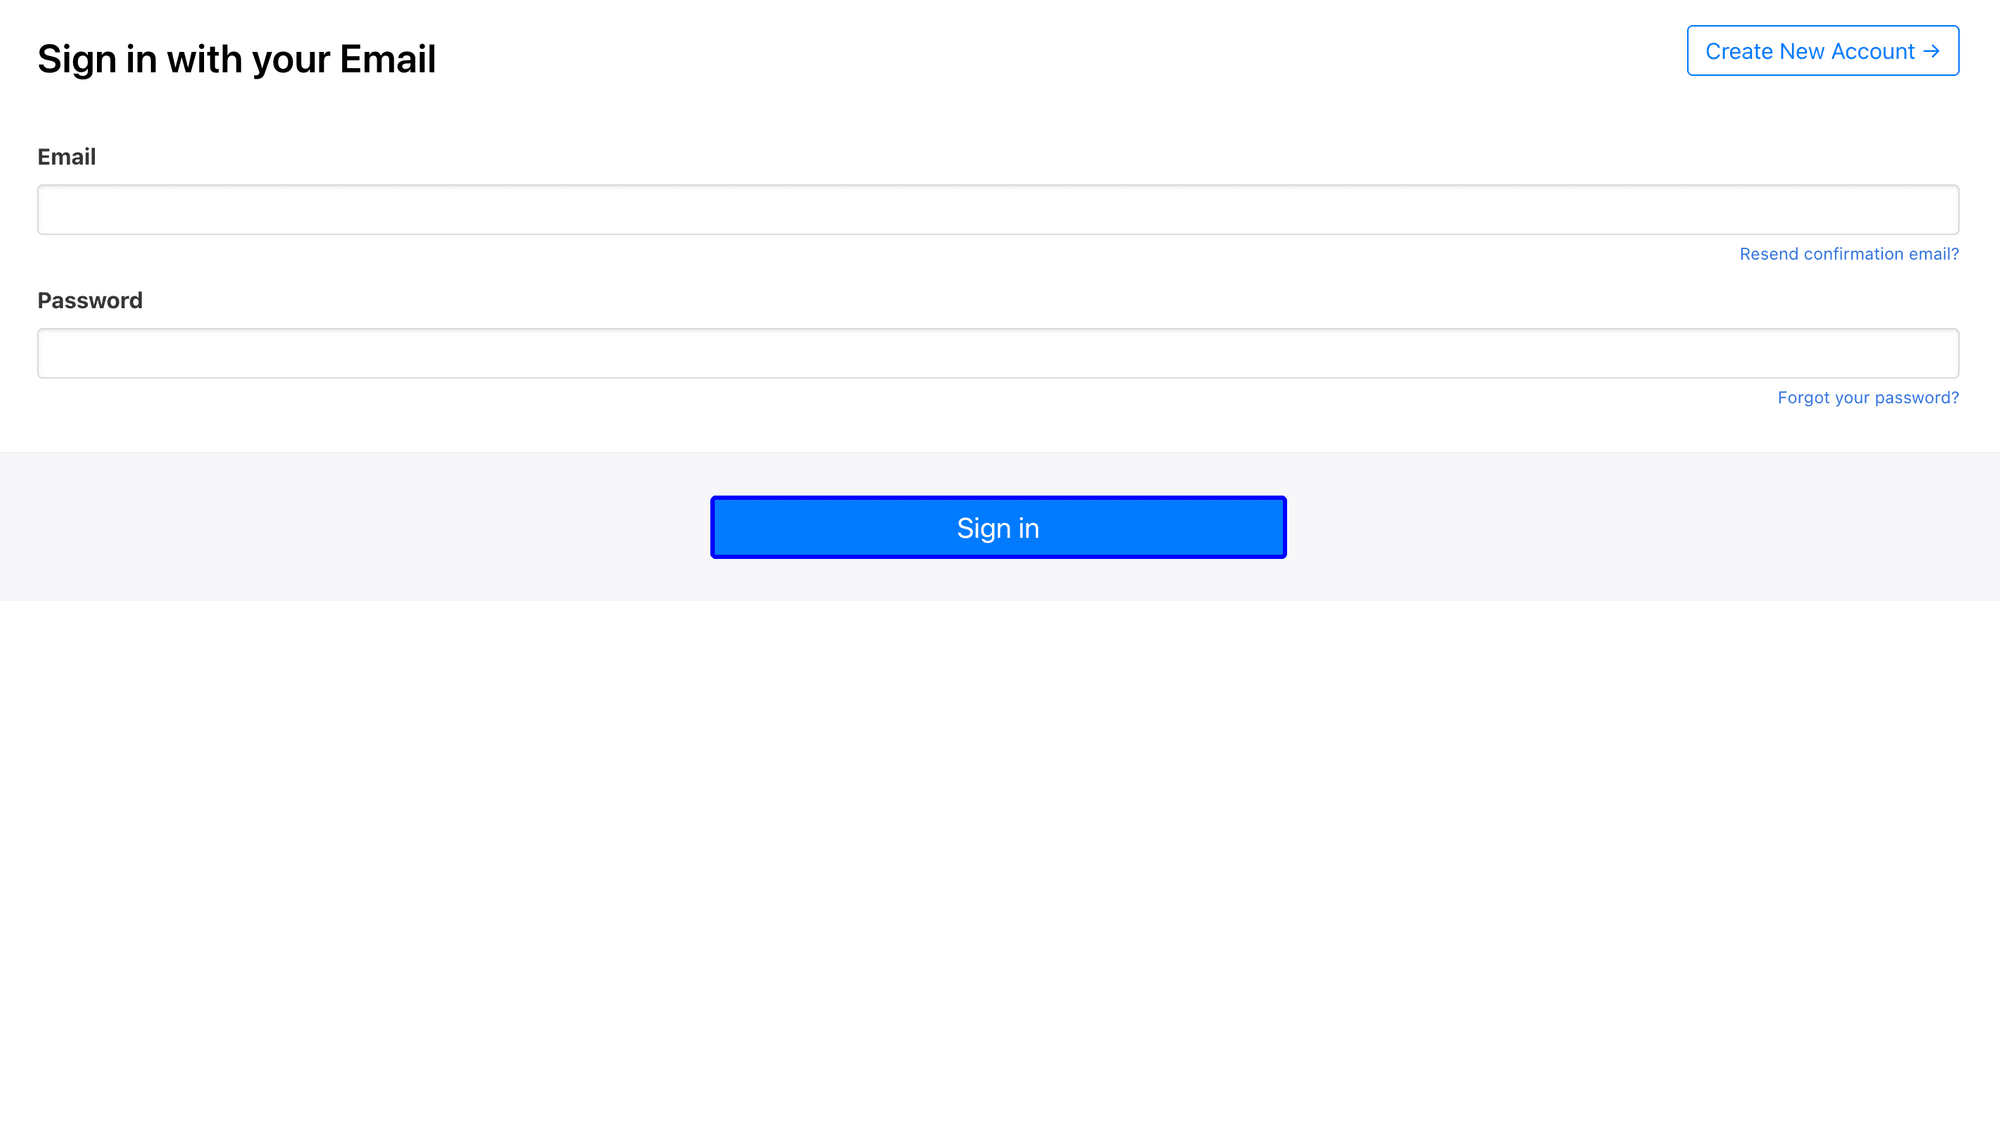
The Browserbear app URL leads to a page with buttons for creating a new account and signing in. We will use a Click command to go to the login page.
Select click as the Action.
You will need to use the Browserbear Helper Chrome extension to get the helper config. Activate the extension on the fully loaded destination website, then hover over the Sign In button. You should see a blue outline indicate the element selected.
Click the element, then copy the resulting config.
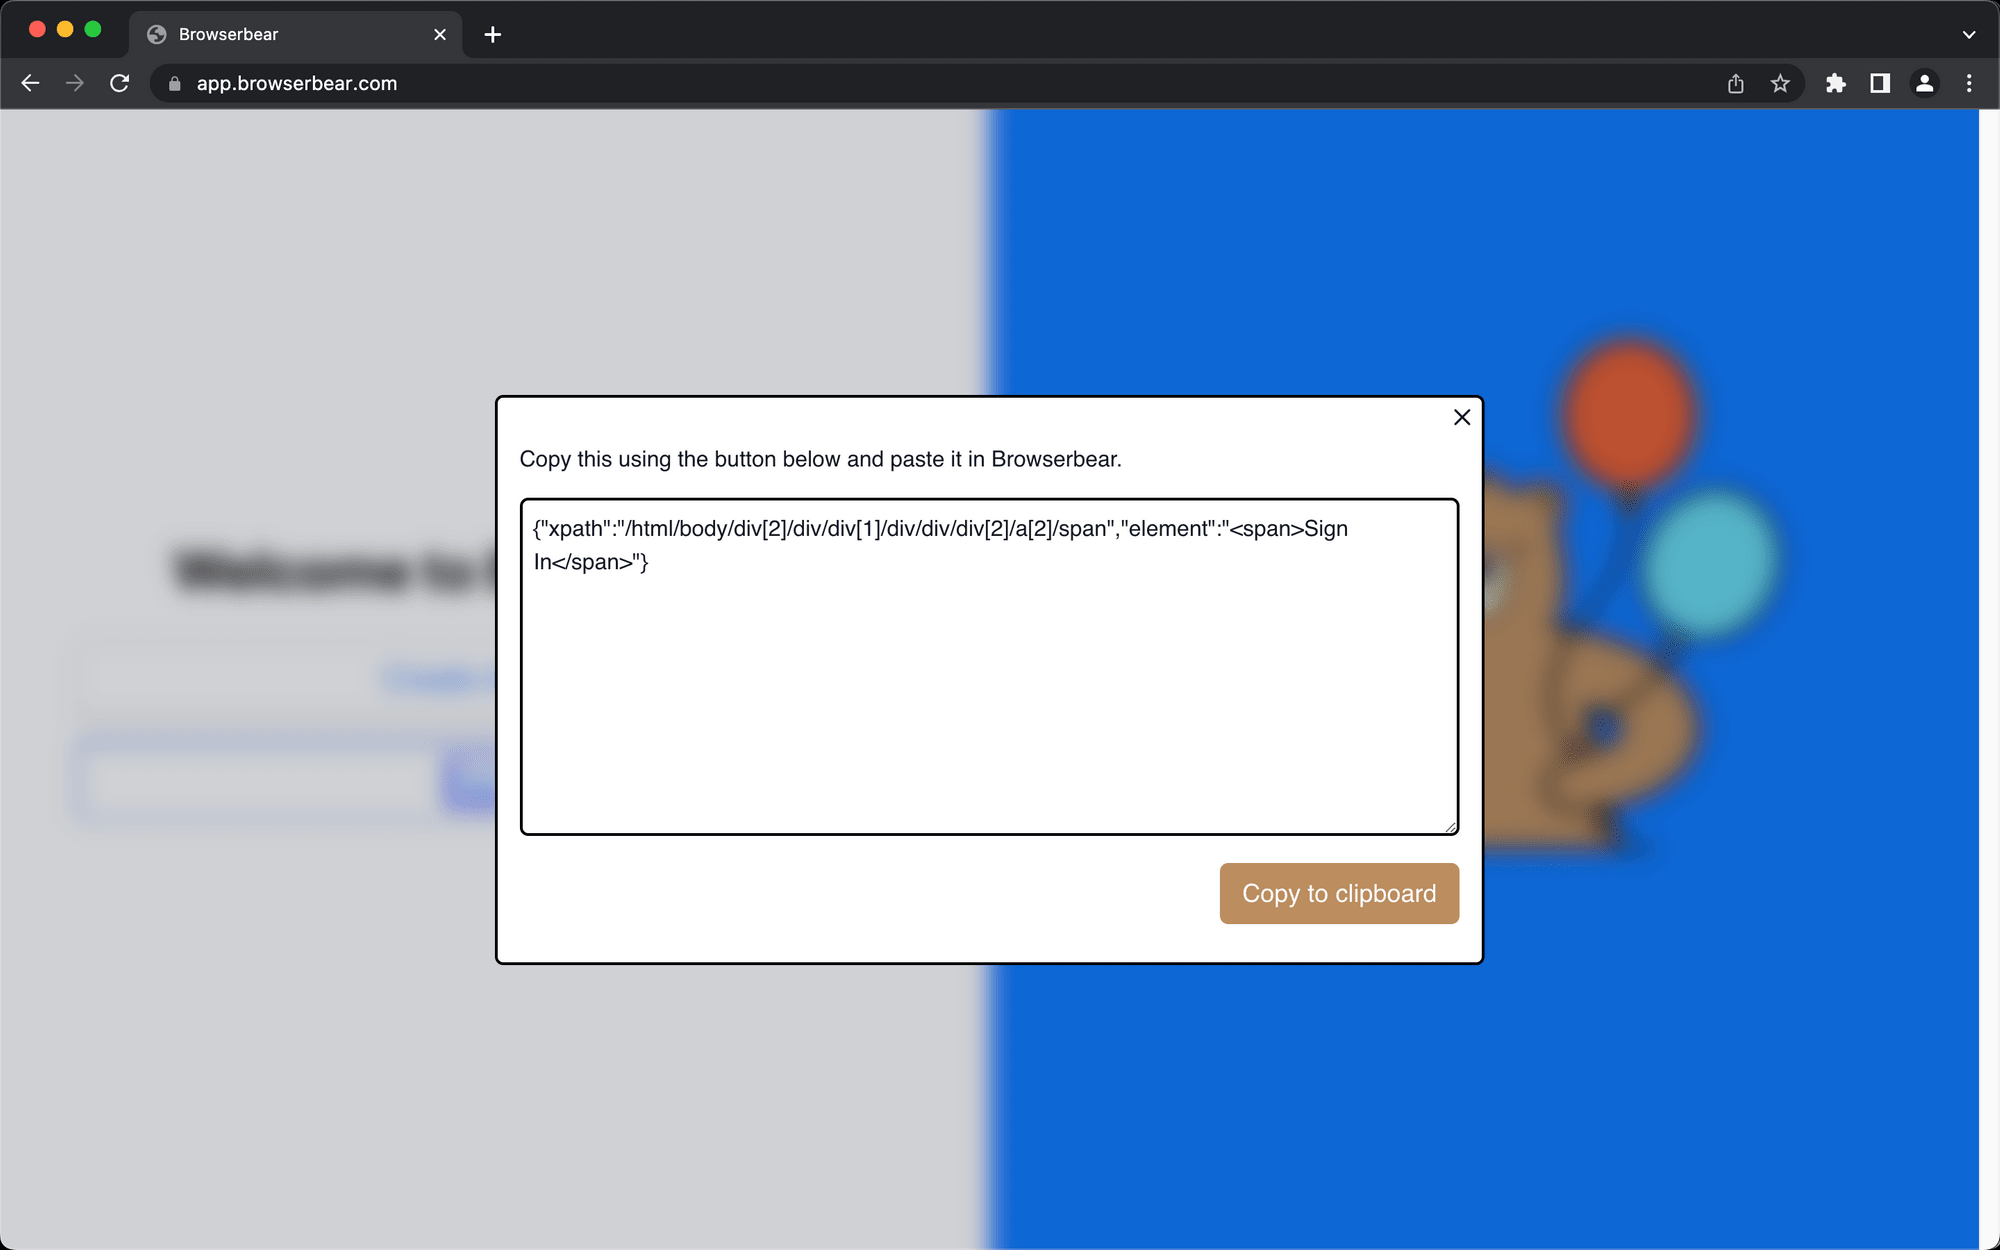
Insert it into the Helper section of your click step.
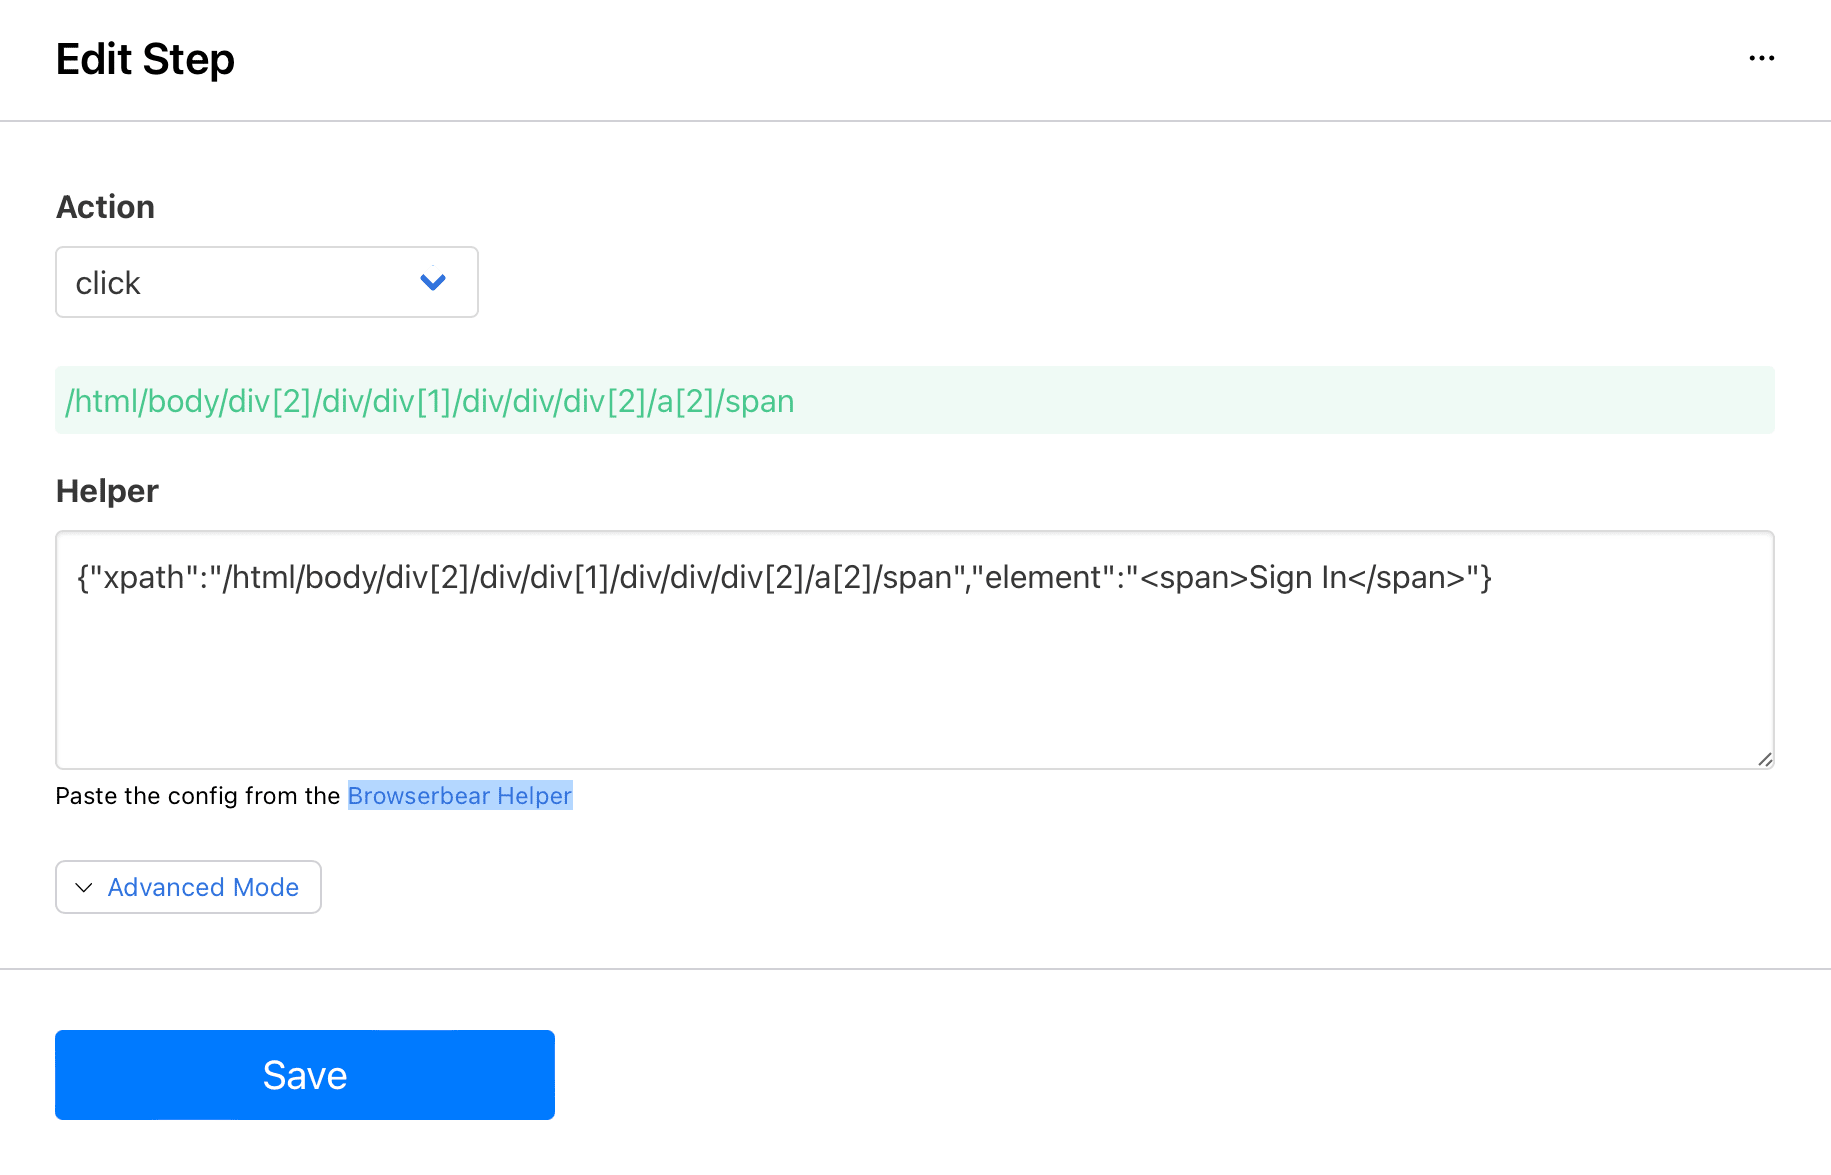
Click Save.
Step 3. Wait
The wait step simply reduces the margin of error by giving any limiting factors a chance to catch up.
Select wait as the Action and insert anywhere from 3 to 5 Seconds.
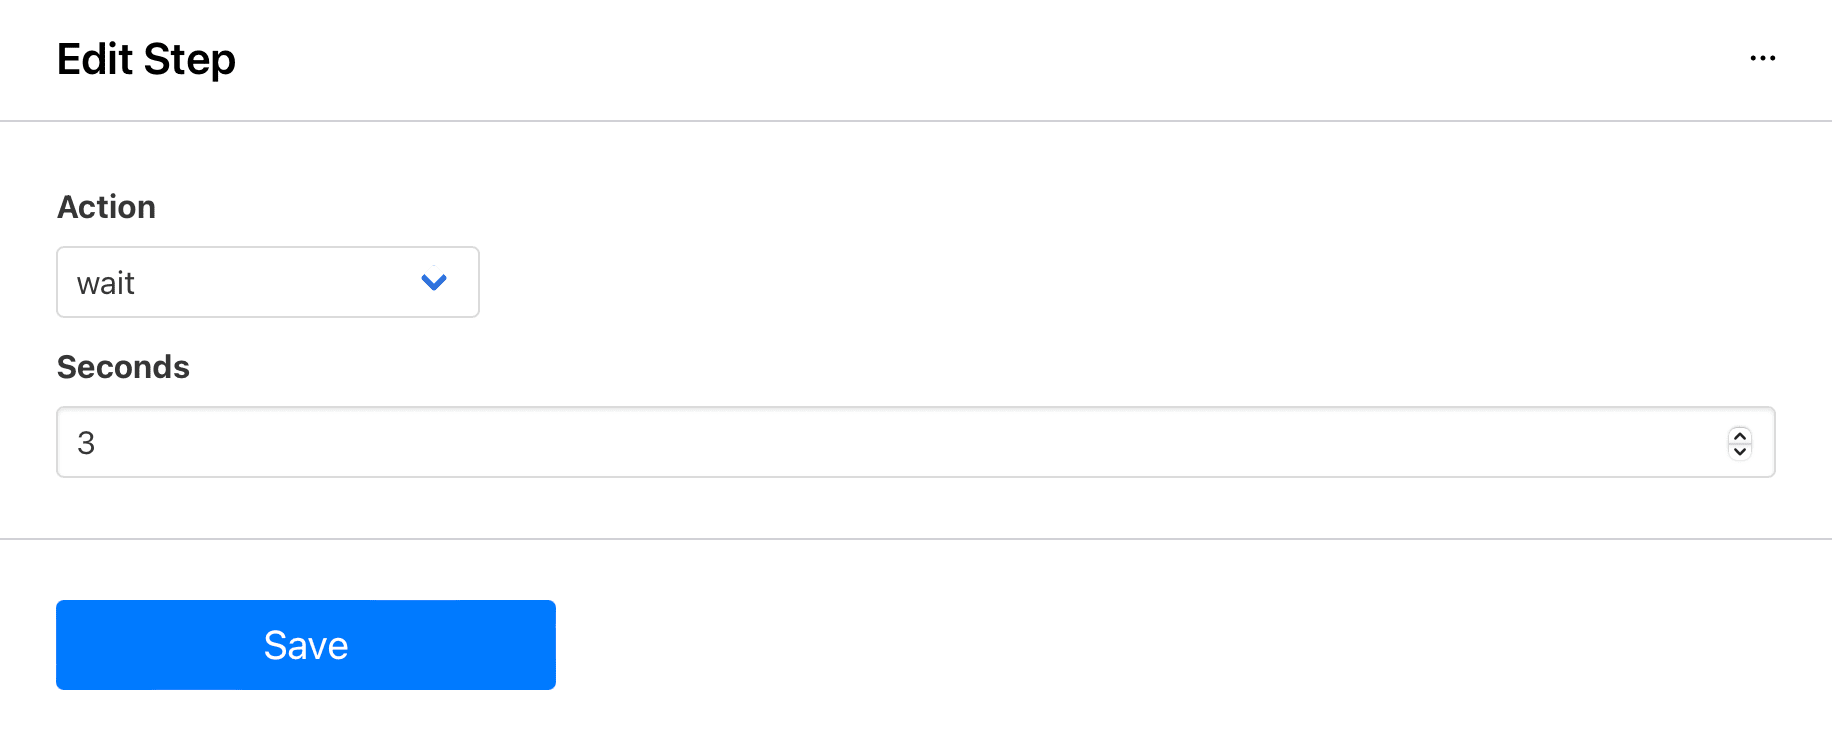
Click Save.
Step 4. Enter Text
This step instructs Browserbear to enter text in the Email field of the login page.
Select enter_text as the Action.
Use the Browserbear Helper to get the helper config of the Email text box.

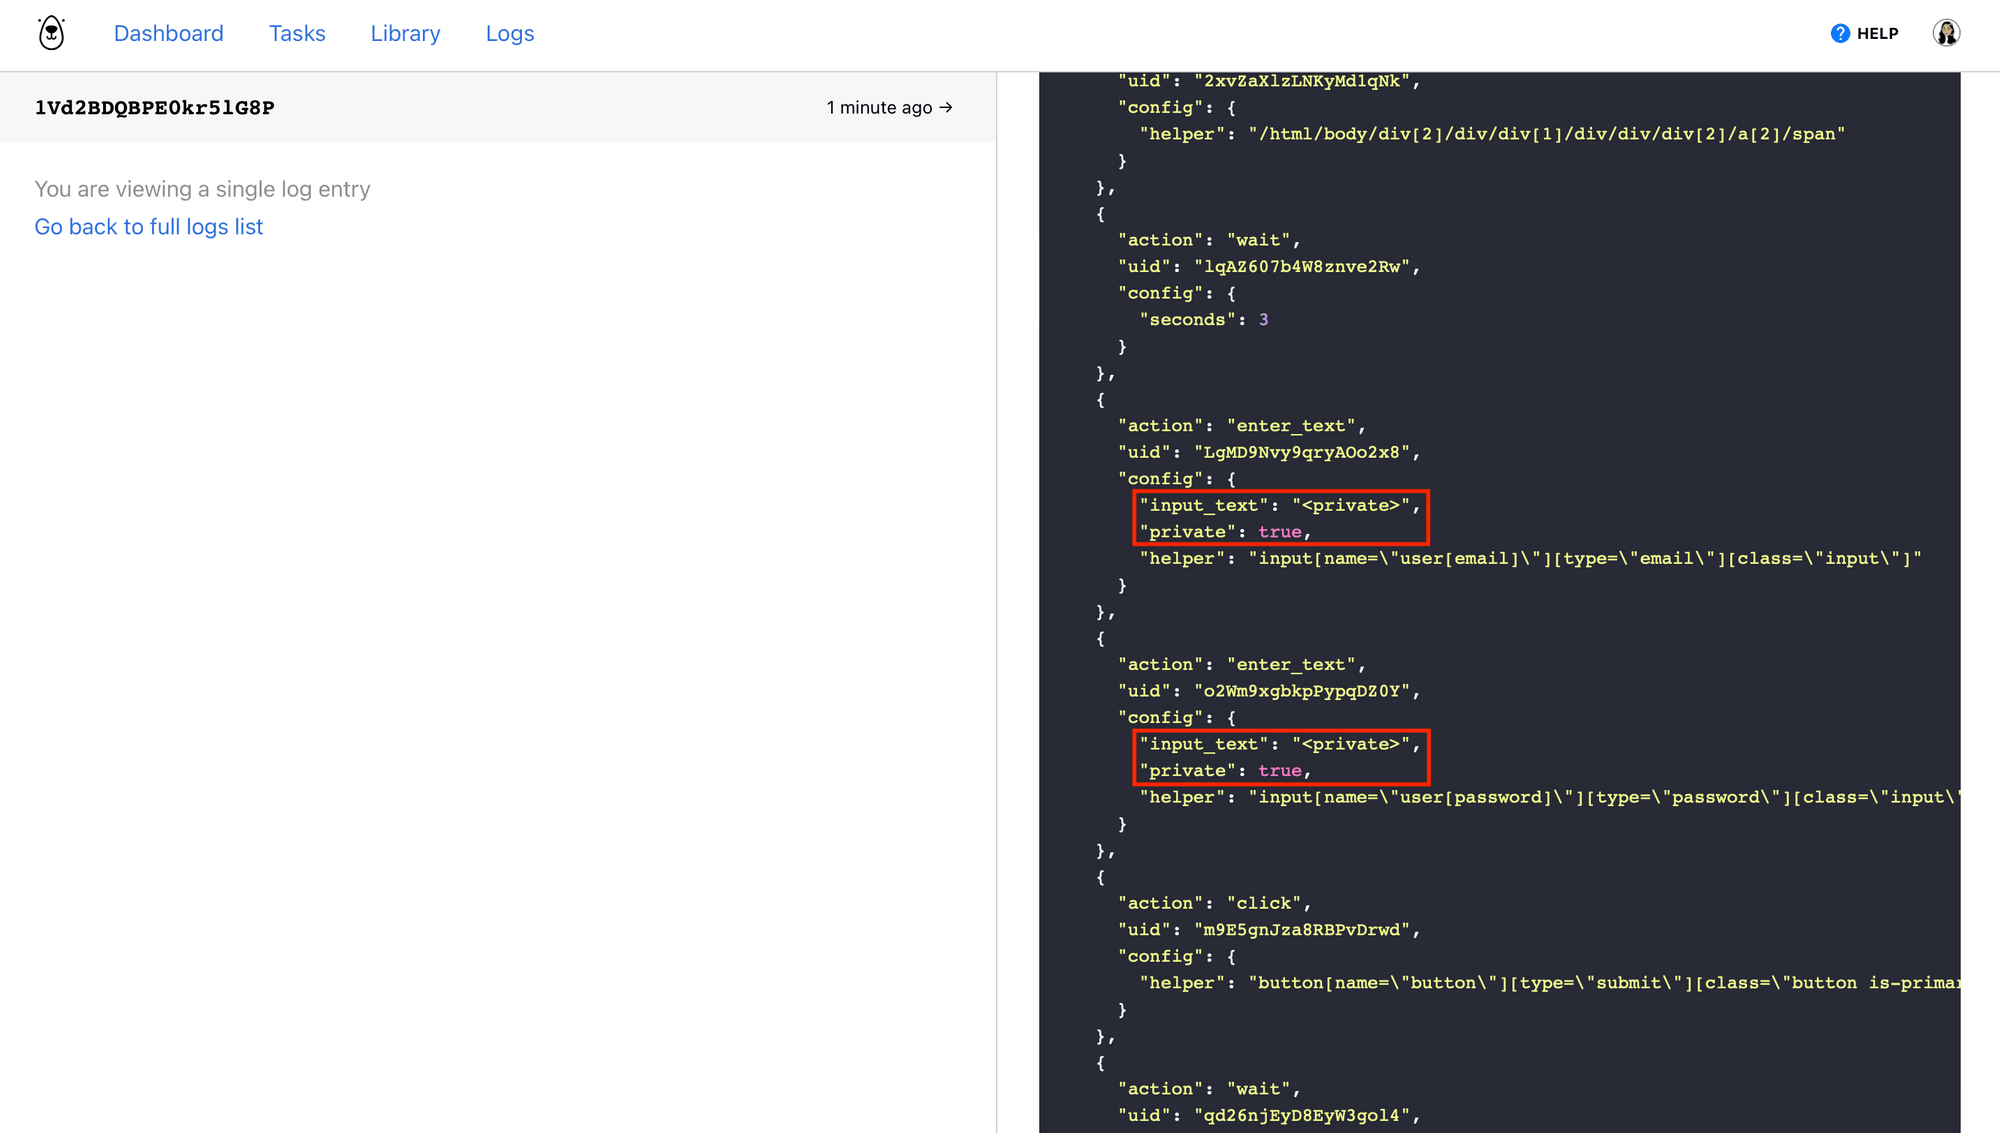
Insert the config into the Helper section of your enter_text step and use username as the Input Text.
Tick the Private option to hide input text in logs. This will give you an extra layer of privacy.
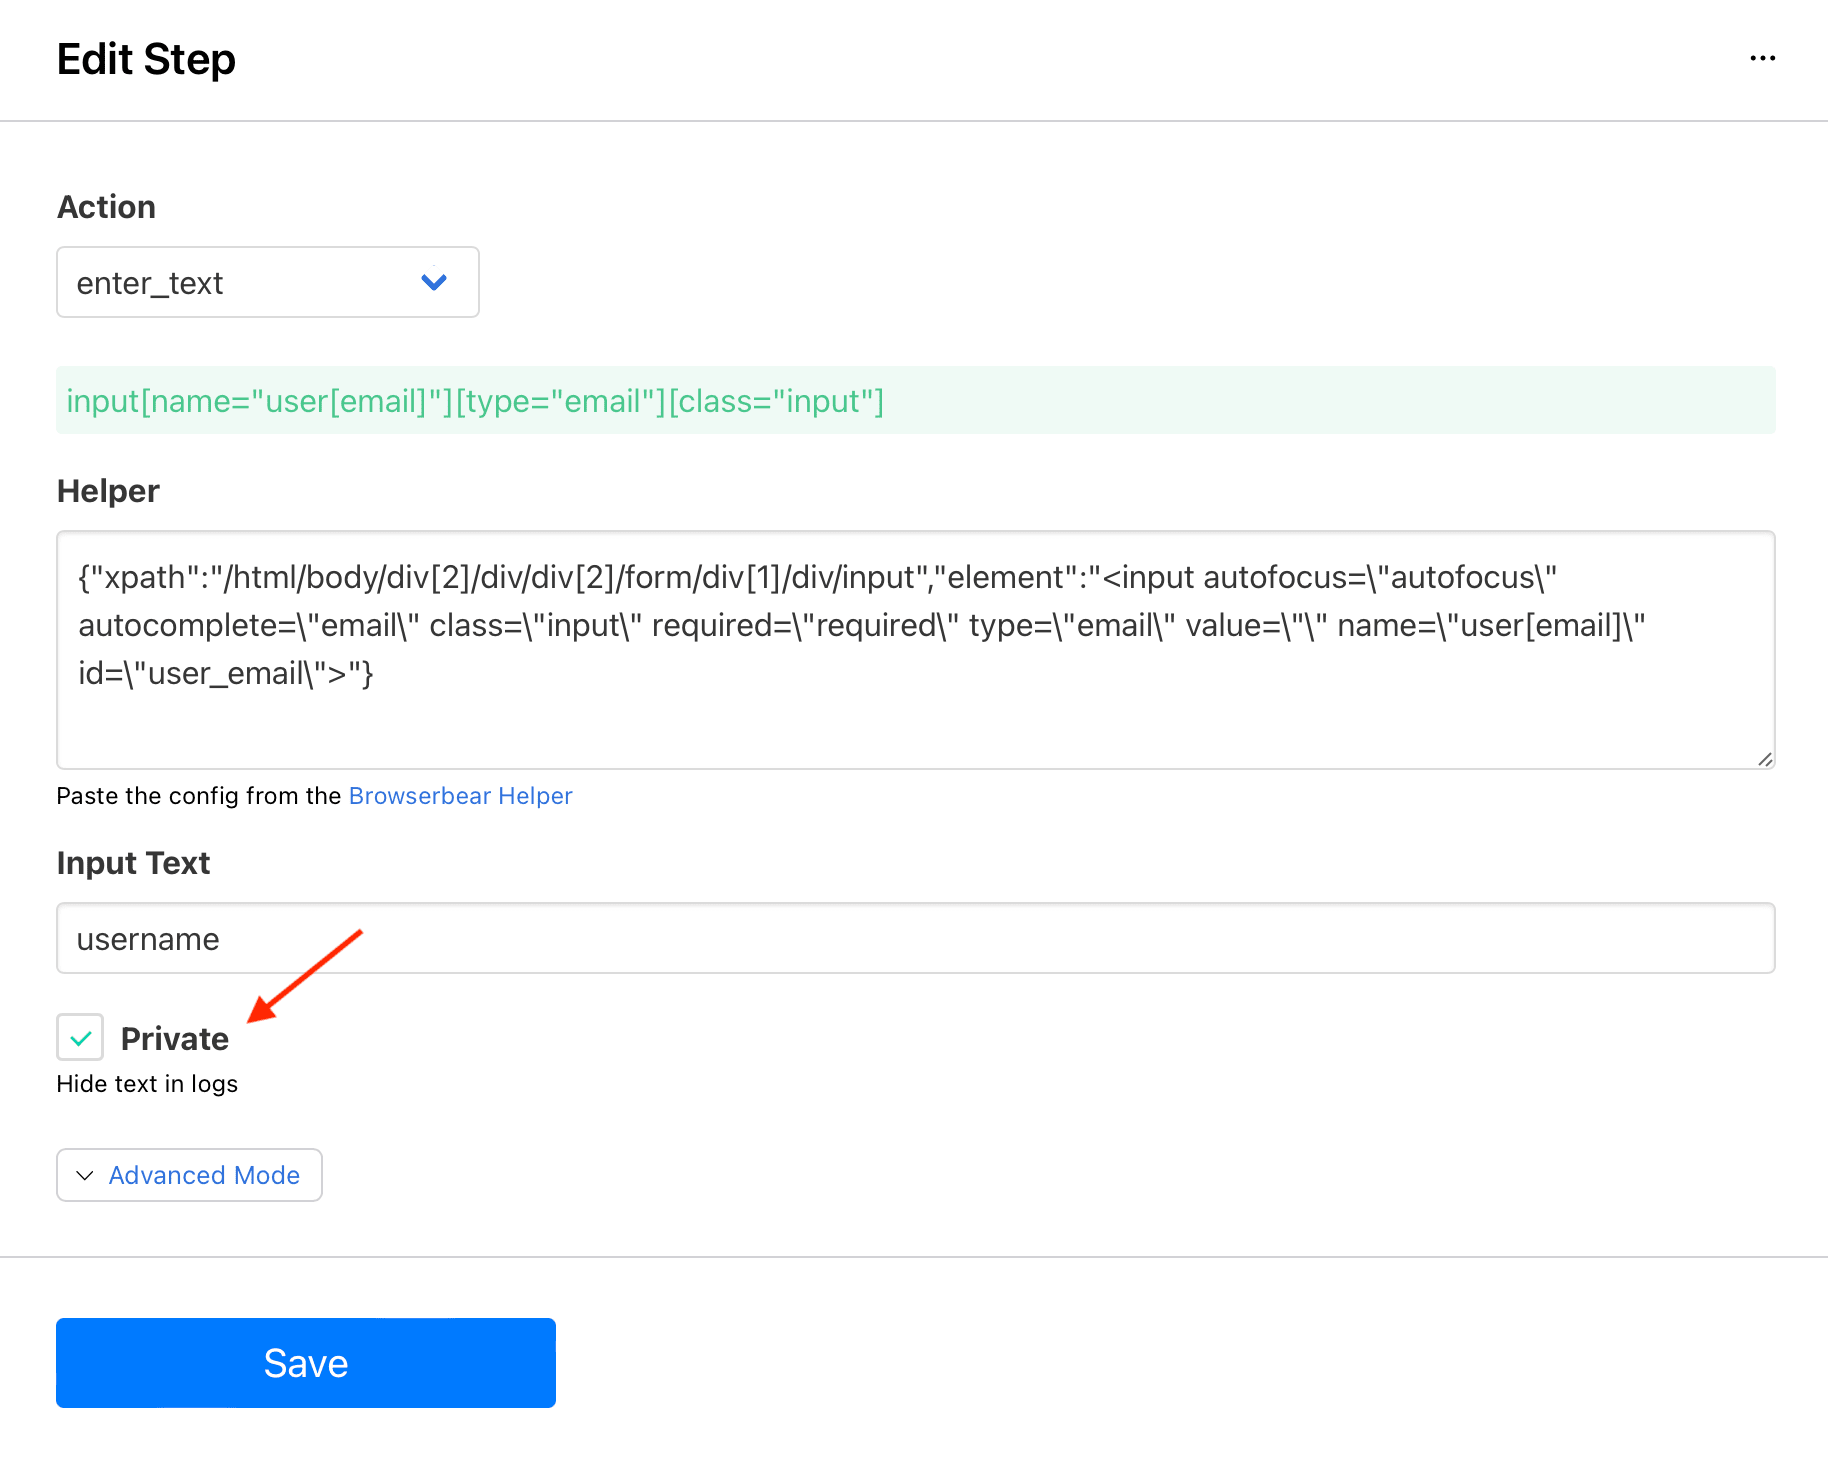
Click Save.
Step 5. Enter Text
This step instructs Browserbear to enter text in the Password field of the login page.
Select enter_text as the Action.
Use the Browserbear Helper to get the helper config of the Password text box.
Insert the config into the Helper section of your enter_text step and use password as the Input Text.
Tick the Private option to hide input text in logs.
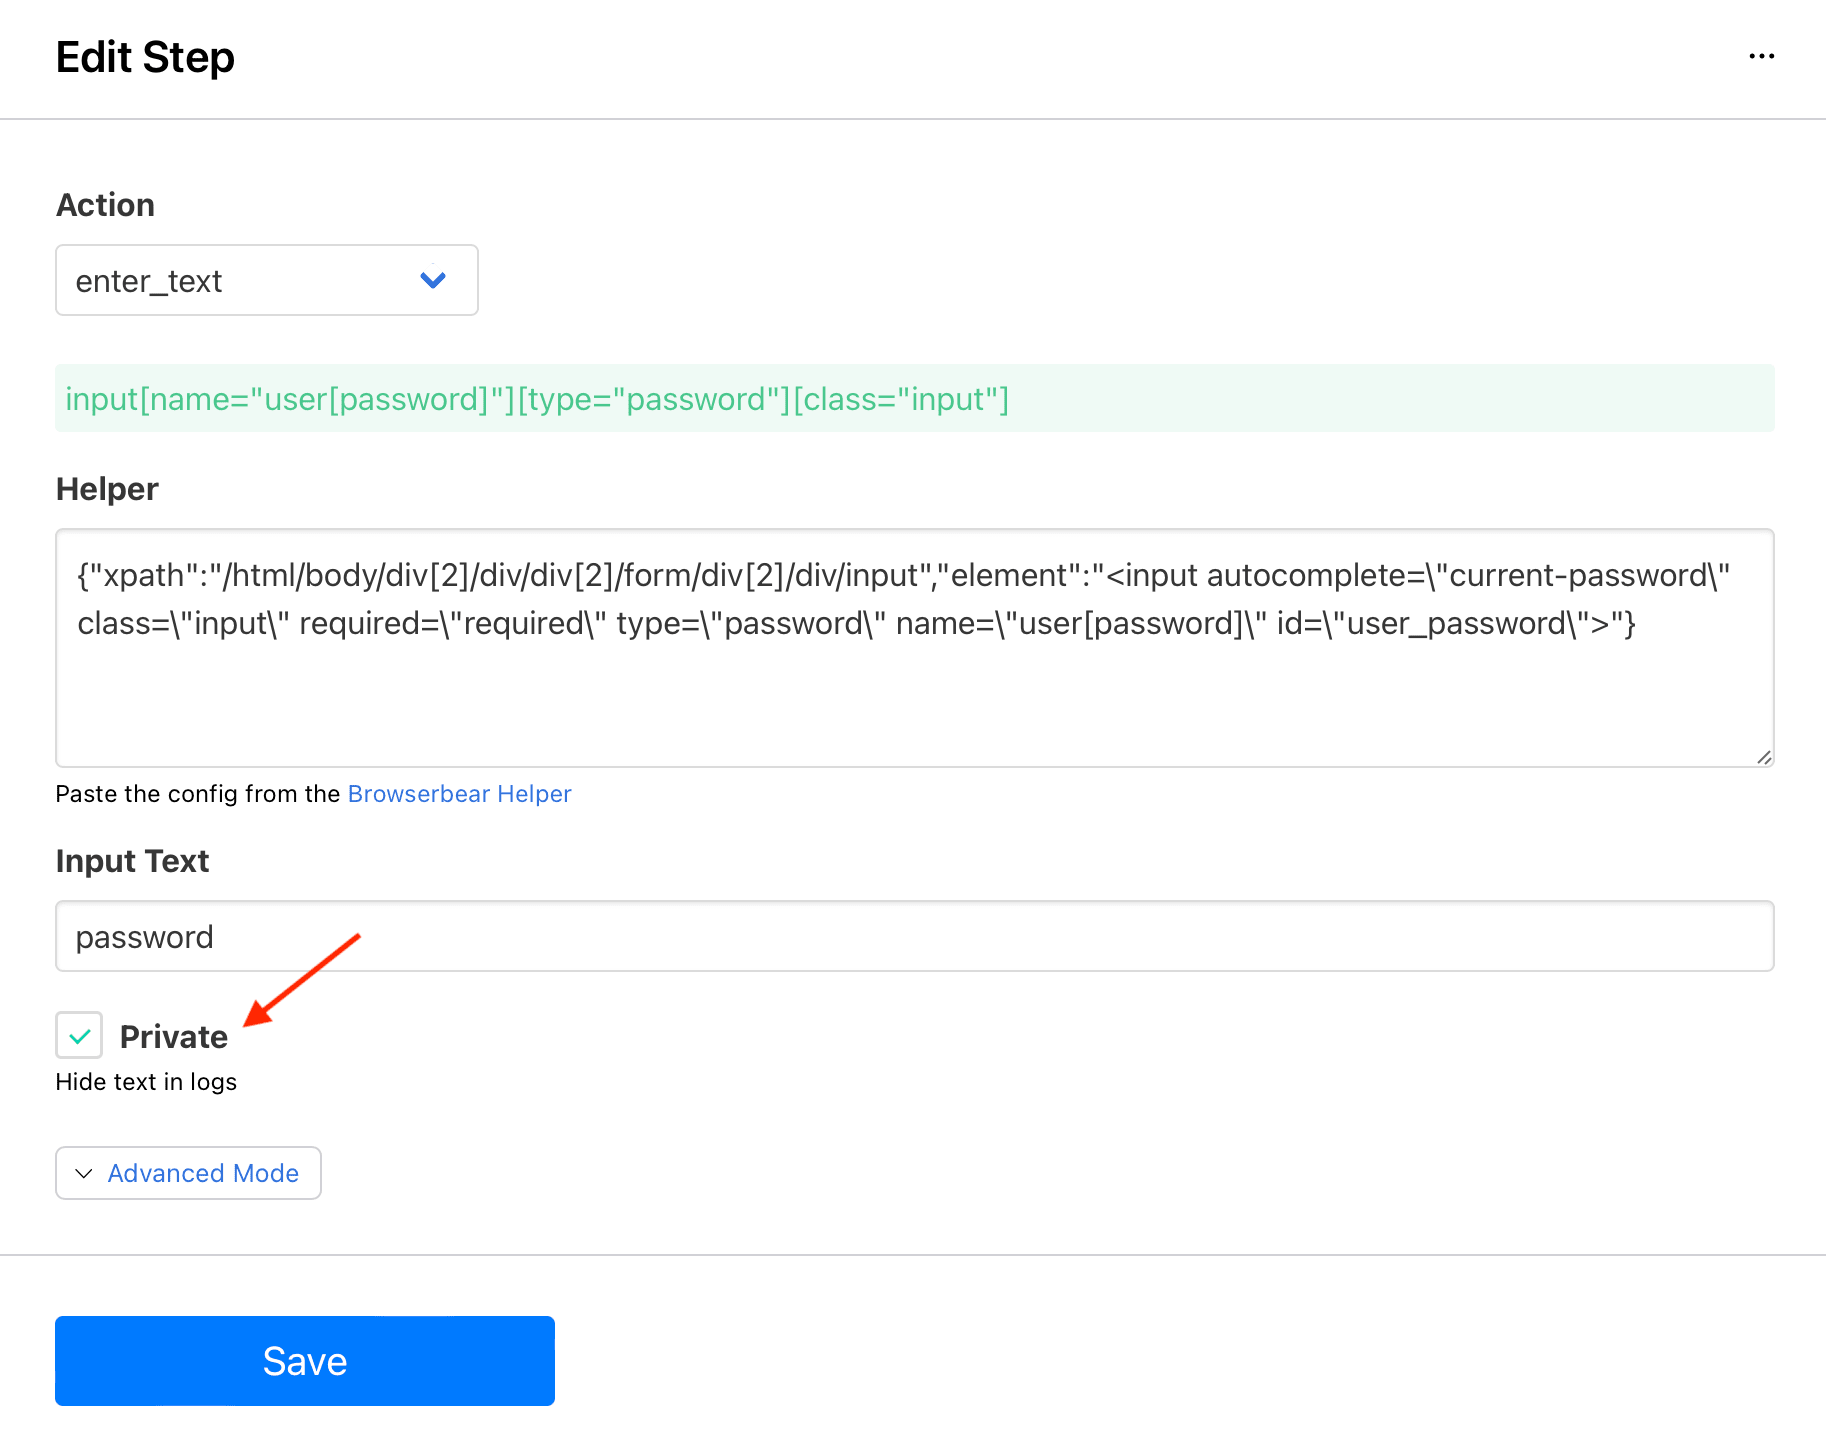
Click Save.
Step 6. Click
At this point in the sequence, login credentials have been entered into the text boxes. What’s left is to click the sign in button.
Select click as the Action.
Use the Browserbear Helper to get the helper config of the Sign in button.
Insert the config into the Helper section of your click step.
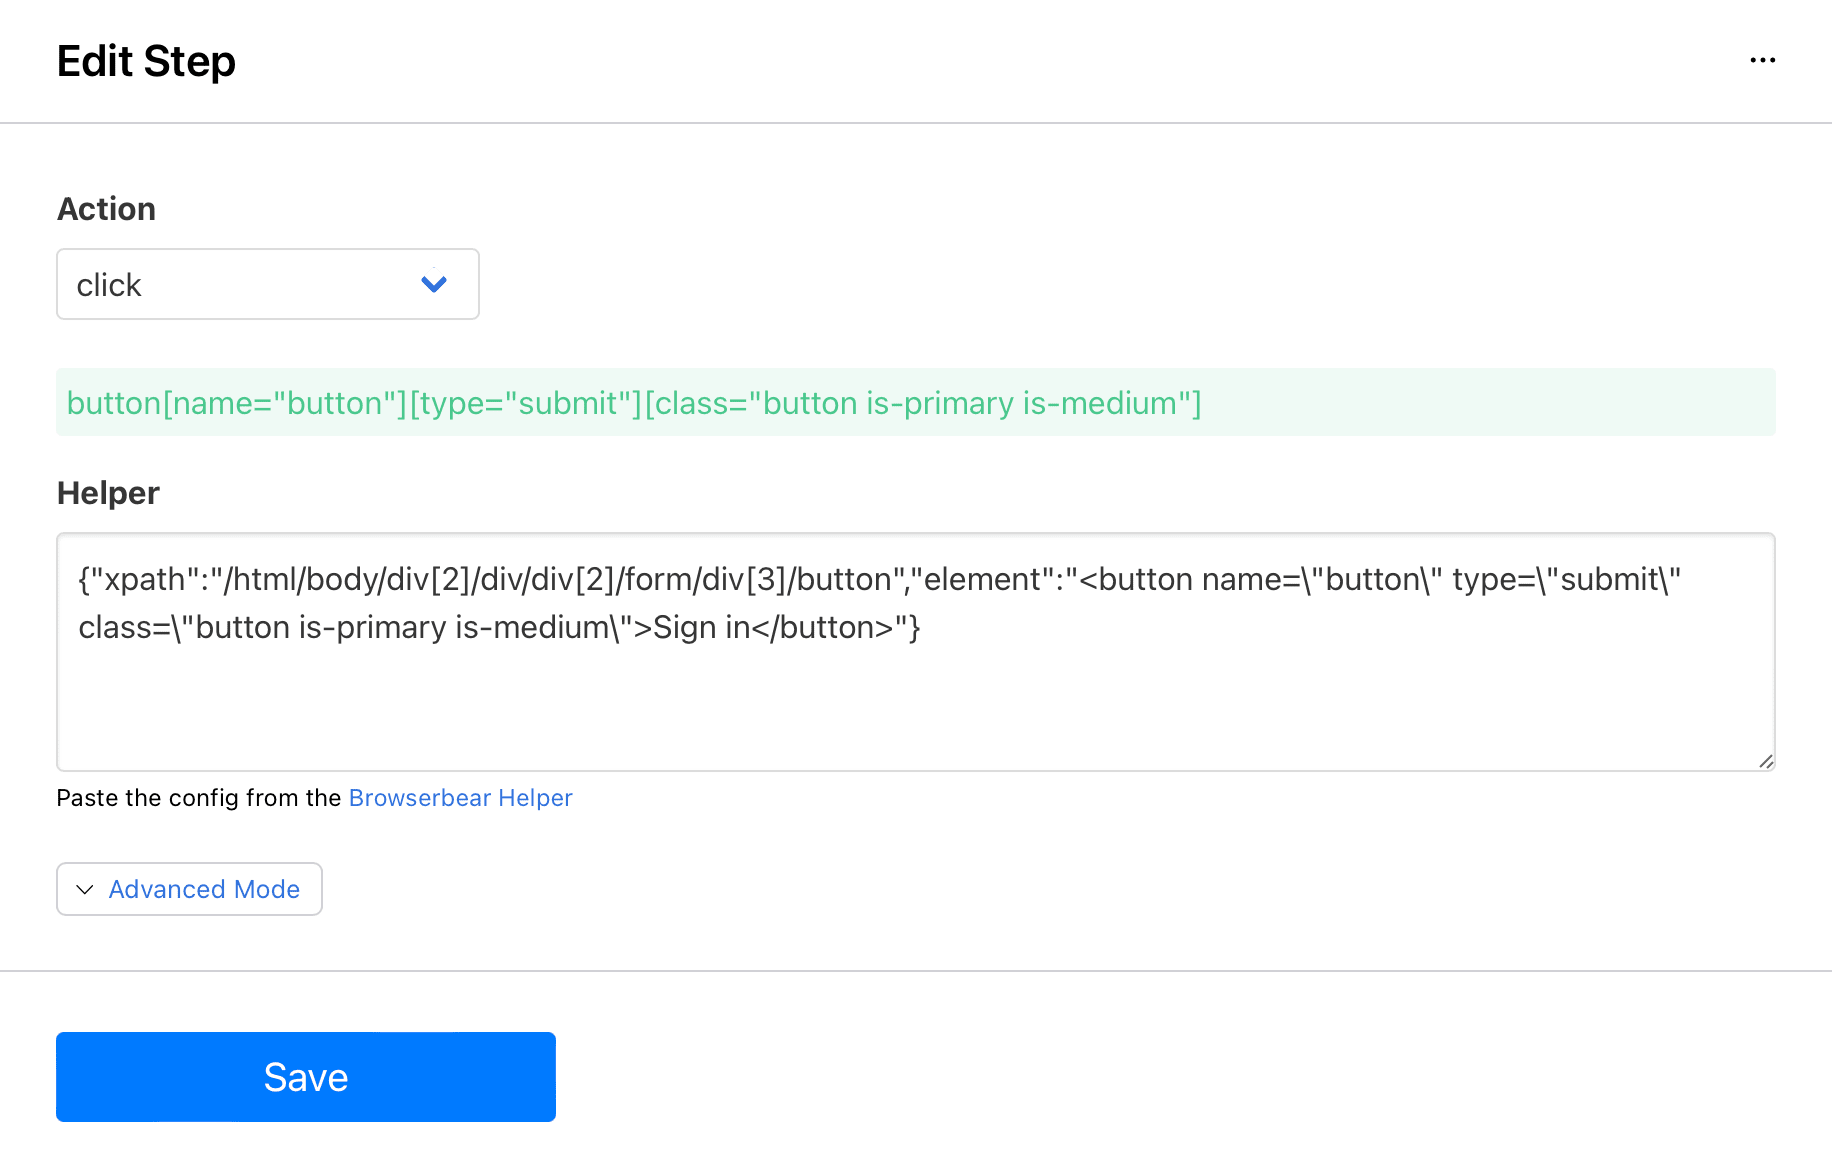
Click Save.
Step 7. Wait
Select wait as the Action and insert anywhere from 3 to 5 Seconds.

Click Save.
Step 8. Take Screenshot
A screenshot acts as reference material that shows what happens when a certain set of login credentials is used, which is helpful for troubleshooting and documentation later on.
Select take_screenshot as the Action and tick the Full Page option.
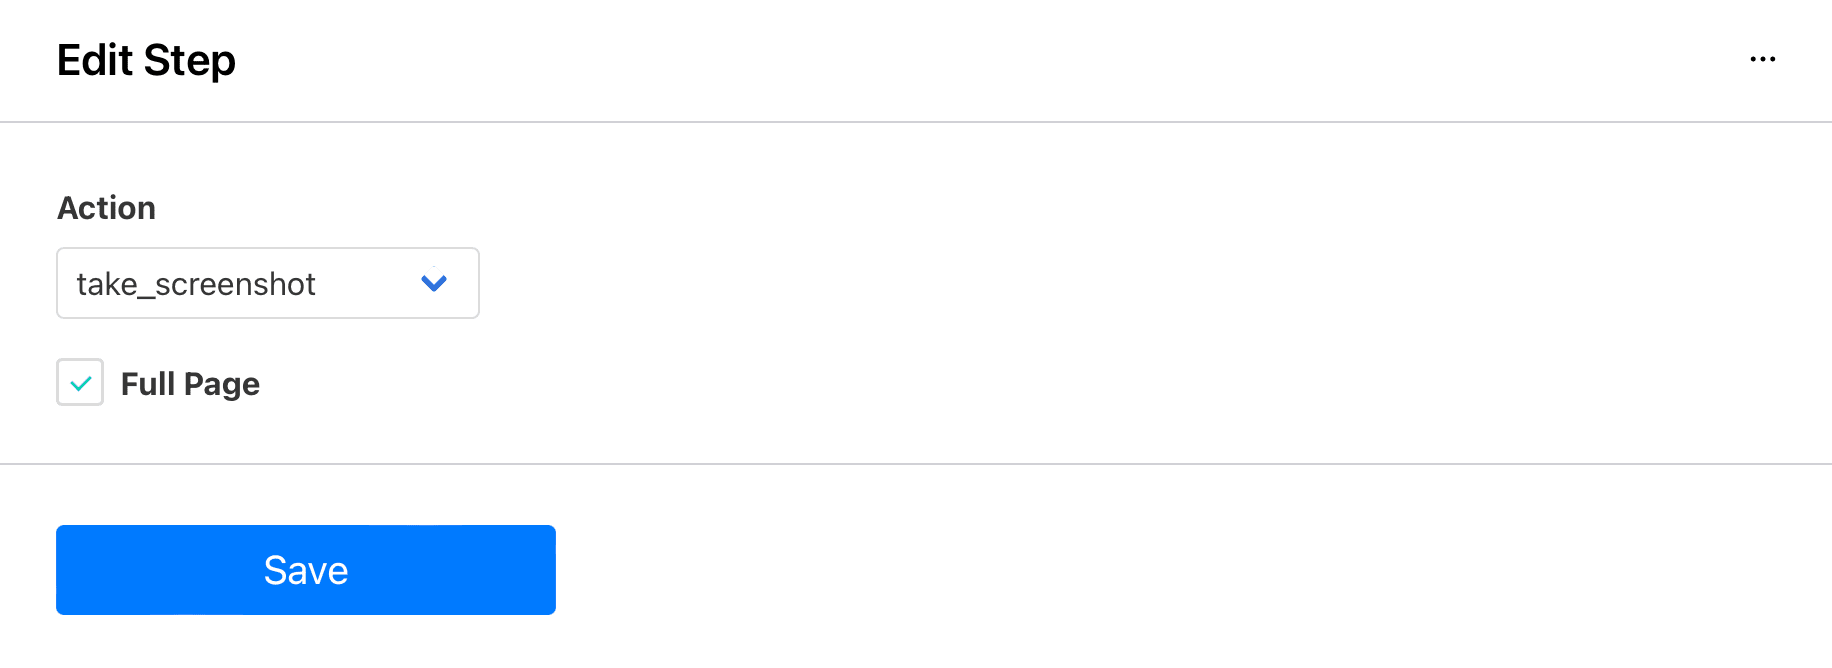
Click Save.
Step 9. Assert
Now, let’s add a step that checks whether login was successful. We will set up an automation that displays the output in Airtable later on.
Select assert as the Action.
Use the Browserbear Helper to get the helper config of an element that only exists on this page. We will use the Dashboard button.
Insert the config into the Helper section of your assert step and use element_visible as the Type.
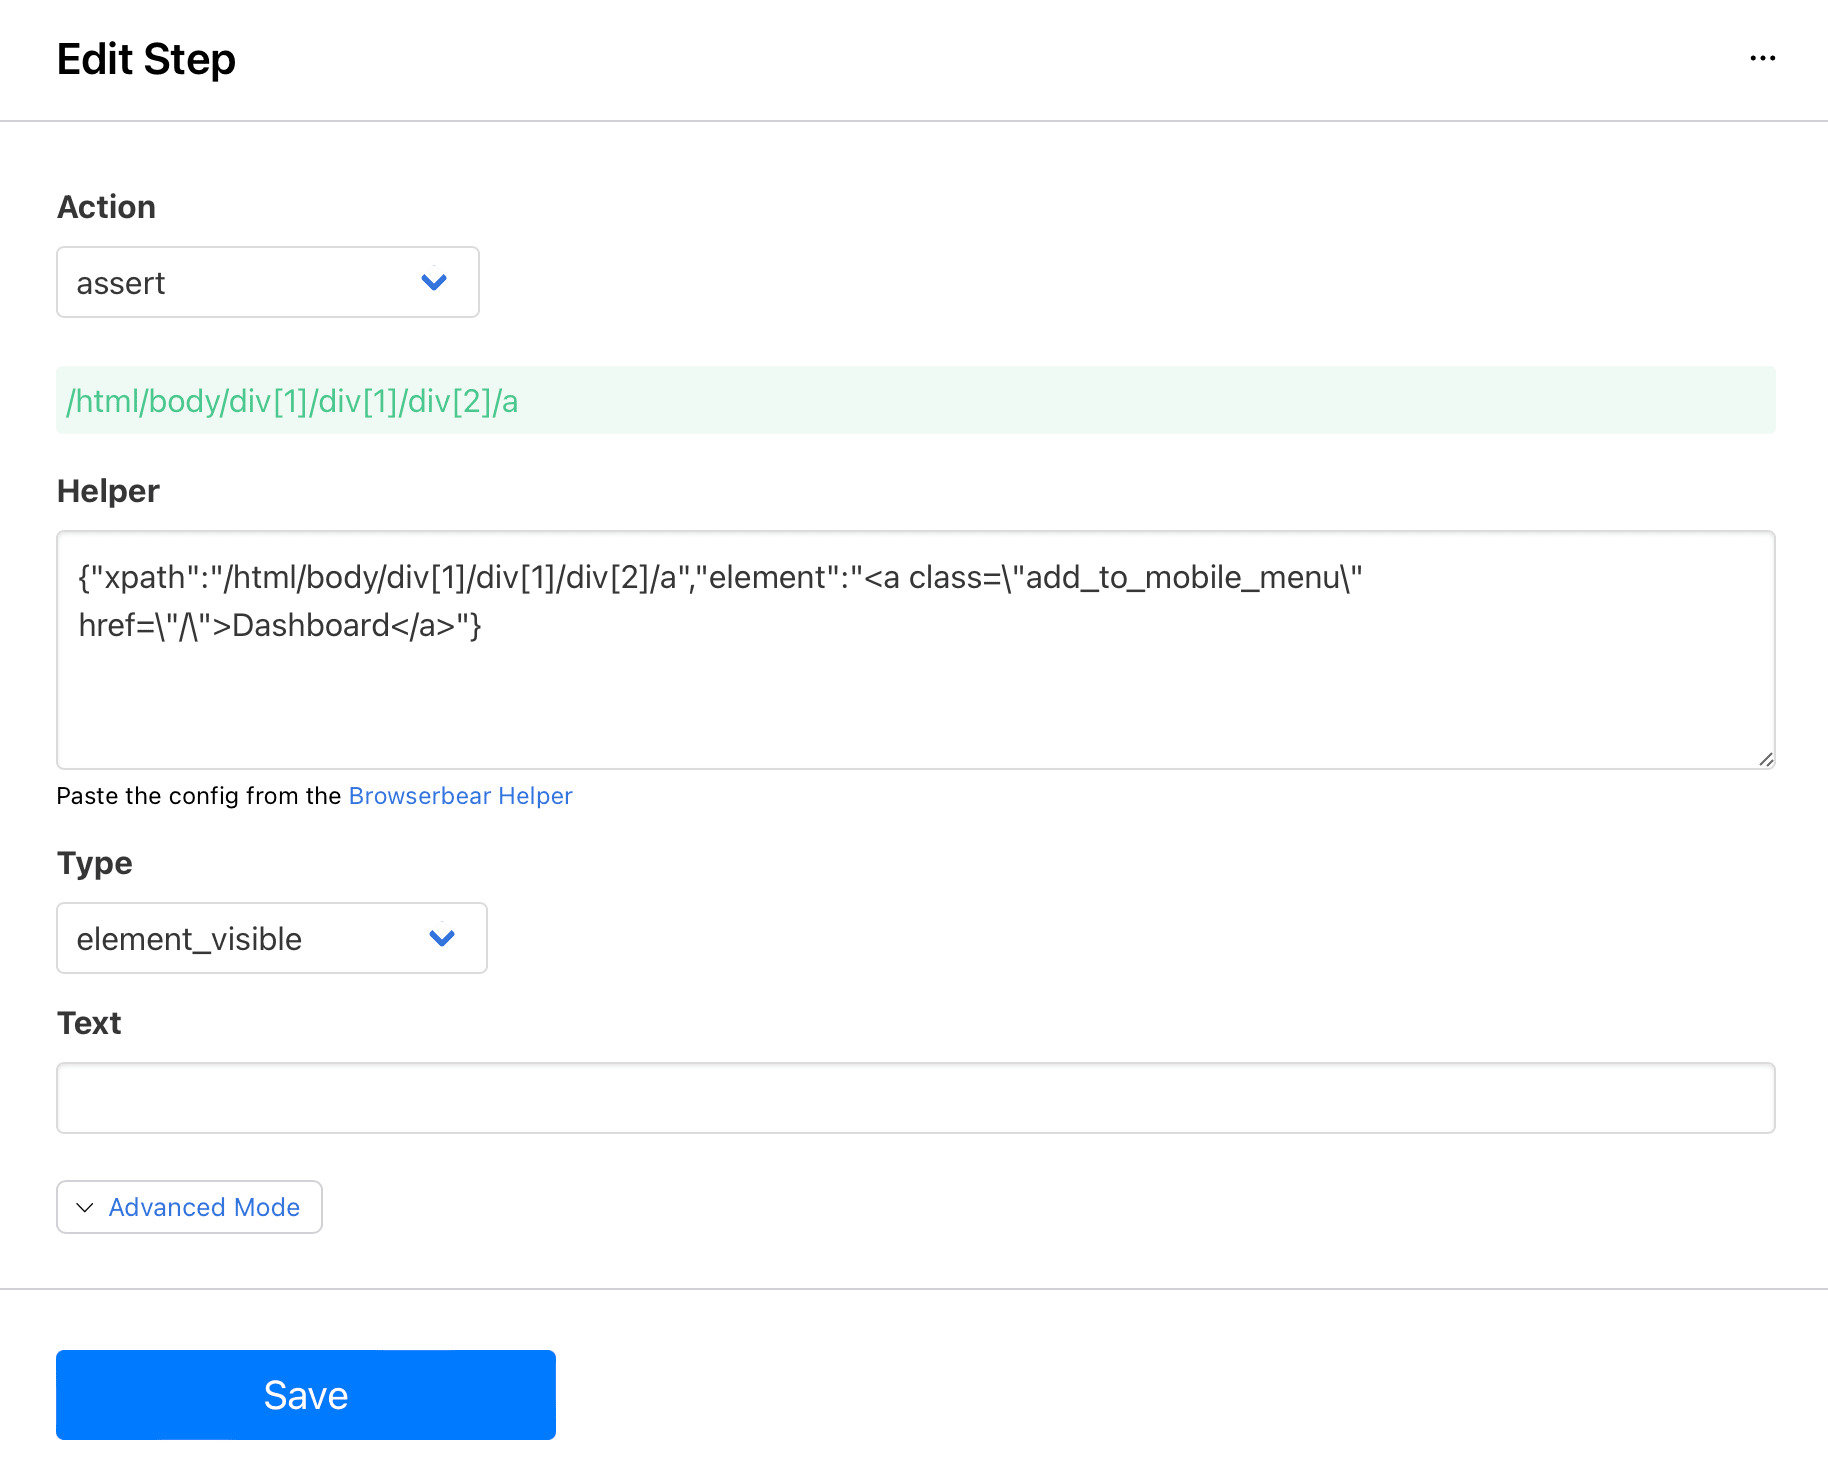
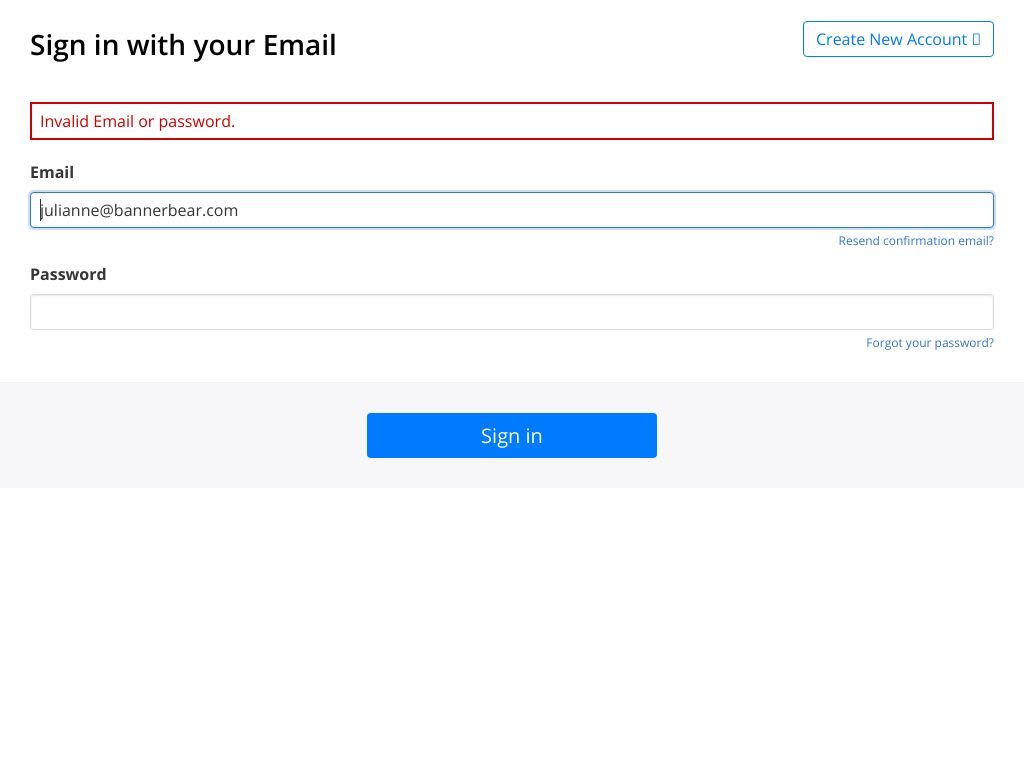
Click Save and test your automation. You should notice that usernames and passwords are obscured in logs.
Bear Tip 🐻: To test your task, temporarily change the Input Text of the username and password fields in the Enter Text steps to a set of login credentials. Then, click Run Task. A run should appear at the bottom of your task page. View the log to check if the screenshot and assert steps showed the expected outcome. Remember to change the input text back for the zap to work properly.
Set up a Zap to Test Logins
We will use two zaps in this workflow: one to test logins and another to update login status in Airtable.
Log into your Zapier account, click + Create Zap , and set up the following events:
Trigger: Every Day in Schedule by Zapier
Select Schedule by Zapier as the app and Every Day as the event.
Set up the trigger by choosing the time of day you want the automation to run and whether it should activate on weekends.
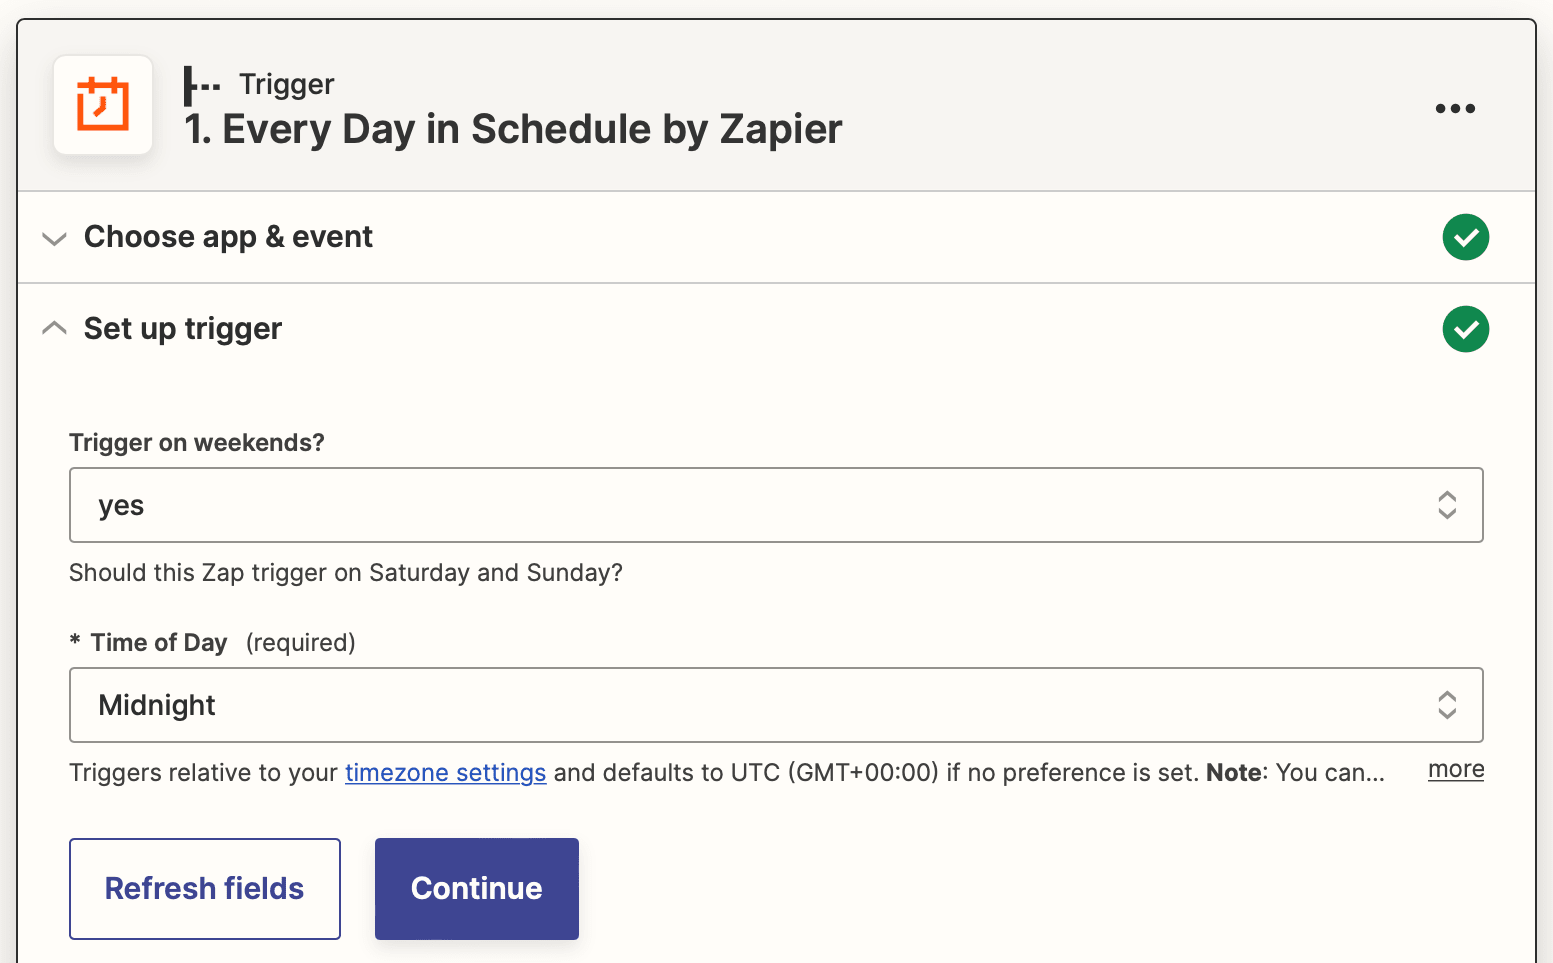
Test the trigger, then move to the next step.
Bear Tip 🐻: You might find that a different trigger is more suitable for your use case, such as a workflow trigger in Bubble or a commit in GitHub.
Action: Find Many Records (With Line Item Support) in Airtable
Choose Airtable as the app and Find Many Records (With Line Item Support) as the event. If you haven’t connected your Airtable account yet, you can do so using the API key found on your Account page.
Set up the action by choosing the correct base and table. We will search by the Test field and use Active as the Search Value.
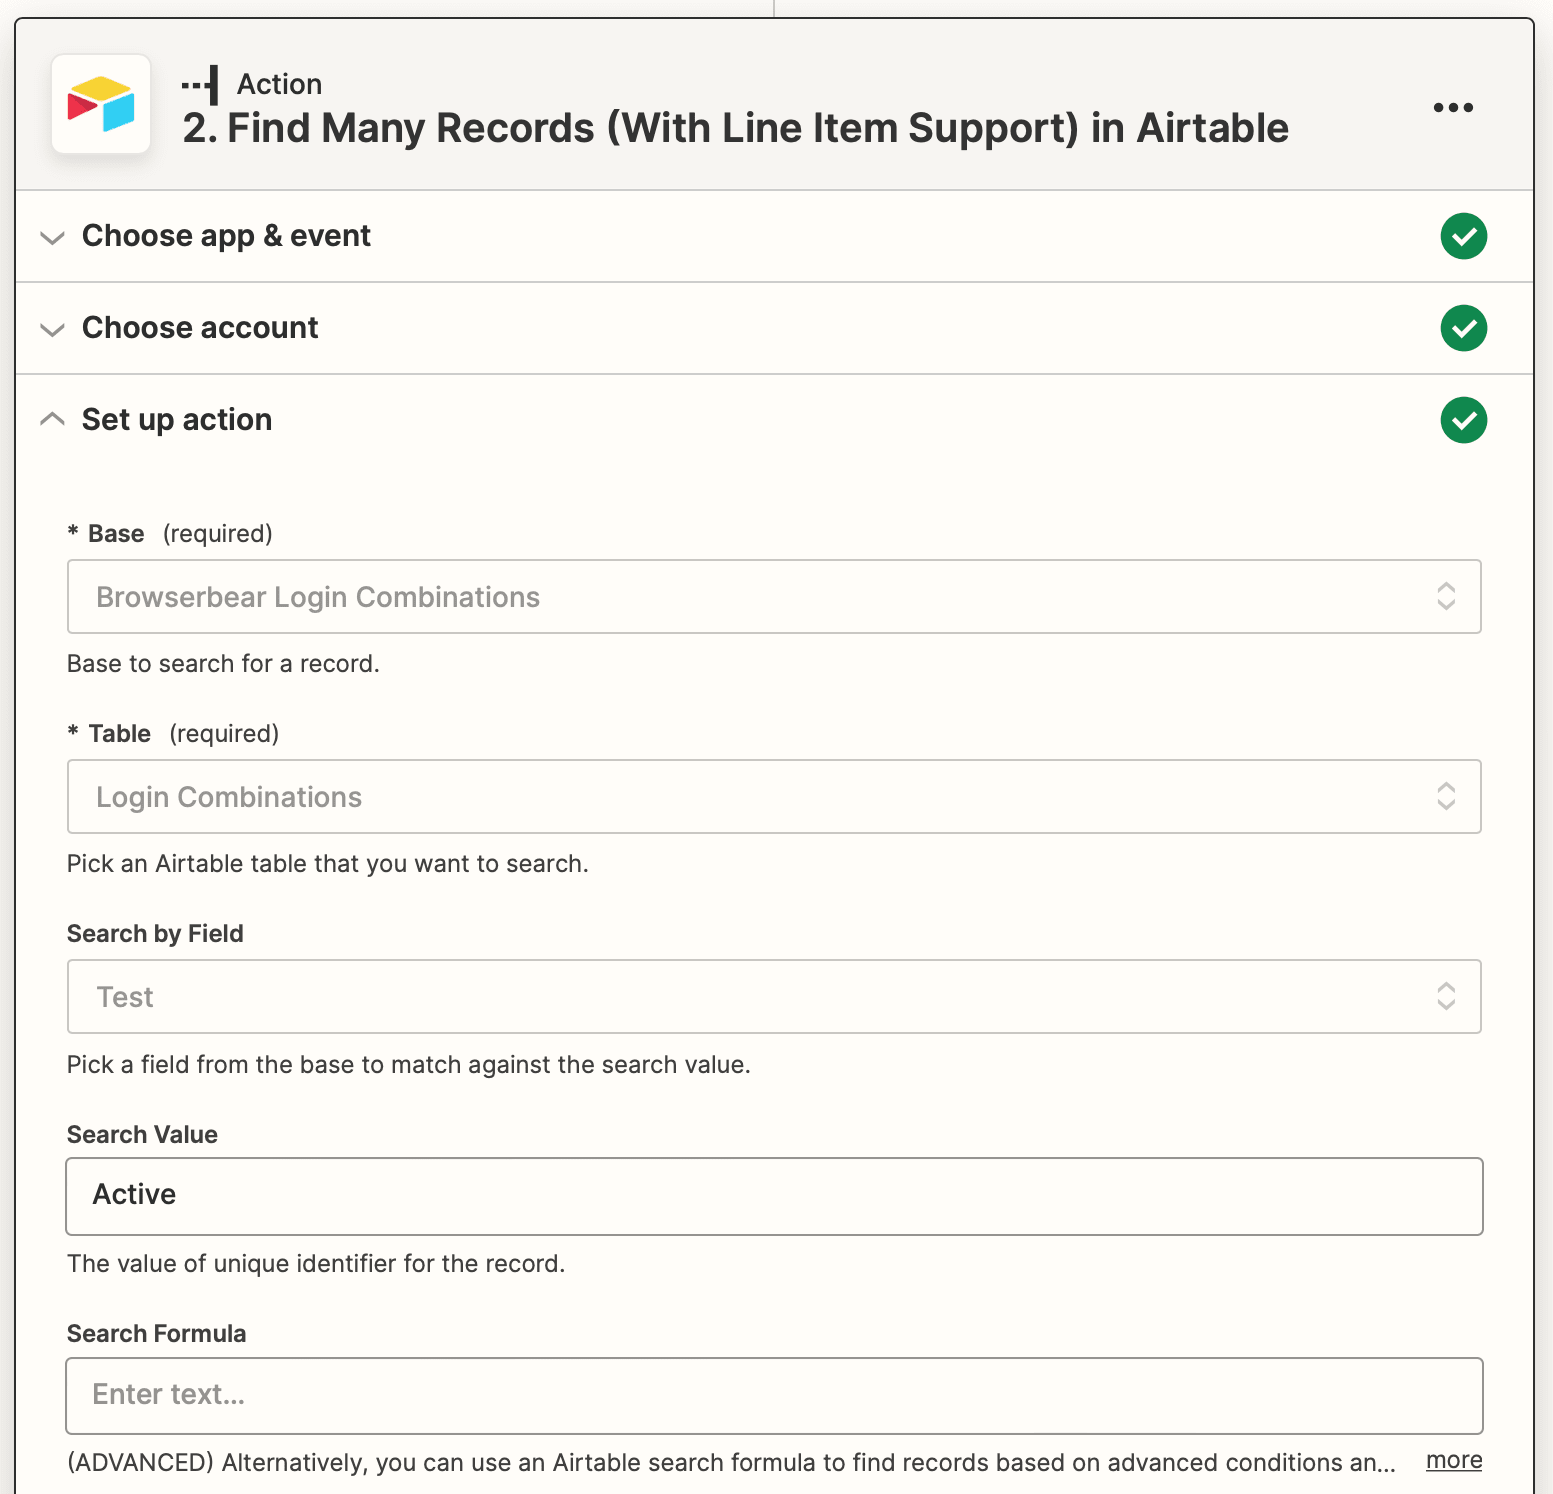
Test your trigger to ensure Zapier is able to find a record.
Action: Utilities in Formatter by Zapier
The records found in Airtable are fetched in line-item form, so they need to be split for use in future actions.
Choose Formatter by Zapier as the app and Utilities as the event.
Set up the action by selecting the Records Fields Username item from the previous step as the input and using a comma (,) as the separator.

Test your action, then repeat this step to split the Records Fields Password and Records ID items.
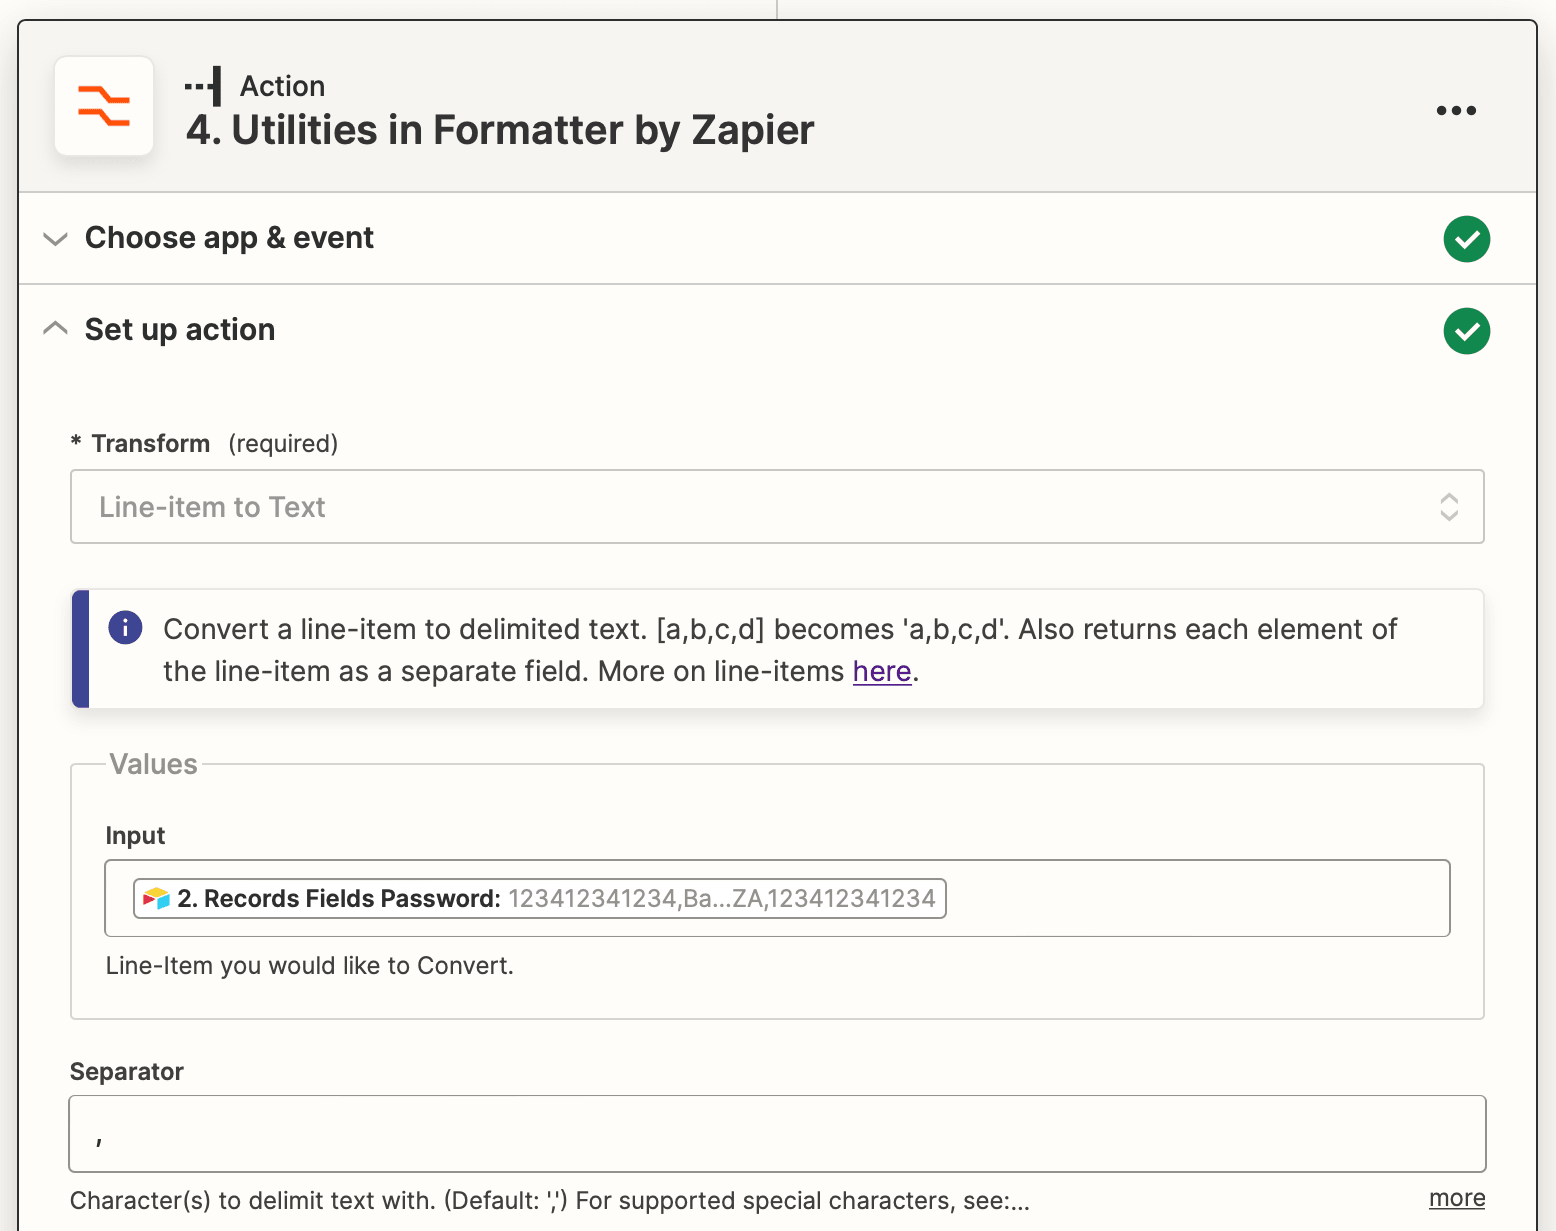
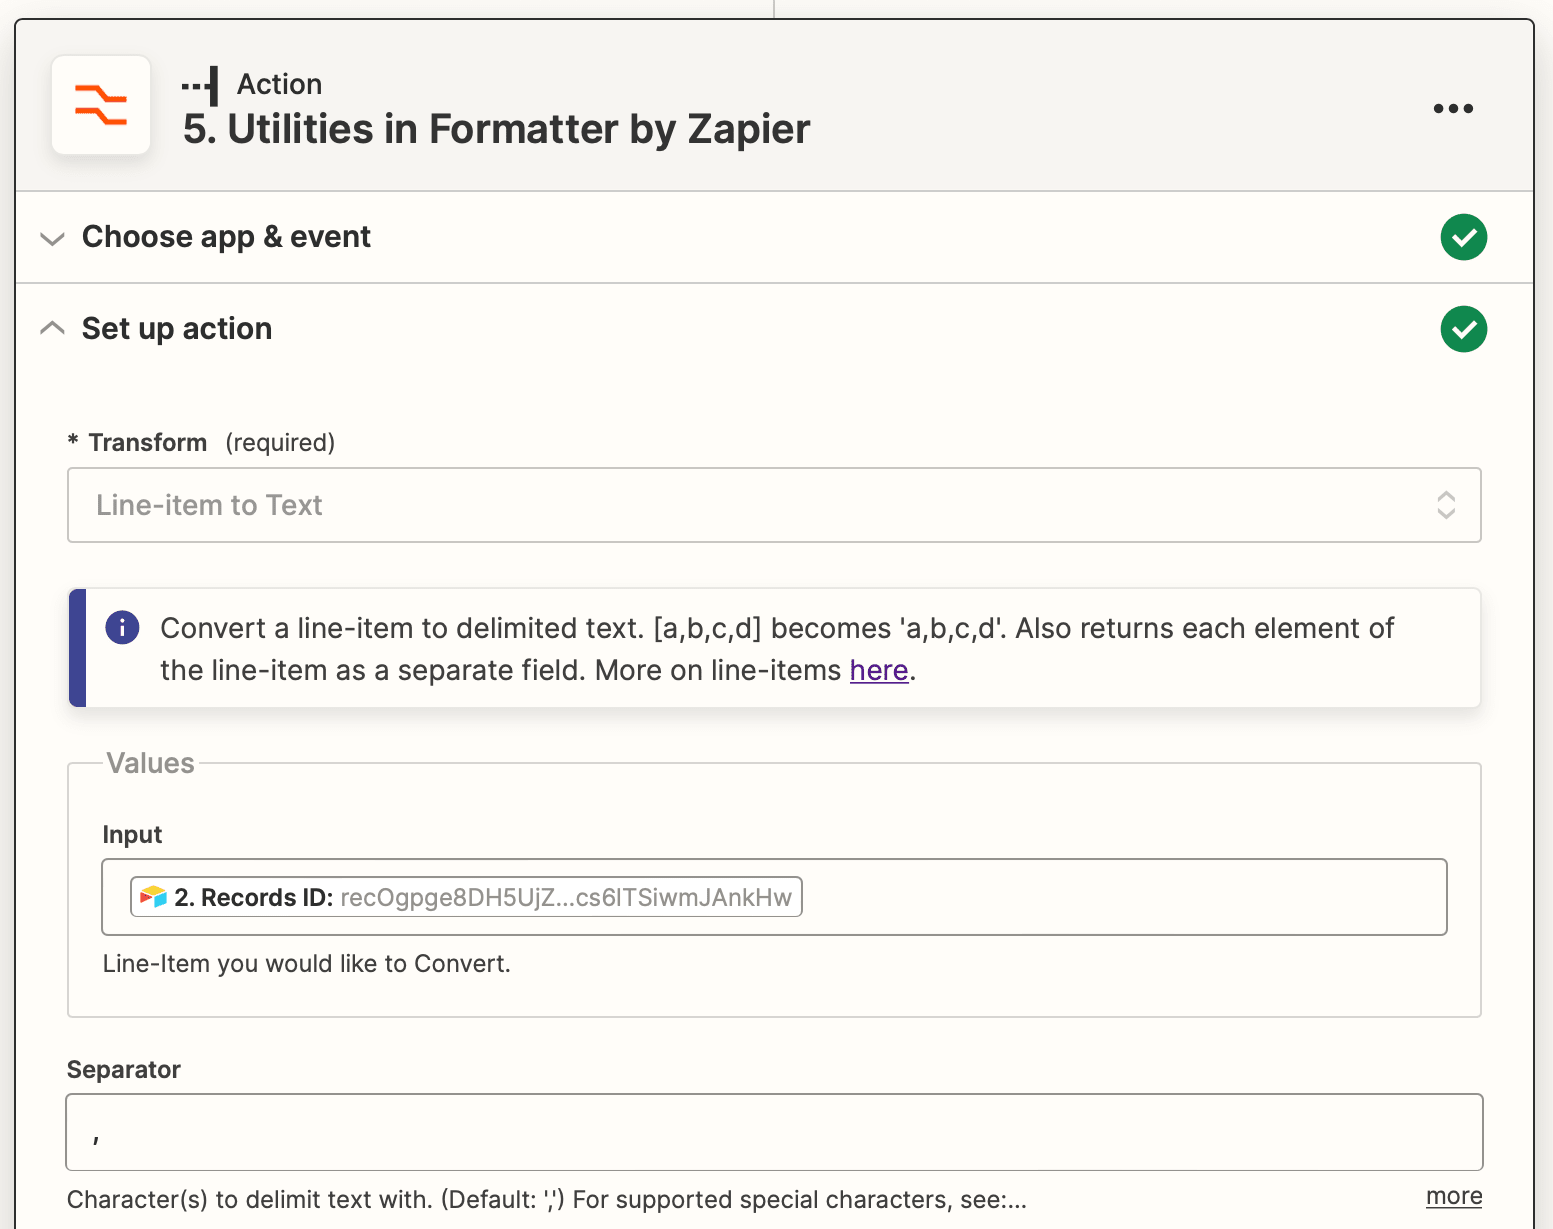
Screenshots of Utilities in Formatter by Zapier setup for Password and ID
Action: Create Run in Browserbear
Choose Browserbear as the app and Create Run as the event. You will need to connect your account using an API key generated in the Browserbear app.
Set up the action by selecting your task and mapping one set of test credentials: a username, a password, and a record ID.
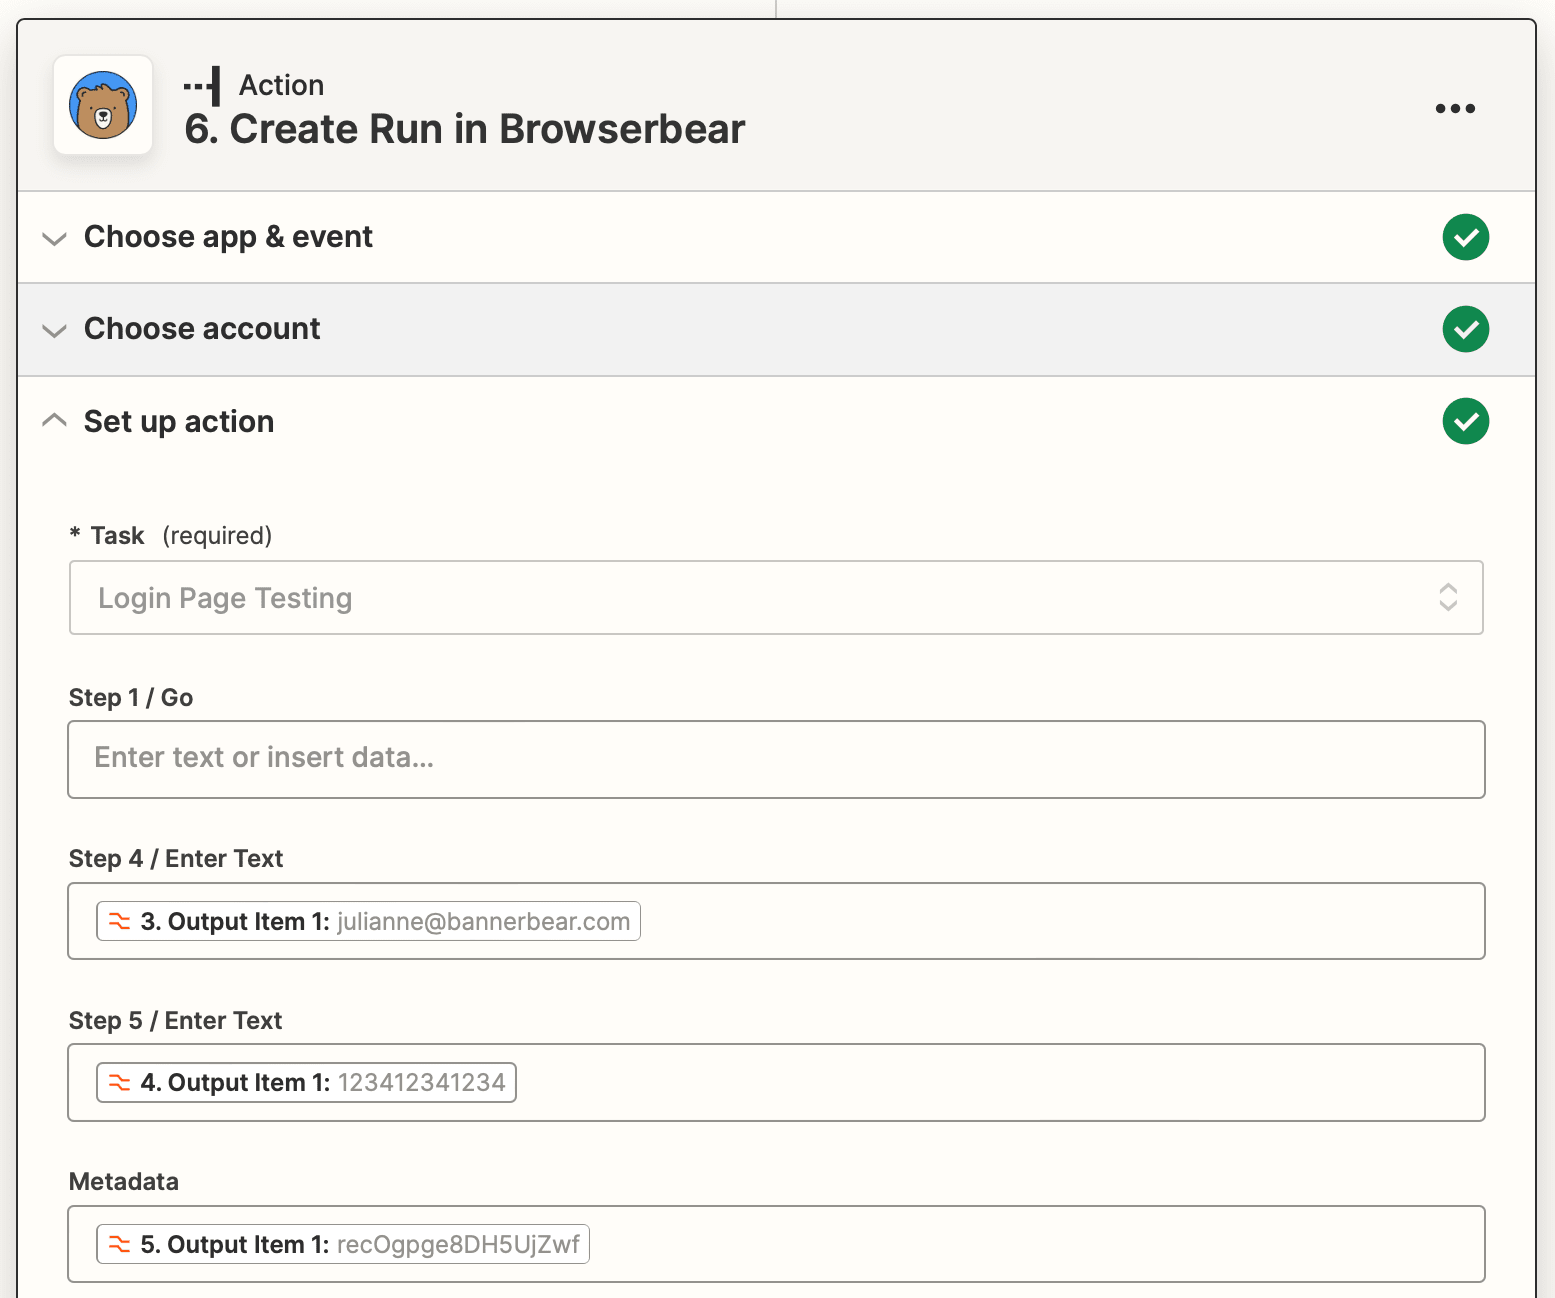
Test the action, then repeat this step for as many sets of login credentials as needed.
Set up a Zap to Update Login Status in Airtable
This zap will update your Airtable with the current status of a set of login credentials, allowing you to quickly identify any issues at a glance.
Log into your Zapier account, click + Create Zap , and set up the following events:
Trigger: Run Finished in Browserbear
Choose Browserbear as the app and Run Finished as the event.
Set up the trigger by choosing your login testing task.
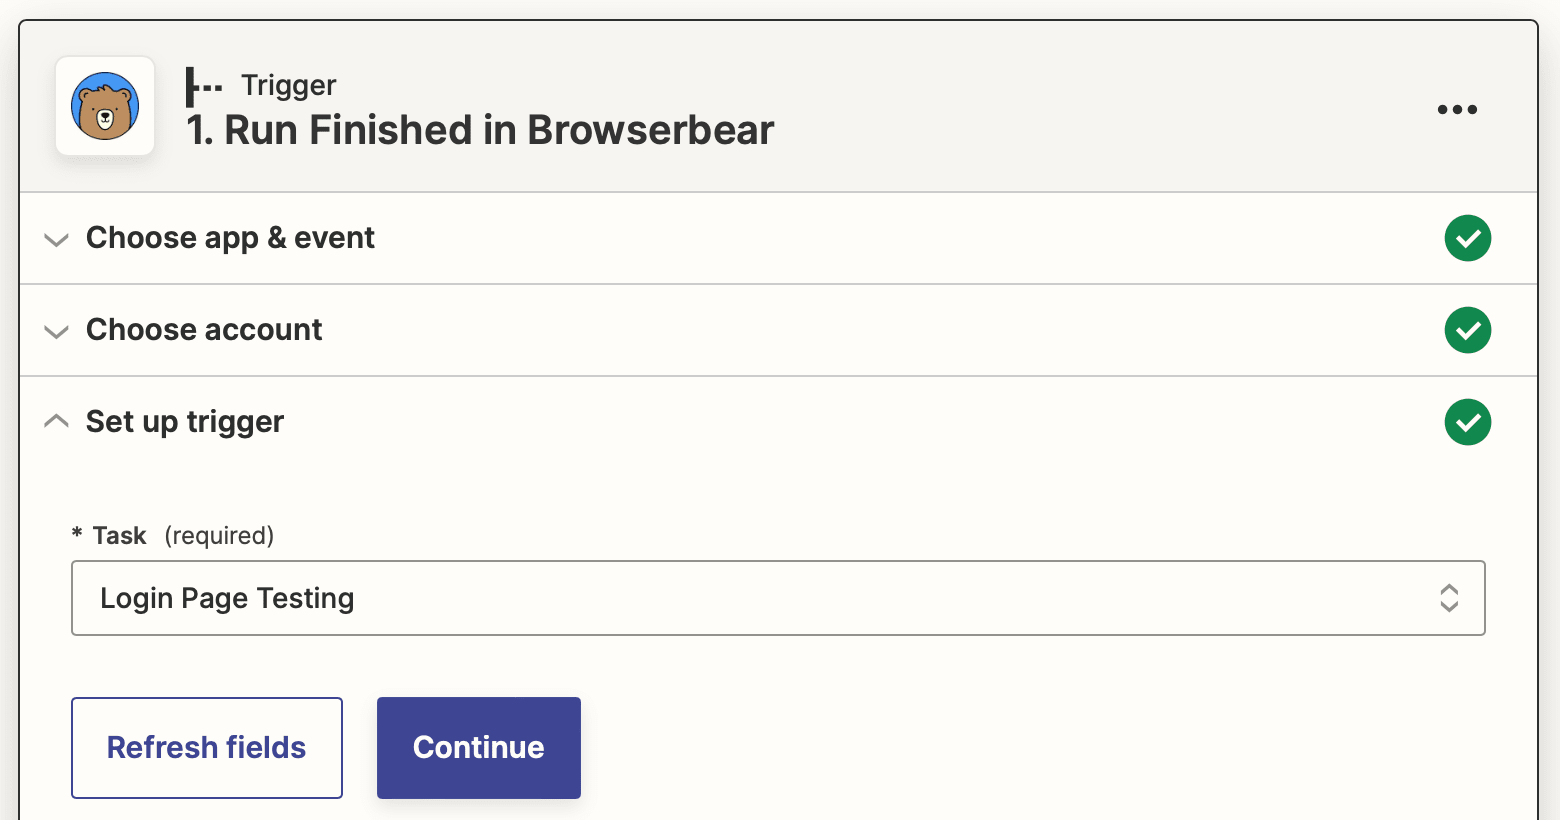
Test the trigger to ensure Zapier is able to find a completed run.
Action: Update Record in Airtable
Choose Airtable as the app and Update Record as the event.
Set up the action by choosing the right base and table. Then, map the Metadata from the Browserbear run to the Record field and the Assert Output to the Login Successful field.
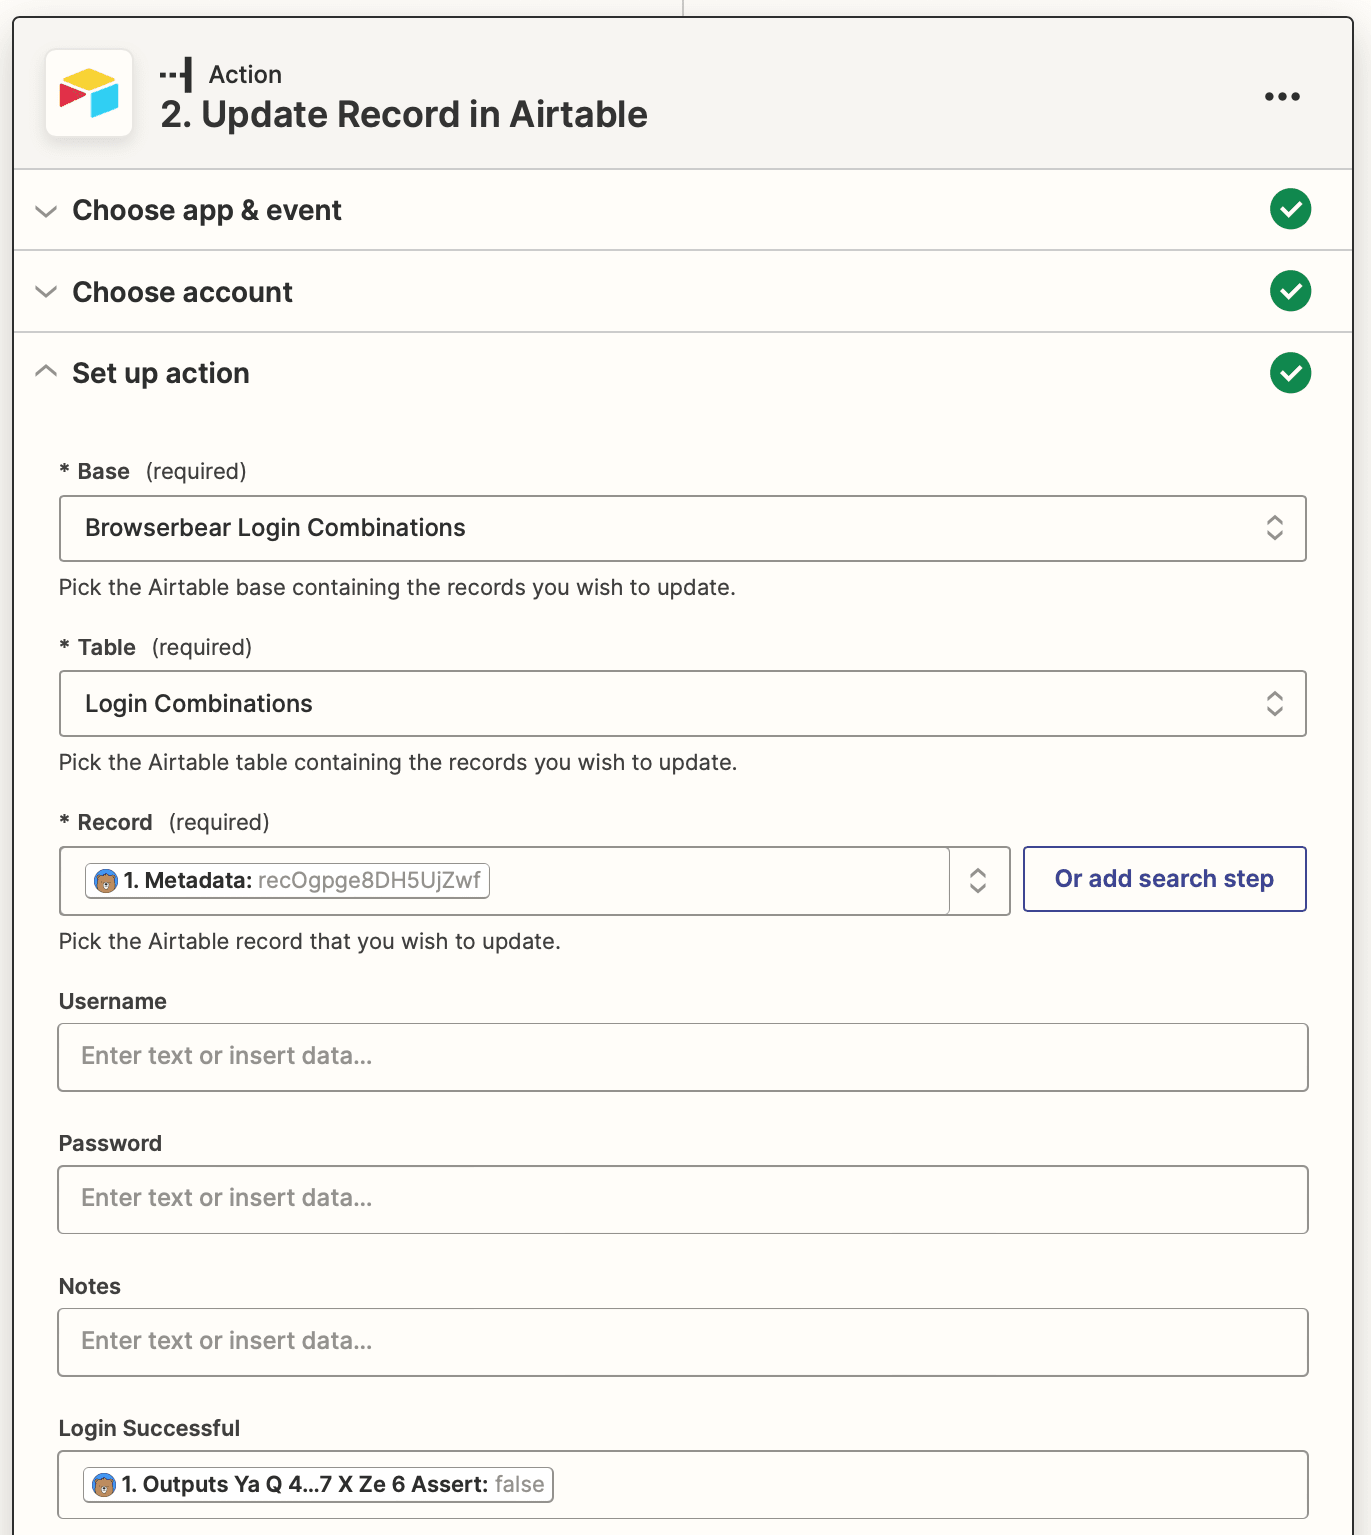
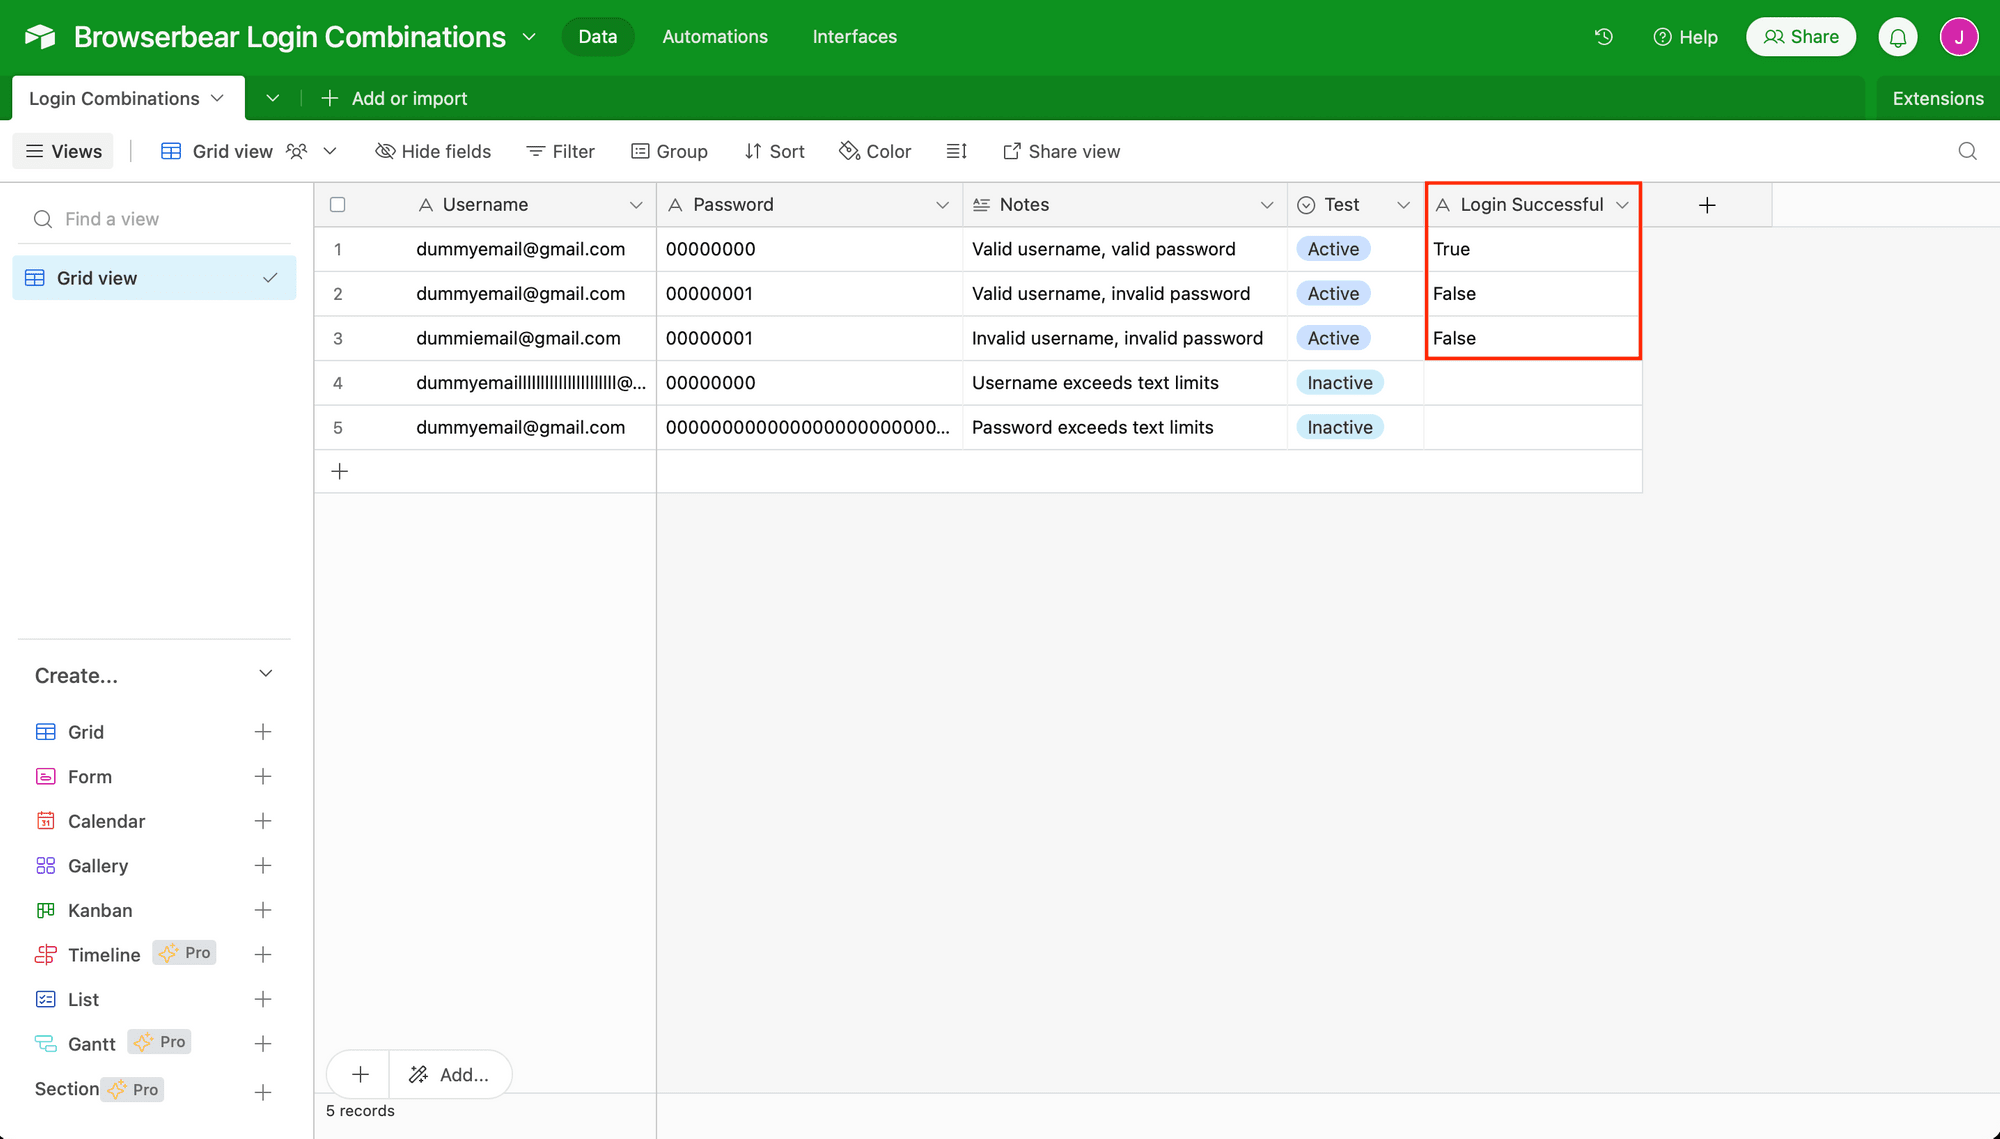
Test the action. You should see the login status of that set of credentials update itself in your Airtable base:
Make any final adjustments to your zaps, then hit publish to take them live!
Set up Automated Login Testing Tasks with Browserbear
Thanks to automated tools, app testing is easier than ever. You don’t need to rely on manual testing to know when a bug needs to be worked out—and you don’t always need to write scripts to perform the tests, either.
There are several other ways to further improve login testing. You can add steps to your zap that notify you when a login isn’t responding as it should, or upload screenshots of the latest tests to Airtable to make them even easier to access. It’s all up to you!
Testing is ultimately about providing a consistent user experience by ensuring features respond correctly—even as your product evolves. Automated browser tools like Browserbear allow you to do this in the background so you can focus on tasks that actually require your expertise.
